How to Export Active Directory Users to CSV With PowerShell and ADUC

In this article, I’ll show you how to export Active Directory users to a CSV file using PowerShell and Active Directory Users and Computers (ADUC). Using PowerShell is recommended as IT Pros can use it to extract task-specific information about a subset or all of their users from Active Directory. This can be really helpful when you need to export all of your user information for access into other systems like an HR import or third-party authentication systems.
🎬 Watch This Week in IT.
There is a myriad of commands, cmdlets, and other functions that allow you to obtain said information with ease. This article will demonstrate the most common tasks you’ll come across when exporting AD information and the intricacies of these cmdlets to finish the job.
How to export Active Directory users to CSV
The easiest way to export a list of users in Active Directory to a .CSV file is to use PowerShell Export-CSV cmdlet. Here’s the command you need to use to AD users to CSV file.
Get-ADUser -filter * -Properties * | export-csv -path AllUsers.csv
Keep reading if you would like to learn other commands to export a specific set of users from Active Directory!
How to export Active Directory users to CSV with PowerShell
Before we get started, you’ll need to be using a computer account that has read permissions to your Active Directory, and an appropriate shell to accommodate this. You can either log into a domain controller (not generally advisable) or log into a workstation with the Remote Server Administration Tools (RSAT) installed.
Using Get-ADUser to get a list of users in Active Directory
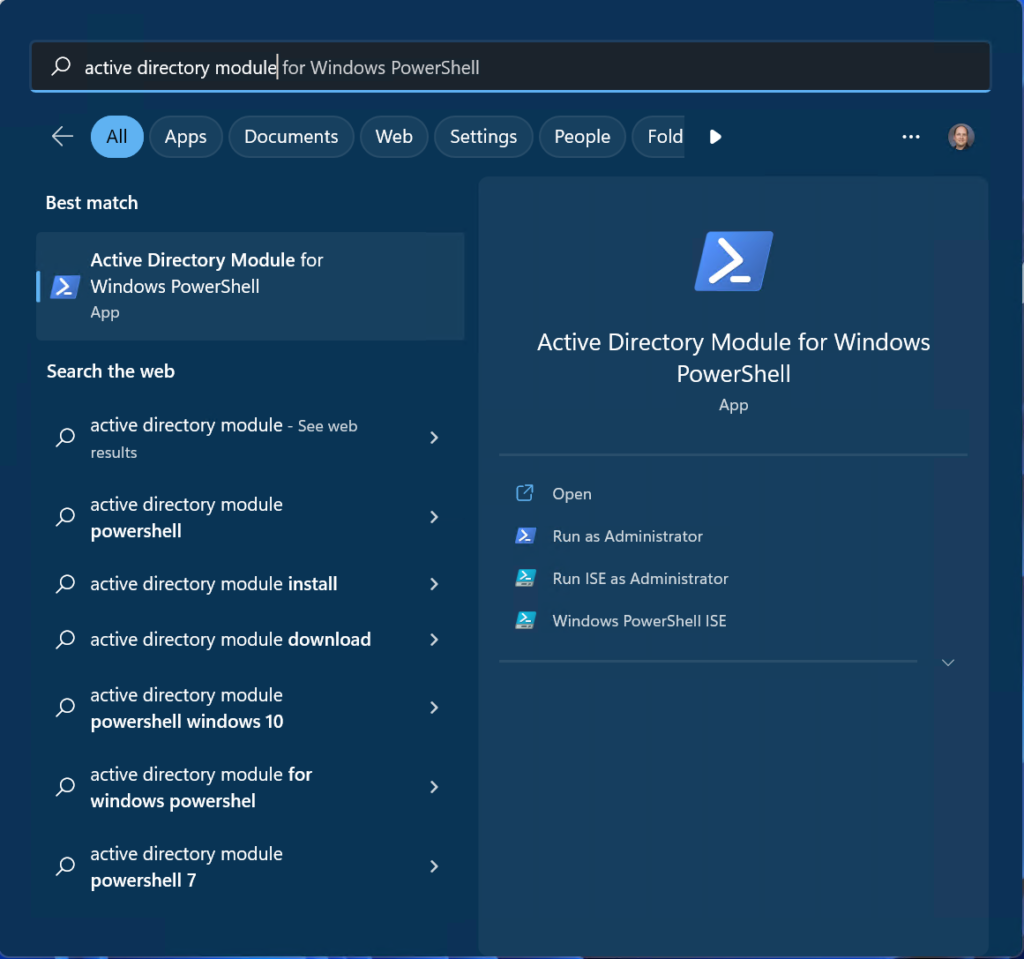
The most common PowerShell cmdlet we’ll use is Get-ADUser. Go ahead and launch the Active Directory Module for Windows PowerShell from the Start Menu.
To get a list of all users with the default attributes output to the console, enter this command.
Get-ADUser -filter *
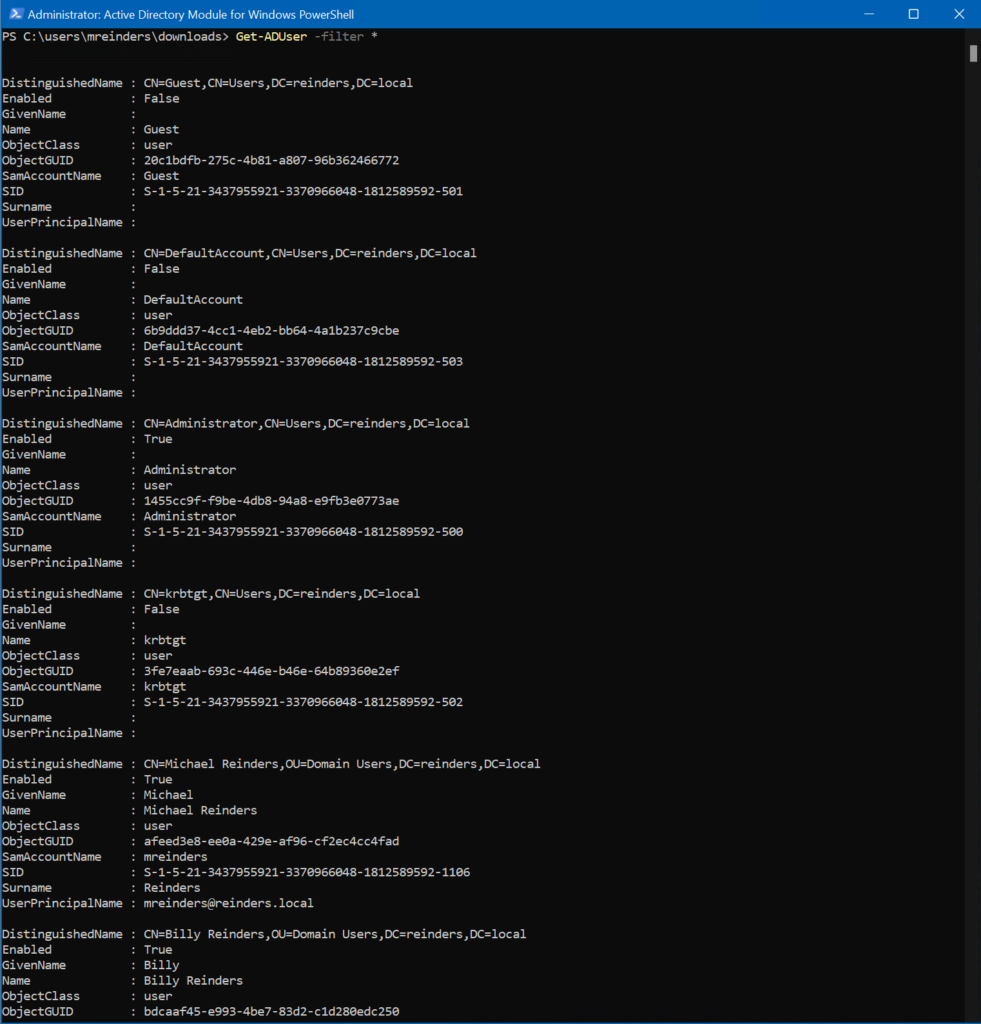
As you can see above, this will list every user in your Active Directory with the default attributes:
- DistinguishedName
- Enabled(/Disabled)
- GivenName
- Name
- ObjectClass
- ObjectGUID
- SamAccountName
- SID
- Surname
- UserPrincipalName
Now, my Windows Server 2022 Hyper-V environment is rather simple. I have a dozen or so users. Your enterprise environment likely consists of hundreds or thousands of users. So, sending the output to the console won’t really be helpful.
The main point of this post is to explain how to export them to a much more manageable and helpful interface – a CSV file. You can use Microsoft Excel or other software to manipulate this data – we’ll go into this more throughout this article.
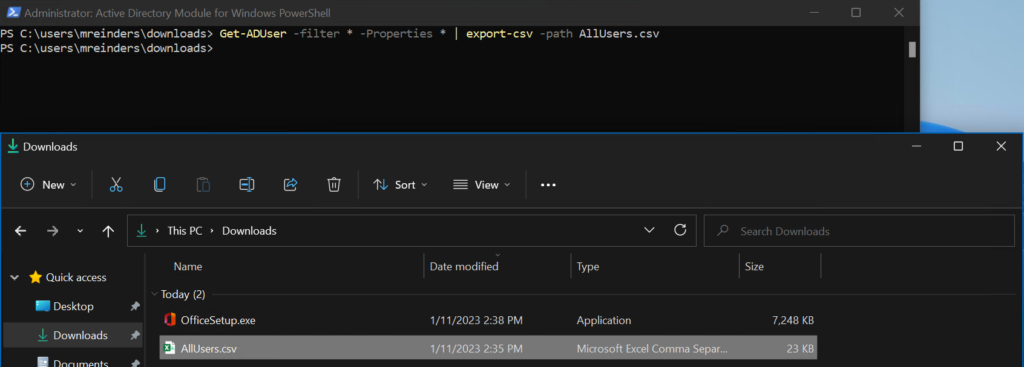
To export all your users to a CSV file, run the following command:
Get-ADUser -filter * -Properties * | export-csv -path AllUsers.csv

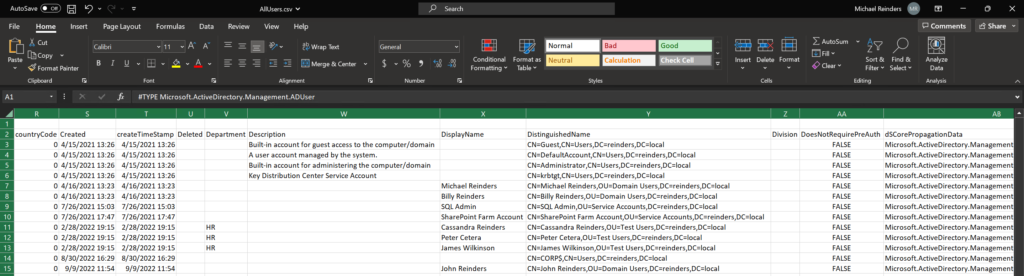
The ‘-filter *’ tells the command to export EVERY user. The ‘-Properties *’ tells the command to export every attribute for each user account. And yes there are many. I opened the file in Excel to show you an example of how the output looks.
How to export all user properties for a single user
You’ll often need to work on a specific user and investigate an attribute or two for them. Let me show you how to export all the properties for one user.
Get-ADUser mreinders -properties *
And yes, there are a lot of attributes for each user. I am showing only a few columns/attributes. In Excel, the columns go all the way to ‘CV’!
How to export specific user attributes with Select-Object
So, we have shown you the default attributes and then ALL the attributes. However, to stay efficient, we of course need to be able to export only pertinent attributes for your users. We will use the Select-Object command to achieve the results we need.
Let’s grab each user’s Name, their Department, and their email address (mail) with the following command:
Get-ADuser -filter * -Properties * | Select-Object name, description, office, department, mail | export-csv -path UsersAttributes.csv

If we open the file in Excel, we can see only the attributes we asked for are in the output.
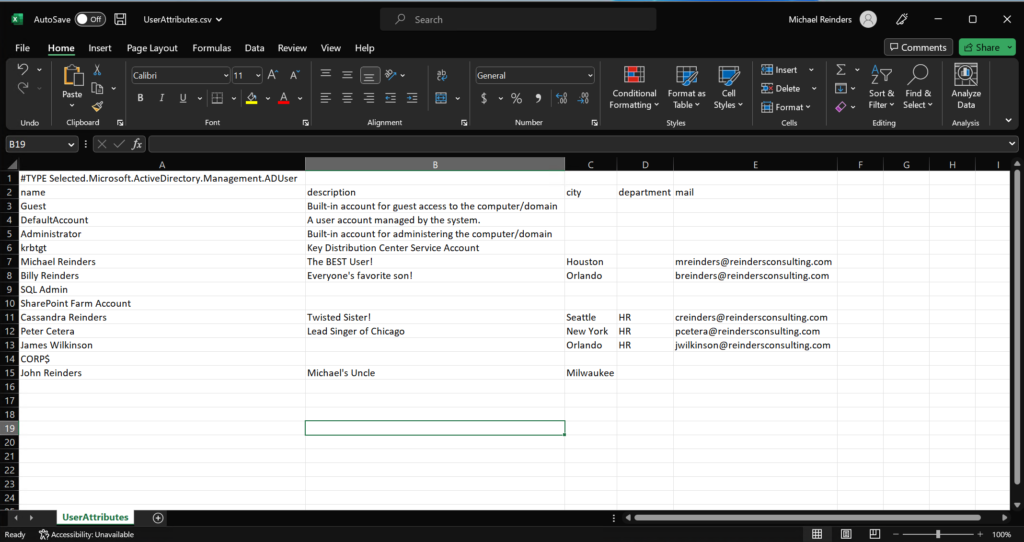
Now, we have some data worth our while. In Excel, we of course have the ability to filter specific columns/attributes to find everyone in the Houston office or everyone in the HR department.
How to export Active Directory users from a specific organization unit (OU)
We will also come across the need to pull all the users from a specific organizational unit (OU) instead of our entire directory. We can use the ‘-SearchBase‘ command to accomplish this. We will use the DistinguishedName attribute of said OU to make this work.
Get-ADUser -Filter * -SearchBase "OU=Test Users,DC=reinders,DC=local" -Properties * | Select-Object name | export-csv -path UsersinOU.csv
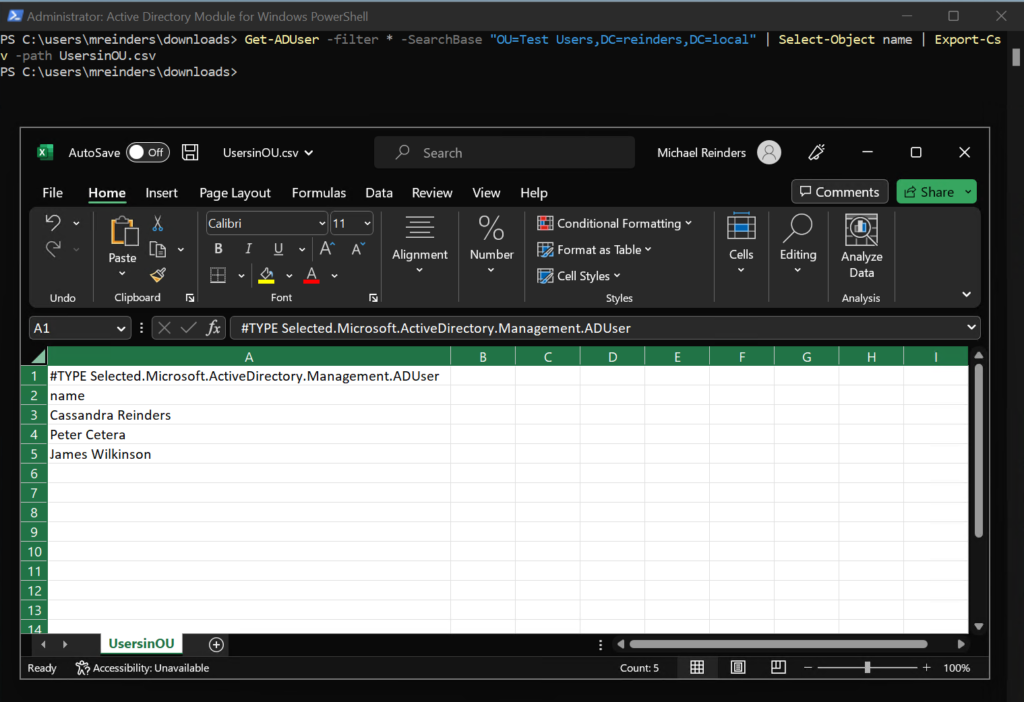
And there we have it. We have our simple list of users in a specific OU. It is clear by now how easy and powerful PowerShell is in disseminating information and finding just the data we need!
How to export Active Directory users with the last logon date
Now, let’s dig into some more useful and helpful attributes that will undoubtedly assist you in troubleshooting some service tickets in your organization. When did that user last log onto the domain? Let’s find out with the command below:
Get-ADUser -filter * -Properties * | Select-Object name, lastlogondate | export-csv -path LastLogonDate.csv
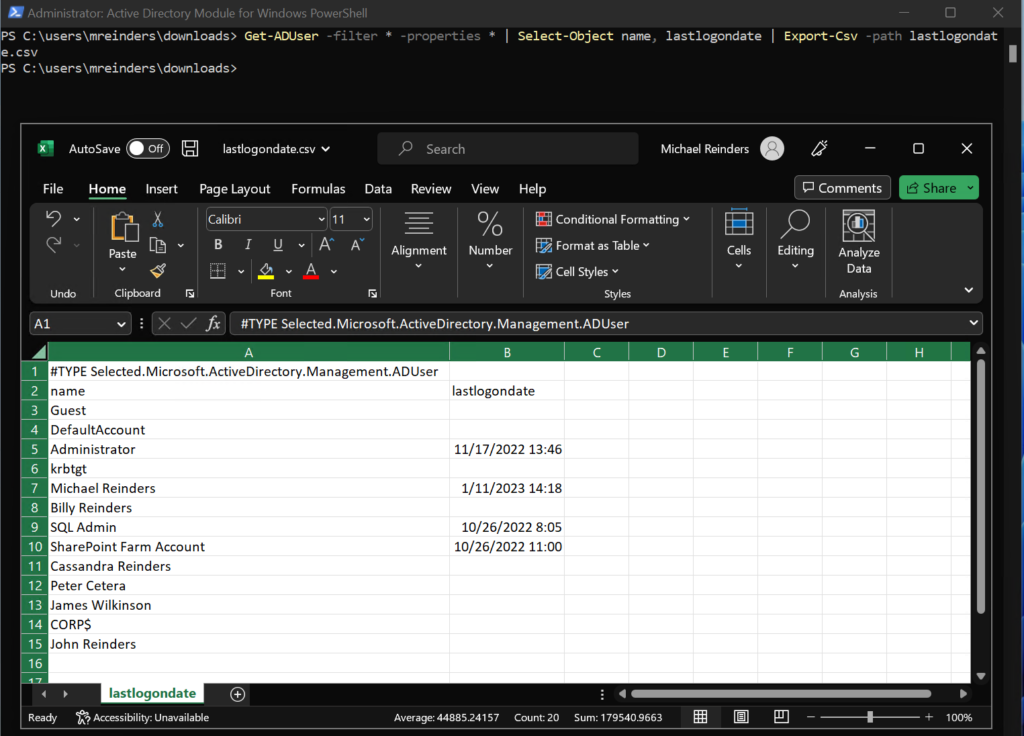
Again, my sample data is not the most useful set in the world, but, you get the idea. Plus, you can sort and filter this data easily in Excel.
How to only export enabled Active Directory user accounts
If you want to export a list of your users but exclude any disabled accounts, you can use the ‘Enabled‘ attribute in your filter section. Here’s the command you need to use:
Get-ADuser -Filter {(Enabled -eq $True)} -Properties * | Select-Object name, lastlogon | export-csv -path EnabledUsers.csv

Notice someone missing by chance? I disabled ‘Cassandra Reinders’ before running the command and she is nowhere to be found. So, that works!
How to export all Active Directory users by Name
Alright. Now, you may have a need, maybe for HR, to get a list of all your users with just their names. We can use a previous command with a tweak or two to accomplish this.
Get-ADUser -filter * -Properties * | Select-Object givenname, surname, name | Export-CSV -path Users-Names.csv
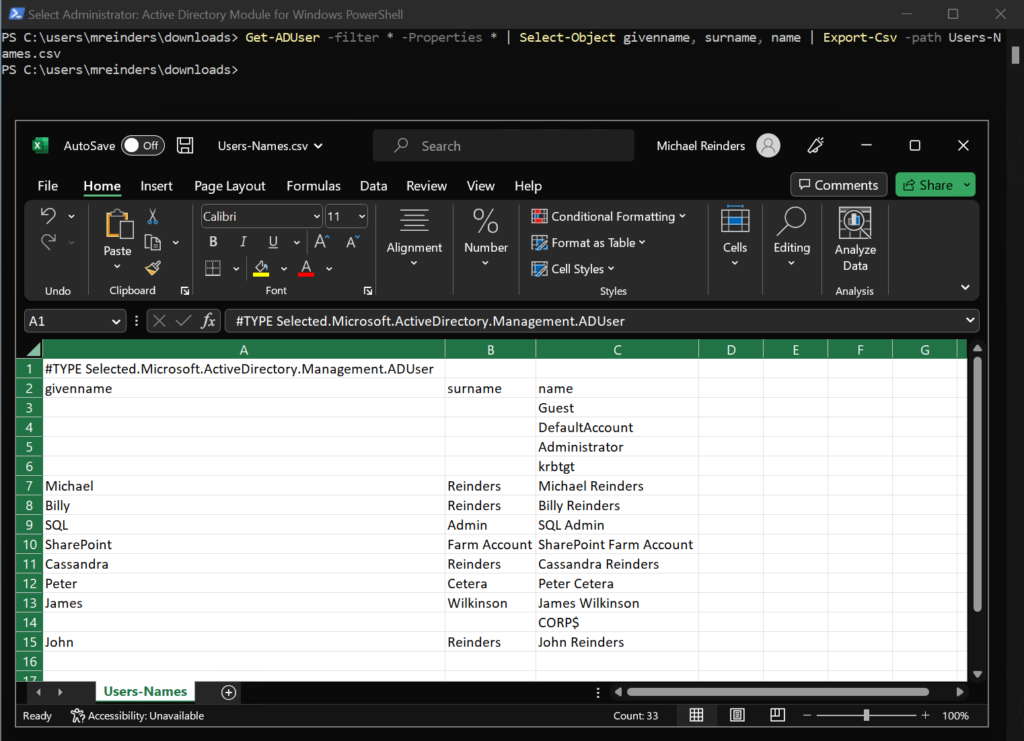
Here, we have each user’s first name (givenname), last name (surname), and their ‘complete’ name (name). Again, HR would obviously love this type of information.
Plus, whenever you are exporting user information to import into another application or cloud service, this is precisely the type of information you will need to present to them. Again, tweaking the Get-ADUser command is vital and very helpful!
How to export all Active Directory Users by Name and LastLogonDate
Let’s export all our users with their full name information and the attribute showing when they last logged onto a domain computer.
Get-ADUser -filter * -properties * | Select-Object givenname, surname, name, lastlogondate | Export-CSV -path Users-LastLogon.csv
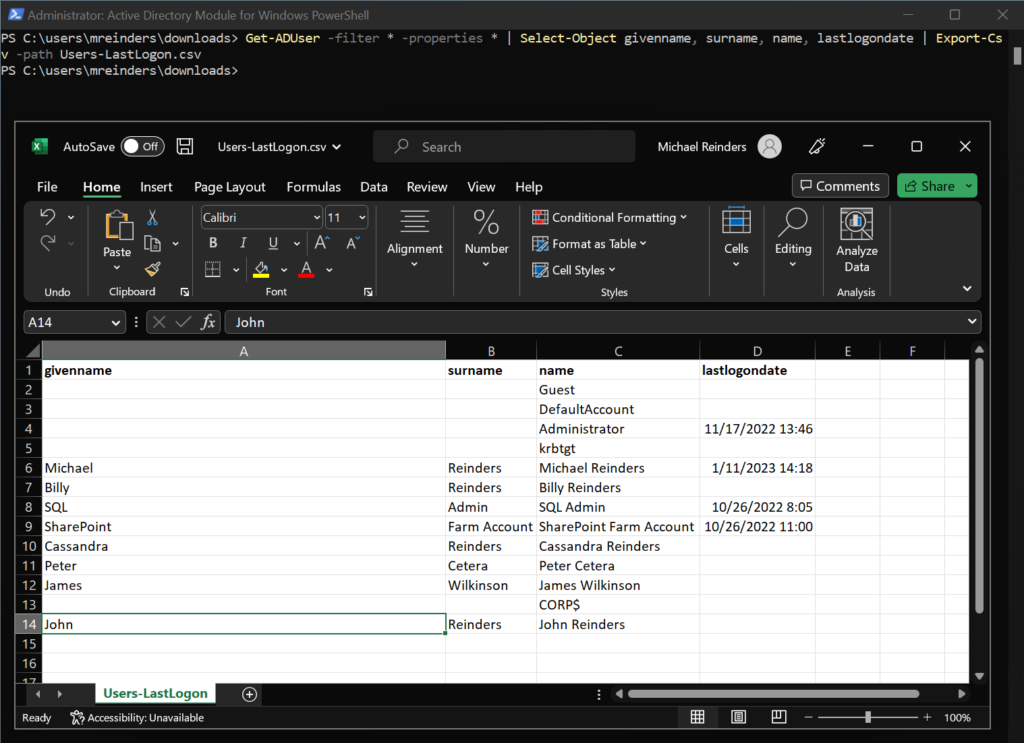
Just like in similar commands above, we have a simple list of our users and their last logon time/date in a simple, easy-to-read format. Excellent!
How to export AD users to CSV with Active Directory Users and Computers (ADUC)
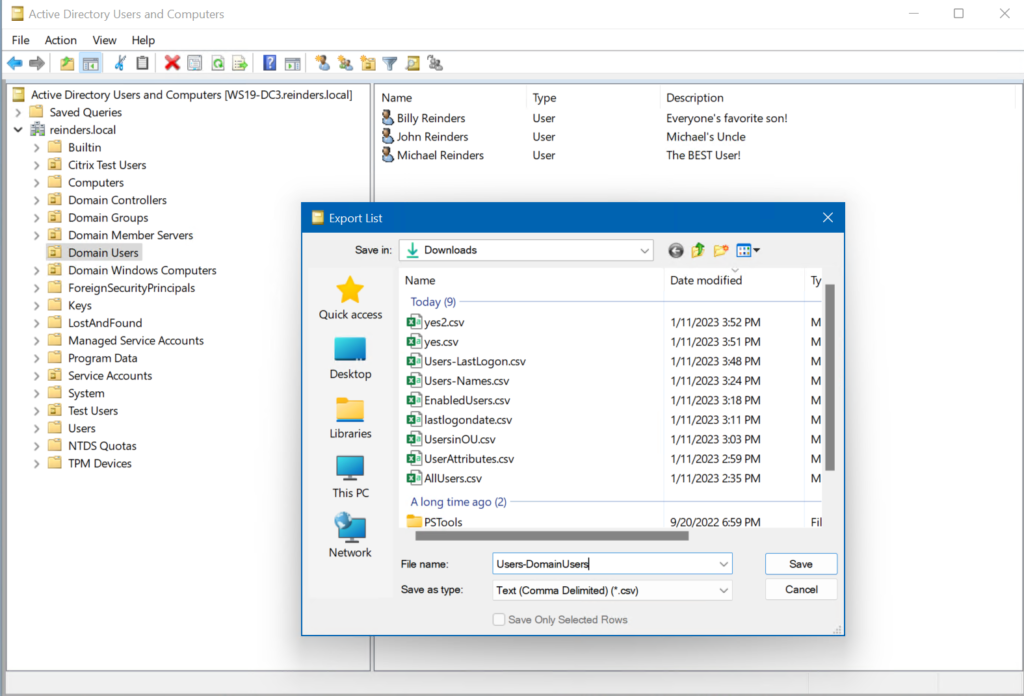
Well, did you know that you can also use the Active Directory Users and Computers snap-in/tool to export users to a CSV file? Actually, there’s probably a very good chance you kind of do, and I’ll tell you why.
When you go to click the Refresh icon on the toolbar, the icon just to the right of Refresh is ‘Export List.’ That’s right. You probably clicked ‘Export List’ by mistake and ‘woven a tapestry of obscenity that, as far as we know, is still hanging in space over your datacenter.’
Anyway, let me show you how to use this function.
How to export Active Directory users from a specific folder to CSV
Go ahead and navigate to a specific folder/OU in Active Directory. Then, click the ‘Export List‘ button.
When we open the file in Excel, we see a much more limited set of information and attributes. This function only exports the information displayed in the ADUC tool. To extract more attributes, you would need to first modify the displayed columns in the GUI. You would then run the export again.
This is a rather limited function. Unfortunately, it only exports what is displayed on the screen. So, if you click on the root of your domain and click ‘Export List’, you will only get what you see.
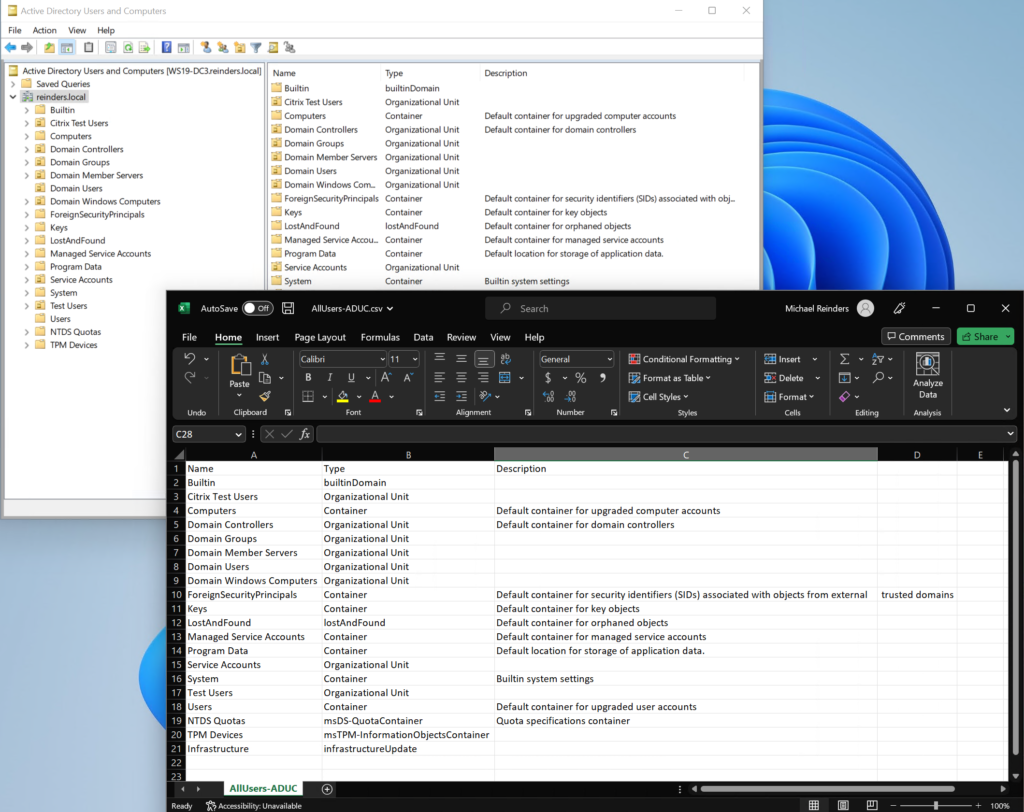
Probably not the most helpful information. But, you get the idea.
Conclusion
Well, as you can see, there are a lot of ways to extract and export very useful information on your users in Active Directory. This post only scratches the surface in terms of the power and breadth of using PowerShell to get at this information. I didn’t even touch on manipulating the information in Active Directory using the Set-ADUser command. Besides changing a user’s ‘Department’, you can also use a PowerShell Foreach loop to change everyone’s business address in the ‘Pittsburgh, PA’ office to the new office building you just moved into!
Thank you for reading about exporting users to CSV file. If you have any questions or comments, please leave a comment or question below!
FAQs
How can I export AD users to CSV with specific date filters?
To export AD users to CSV with date filters, use the Get-ADUser cmdlet with the -Properties parameter and specify a date range using Where-Object.
For example, to export users created in the last 30 days, use: Get-ADUser -Filter * -Properties whenCreated | Where-Object {$_.whenCreated -gt (Get-Date).AddDays(-30)} | Export-CSV -Path NewUsers.csv
Can I automatically schedule Active Directory users to CSV exports?
Yes, you can schedule automatic export AD users to CSV using Task Scheduler in Windows. Create a PowerShell script with your export commands and set up a scheduled task to run at specified intervals, ensuring your CSV files are always up-to-date with the latest user information.
How do I export AD users to CSV with password expiration details?
To export AD users to CSV with password information, include the “PasswordLastSet” and “PasswordNeverExpires” properties in your PowerShell command: Get-ADUser -Filter * -Properties PasswordLastSet,PasswordNeverExpires | Select-Object Name,PasswordLastSet,PasswordNeverExpires | Export-CSV -Path PasswordInfo.csv
What’s the maximum number of Active Directory users I can export to CSV at once?
When you export AD users to CSV, there’s no built-in limit to the number of users you can export. However, you should consider your system’s memory constraints and processing power. For large organizations with 100,000+ users, consider exporting in batches using pagination techniques.

Michael has been an IT Pro since 1998. He has worked predominantly in the Windows world including client and server operating systems, on-prem systems engineering (AD, DNS, etc.), and over the last ten years or so has embraced and immersed himself in...


