How to Install the RSAT Tools in Windows 10

The Remote Server Administration Tools (RSAT) package familiar server tools, like Active Directory Users and Computers (ADUC) and Server Manager, for Windows client operating systems. The tools have long been built-in to Windows Server and there is no need to download them. But until Windows 10 version 1809, you needed to download the right RSAT package for your version of Windows and then install the tools using the Control Panel.
If you are wondering why I’m discussing RSAT now when Microsoft is pushing Windows Admin Center (WAC) as the future of graphical user interface administration in Windows Server, that is because there are still many tools not available as part of WAC. Most notably, for administering Active Directory. But in general, WAC is the way forward if you want to use GUI tools for Windows Server management. You can find more information on using WAC on Petri: Windows Admin Center — The Future of the Windows Server GUI and Getting Started with the Windows Admin Center.
Install RSAT in Windows 10
RSAT is a Feature-On-Demand in Windows 10 version 1809 and later. But unlike in Windows Server and versions of Windows that require RSAT to be downloaded manually, RSAT is installed using the Settings app rather than the Control Panel.
- Log in to Windows 10 with an administrator account.
- Open the Settings app by pressing WIN+I.
- Click Apps in the Settings app.
- On the Apps & features screen, click Manage optional features.
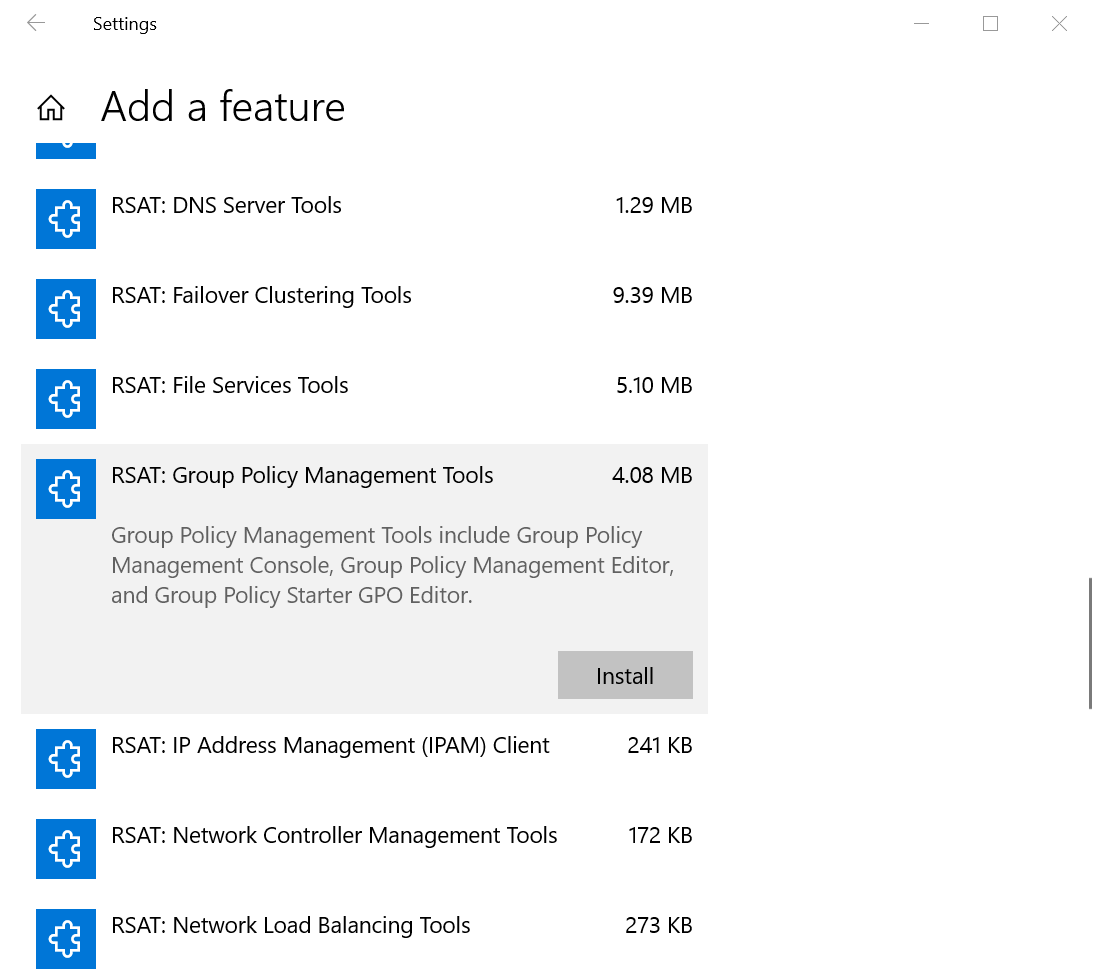
- On the Manage optional features screen, click + Add a feature.
- On the Add a feature screen, scroll down the list of available features until you find RSAT. The tools are installed individually, so select the one you want to add and then click Install.
After a few minutes, the RSAT tool you selected will be installed on your device.
Install and Remove RSAT Using PowerShell
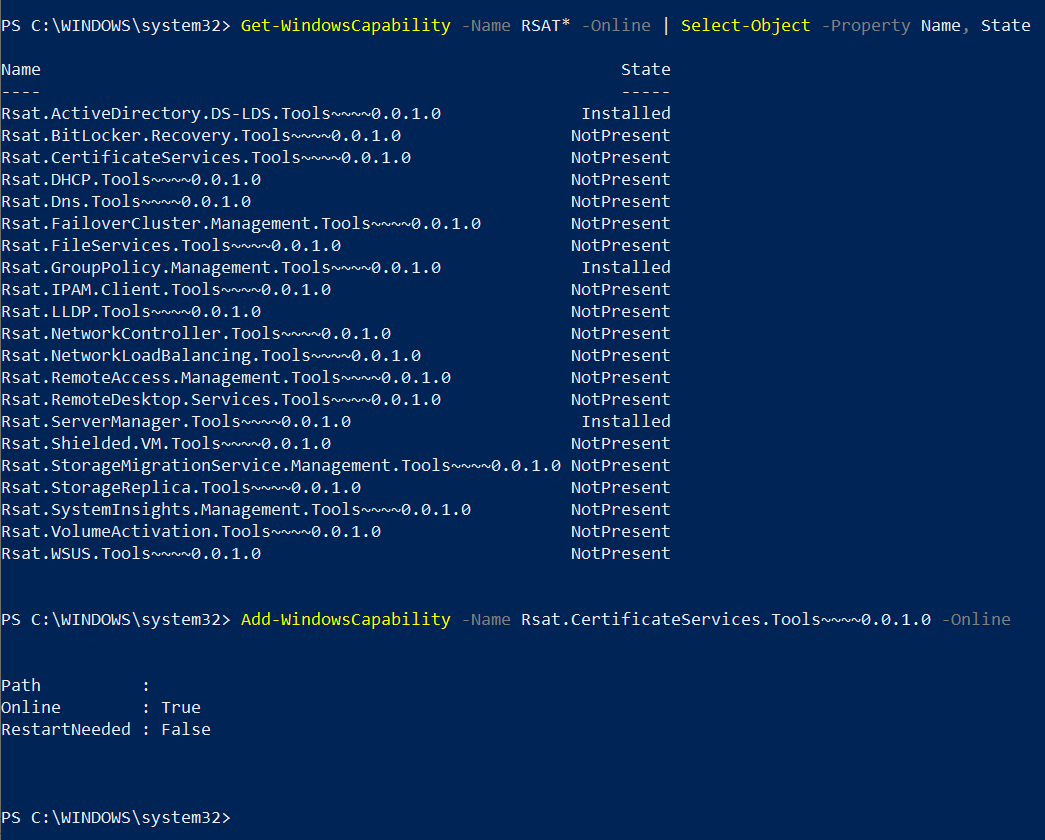
You can also install and remove RSAT in Windows using PowerShell. Start by opening a PowerShell prompt with local administrator privileges. To see which RSAT tools you have installed, use the Get-WindowsCapability cmdlet. This method is a powerful way to install RSAT Windows 10 PowerShell:
Get-WindowsCapability -Name RSAT* -Online | Select-Object -Property Name, State
To install all the available tools, pipe the results of Get-WindowsCapability to Add-WindowsCapability:
Get-WindowsCapability -Name RSAT* -Online | Add-WindowsCapability –Online
To install individual tools, use the name of the tool you want to add. You can get the name from the Get-WindowsCapability cmdlet and add it to Add-WindowsCapability as shown here. In this example, I’m installing the Certificate Services tools.
Add-WindowsCapability -Name Rsat.CertificateServices.Tools~~~~0.0.1.0 –Online
To remove a tool, use Remove-WindowsCapability instead of Add-WindowsCapability:
Remove-WindowsCapability -Name Rsat.CertificateServices.Tools~~~~0.0.1.0 –Online
Note that Feature-On-Demand requires Microsoft Update. If Windows Update is configured to use an internal Windows Update server or System Center Configuration Manager (SCCM) Software Update Point (SUP), then you won’t be able to install RSAT without taking extra steps. Either you need to temporarily configure the device to use Microsoft Update or go to Windows Update and select Search for updates online.
FAQs
Can I install RSAT on Windows 10 using PowerShell without an internet connection?
Yes. To install RSAT on Windows 10offline, you’ll need to download the RSAT package from the Microsoft Update Catalog first and use DISM commands instead of the standard PowerShell installation method. This requires storing the package locally and using specific offline installation parameters.
What happens if PowerShell fails to install RSAT tools in Windows 10?
If the install RSAT Windows 10 PowerShell commands fail:
- Check your PowerShell execution policy,
- Ensure you’re running as administrator, and
- Verify Windows Update services are running.
Common fixes include resetting Windows Update components and clearing the SoftwareDistribution folder.
Can I automate RSAT installation across multiple Windows 10 machines using PowerShell?
Yes. You can create a PowerShell script to install RSAT Windows 10 PowerShell remotely using Invoke-Command or PSExec. This allows for bulk deployment across your network, though you’ll need appropriate administrative permissions and WinRM enabled.
Are there any prerequisites before using PowerShell to install RSAT on Windows 10?
Before you install RSAT Windows 10 PowerShell, ensure you have:
- Windows 10 1809 or later,
- Administrative privileges, and
- Microsoft Update enabled.
Your system should also have enough disk space and all pending Windows updates installed.
What’s the difference between installing RSAT tools individually versus all at once via PowerShell?
When you install RSAT Windows 10 PowerShell tools individually, you have better control over disk space usage and can troubleshoot installation issues more easily. Installing all tools at once is faster but requires more system resources and longer installation time.
Russell Smith, the Editorial Director at Petri IT Knowledgebase, has over two decades of hands-on experience in IT, in both small business settings and government IT infrastructure projects. Russell started writing for Windows IT Pro Magazine in t...
