Collaborating with Microsoft 365: File Sharing, Real-Time Co-Authoring, and Microsoft Loop Components

Microsoft 365 includes powerful collaboration features that allow teams to work on and share Office documents more easily than ever before. But do you understand how file sharing works within Microsoft 365 and how to manage and secure your files? In this article, we’ll take you through the basics of file sharing and collaboration in Microsoft 365, and how you can control who can share what, and with whom, in the Microsoft 365 Admin Center.
We’ll also be discussing Microsoft 365 Groups, what they’re for, and how to boost your productivity with them. You will also learn how Microsoft’s new dynamic Loop components work and how Office and OneDrive for Business facilitate file sharing and co-authoring.
The benefits of using Microsoft 365 to share files
The best way to demonstrate the benefits of using Microsoft 365’s file sharing and collaboration features in your organization is to compare the old (not so good) way of doing it, and the new (wonderful!) way. First, let’s try to envision how we shared files in the past (and still do…).
How we shared files in the past
Imagine sending an Excel spreadsheet as an attachment to ten employees in your organization. You ask each of them, as heads of specific teams, to leave feedback about the decommissioning process of a few dozen legacy servers.
To accomplish your task to remove unused and obsolete servers safely, you need to gather feedback from several individuals in varying areas of your organization. Imagine a situation where:
- Employee A replies to everyone on the thread with their feedback on two of the servers.
- Then, Employee B replies (to everyone) with their information on three other servers.
- Now, Employee C replies and mentions that they must contradict information and details about one of the servers from Employee A, and two of the servers from Employee B. They also have info on their own five servers.
Now, before I go off the rails here, imagine anyone being on this thread, much less you, the team lead, on this project, trying to make heads or tails of any precise action items that make sense to everyone involved.
Not a smooth picture, is it? Not the greatest knowledge flow, huh? Could we benefit from some efficiency?
Why using Microsoft 365 for file sharing is more efficient
Let’s move into the future (now) and see how we can use file sharing with Microosft 365 to make that process more efficient. As the team lead, here’s what you can do to improve this collaboration process:
- You start by creating an Excel spreadsheet with the server names, the team responsible for them, and the ‘server-owner’ of each.
- You upload the Excel file into your OneDrive for Business account and share it by creating a link that grants the recipient(s) the ability to open, view, and edit the file.
- You then send the email or chat in Microsoft Teams explaining the project and paste the link to the Excel file right in the Teams chat (or channel).
- Now, all eleven users can collaborate on one central document in real-time, seeing others’ actions as they work, from any device, at any time.
Now, THAT’S cool! As the team lead, you have a single, central location in the cloud with all critical information about the project.
Let’s say your manager is mobile at the airport, and he’s looking to get a high-level status update on your project. You send him a read-only link to the file in Microsoft Teams. On his mobile device, he opens the Teams app, opens the link, and he’ll be able to open the spreadsheet in the Office mobile app and see your vast progress. Excellent!
Administering Microsoft 365 file sharing
So, how can IT Pros manage how files are shared with employees and with external collaborators? Simple – the Microsoft 365 admin center website, and the SharePoint admin center website.
Before we go further, I strongly suggest you or your Office 365 administrators double-check what your sharing and external sharing settings are. If any of them are still at the defaults, I highly suggest you propose and make some changes after clearing them with senior leadership and the various teams that need to be informed. Let me explain.
Checking file sharing settings in the Microsoft 365 Admin Center
To demonstrate how to verify and make these types of changes, I recently created a small Microsoft 365 Developer sandbox environment. This creates a pre-filled, sixteen-user (plus an admin) Microsoft 365 E5 environment that allows you to develop applications in various pillars of the Microsoft 365 stack.
This just so happens to provide a perfect opportunity to show you how to check these settings in your own environment and make appropriate changes. I will say that the default options are VERY lax in terms of security and integrity. Let me show you.
First, open the Microsoft 365 admin center. Browse to Settings -> Org settings -> SharePoint.
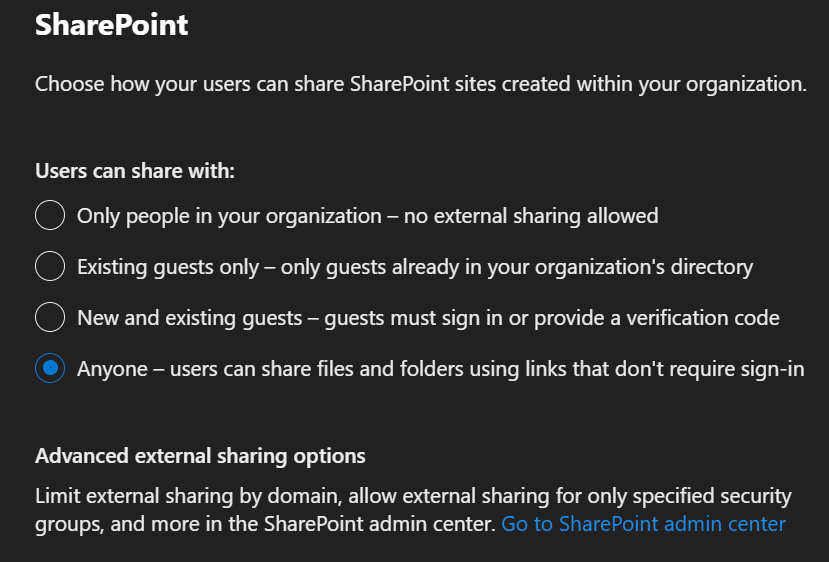
As you can see, the ‘Anyone’ option is not a very secure setting. This means that anyone that gains access to the link to this file can access it, read it, and even make changes. I’ll get to that in a moment.
At a minimum, please change this setting to ‘New and existing guests’. When you send this to external users (outside your Office 365 / Azure Active Directory tenant), they will be required to log in with an account associated with the email address you send it to. They can use their own Office 365 email address (if they have one), or a ‘personal’ Microsoft Account (MSA).
The point is, external users now need to at least have an account to authenticate instead of blindly having free reign over your precious files. There are quite a few more settings and granularity in the SharePoint admin center. Let’s go there next.
Additional sharing controls in the SharePoint admin center
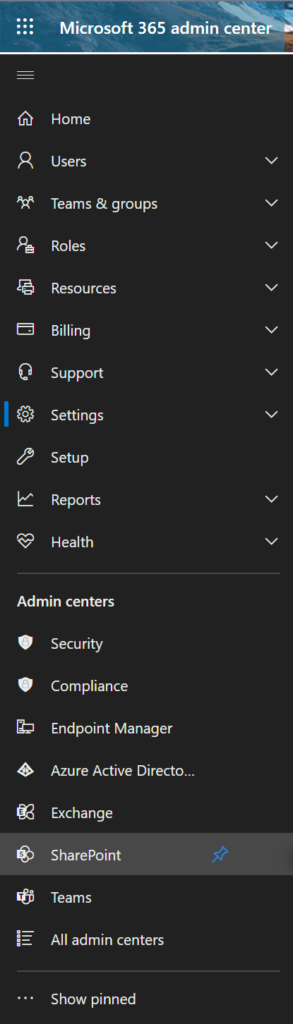
Now, go back to your Microsoft 365 admin center website, go down to the ‘Admin centers‘ section along the left side, and find SharePoint.
Once you have that open, expand the Policies section and click on Sharing.
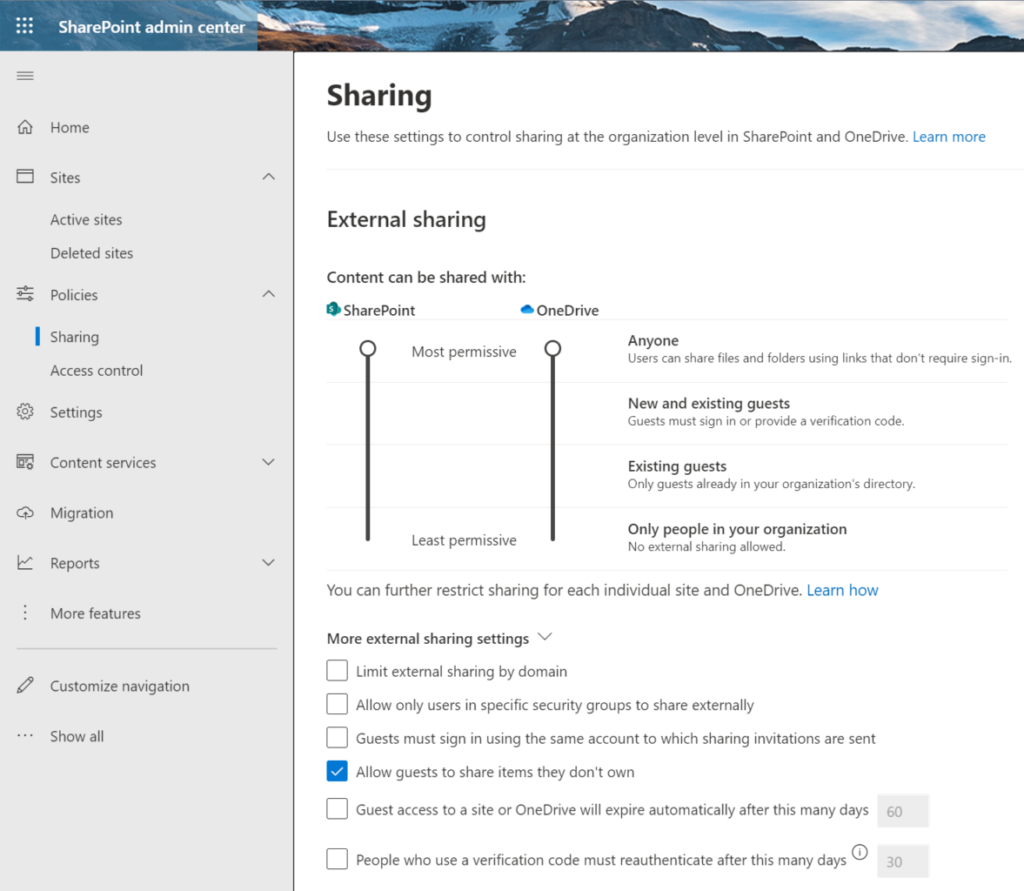
As you can see here, there are a lot of file sharing options. Again, by default, it’s kind of the wild west. When your users share files via SharePoint or OneDrive, they will have the option to share files anonymously. That’s a security no-no, in case it hasn’t sunk in yet.
My recommendation (and common best practice) is to choose the next setting down for both – ‘New and existing guests‘. Again, this requires external users to authenticate against some form of ‘Microsoft authentication mechanism’ to gain access to the file(s).
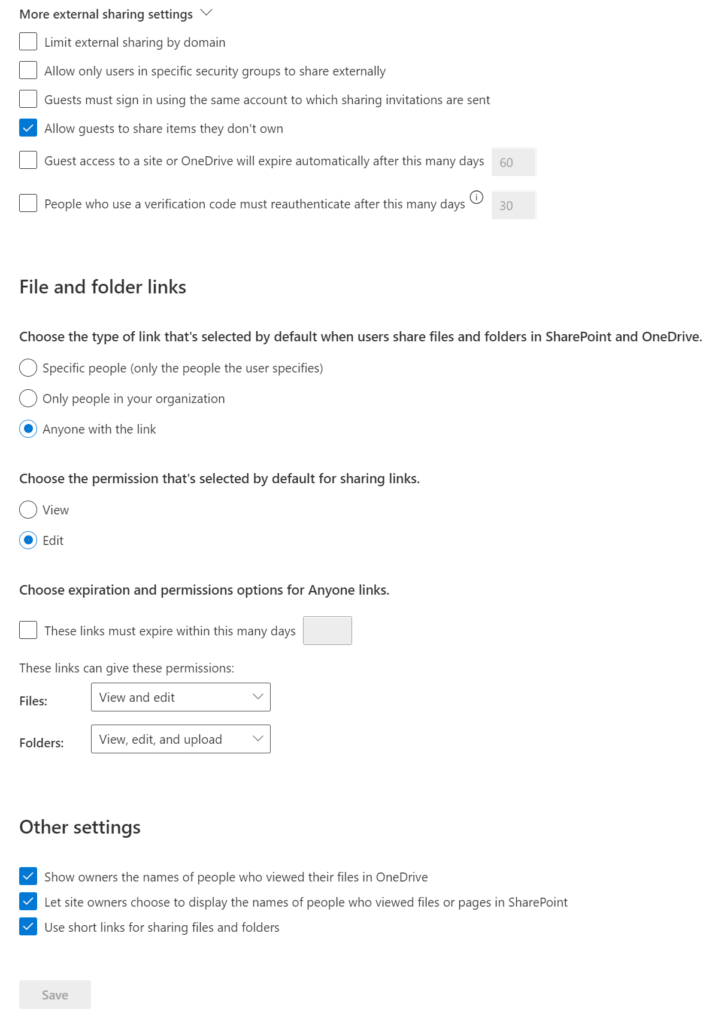
There are quite a few more settings to investigate and a few more that you need to change.
Sharing files with users for real-time collaboration
Let’s go ahead and put all this to productive use. I will now demonstrate how to share an Office file with a colleague and how to collaborate in real-time with my developer environment using Microsoft 365.
Sharing a file with a colleague via Microsoft 365
First, I will browse to office.com (or microsoft365.com) and log in.
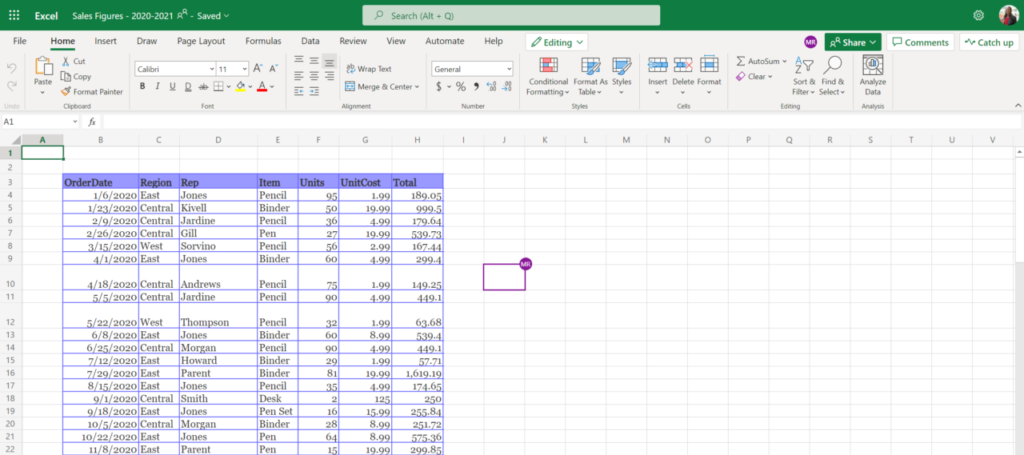
Let me click on the Excel app icon along the left side and start a new spreadsheet. I’ll quickly add some sample data (found on the Information Superhighway).

Let me name this file by clicking the title bar where it currently says ‘Book 1’ and name it ‘Sales Figures 2020-2021’. This file is automatically saved in my OneDrive account. Now, let’s share it.
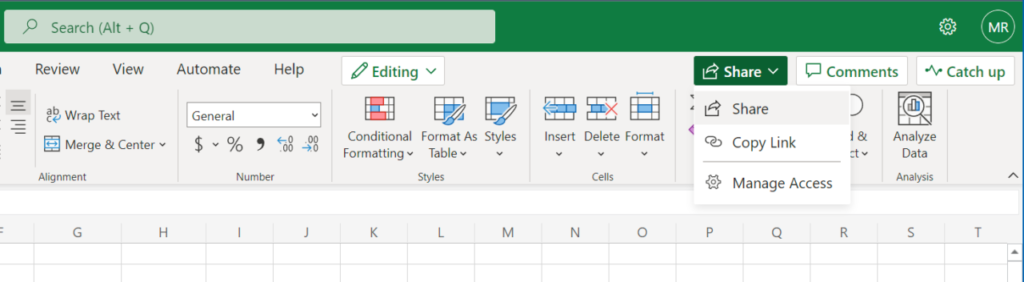
I’ll click the ‘Share‘ button in the upper-right corner and choose Share.
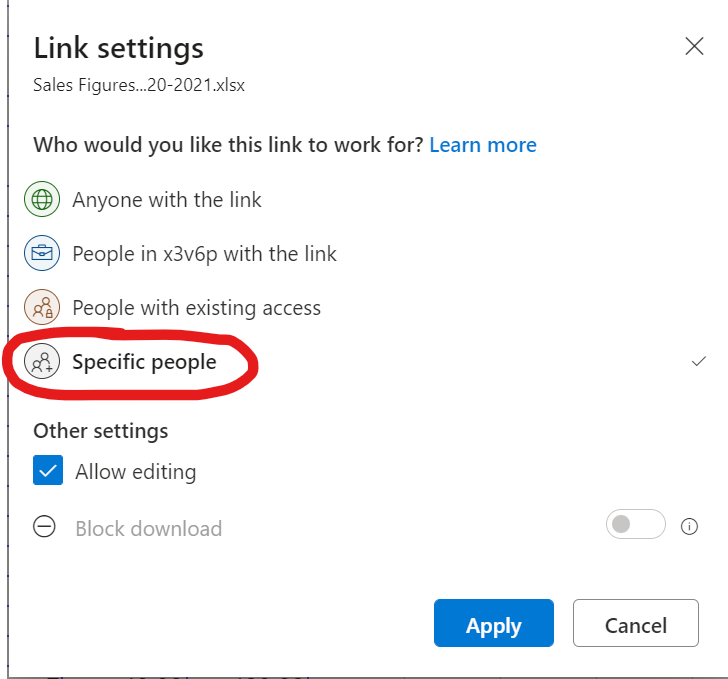
I will not be using the default setting allowing anyone to access the file. I’ll choose the most restrictive option, Specific people. I’ll also check the box for ‘Allow editing‘ so the recipient(s) has/have the ability to make changes to my file.
Next, I’ll start typing in my colleague Lynne’s name in the To: line and choose it from the autocomplete feature. I’ll then write a concise note to Lynne asking her to look over the numbers.
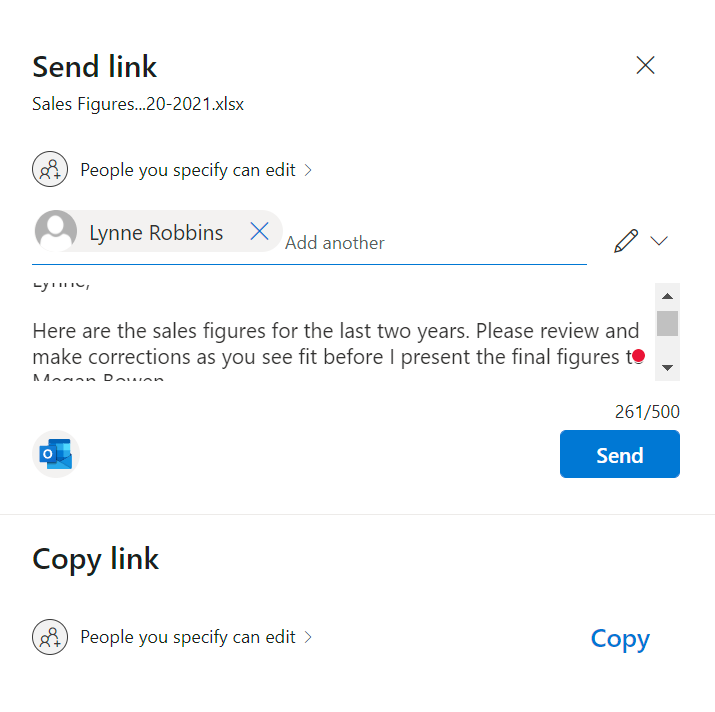
Click Send. The recipient will receive an email with a link to the file. (For some reason, my Microsoft 365 Developer sandbox is not playing nicely and rejecting those emails for some reason. I do have a way around this, of course…).
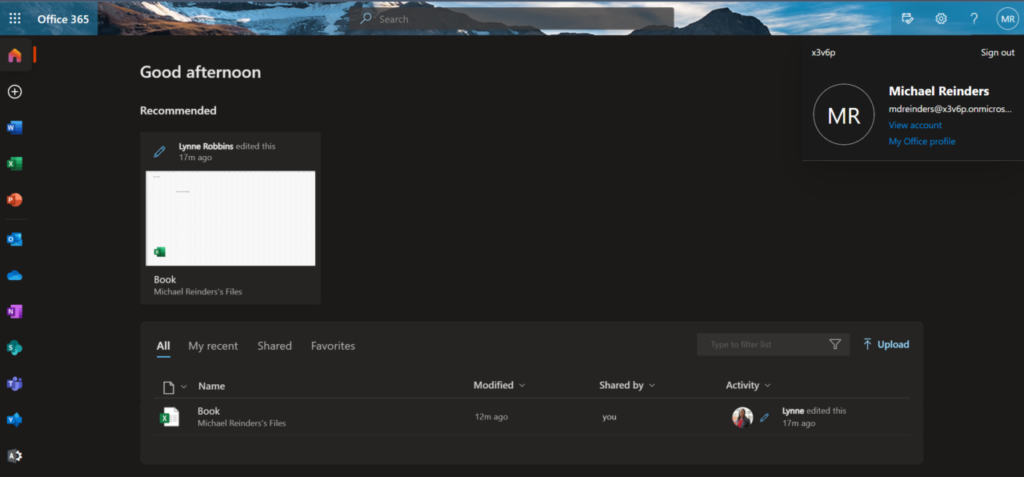
Let’s switch over to the recipient, Lynne Robbins. I will log in to the Office web app as her, and I can already see that the shared file is available to her.
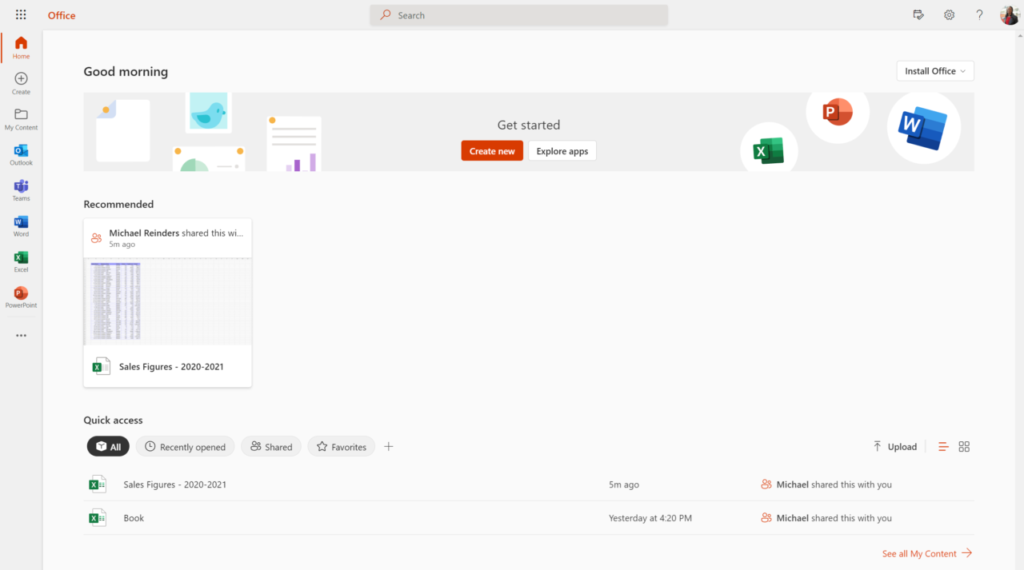
I simply click on the ‘Sales Figures – 2020-2021‘ file under the Recommended category and the file opens in Excel Online.
Collaborating in real-time on an Office file
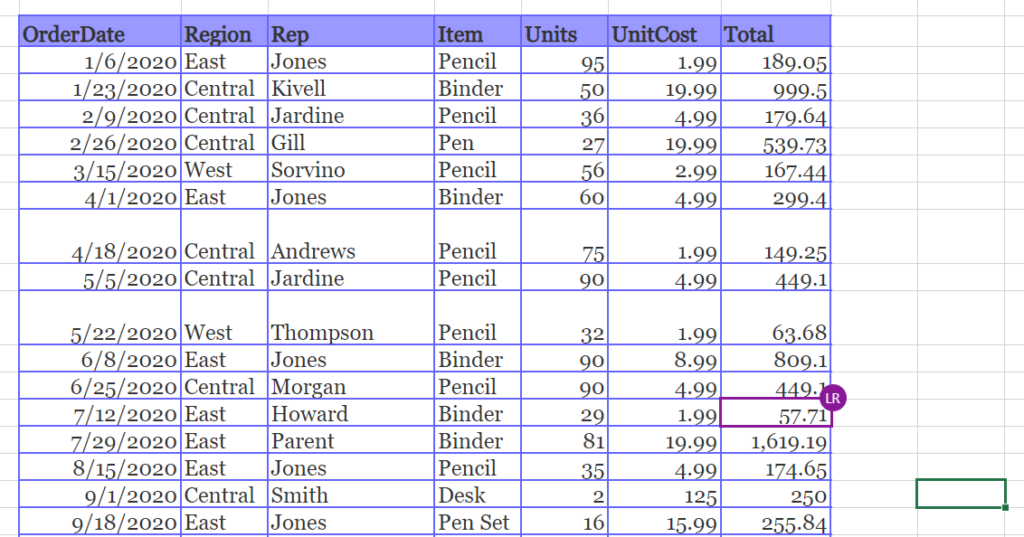
Now that Lynne has the file open, she and I now have real-time, collaborative access to the file. You’ll note that cell J10 is highlighted in purple, and it shows my initials. That is the cell I currently have selected. At a glance, every user can see, live, where everybody else is working. Pretty slick!
Also, you can see in the upper-right corner next to the ‘Share‘ button each user that has the file open. They can be using Excel Online, the Excel desktop app, the Office mobile app, and even Teams! Everyone shares the same, essential information and can make changes efficiently.
As Lynne, I will now update a few figures. Let’s jump back to ‘my’ view of the file, and you’ll see the numbers in cells F13 and H13 updated with new figures. You can also see that Lynne was last in cell H15.
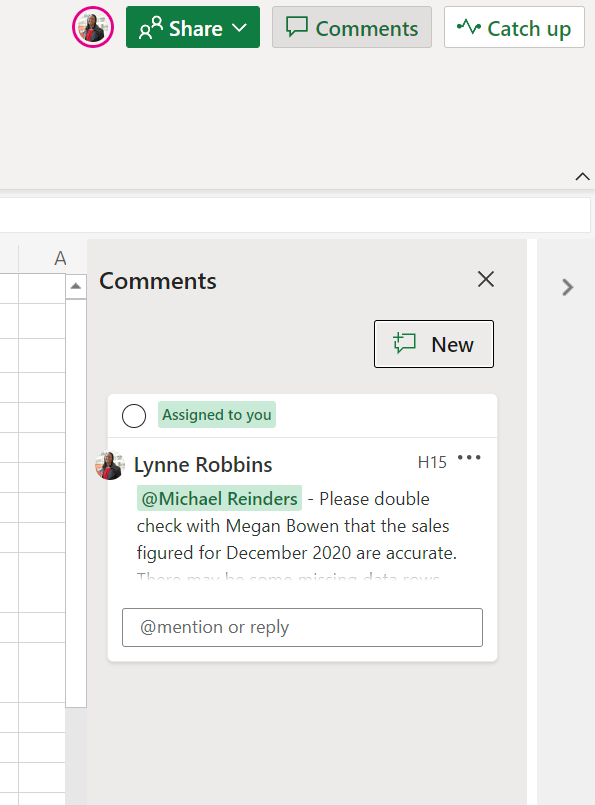
Using comments for task assignment
One more very cool feature is Comments. As Lynne, I’ll click the ‘Comments’ button in the upper-right corner and click New.
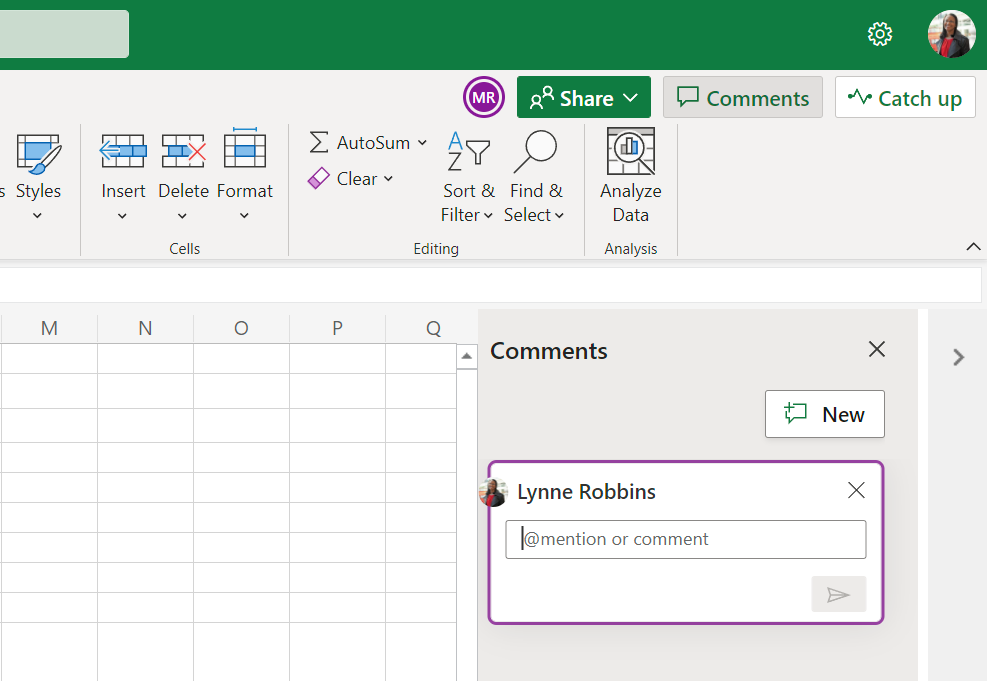
Lynne is asking me to double-check with another colleague to verify some sales numbers. She assigned this as a task, so we have accountability in accomplishing the task.
Back in my view of the spreadsheet, I can click on Comments and see the assigned task.
Brief summary of how Microsoft 365 Groups can enhance your team collaboration
Another very helpful and full-featured tool in Microsoft 365 is Groups. Microsoft 365 Groups (formerly Office 365 Groups, formerly ‘Distribution Lists’) help to add multiple efficient weapons to your arsenal in collaborating amongst your team, your department, and even your organization.
Microsoft 365 Groups were designed to allow you to easily set up a collection of resources for your team members to share. Resources such as a shared Outlook inbox, shared calendar, or a document library for collaborating on Office files, and more.
The administration of Microsoft 365 Groups is fairly easy – adding members to the Group automatically gives them the permissions they need to the tools your group provides. Additionally, Microsoft 365 Groups are the new and improved experience for what we used to use distribution lists or shared mailboxes for.
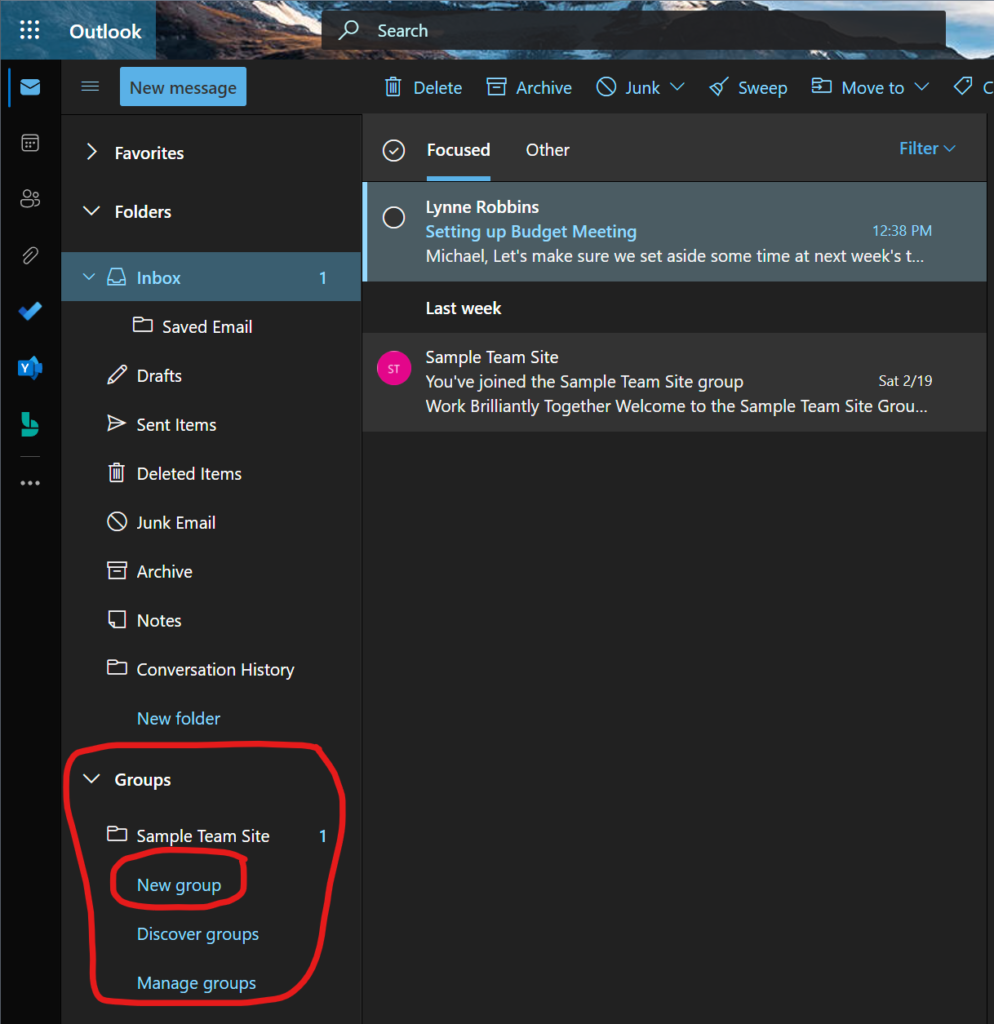
Let me show you how to create a group via Outlook on the Web. At the bottom of your email folder list, you’ll find ‘Groups.’ Go ahead and click ‘New group.’
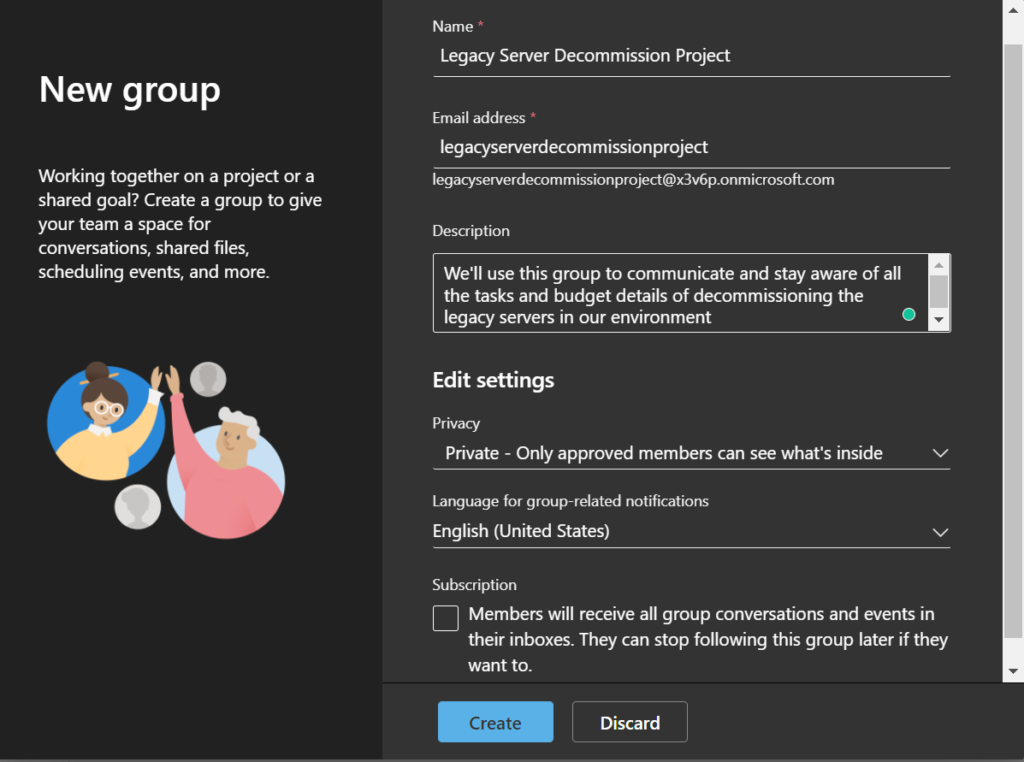
You’ll have different settings to configure:
- You need to choose the Name of the Microsoft 365 group (the email address will be auto-filled in for us).
- You can add an optional Description if you want.
- You can choose if you want to keep the Microsoft 365 group Private (recommended).
- You can also choose the suitable Language, and if you want group members to receive all emails and conversations in their own private Inbox, in addition to the group.
When you’re done, click Create.
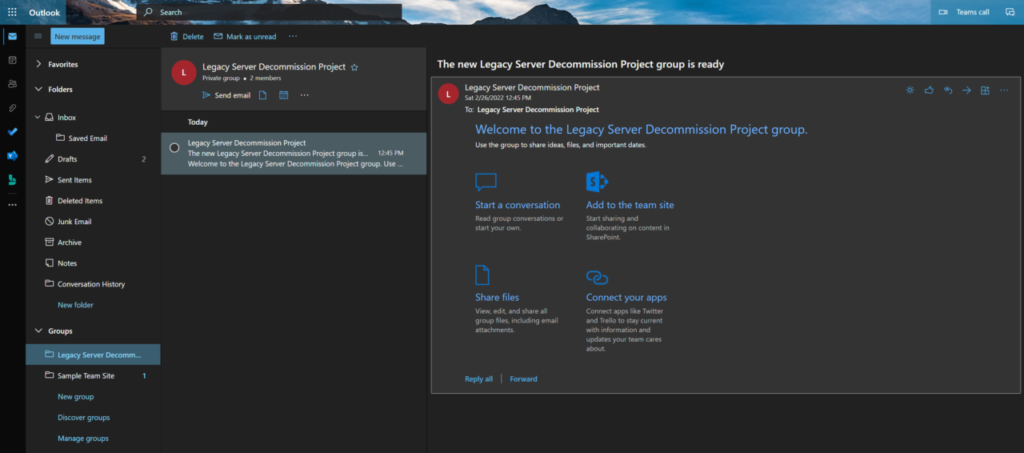
Next, I’ll add Lynne Robbins as a Member of the new Microsoft 365 Group.
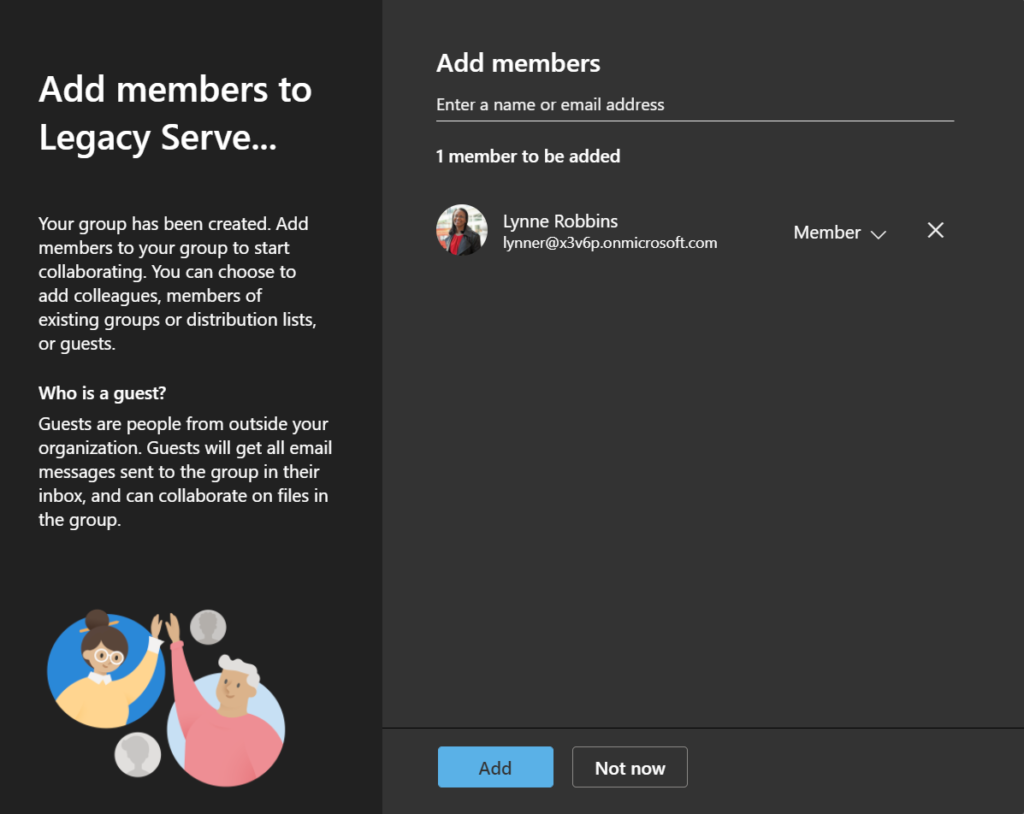
It’s done. Our new private, Microsoft 365 group is ready for use!
Using Microsoft Loop components in a Microsoft Teams Chat
Microsoft Loop components are a new feature surrounding efficient collaboration of information that started rolling out to Microsoft Teams at the end of 2021. Microsoft Loop components are “a new app that combines a powerful and flexible canvas with portable components that move freely and stay coordinated across apps, enabling teams to think, plan, and create together.”
At the beginning of November 2021, Microsoft announced Loop components. This is one of three elements of Microsoft Loop – the other two being Loop pages and Loop workspaces… those are still to come. Microsoft Loop components are supported in Teams chats for desktop and mobile, the Outlook for Windows app, as well the Word, Outlook, and Whiteboard web apps.
At the time of this writing, Loop Components are still a fairly new feature, and they may only be available for ‘Targeted users’ in your Office 365 tenant. To check, open the Microsoft 365 admin center. Click on Settings -> Org settings -> Organization profile -> Release preferences.
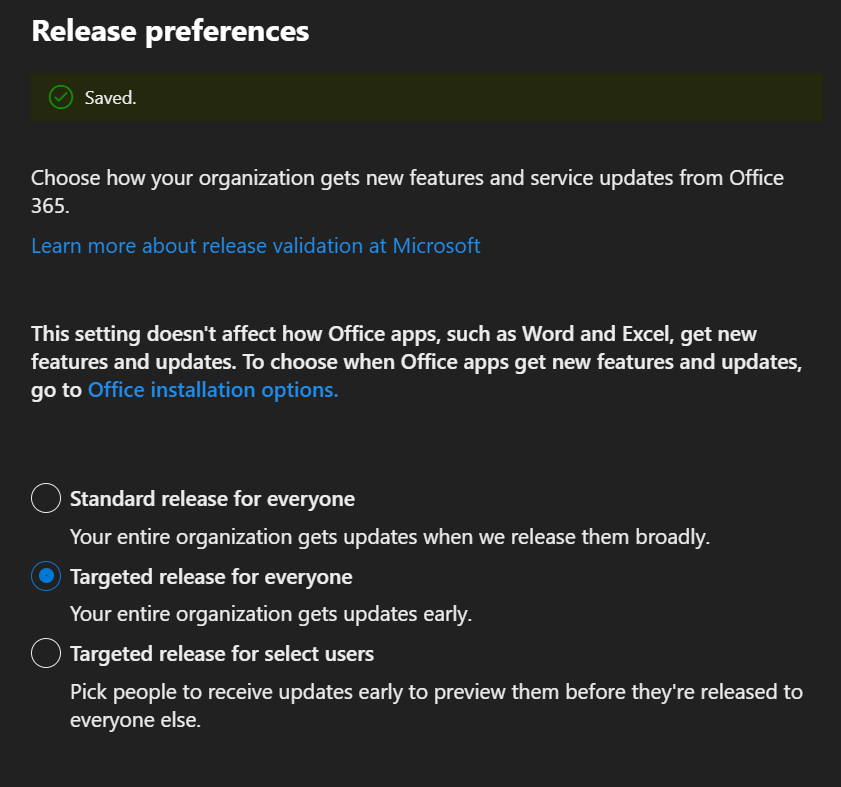
You can choose any of these three options. Normally you choose a small subset of users to be in the ‘Targeted release’ category to ‘test’ new features before most of your users receive them.
Back to regular programming: Microsoft Loop components offer a new way to think, plan, and create together by adding a dynamic component – an Office table, list, paragraph, even a task list – right to your Teams chat.
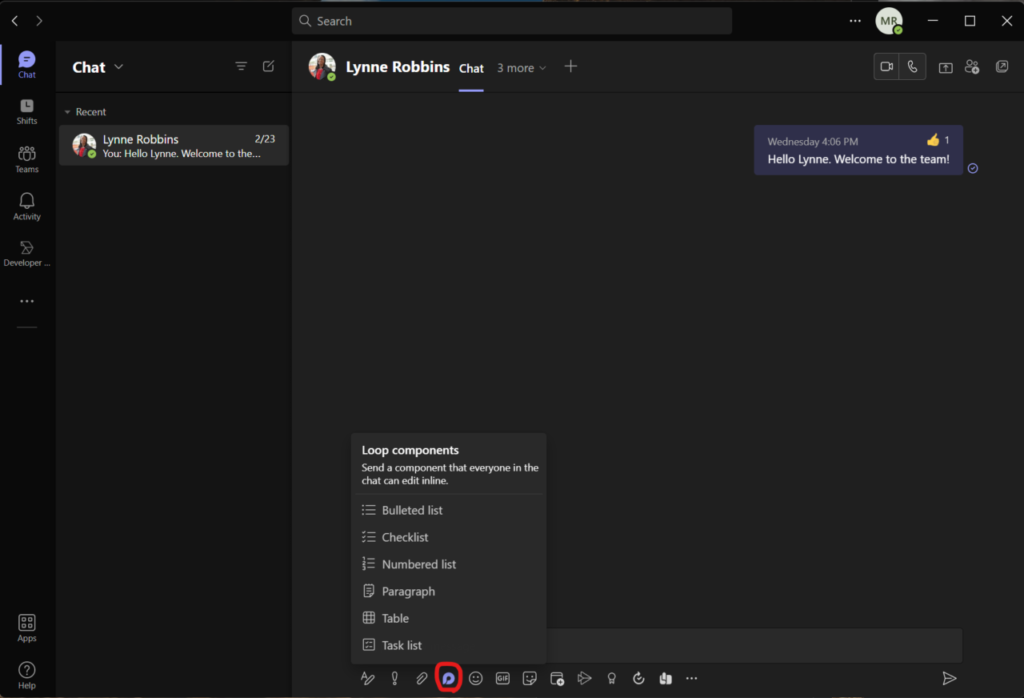
To get started, open the Chat module in Microsoft Teams and select the user you wish to collaborate with. Next, click the icon for Loop components.
Here, I chose Checklist, entered some initial tasks for Lynne and me, and then changed the sharing scope from ‘Anyone in the organization can edit’ to ‘Share within this Chat only’.
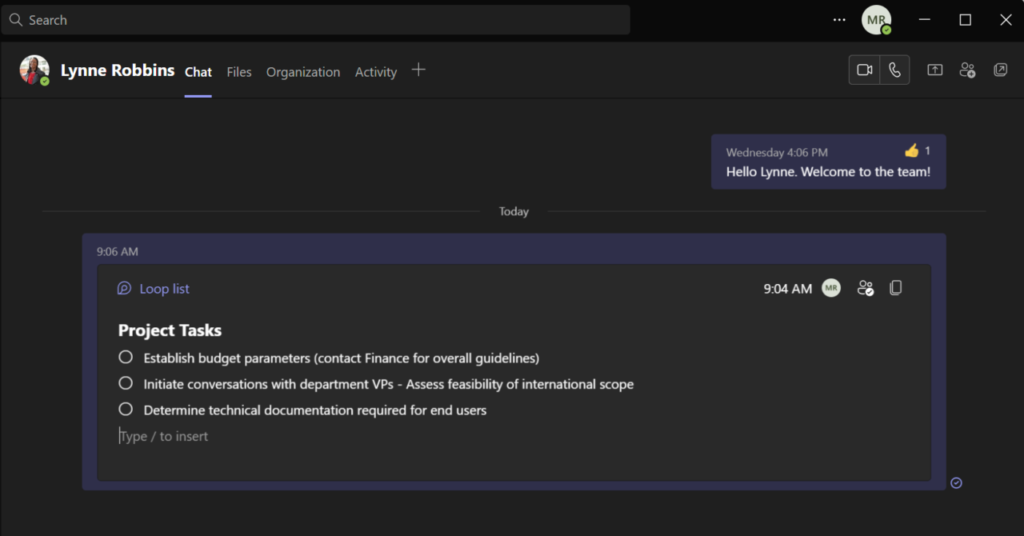
Now, let me switch over to Lynne Robbins and make some changes to the checklist.
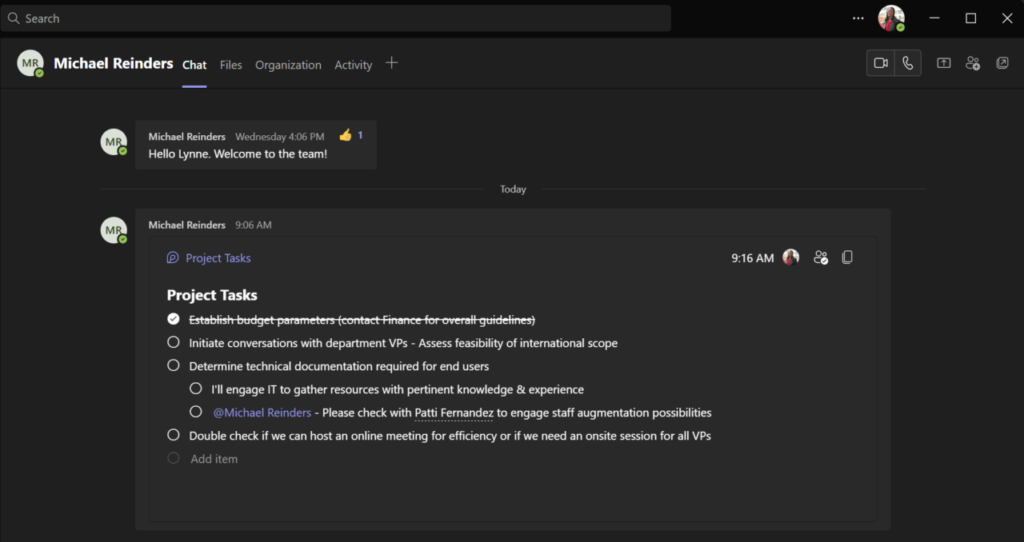
As you can see, Lynne marked the first item complete and added a few tasks with a callout to ‘me’ that will grab my attention next time I’m in Teams. Efficiency and productivity at their best!
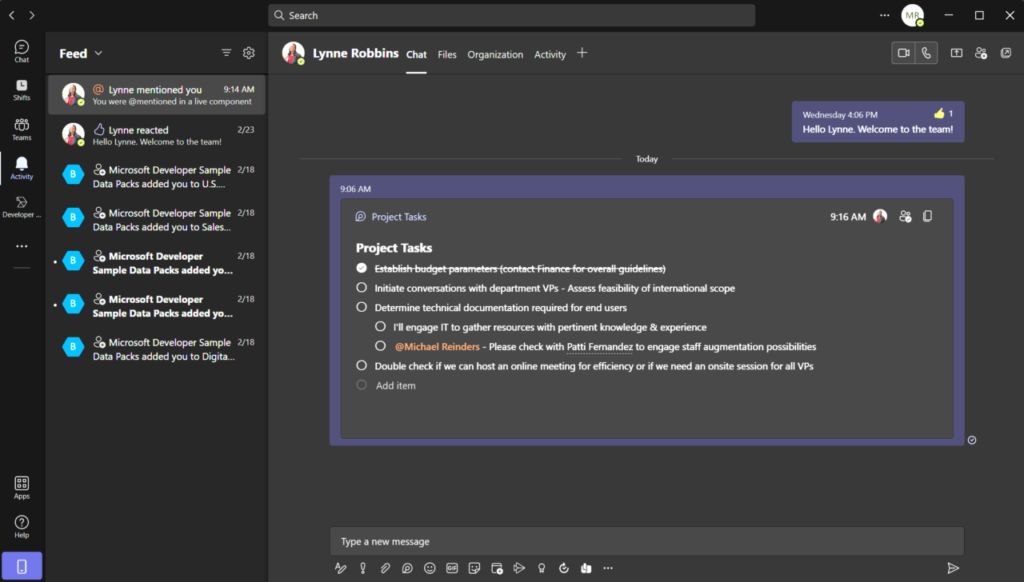
When I logged back into Teams, I saw a notification on my Activity module and saw in my Feed that Lynne (Robbins) mentioned me in a live Loop component. Very cool!
Conclusion
I hope you learned something new about file sharing and collaboration features in Microsoft 365. If you’re inspired to give these Office tips and tricks a try, feel free to leave me a comment below. Thank you!

Michael has been an IT Pro since 1998. He has worked predominantly in the Windows world including client and server operating systems, on-prem systems engineering (AD, DNS, etc.), and over the last ten years or so has embraced and immersed himself in...


