How to Grant Full Mailbox Access to Users in Office 365 and Exchange Server
In Office 365 (Exchange Online) and Exchange Server environments, granting ‘Full Mailbox’ access to a user is a common administrative task, especially when dealing with shared mailboxes, delegation, or troubleshooting. In this article, we will explore step-by-step procedures for granting Full Mailbox access to users in both Office 365 and Exchange Server environments. I will cover various scenarios, including giving access using the Exchange Admin Center and the PowerShell Add-MailBoxPermission cmdlet. I will also detail how to manage permissions for shared mailboxes and resource mailboxes.
How to grant Full Access permissions in Exchange Server with PowerShell Add-MailBoxPermission
There are many parameters surrounding user mailboxes and permissions in Exchange. For this post, we will focus on the ‘Full Access’ access right, which allows a user to use Outlook to view, send, and manage another user’s mail, calendar events, contacts, and other mailbox items. There are other access rights I’ll cover in future posts like ‘Send As’ and ‘Send on Behalf.’
For on-premises Exchange Server deployments, you can grant full mailbox access to users using PowerShell. There are several PowerShell cmdlets that can perform the tasks we need, but again, this article will focus on adding permissions for mailboxes.
- Open the Exchange Management Shell on the Exchange Server.
- Use the Add-MailboxPermission PowerShell command to grant full mailbox access:
Add-MailboxPermission -Identity "MailboxName" -User "UserAlias" -AccessRights FullAccess -InheritanceType All
- Replace “MailboxName” with the mailbox to which you want to grant access and “UserAlias” with the user’s alias you want to grant access.
That’s all there is to it!
How to grant Full Access permissions in Exchange Server with the Exchange Admin Center
You can also grant full mailbox access using the Exchange Management Console (EMC) for on-premises Exchange Server deployments. Here’s how to do it.
- Open the Exchange Management Console on the Exchange Server.
- Navigate to Recipient Configuration and select the mailbox to which you want to grant access.
- Right-click the selected mailbox and choose Manage Full Access Permission.
- Click Add and select the user you want to grant access to.
- Click Manage to set the Full Access permission for the user.
- Save the changes.
Done!
How to add mailbox permissions in Office 365
As for on-premises Exchange Server, you can follow these steps to grant these mailbox permissions using either the GUI or PowerShell. Let’s go over both.
Using the Exchange Admin Center (GUI) portal
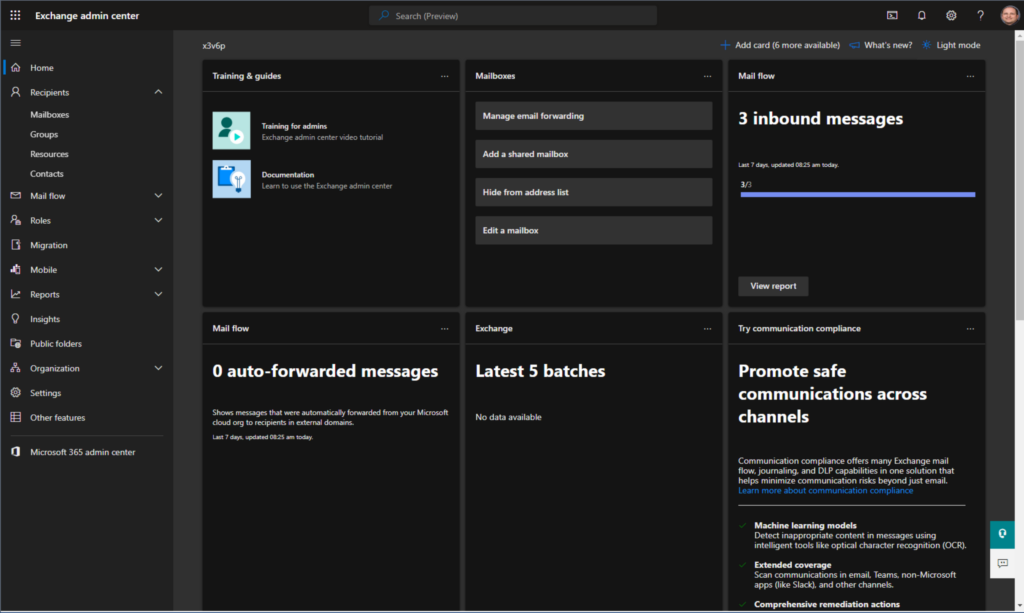
- We’ll start by opening the Exchange Admin Center.
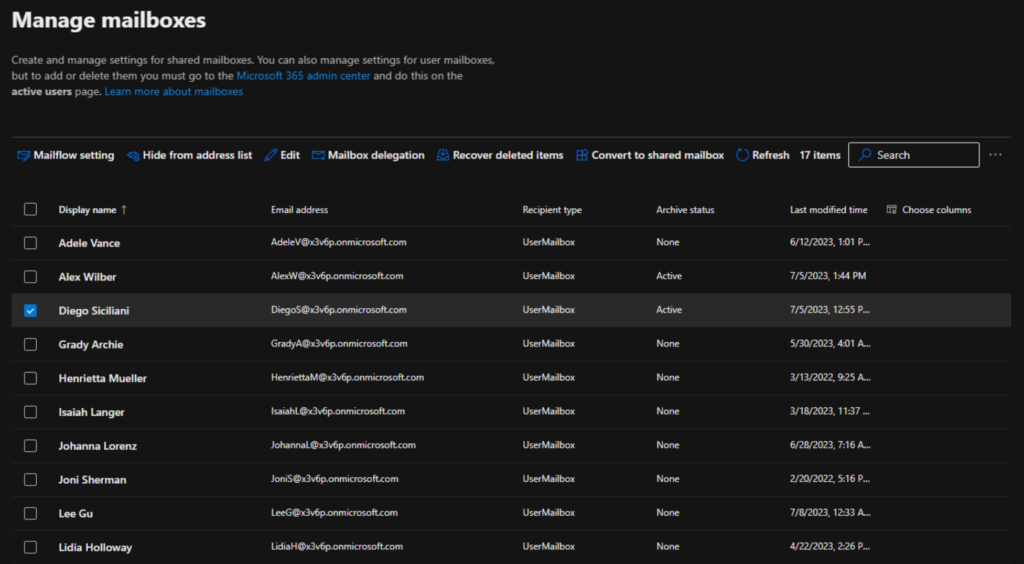
- On the left, under Recipients, click Mailboxes.
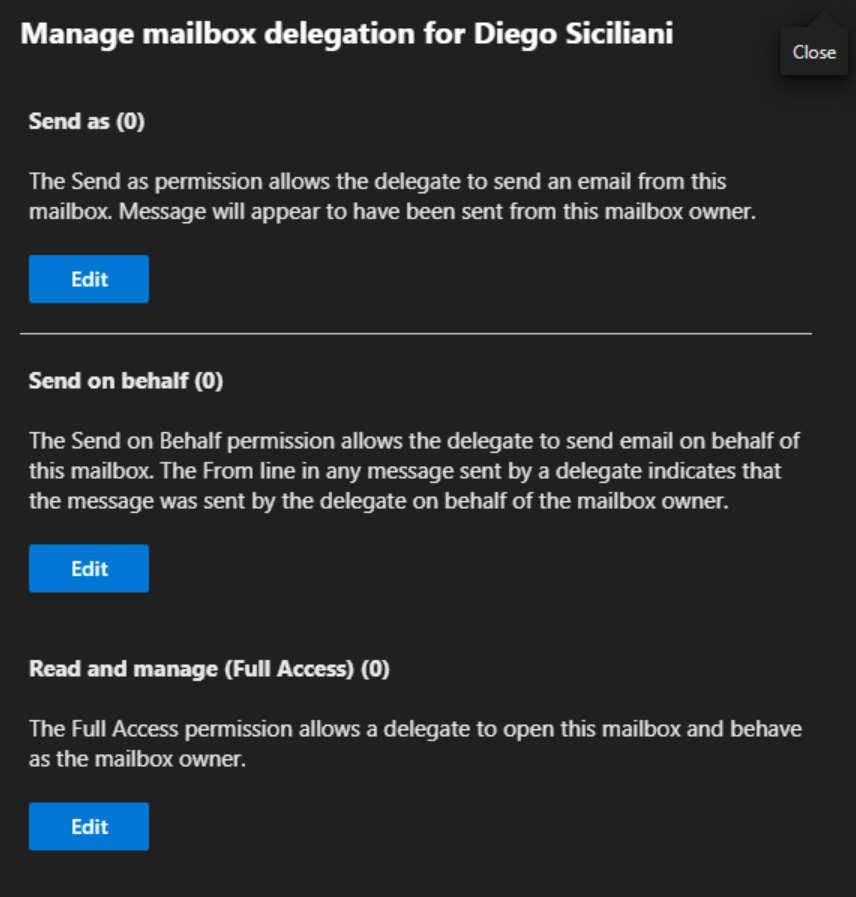
- Select a user, and then click the Mailbox delegation button above on the toolbar.
- Under the Read and manage (Full Access) section, click the Edit button.
- Here, you can click the ‘+ Add members‘ button and choose who you want to grant permission.
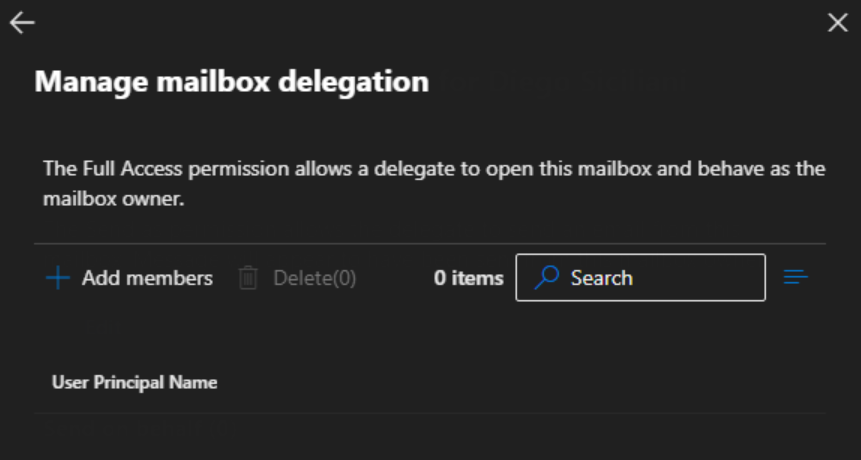
- After selecting the user or users, click the Save button at the bottom and then the Confirm button.
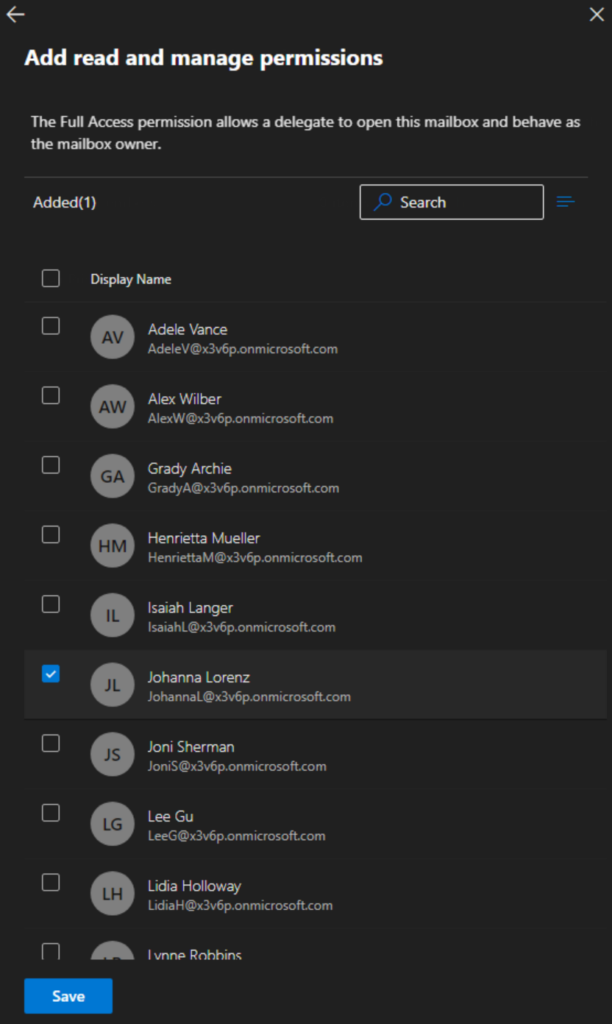
- After selecting the user or users, click the Save button at the bottom and then the Confirm button.
You are done!
Using Exchange Online Powershell
The commands and steps are again similar to the on-premises procedure. Let’s get connected to our Exchange Online tenant and run through the steps. Be sure to always watch the syntax with PowerShell – it’s sometimes amazing (and irritating) how one character or operator will generate the output you need or generate none!
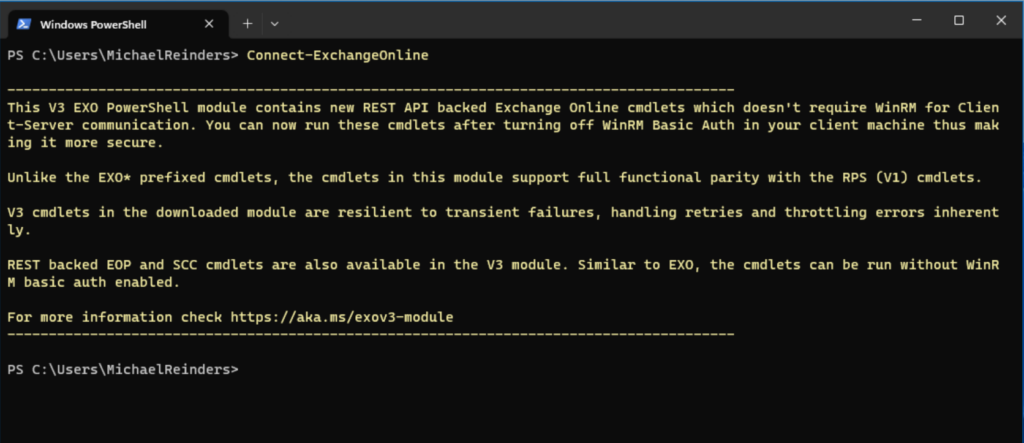
- First, I’ll run the Connect-ExchangeOnline command to get connected to my Microsoft 365 Developer tenant.
Connect-ExchangeOnline
- Next, I can once again use the Add-MailboxPermission command to grant Joni Sherman and Megan Bowen Full Access permission to Miriam Graham’s mailbox. We can run the command twice:
Add-MailboxPermission -Identity [email protected] -User "Joni Sherman" -AccessRights FullAccess
Add-MailboxPermission -Identity [email protected] -User "Megan Bowen" -AccessRights FullAccess
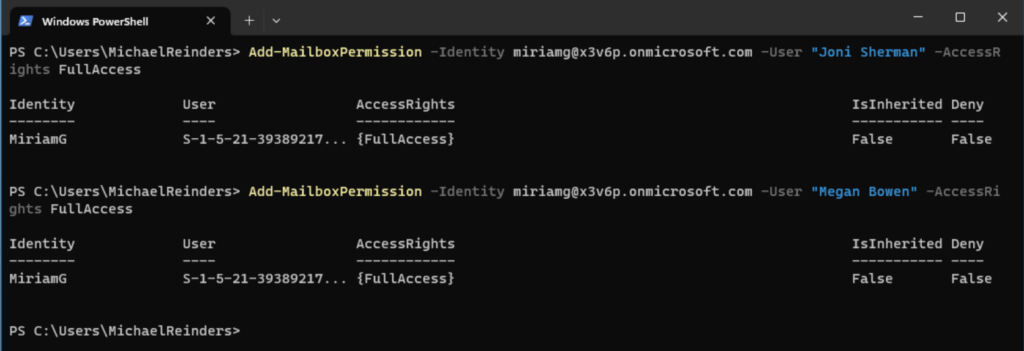
These changes usually take effect in just 5-10 minutes.
In Office 365, a shared mailbox is a type of mailbox that allows multiple users to access and manage emails, calendar events, and other mailbox items. Shared mailboxes are designed for collaboration and sharing among teams, departments, or project groups, and they don’t have their own individual login credentials. Instead, users with appropriate permissions can access the shared mailbox using their own Office 365 credentials.
Shared mailboxes are, by default, commonly used for group collaboration and customer service teams. Here is a brief description of the involved steps for managing full mailbox access for shared mailboxes:
In Office 365
- Use the Exchange Admin Center or PowerShell as described in the first section to grant full mailbox access to users.
- Ensure that you have appropriate user permissions to manage mailbox permissions for shared mailboxes.
In Exchange Server
- Use the Exchange Management Console or PowerShell as described in the section above to grant full mailbox access to users.
- Ensure that users have the necessary permissions to access and manage shared mailboxes.
How to manage full mailbox access for resource mailboxes
Similarly, a resource mailbox is a type of mailbox that represents a non-human entity, such as a meeting room, conference room, projector, or other shared resources within an organization. Resource mailboxes are designed to manage and simplify the booking of these shared resources for meetings, events, or any other scheduled activities. When users want to reserve a resource, they can do so by creating a calendar event and inviting the resource mailbox, which will automatically process the booking based on availability and accept or decline the request.
Here is a brief description of the involved steps for managing full mailbox access for resources mailboxes.
In Office 365
- Use the Exchange Admin Center or PowerShell as described above to grant full mailbox access to users.
- Instead of clicking on Mailboxes under ‘Recipients’, you will click on Resources.
- Ensure that users have the appropriate permissions to book and manage the resource mailbox.
In Exchange Server
- Use the Exchange Management Console or PowerShell as described above to grant full mailbox access to users.
- As stated above, you will click the Resources heading along the top between ‘groups’ and ‘contacts’ to find the conference room you wish to delegate.
- As always, ensure that users have the necessary permissions to book and manage the resource mailbox.
How to check current permissions on a mailbox with Get-MailboxPermission
This is one high-level frequent question from IT Pros. Before you add permissions, how can you verify what permissions exist? Let me use PowerShell to show you how.
I’ll be using the Get-MailboxPermission cmdlet to retrieve the permissions on Miriam’s mailbox thusly.
Get-MailboxPermission -Identity "Miriam Graham"

The first entry is by design – the user in question, Miriam, has full access to her own mailbox. The next two lines show the changes we made MeganB and JoniS have ‘FullAccess’ permissions.
How to remove permissions from a mailbox with Remove-MailboxPermission
After you verify current permissions or after your junior admins are performing their analysis on said mailboxes, how do you remove these permissions? You guessed it: The Remove-MailboxPermission cmdlet is here to help.
Let me show you how to use it:
Remove-MailboxPermission -Identity "Miriam Graham" -User "Megan Bowen" -AccessRights FullAccess

Simple as that. After I removed the permission from Megan, I ran the Get-MailboxPermission cmdlet again to confirm my work. We are good!
Conclusion
Granting Full Access permissions to mailboxes in Office 365 is essential for enabling efficient collaboration and seamless delegation within an organization. By assigning Full Access to specific users or groups, authorized personnel can access and manage other users’ mailboxes, calendars, and contacts, streamlining tasks such as handling urgent emails, scheduling meetings, or responding to inquiries on behalf of a colleague.
This level of access fosters a more responsive and productive work environment, allowing team members to work together effectively and ensuring continuity in case of absences or changes in personnel. Additionally, Full Access permissions can simplify the process of managing shared mailboxes or resource mailboxes, improving overall workflow efficiency and enhancing communication and coordination across the organization.
Table of contents
- How to grant Full Access permissions in Exchange Server with PowerShell Add-MailBoxPermission
- How to grant Full Access permissions in Exchange Server with the Exchange Admin Center
- How to add mailbox permissions in Office 365
- How to manage Full Mailbox access for shared mailboxes
- How to manage full mailbox access for resource mailboxes
- How to check current permissions on a mailbox with Get-MailboxPermission
- How to remove permissions from a mailbox with Remove-MailboxPermission
- Conclusion


