How to Create Conditional Access Policies using PowerShell

When working in a Microsoft 365 environment, IT pros can use Conditional Access policies to control access to their tenant. In this article, we’ll detail how to create Conditional Access policies using PowerShell instead of the graphical user interface, and why using PowerShell to do that can help you save some time
Conditional Access policies can assist IT and security teams to further secure all access and control to a tenant, enforcing items such as multi-factor authentication. In a previous article, I explained why organizations should restrict access to Office 365 using conditional access policies, and you may want to check it out before reading further.
The advantages of creating Conditional Access policies with PowerShell
Conditional access policies are straightforward if-then statements. For example, if a user needs to access SharePoint Online, they must complete a security action. Conditional access policies make decisions based on signals such as users or group memberships, IP location information, the devices or applications used to connect to services, and many others.
In addition to providing a final decision for granting or blocking access to a tenant, Conditional Access policies also enforce extra checks. The possible requirements you can configure include multi-factor authentication, restricting access to devices marked as compliant, requiring Hybrid Azure AD joined devices, using an approved client app, or utilizing an app protection policy.
You can create Conditional Access policies using the graphical user interface within Azure Active Directory and Microsoft Endpoint Manager. However, you can also use PowerShell, Microsoft Graph PowerShell, and the Microsoft Graph API to do the same.
Even though using the user interface is a straightforward way to create Conditional Access policies, using PowerShell will allow you to replicate the same Conditional Access policies across multiple tenants. As a result, it is much more effortless to create these policies using PowerShell.
The PowerShell approach you’ll choose will dictate the commands and syntax you’ll have to use. The two available PowerShell modules you can use are “AzureAD” and “Microsoft.Graph.”
How to Create a Conditional Access policy using the AzureAD PowerShell module
A Conditional Access policy requires a conditional access set, a condition, an optional platform, locations, risk levels, app types, session controls, and grant controls. The properties require specific object types within PowerShell.
The main object is the “Microsoft.Open.MSGraph.Model.ConditionalAccessConditionSet“, followed by a set or subset of these:
- Applications = Microsoft.Open.MSGraph.Model.ConditionalAccessApplicationCondition
- Users = Microsoft.Open.MSGraph.Model.ConditionalAccessUserCondition
- Locations = Microsoft.Open.MSGraph.Model.ConditionalAccessLocationCondition
- Controls = Microsoft.Open.MSGraph.Model.ConditionalAccessGrantControls
To create a conditional access policy using the “AzureAD” PowerShell module, you could use the following code as an example:
Using Namespace Microsoft.Open.MSGraph.Model
$conditions = [ConditionalAccessConditionSet]@{
    Applications  = [ConditionalAccessApplicationCondition]@{
        IncludeApplications = 'All'
    }
    Users = [ConditionalAccessUserCondition]@{
        IncludeUsers = 'All'
    }
    ClientAppTypes = @('ExchangeActiveSync', 'Other')
}

$grantcontrols = [ConditionalAccessGrantControls]@{
    _Operator = 'OR'
    BuiltInControls = 'block'
}

$Params = @{
    DisplayName = "SEC001-Block-Legacy-Authentication-All-Apps";
    State = "EnabledForReportingButNotEnforced";
    Conditions = $conditions;
    GrantControls =$grantcontrols;
}
New-AzureADMSConditionalAccessPolicy @Params
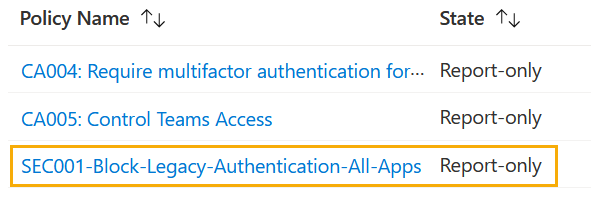
Executing this will create a new policy that will be visible within the graphical user interface. Be aware that it can take time before it appears there, though you may run PowerShell or call the Graph API directly as it shows up there.
Even though this approach works, the recommended option is to use “Microsoft.Graph” PowerShell module instead.
How to Create a Conditional Access policy using the Microsoft.Graph PowerShell module
To use the “Microsoft.Graph” module within PowerShell, you first need to install and import it.
Installing the Microsoft.Graph PowerShell module
You’ll need to use the following commands to install and import the “Microsoft.Graph” PowerShell module:
Install-Module Microsoft.Graph
Import-Module Microsoft.Graph
The PowerShell module connects directly to the Graph API and supports the current version 1 and beta endpoints. You can set which profile to use by using the following command:
Select-MgProfile -Name "beta"
Connecting to the tenant with PowerShell
The next step is to connect to the tenant using “Microsoft.Graph“. You can connect to the tenant by sending the required permissions or scopes, or you can use an Azure Active Directory application registered with the required permissions.
To create Conditional Access policies, you’ll need the “Policy.Read.All”, “Policy.ReadWrite.ConditionalAccess”, and “Application.Read.All” permissions. You can pass these permissions as part of the connected syntax, as seen in the example below:
$permissions = @(
    "Policy.Read.All",
    "Policy.ReadWrite.ConditionalAccess",
    "Application.Read.All"
)
Connect-MgGraph -Scopes $permissions
Creating a Conditional Access policy
Once connected to the tenant, you need to create the components that make up a Conditional Access policy. When using the “Microsoft.Graph” PowerShell module, you must construct each element using a PowerShell object (PSCustomObject).
$conditions = @{
    Applications = @{
        includeApplications = 'All'
    };
    Users = @{
        includeUsers = 'All'
    };
    ClientAppTypes = @(
        'ExchangeActiveSync', 'Other'
    );
}
$grantcontrols = @{
    BuiltInControls = @('mfa');
    Operator = 'OR'
}
With the core settings now defined, you can now create the Conditional Access policy. Here’s the code you can use in PowerShell:
$Params = @{
    DisplayName = "SEC001-Block-Legacy-Authentication-All-App";
    State = "EnabledForReportingButNotEnforced";
    Conditions = $conditions;
    GrantControls =$grantcontrols;
}
New-MgIdentityConditionalAccessPolicy @Params
To create different types of Conditional Access policies, an easy way to learn how to structure them is to view them within the Microsoft Graph Explorer tool. As before, this will create the Conditional Access policy with the defined settings.
If you have never used this tool, navigate to the Microsoft Graph Explorer and sign in with an account for your tenant:
- In the left panel for sample queries, expand Security, select the get all Conditional Access policies query and execute it.
- If you hit permission issues, click on Modify permissions to consent as required.
- Once approved, you will see the Policy.Read.All permission and the query will execute successfully.

After executing a successful query, the Response preview pane at the bottom will display the outputted JSON.
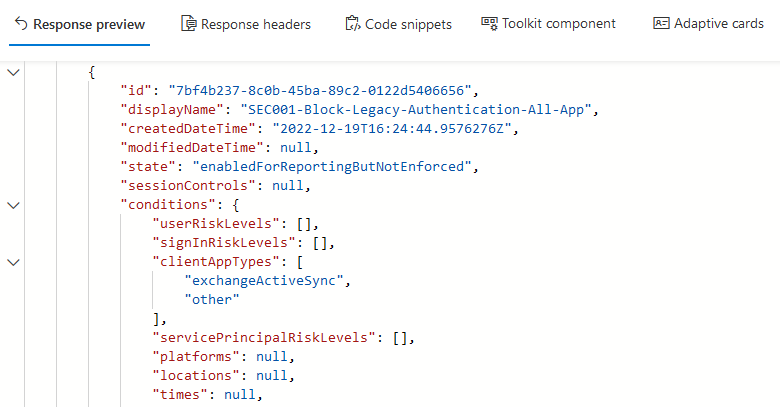
You can now use this JSON to structure your PowerShell command as required. For example, we could use this JSON to make the PowerShell structure needed for enabling multi-factor authentication for all administrators.
Here’s a JSON example you can use:
{
    "displayName": "Require multi-factor authentication for admins",
    "state": "enabledForReportingButNotEnforced",
    "conditions": {
        "userRiskLevels": [],
        "clientAppTypes": [
            "all"
        ],
    "applications": {
        "includeApplications": [
            "All"
        ]
    },
     "users": {
         "excludeUsers": [
         "a4b6209c-d501-4fce-83d0-e8da5975de77"
         ],
    "includeRoles": [
        "62e90394-69f5-4237-9190-012177145e10",
        "194ae4cb-b126-40b2-bd5b-6091b380977d",
        "f28a1f50-f6e7-4571-818b-6a12f2af6b6c",
        "29232cdf-9323-42fd-ade2-1d097af3e4de",
        "b1be1c3e-b65d-4f19-8427-f6fa0d97feb9",
        "729827e3-9c14-49f7-bb1b-9608f156bbb8",
        "b0f54661-2d74-4c50-afa3-1ec803f12efe",
        "fe930be7-5e62-47db-91af-98c3a49a38b1",
        "c4e39bd9-1100-46d3-8c65-fb160da0071f",
        "9b895d92-2cd3-44c7-9d02-a6ac2d5ea5c3",
        "158c047a-c907-4556-b7ef-446551a6b5f7",
        "966707d0-3269-4727-9be2-8c3a10f19b9d",
        "7be44c8a-adaf-4e2a-84d6-ab2649e08a13",
        "e8611ab8-c189-46e8-94e1-60213ab1f814"
        ]
    }
    },
    "grantControls": {
        "operator": "OR",
        "builtInControls": [
            "mfa"
        ]
    }
}
Now, here’s an example of a PowerShell command we can use for enabling multi-factor authentication for all administrators.
$conditions = @{
    Applications = @{
        includeApplications = 'All'
    };
    Users = @{
        excludeUsers = "a4b6209c-d501-4fce-83d0-e8da5975de77"
        includeRoles = @(
            "62e90394-69f5-4237-9190-012177145e10";
            "194ae4cb-b126-40b2-bd5b-6091b380977d";
            "f28a1f50-f6e7-4571-818b-6a12f2af6b6c";
            "29232cdf-9323-42fd-ade2-1d097af3e4de";
            "b1be1c3e-b65d-4f19-8427-f6fa0d97feb9";
            "729827e3-9c14-49f7-bb1b-9608f156bbb8";
            "b0f54661-2d74-4c50-afa3-1ec803f12efe";
            "fe930be7-5e62-47db-91af-98c3a49a38b1";
            "c4e39bd9-1100-46d3-8c65-fb160da0071f";
            "9b895d92-2cd3-44c7-9d02-a6ac2d5ea5c3";
            "158c047a-c907-4556-b7ef-446551a6b5f7";
            "966707d0-3269-4727-9be2-8c3a10f19b9d";
            "7be44c8a-adaf-4e2a-84d6-ab2649e08a13";
            "e8611ab8-c189-46e8-94e1-60213ab1f814";
        )
    };
    }
    $grantcontrols = @{
        BuiltInControls = @('mfa');
        Operator = 'OR'
    }

$Params = @{
    DisplayName = "SEC002-Require-Multifactor-Authentication-for-Admins";
    State = "EnabledForReportingButNotEnforced";
    Conditions = $conditions;
    GrantControls = $grantcontrols;
}
New-MgIdentityConditionalAccessPolicy @Params
There we go!
Conclusion
As you can see this is a really easy way to learn how to create Conditional access policies based on looking at existing structures of policies you create. You can also use the out-of-the-box Microsoft template policies and export the JSON to create new custom ones as required. To learn more about Conditional access policies, you can head over to the Microsoft learn website.

Liam started his career as a Trainer but realized that Programming and Hacking were more fun. After spending time in infrastructure and security services, he moved to consult for SharePoint where he became a Microsoft MVP. He is also a Microsoft Cert...