Managing Group Policy Objects: Create GPOs, Link GPOs, and Edit GPOs

If you’re an IT pro working with Active Directory, you can use Group Policy to configure the Windows environments of your users’ computers and your enterprise servers using Group Policy Objects (GPO). However, the struggle to reach an intuitive and secure environment is real. In this article, I will explain how to create a GPO, and how to link, delete, and disable them. When we’re done, you should better understand the nuances of the wonderfully complex world of Group Policy.
🎬 Watch This Week in IT.
Working with GPOs
There are two ways to work with GPOs: You can either use the Local Group Policy Editor to adjust the policies on a local computer or use the Group Policy Management Console (GPMC) to work on your enterprise environment. Because local policies are processed first (before domain policies) and to sustain and design a robust environment, we will focus on the enterprise scenario in this article.
Installing the Group Policy RSAT Tool
The Group Policy Management Console is part of the traditional Remote Server Administration Tool (RSAT) toolset. It is an MMC-based (Microsoft Management Console) tool that is installed with the modern Windows Settings app in Windows. I’ll show you how to install it next.
On a domain controller (DC), Group Policy settings are stored in the ‘SYSVOL’ shared folder and replicated to all other DCs in the domain (and forest, if you are set up that way). This describes the built-in redundancy of Group Policy infrastructure.
To show you how to install the Group Policy Management Console tool, I’ll be using my Hyper-V lab running a Windows Server 2022 Active Directory domain. I have logged into my Windows 10 version 22H2 workstation, so let’s get started:
- First, click the Start button and type in ‘optional‘.
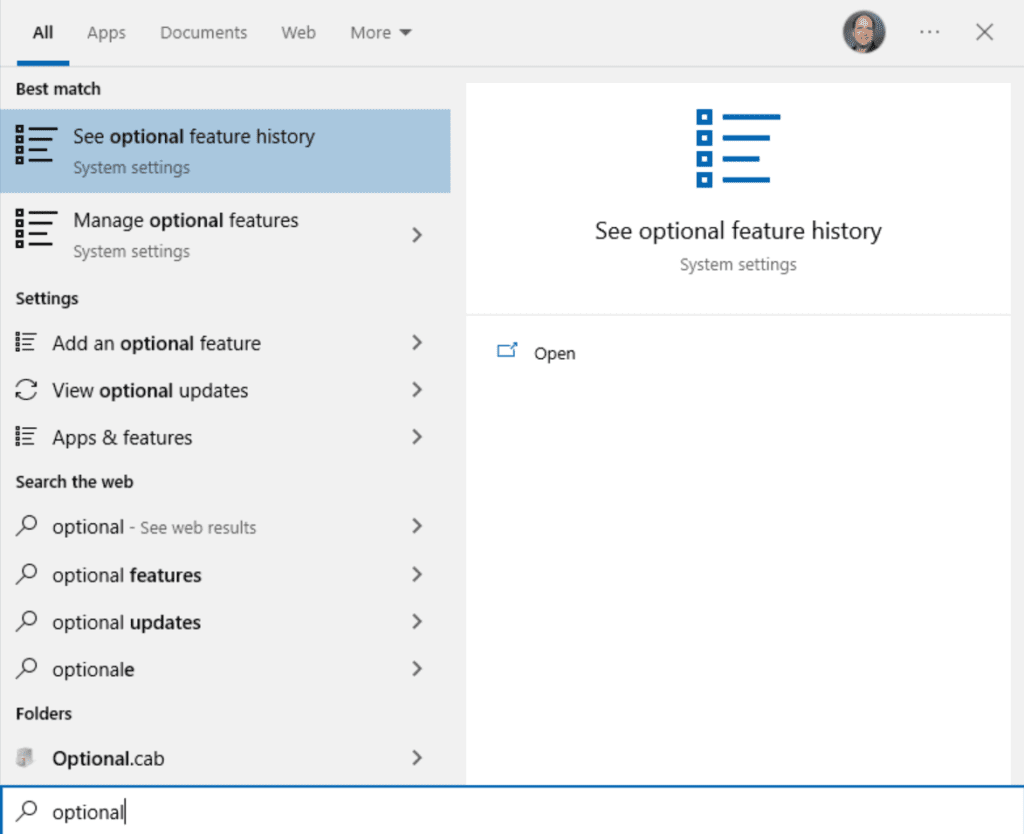
- Click on ‘Manage optional features‘ and click the ‘+ Add a feature‘ button at the top.
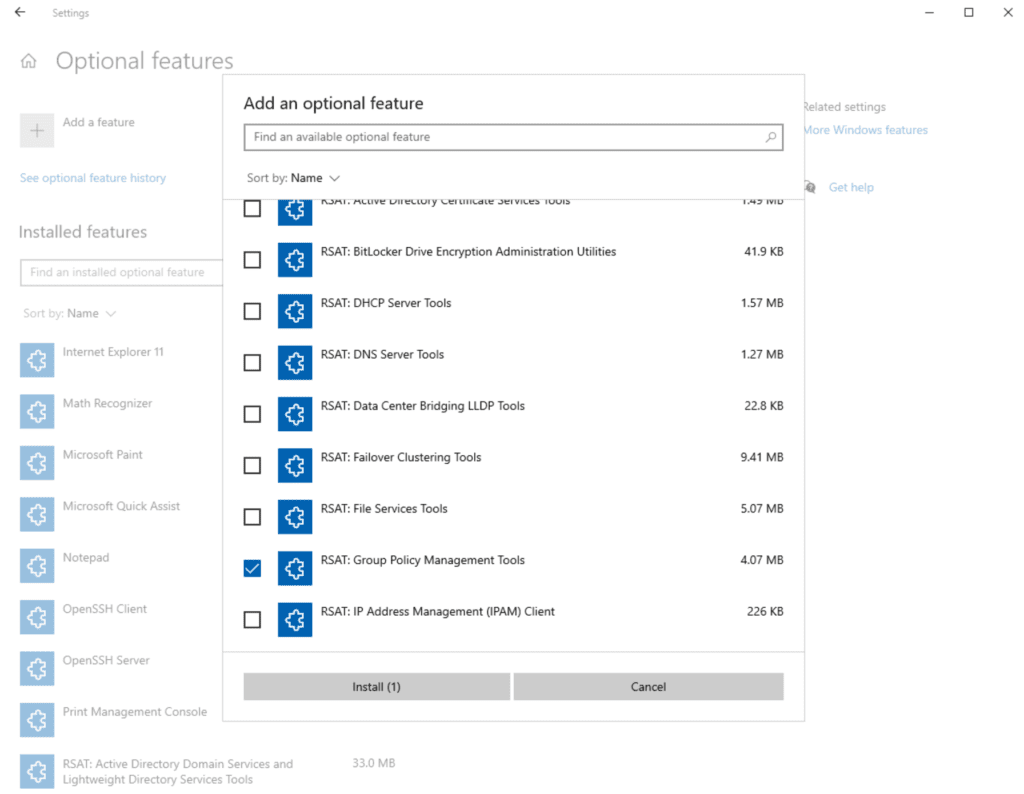
- Scroll down and put a checkmark in ‘RSAT: Group Policy Management Tools‘ and click Install.
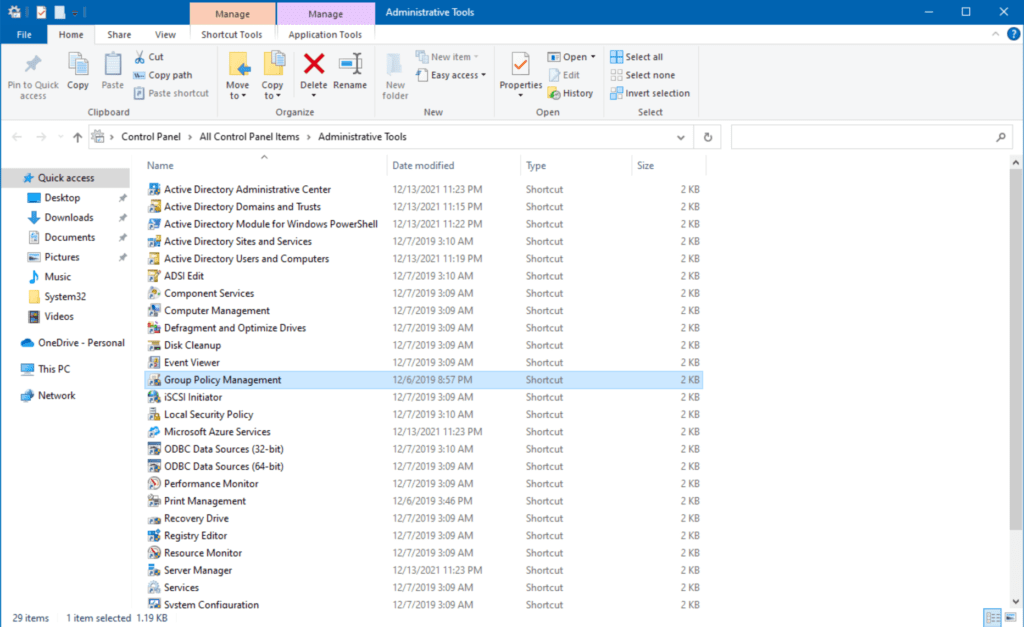
- After that is complete, click Start and open ‘Windows Administrative Tools.’
- Double-click on ‘Group Policy Management.’
Now we see the Group Policy Management console. Here, we are introduced to the overall structure of how Group Policy is laid out and how you can target specific logical entities in your organization.
At this point, IT Pros, with the consultation of their security and compliance teams can do any of the following:
- Modify existing Group Policy Objects (GPOs)
- Create new GPOs
- Modify the filtering of specific GPOs at a group level
- Use WMI Filtering to target specific computers
- Use Group Policy Modeling and results to ‘test’ or perform ‘What-If’ scenarios
Next, we’ll start with creating a new GPO.
Create GPO
Let’s create a new setting that will demonstrate how to modify your users’ computers in another way.
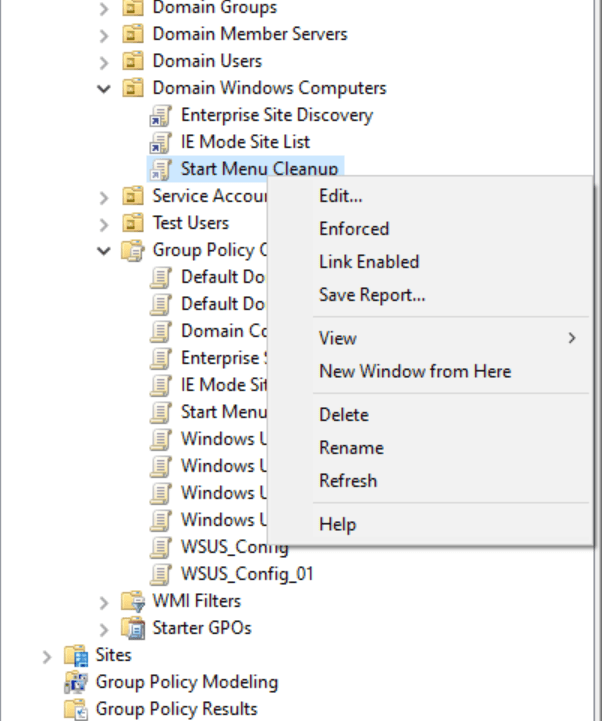
- First, I will right-click on ‘Domain Windows Computers‘ and click ‘Create a GPO in this domain, and Link it here…‘
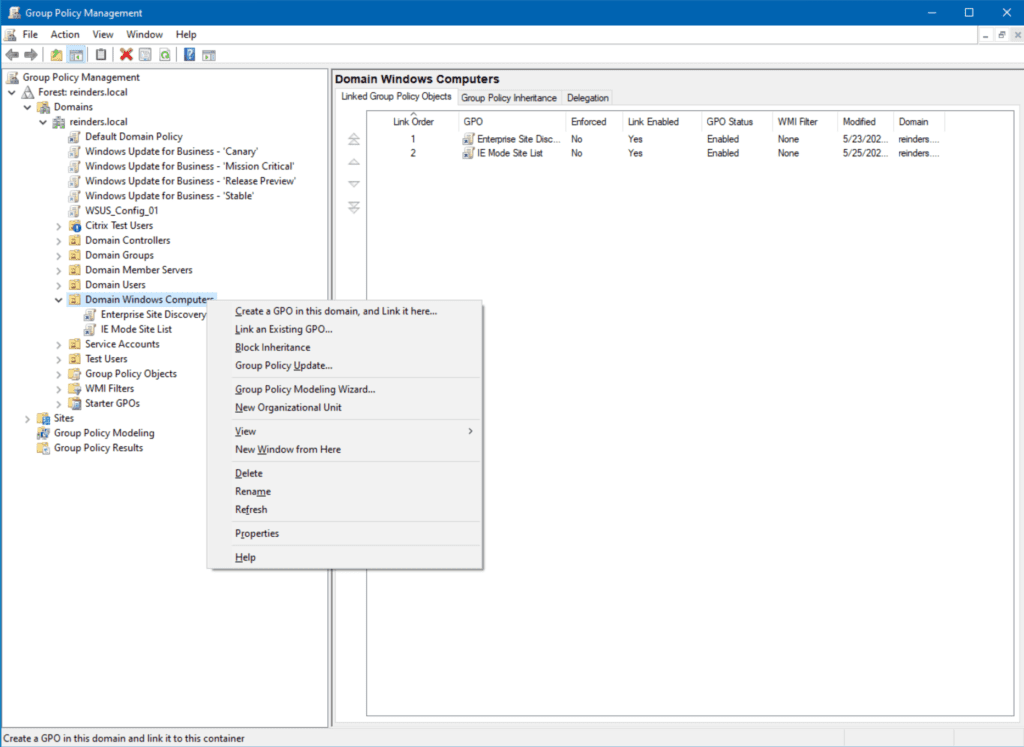
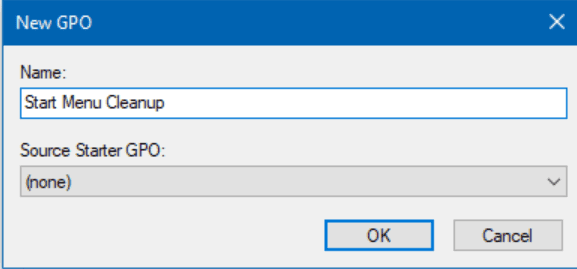
- I will name it ‘Start Menu Cleanup‘ and click OK.
- Then, I will right-click on the new GPO and click Edit.
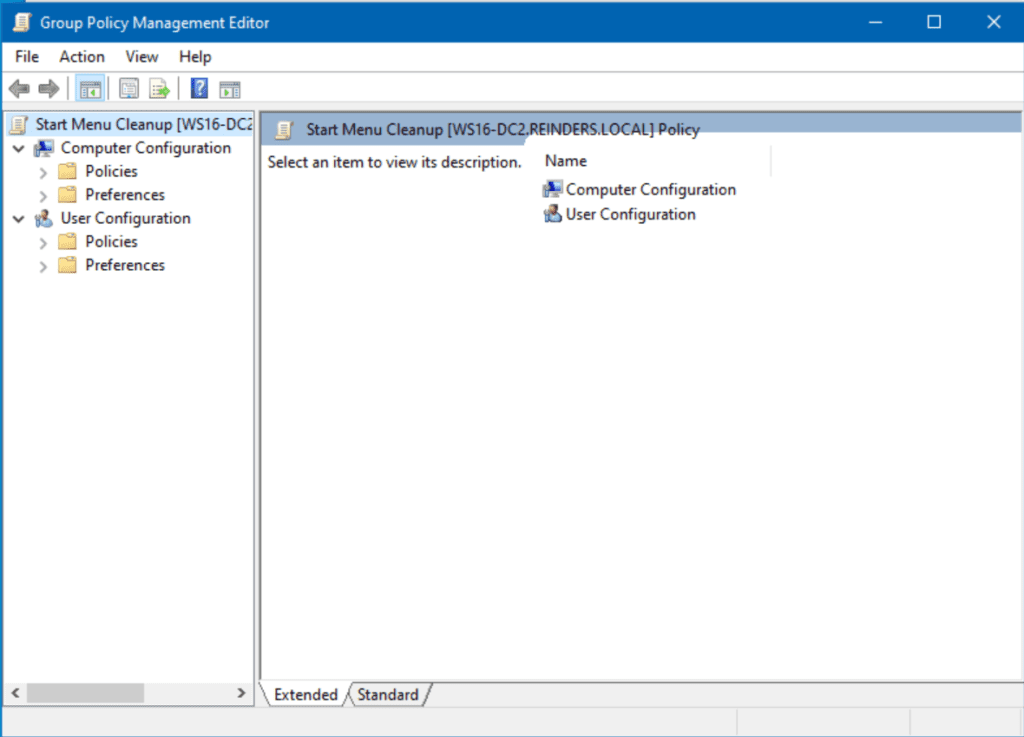
- Let’s browse to Computer Configuration -> Policies -> Administrative Templates -> Start Menu and Taskbar.
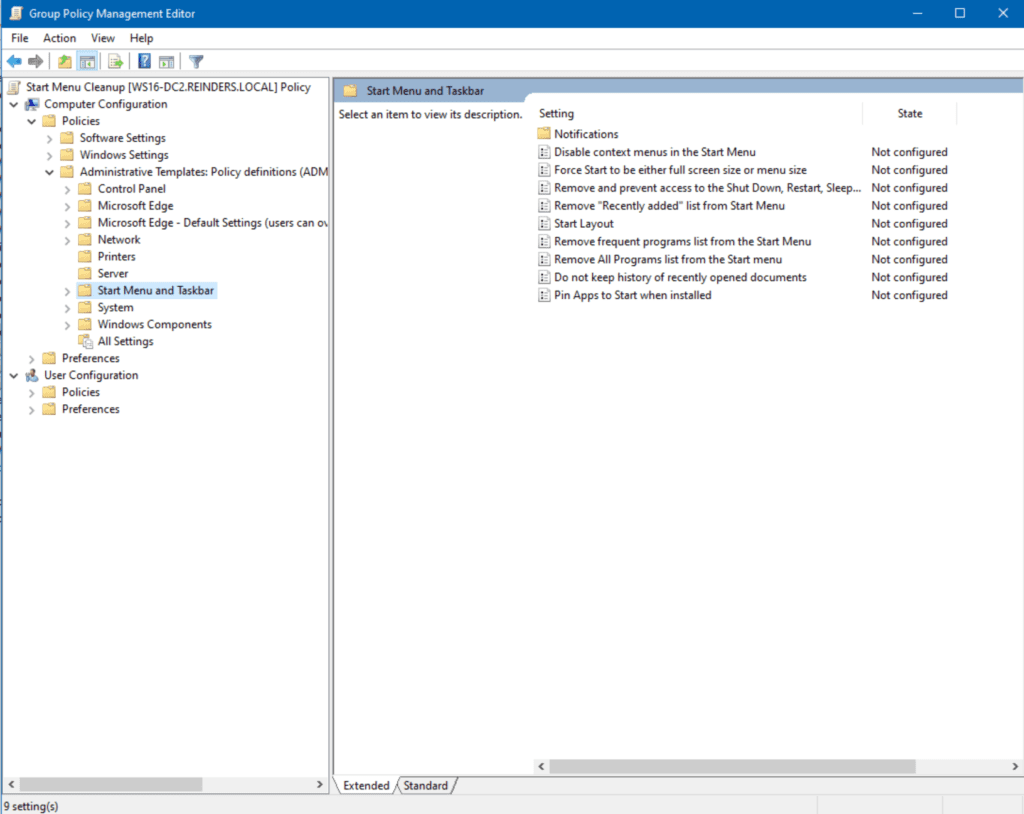
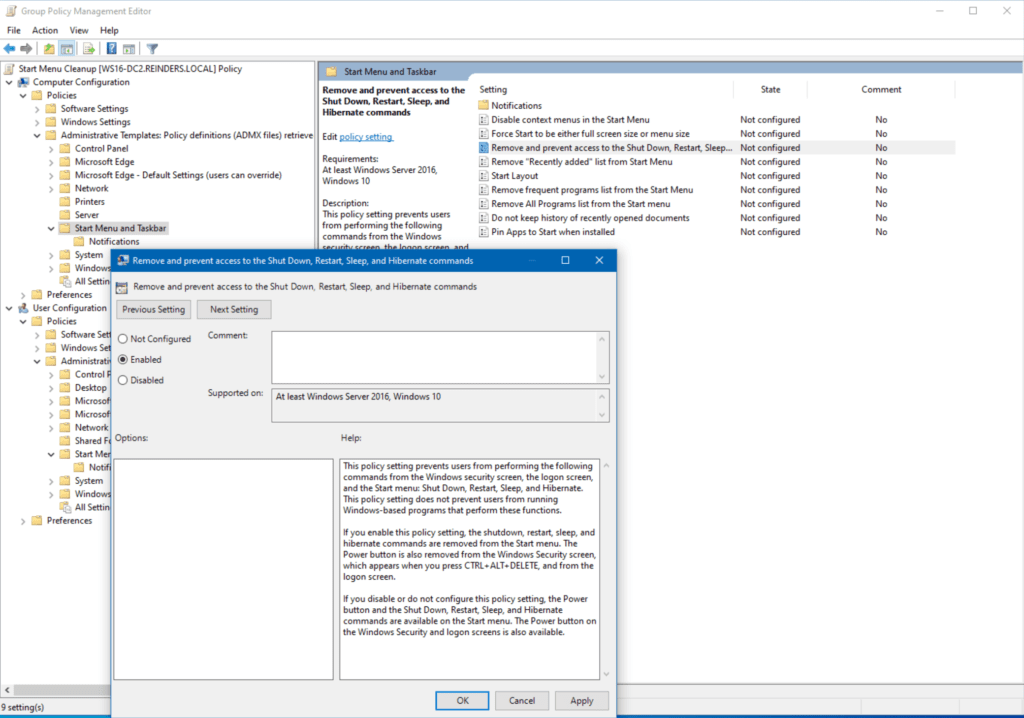
- Here, I will double-click on Remove and prevent access to the Shut Down, Restart, Sleep, and Hibernate commands.
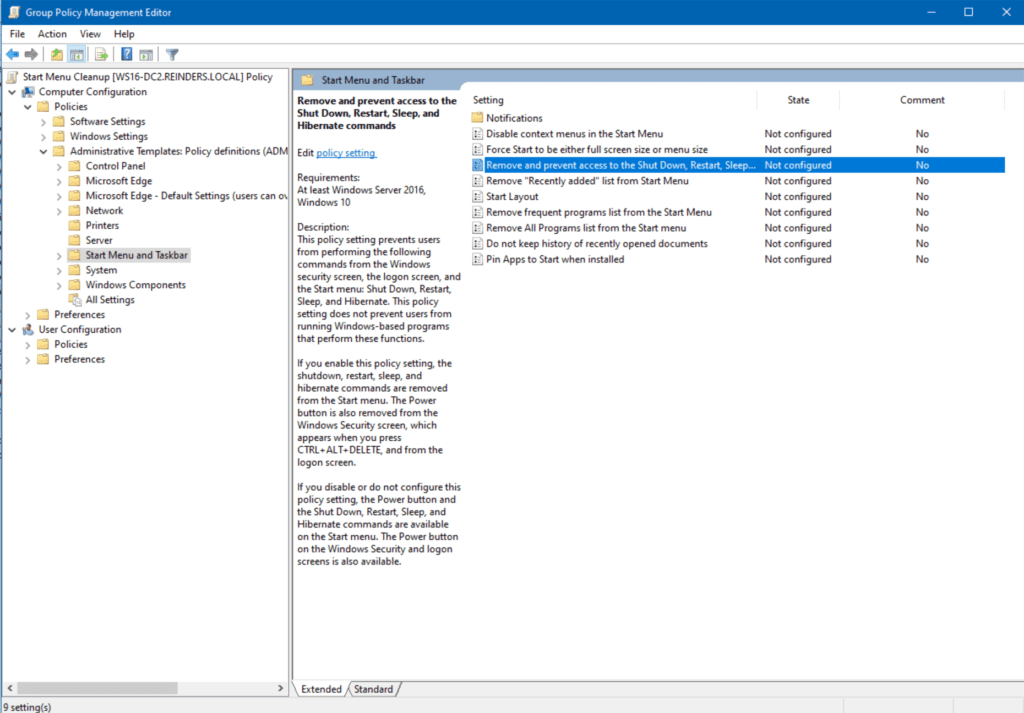
- After reading the Help, I’ll toggle Enabled on and click OK.
Now, be advised, this setting is now live in the environment. Every computer object in that OU will see these settings during the next refresh. By default, domain computers and servers will process Group Policy every 90 minutes with a 30-minute random offset. However, when testing (and troubleshooting), the gpresult command is your friend.
You can also force the computer to update Group Policy on the machine by running the following gpupdate command in your favorite terminal/shell. This will process all Group Policy changes for the computer and the logged-in user. The ‘/force’ switch forces the changes without request for approval.
gpupdate /force
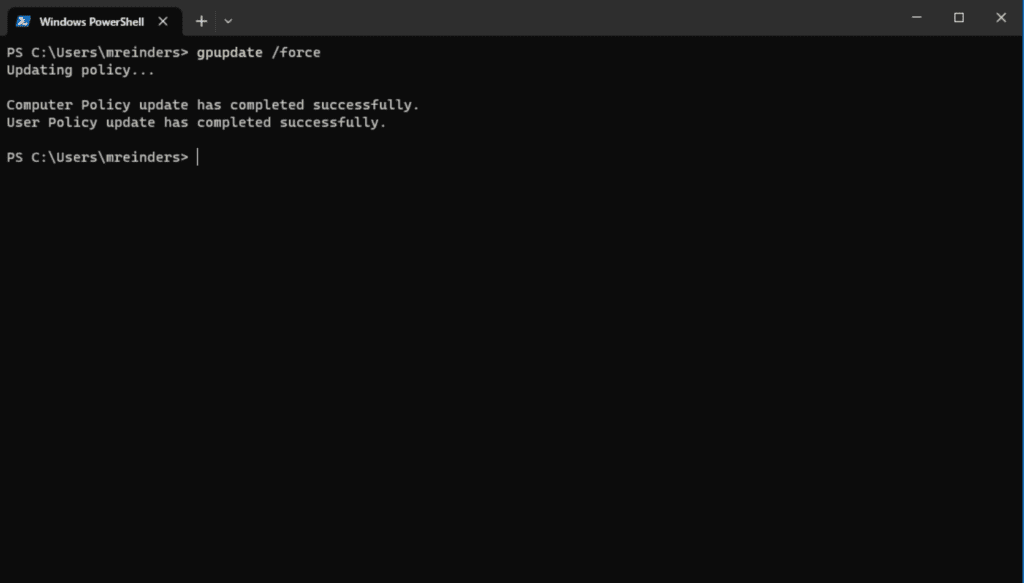
Ok, changes have now been processed. Let me right-click on the Start button and go to the Shut down or sign out menu, and… it worked! Those items we set to remove are now hidden.
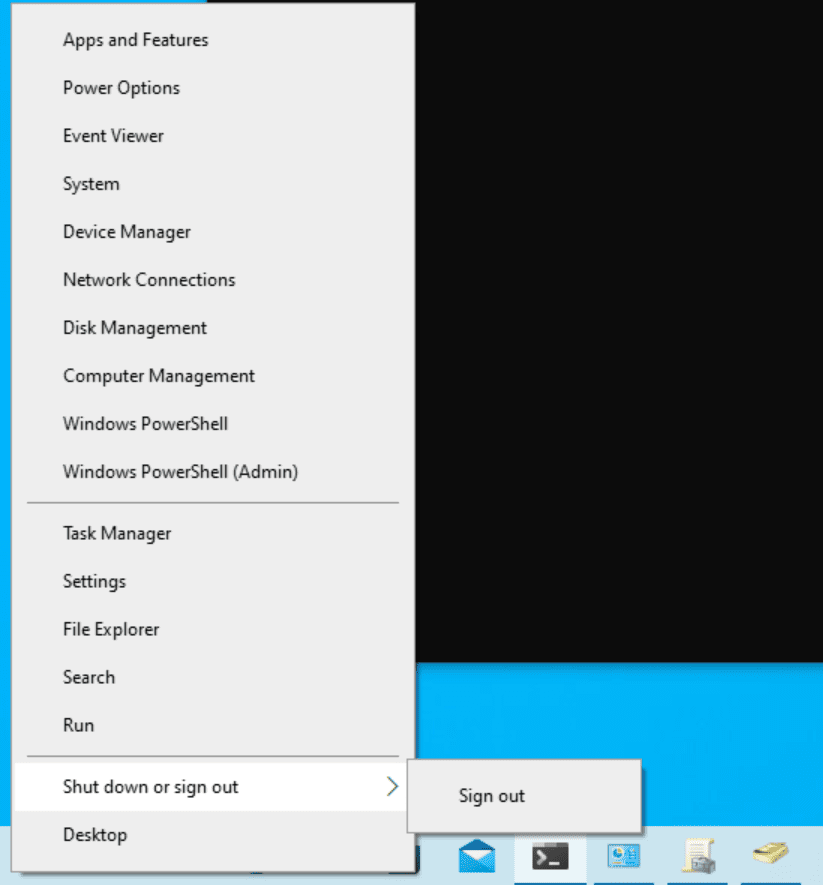
This rather simple change prevents your users from restarting or shutting down their computers. Obviously, there are a lot of variables and use cases for settings like this. It is ideal in some situations and painful in others. This is the balance you’ll go through as an IT Pro to decide what works best for your organization.
Link GPO
Let me show you how to link an existing GPO to a specific location in Active Directory. In a previous lifetime, I created a GPO called ‘Domain Controller Security Lockdown.’ The settings in this GPO contain security compliance standards for domain controllers per our company’s guidelines. I can easily link these new settings to the DCs in my domain – reinders.local.
- First, I right-click on the Domain Controllers OU and select Link an existing GPO.
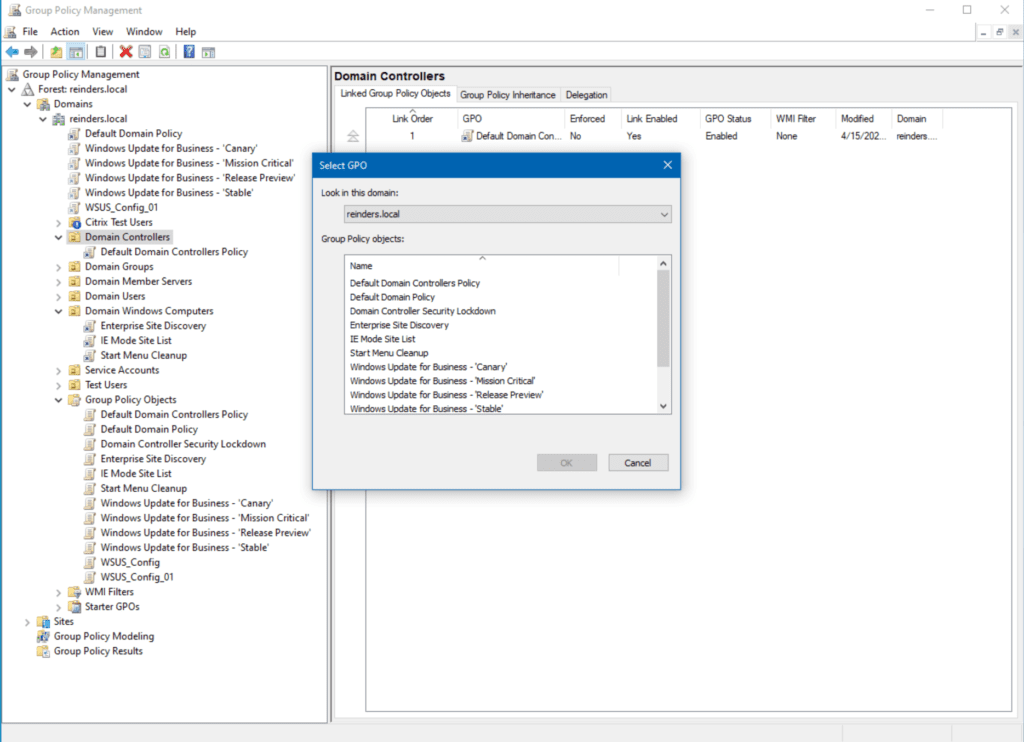
- Next, I will choose Domain Controller Security Lockdown from the list and click OK.
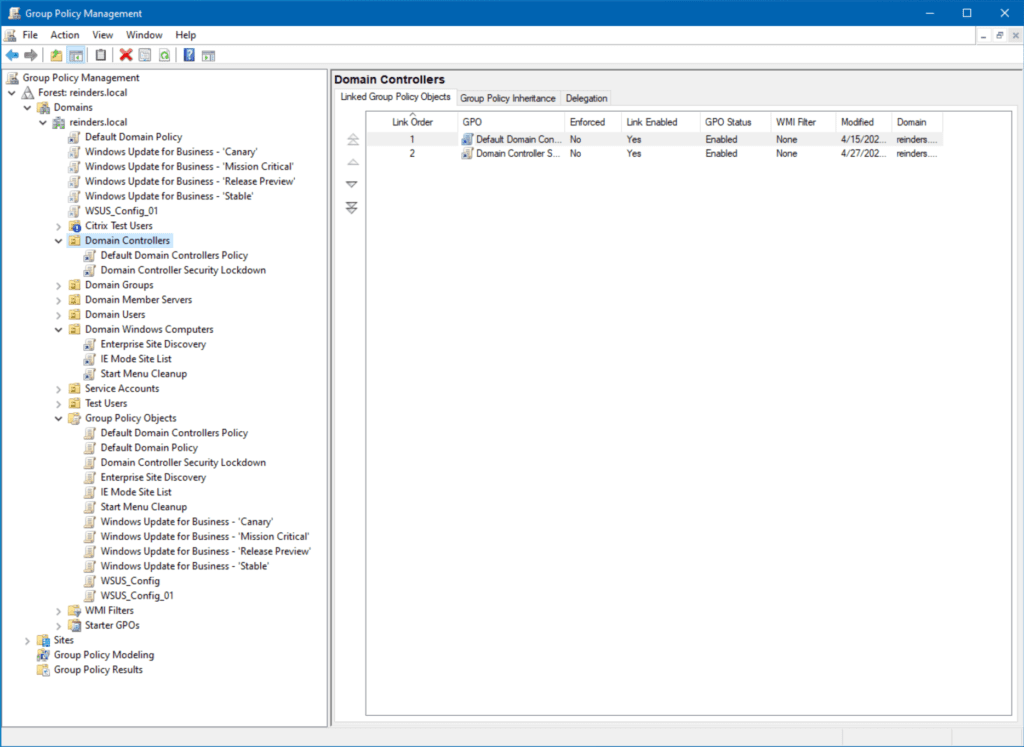
Now you can see that GPO is linked to domain controllers. The next time our DCs check for Group Policy updates, they will process the settings in that GPO. That’s the beauty of the central control you have. Create and craft a group of settings once, then deploy (link) it easily to a container in your environment. You’re done!
Modify an existing GPO
Let’s look at my domain – reinders.local – and see what we have.
As this is a lab, it is rather basic, almost primitive. In larger enterprises, it is not uncommon to discover hundreds or thousands of GPOs in a single domain. The complexity of inheritance of some GPOs, using WMI to target specific operating systems, dealing with local GPOs, child OUs, and local policies in the mix – all of it can be quite daunting.
As an aside, the sheer number of GPOs in your domain will start to dictate some overall performance penalties when computers start up and when users log in. This is probably the biggest debate today: Do you create a bunch of GPOs and only include one setting in each of them for ease of manageability? Or do you create a handful of GPOs with your policy changes to cut down processing time? This could be an article all on its own!
GPO scope
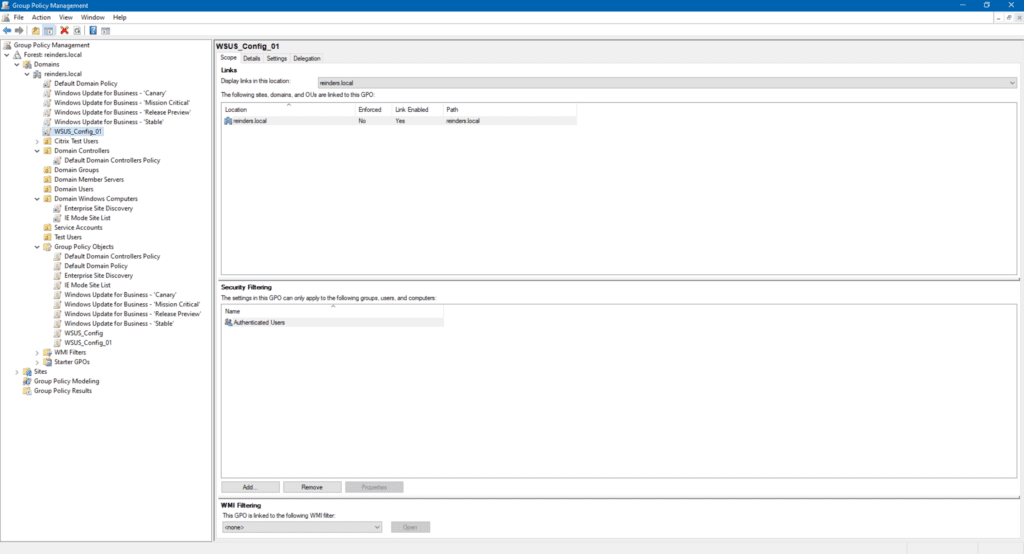
I previously installed Windows Server Update Services (WSUS) – there’s my GPO for the setup – ‘WSUS_Config_01’. If I click on it, you’ll see the scope defined.
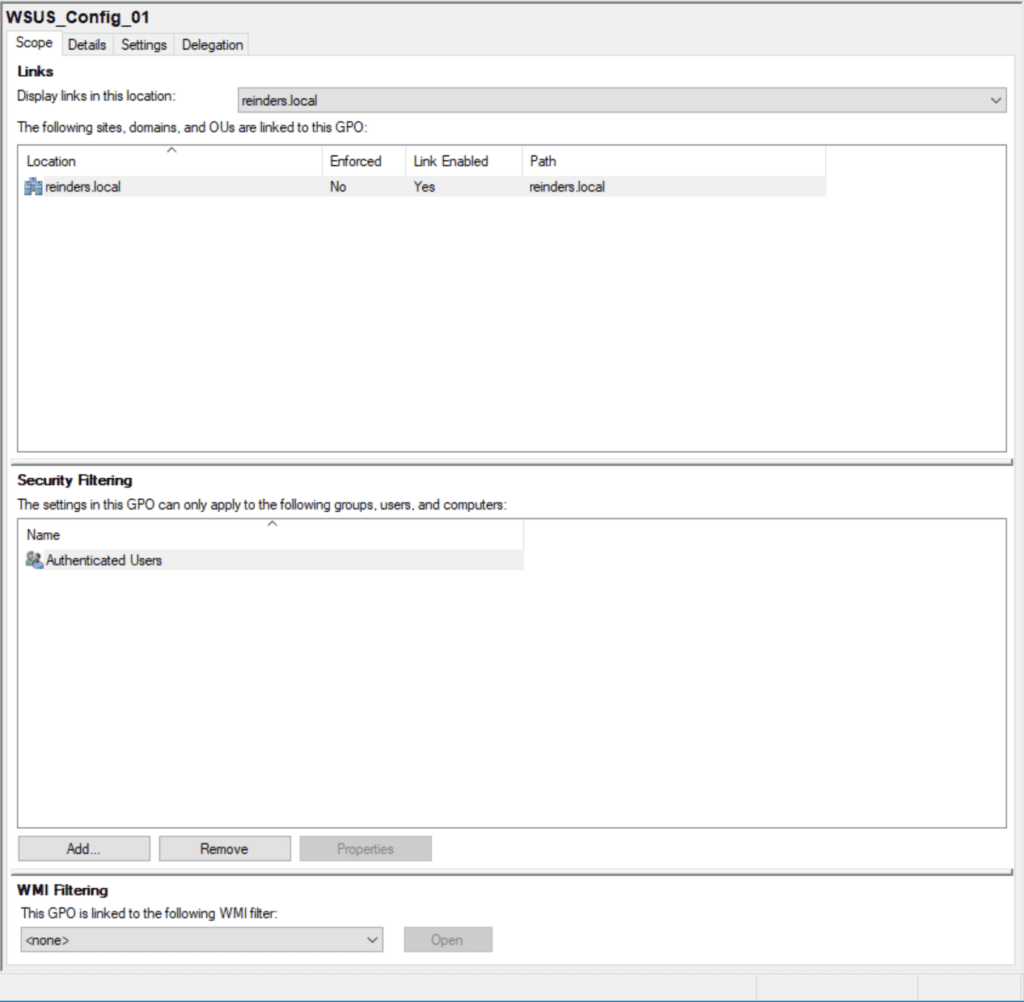
The location is at the root of the domain (reinders.local). This means, by default, EVERY computer and server object in the domain will see and implement this GPO. Again, there are ways to filter out specific users, computers, OUs, and security groups. More on this later.
Here, the Security Filtering section shows the Authenticated Users group. This is almost saying ‘Everyone’: Any account that has authenticated to the domain will see this GPO.
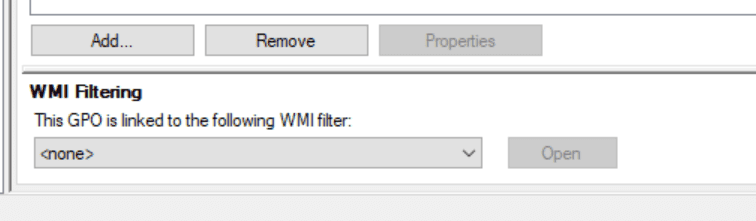
WMI Filtering
The WMI Filtering setting below is where you can target specific SKUs. For example, you could target a specific WSUS installation to only touch Windows 10 version 21H2 and 22H2 computers.
Edit GPO
Let me show you how to edit a GPO.
- First, right-click on the GPO you want to and to modify and click ‘Edit…‘
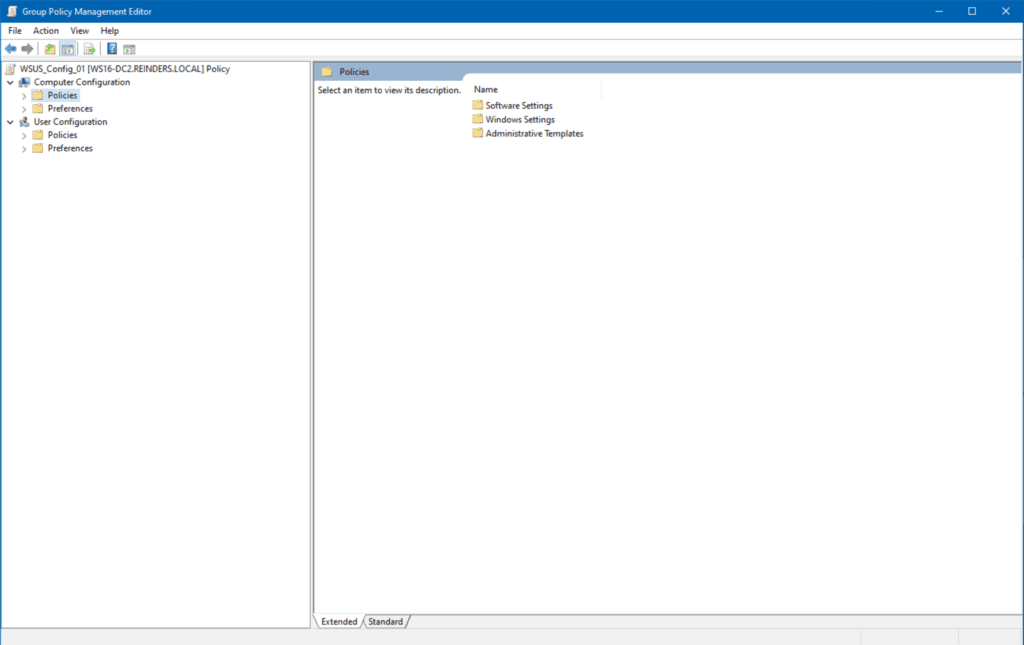
- A new window will open showing you the logical layout – Computer Configuration and User Configuration trees.
- To locate the WSUS settings, expand Computer Configuration -> Policies -> Administrative Templates -> Windows Components -> Windows Update.
- Here, you can see there are two settings ‘Enabled’ or configured. Let’s open up Configure Automatic Updates.
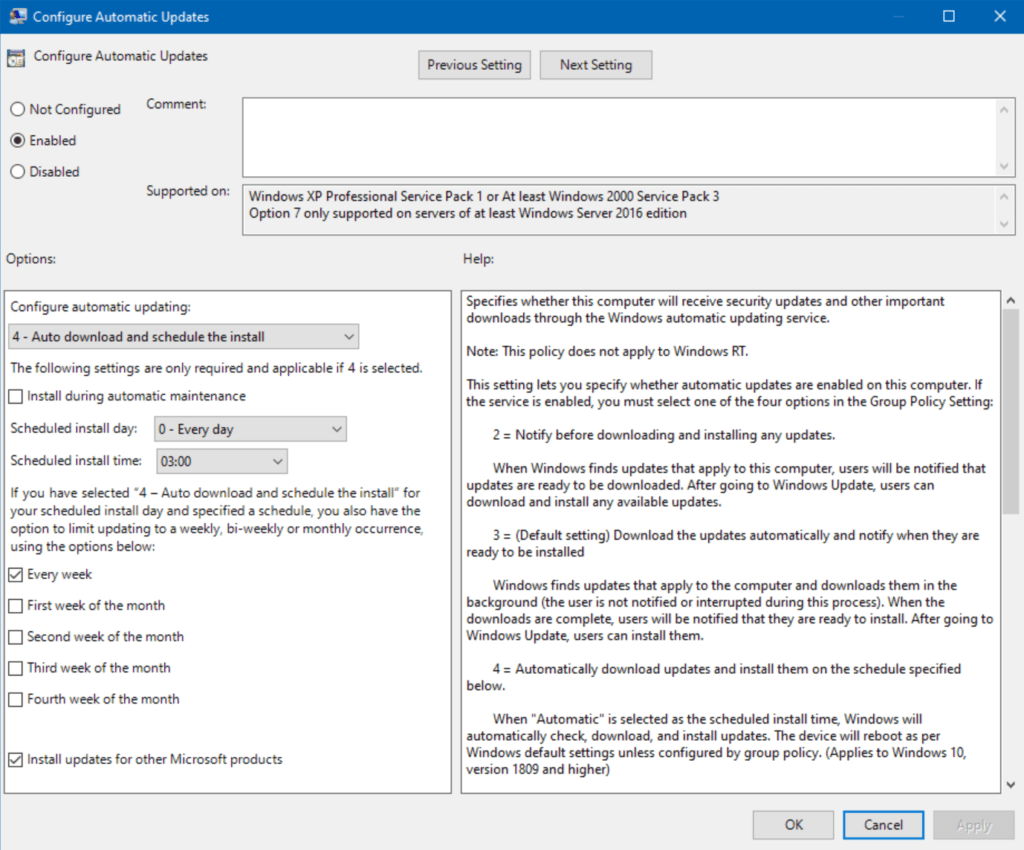
This is a more involved setting, but you get the gist. These are the settings for how Windows Updates are applied to my domain. Rather granular, wouldn’t you say? But, the point here is you can manage all of your computers (or a subset) centrally here.
Here is an example of how GPOs “lock down” settings on computers. Did you notice the ‘Install updates for other Microsoft products‘ option checked at the bottom? If I check Windows Update -> Advanced options on this workstation, note that the first setting, ‘Receive updates for other Microsoft products when you update Windows’ is now controlled by Group Policy. It is marked On and is greyed out.
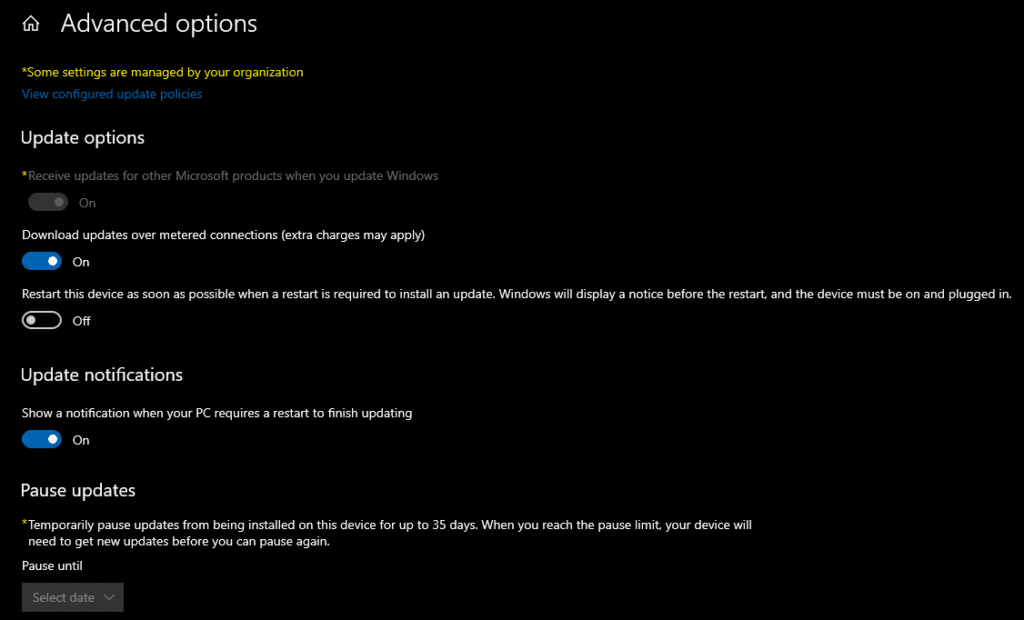
This is precisely what the “Some settings are managed by your organization” blurb signifies on top. Technically, it states that some Group Policies have been applied to this computer and you can’t adjust the setting.
Managing the default GPOs
Two GPOs are created when a new domain is created – ‘Default Domain Policy’ and ‘Default Domain Controllers Policy.’ At the minimum, these will dictate the domain password policies, account lockout policies, Kerberos policies, basic security options, and other network security options.
For decades, it has been strongly held that, as an IT pro, you should NOT modify these 2 policies – you should create new GPOs instead. There are several reasons for this, but I believe the most fundamental is that when troubleshooting your domain, you have a knowing that this default config has not been changed.
This has often been the first question out of Microsoft Technical Support when I’ve worked with them over the years on issues in Active Directory/Group Policy. They know those core settings and need to start there, at the bottom of the ocean, to make sure their inherent baseline is accurate.
So, that is also my recommendation on how you should manage the default GPOs – DON’T!
Disable a GPO
If you want to disable a GPO and prevent its settings from applying to future computers, simply right-click on the GPO and click Link Enabled. That will remove the link and set the GPO to a “dormant” state.
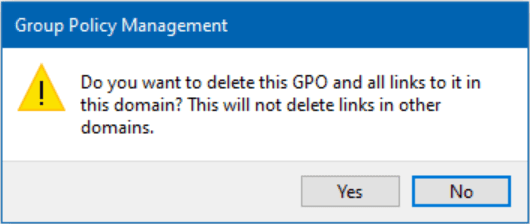
Delete a GPO
If you are performing cleanup and/or troubleshooting, you can delete a GPO by right-clicking on it and clicking Delete. To be thorough and efficient, I recommend you go to the Group Policy Objects view in the tree and delete it from there.
Conclusion
Implementing Group Policy is deceptively simple… at first. It is rather easy to lay out your Group Policy Objects infrastructure. Confirming, validating, and later, troubleshooting why specific computers’ Office installations are updating on their own and others prompt the user… that’s where the fun begins.
All in all, the moral of the story is quite simple: Test, Test, Test! The more you can validate and get compliance in the beginning, the more efficient and streamlined your environment will be. Easier for troubleshooting and enabling new policies.
Please leave a comment below if you have any questions!
FAQ
How can I quickly edit GPO settings across multiple domains simultaneously?
To edit GPO settings across multiple domains, use GPMC’s PowerShell commands or third-party tools like Advanced Group Policy Management (AGPM). These solutions allow bulk GPO editing and synchronization, saving time and ensuring consistency across your organization.
What are the best practices for version control when I edit GPO settings?
Implement a change management system, use AGPM for version tracking, create regular backups before you edit GPO settings, and maintain detailed documentation of all changes. Consider using a staging environment to test GPO modifications before deployment.
Can I edit GPO settings remotely without direct access to the domain controller?
Yes, you can remotely edit GPO settings using Remote Server Administration Tools (RSAT) or Windows Admin Center. Ensure you have appropriate permissions and a secure connection to make remote GPO modifications.
What tools can help me audit changes when I edit GPO settings?
Microsoft Advanced Group Policy Management (AGPM) provides comprehensive auditing capabilities. Additionally, you can use PowerShell scripts, Event Viewer logs, and third-party monitoring tools to track GPO modifications and identify who made specific changes.
How do I troubleshoot conflicts when I edit GPO settings between different organizational units?
Use the Group Policy Results Wizard (GPResult) and Group Policy Modeling Wizard to identify conflicts. Analyze GPO precedence, check WMI filters, and review Group Policy security filtering to resolve overlapping or conflicting policies between OUs.

Michael has been an IT Pro since 1998. He has worked predominantly in the Windows world including client and server operating systems, on-prem systems engineering (AD, DNS, etc.), and over the last ten years or so has embraced and immersed himself in...