How To Use The Windows Local Group Policy Editor
Windows's Local Group Policy Editor (LGPE) is a powerful tool for managing and configuring operating system settings.

This guide aims to help you understand how to navigate and use the Windows Local Group Policy Editor (LGPE) to enhance your Windows desktop environment’s security, performance, and usability.
What is the Local Group Policy Editor?
The Windows Local Group Policy Editor is a Microsoft Management Console (MMC) snap-in that allows you to manage and change Group Policy Objects (GPO) on the local computer. Policy changes reflect changes to specific keys in the Windows Registry.
In medium-to-large enterprises, Group Policy settings are managed via Active Directory domain controllers and are pushed down to endpoints. LGPE offers advanced users and IT Pros a troubleshooting option for determining why specific settings aren’t working as expected. In addition, for computers that are not centrally managed by Active Directory (AD), the LGPE lets IT Pros make configuration changes to Windows PCs.
How to access the Local Group Policy Editor
There are several methods to open LGPE. The only prerequisite is that it is not installed or supported on Windows 10/11 Home Edition.
Here are the most common methods for launching the tool.
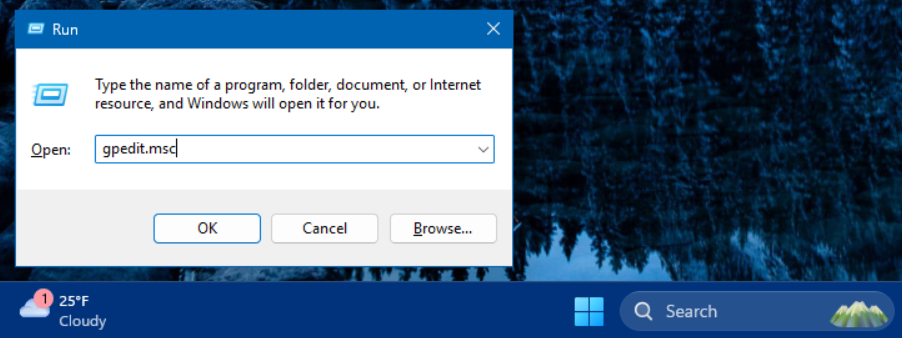
- On your keyboard, click the Start button and the ‘R‘ key to open the ‘Run’ dialog. Type in ‘gpedit.msc‘ and press Enter.
- You can also open the Search box and type in ‘gpedit.msc‘.
- Click the Start menu button in Windows, type ‘local group‘, and select ‘Edit group policy—Control Panel‘ on the Start menu.

- PowerShell – Run this command in Windows Terminal to launch – ‘Start-Process gpedit.msc‘.
- You can also open a command prompt and run gpedit.msc.
- Administrative Tools – Click the Start button, Click ‘All >‘ at the upper right corner, scroll down to Windows Tools, open it, then double-click on ‘Group Policy Management.’
- Special Note – If you are logged into a computer that has the Active Directory Remote Server Administration Tools (RSAT) tools installed, this will open the central ‘Group Policy Management‘ tool that manages GPOs in your enterprise, NOT the local policies.

Navigating the LGPE user interface
The LGPE is divided into two panes:
- On the left are the two main configuration trees (Computer Configuration and User Configuration).
- On the right, all the policies are displayed. As you drill down into one of the trees, you’ll discover all the various policies that can be modified.

Computer configuration
The Computer Configuration contains all the policy settings that affect the computer object, regardless of whether a user is logged on or not. Changing these settings will, by default, affect every user who logs onto this computer. Typically, when the computer starts and boots into Windows, these policies will be applied.
User configuration
In the User Configuration section, you’ll find settings that affect users specifically. These settings generally run when a user logs into the computer. If you want a logon script to run when a user logs on, this is where you will configure the policy changes.

Browsing and modifying policy settings
As you drill down into all the various sections of policies, you’ll eventually see Settings. These are the individual policies you can view and edit.
As you click on one of the settings, and the view mode is set to ‘Extended‘ at the bottom of the window, you’ll see the Requirements and Description of the setting on the left.

Above I clicked on the ‘Remove Properties from the Recycle Bin context menu.’ The Requirements show that this setting will only affect Windows Server 2003 and Windows XP or newer. So, any supported version of Windows client and server today. 🙂 The Description shows the basics of what the setting will affect.
How to edit policies using the Local Group Policy Editor
To make changes to a setting, you can click the ‘Edit policy setting‘ link in the Extended pane I just mentioned. However, it’s probably easiest to just double-click on the setting name.

All the information you need to know to make an informed change is here. For most settings, you choose ‘Not Configured‘, ‘Enabled‘, or ‘Disabled.’ In this example, if I click Enabled and click OK, that change will occur right away. Let me show you.

Because I didn’t log off and log on again, the Properties link was still visible, but as you can see, it is unavailable.
Understanding local vs domain Group Policy
I stated above that there is a difference between using the Local Group Policy Editor to modify the local computer configuration and using Group Policy Management to manage your enterprise Group Policy Objects (GPOs).
You’ll use the same type of tool for both, but how policies are displayed is different. The Group Policy Management tool will show your AD forest and domains and list the entire domain Organizational Unit (OU) structure – this is how they are applied.

Group Policy administrative templates
Administrative template files (ADML and ADMX files) determine the settings and policies that are displayed. Admin templates are released and updated periodically by Microsoft when new features are released and new Windows versions (Feature Updates) are made generally available.

The ADMX files store the setting definitions, and the ADML files ‘en-US’ (or other languages) contain the specific language policy descriptions. Admin templates can be downloaded from Microsoft from various locations.
Common security policies
Some helpful and routine security settings can quickly be set using this tool. Here are some examples:
- Password Policies– Browse to Computer Configuration -> Windows Settings -> Security Settings -> Account Policies -> Password Policy.
- You’ll find settings like Maximum password age, Minimum password length, and Password must meet complexity requirements.
- Account Lockout Policy– Browse to the same location – you’ll find ‘Account Lockout Policy’ right below the Password Policy folder.
- This is where you’ll find the Account lockout duration, Account lockout threshold, and how long to Reset the account lockout counter after.
- Local Policies– Right below the last folder, you’ll find Local Policies. Beneath this, you can click User Rights Assignment.
- Many security settings are found here – Allow log on locally, Deny log on as a service, and Add workstations to the domain.
Exporting and importing LGPO settings
Somewhat buried in the Microsoft Security Compliance Toolkit 1.0, the LGPO Utility lets you export your Local Group Policy Editor settings and import them on another machine.
- Download the LGPO Utility and run this command from an administrative window in Windows Terminal to export your local configuration.
LGPO.exe /b c:\Path\To\Backup\ToYou can then run this command on a new machine to import the prior config.
LGPO.exe /g c:\Your\New\PathThank you for reading my post on using the Local Group Policy Editor. Please leave a comment or question below.

Michael has been an IT Pro since 1998. He has worked predominantly in the Windows world including client and server operating systems, on-prem systems engineering (AD, DNS, etc.), and over the last ten years or so has embraced and immersed himself in...


