How to Map a Network Drive on Windows
Learn how to map a network drive, and when and why to disconnect a mapped drive, using the GUI and PowerShell.

This post will explain what a mapped network drive is in Windows, how to map a network drive, how and why to unmap one, and some general troubleshooting tips to help retain your sanity in even the simplest of implementations.
How to map a network drive in Windows 10 or Windows 11
Let me show you how to map a network drive in Windows.
Step 1: Open File Explorer and locate “This PC”
- First, launch File Explorer and then make sure ‘This PC’ is selected.

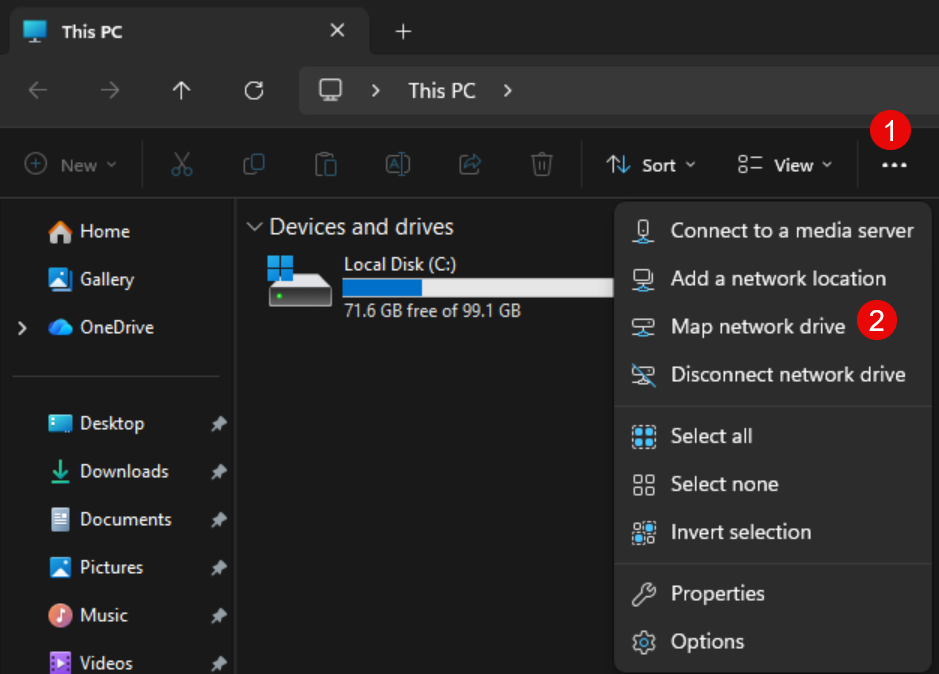
Step 2: Access the “Map network drive” option
- Then click the ellipsis “…” at the right side of the toolbar in File Explorer and click ‘Map network drive.’
Step 3: Configure the drive letter and folder path
The next step is to select an available drive letter to assign to the resource on the network. I’ll keep the default ‘Z:’ for simplicity purposes.
- I then enter the network path in the form of a UNC (Universal Naming Convention) path. The syntax is ‘\\servername\sharename’. In my instance below, the server name is ‘WS16-FS01-CORE’ and the share name is ‘Shares.’
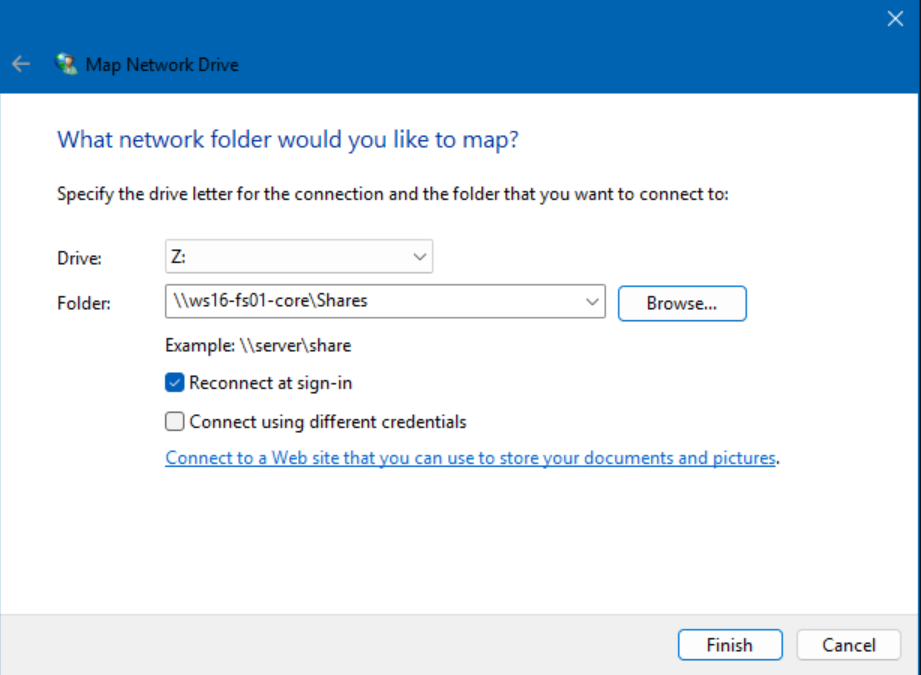
If you want this mapping to be persistent, or exist beyond reboots, make sure the checkbox for ‘Reconnect at sign-in’ is checked.
Step 4: Connect to a shared folder
- The easiest step is to click the Finish button. Piece of cake.
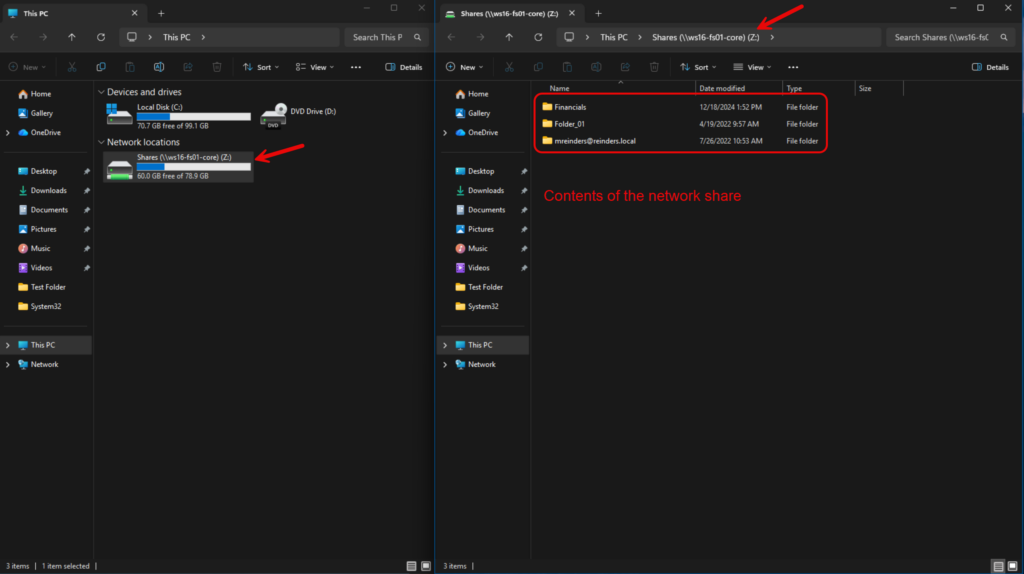
Step 5: Verify the mapped drive
The drive will show up under the ‘Network locations’ menu. It typically also opens a new window showing you the contents.
How to disconnect a mapped network drive
- To disconnect or remove a network drive from File Explorer, right-click on the drive and select Disconnect.
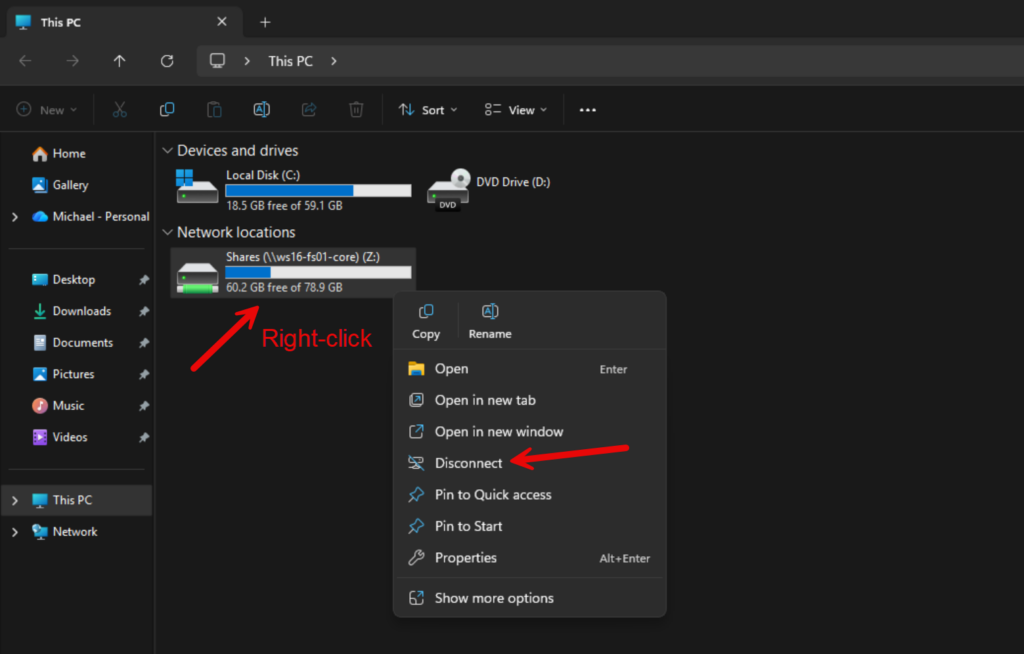
Poof. It’s gone.
Mapping a network drive using the command line
The other most popular option to map a network drive is to use Command Prompt. Using the Command Prompt to map a network drive is a powerful option for IT professionals who need speed, flexibility, and automation.
Unlike the graphical interface, the command-line approach allows you to script the process, making it ideal for deploying mapped drives across multiple machines or during system setup (or login). It also provides more control over advanced parameters, such as persistent connections and credential management.
When to use the Command Prompt
Using the Command Prompt is especially useful when working remotely, troubleshooting, or operating on systems without a full GUI. By leveraging commands like net use, IT pros can quickly establish or remove network drive mappings without navigating through menus, saving time and ensuring consistency in your environment.
Step 1: Open Command Prompt as Administrator
- First, I’ll launch ‘Terminal (Admin)’ from the system context menu by right-clicking on the Start button and selecting that program.
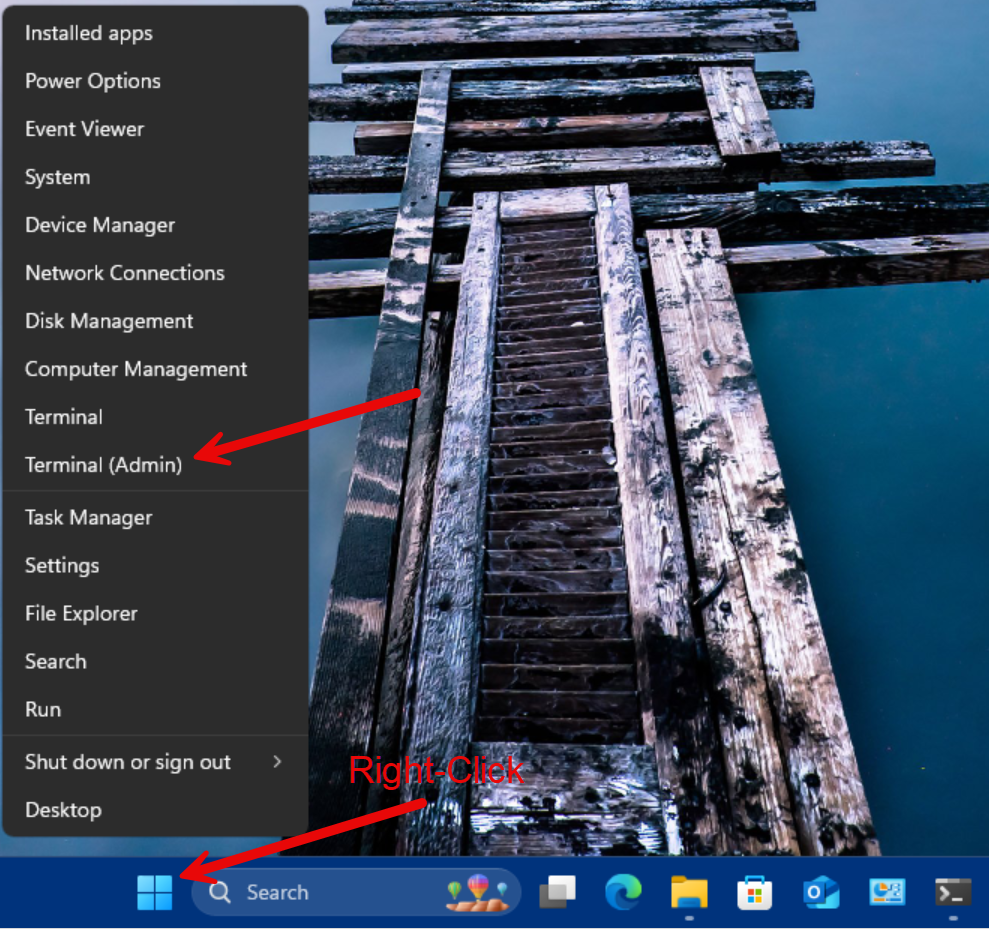
- You may already have a tab for Command Prompt, but if you don’t, click the dropdown arrow at the right side of Terminal’s tab bar at the top and choose ‘Command Prompt’.

Step 2: Use the ‘net use’ command
- We’ll use the ‘net use’ command-line utility. Here is the syntax:
net use drive letter: \\servername\sharenameIn my instance, I will type:
net use M: \\ws22-fs02\Shares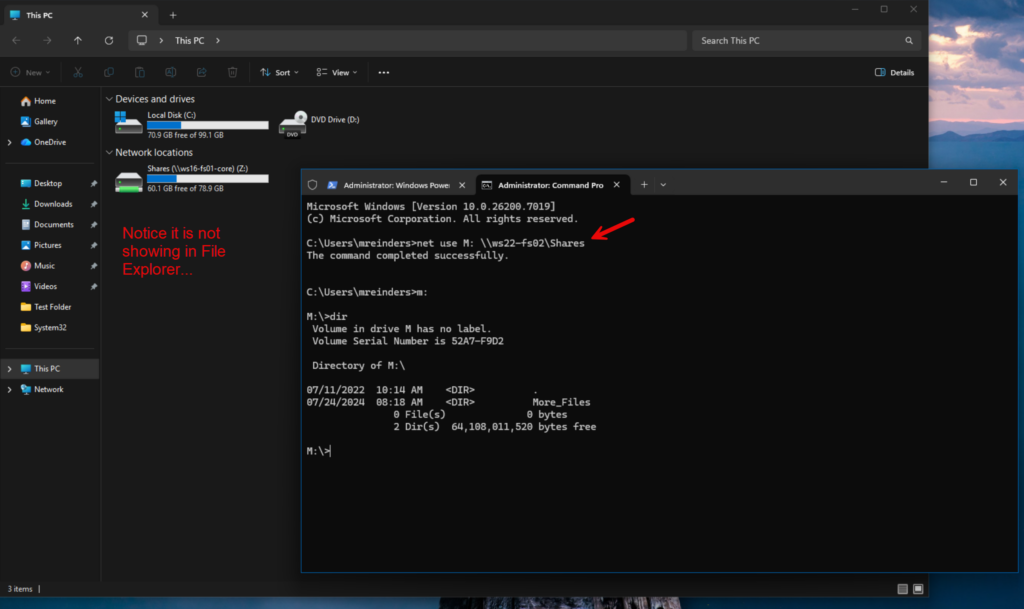
The command completed, and I can then access it and do a dir(ectory) command to show its contents. Notice, the drive does not show up in File Explorer. Yep. Windows.
Side Note – this is due to how Windows handles administrative sessions and logon sessions being separated between elevated and non-elevated apps.
Step 3: Disconnect a mapped drive via Command Prompt
We can remove the mapped drive using the same ‘net use’ utility.
- I’ll type the same command, but I’ll replace the server\share info with the ‘/del’ switch at the end of the line.
net use M: /del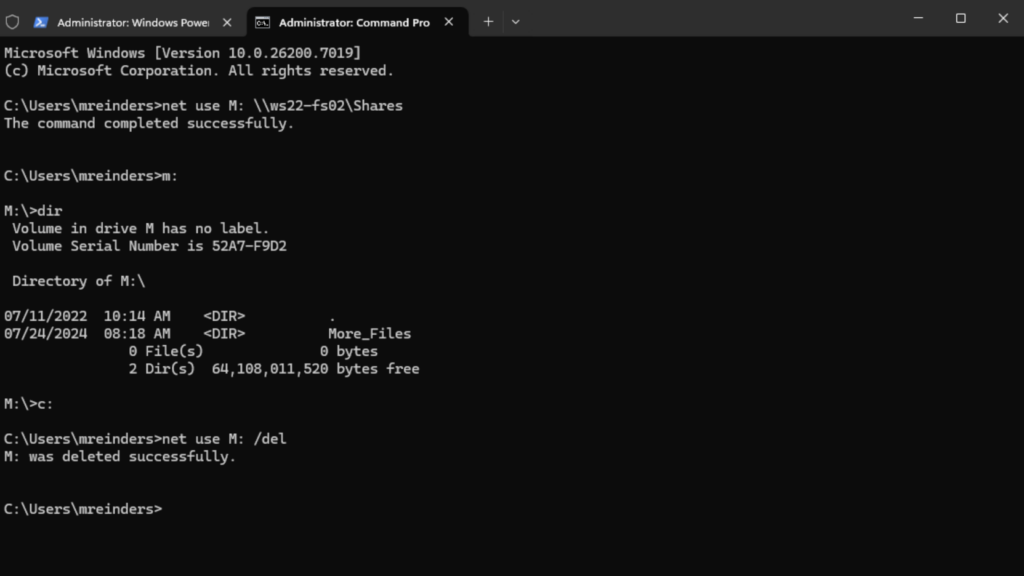
All gone.
How to map a network drive with PowerShell
An article today wouldn’t be complete without mentioning PowerShell, right? Let me open a new tab in Windows Terminal for PowerShell and use the ‘New-PSDrive’ cmdlet.
New-PSDrive -Name “M” -PSProvider “FileSystem” -Root “\\ws16-fs01-core\Shares\” -Persist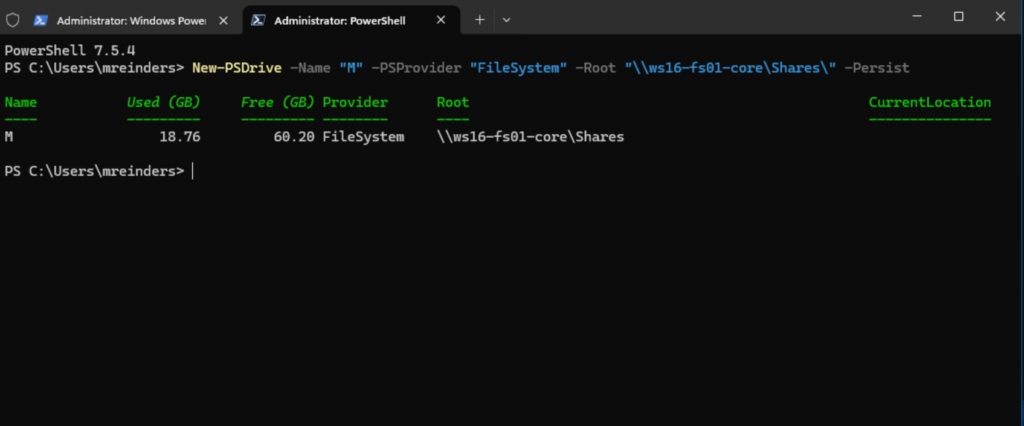
Very good.
What is a mapped network drive?
A mapped network drive is essentially a shortcut that connects your local computer to a shared folder or storage location on another computer or server within your network, commonly known as file sharing. Instead of navigating through network paths manually every time, mapping creates a consistent and immutable drive letter (like Z: or H:) that points directly to that network share. This makes accessing files and folders on remote systems as easy as opening a local drive in File Explorer.
Mapped drives are most often used in business environments to provide centralized access to shared documents, applications, or backups. It’s important to note that while a mapped drive looks like a local drive, the data still resides on the remote system, so network connectivity and permissions play a key role in how they work.
Why map a network drive?
For IT professionals, mapped drives offer several advantages: they reduce user confusion and enable automation through scripts or Group Policy. They also help maintain productivity by ensuring that critical shared folders are always just a click away, without requiring users to remember complex network paths, like “\\filesvr01_mke\Finance\Initial_Data_Feed\”.
Troubleshooting common issues
This may look easy, but there are literally dozens and dozens of issues that can arise when performing this relatively straightforward task. Many environment variables, permissions, and file servers are down or inaccessible. Let’s touch on the main ones here.
“Network Path Not Found” or “Access Denied”
These errors typically occur when the system cannot locate the shared resource, or the user lacks the necessary permissions. “Network path not found” often points to connectivity issues, such as incorrect UNC paths, DNS problems, or the target device being offline.
“Access denied” usually means the user account doesn’t have the required permissions on the shared folder. IT pros should verify the path, ensure the remote system is reachable, and confirm that the correct credentials and share permissions are in place.
Drive disappears after reboot
If a mapped drive is gone after a user reboots their computer, it’s usually because the mapping wasn’t set to persist. By default, some mappings are temporary unless the Reconnect at sign-in option is selected or the /persistent:yes flag is used in the command line.
Group Policy or login scripts can also enforce persistent mappings for multiple users. Checking these settings ensures the drive remains available after reboot.
Slow performance
Slow access to a mapped drive can stem from network congestion, bandwidth limitations, or latency between the client and the server. It may also indicate issues with the underlying hardware or misconfigured SMB settings. IT professionals should start by testing network speed, verifying the health of the server hosting the share, and ensuring that antivirus or endpoint protection isn’t scanning network drives excessively. In some cases, enabling SMB multichannel or adjusting caching settings can improve performance.
When to unmap a network drive
Unmapping a network drive is necessary when the connection is no longer needed or is causing issues. For example, if a shared folder has been decommissioned, moved to a different server, or replaced by a newer resource, keeping the old mapping primarily leads to poor performance and reliability using File Explorer. Every time a user opens a new tab or window, or launches File Explorer, it will ‘timeout’ looking for that missing share.
Unmapping network drives is also recommended when troubleshooting connectivity problems, updating credentials, or preparing a system for a user role change. Removing unused mappings helps maintain a clean environment and improves user login performance.
FAQs
How do I map a network drive in Windows?
To map a network drive, open File Explorer, select This PC, and choose Map Network Drive from the toolbar. Then pick a drive letter, enter the network folder path (such as \\SERVER\Share), and click Finish to complete the connection.
What is the purpose of mapping a network drive?
Mapping a network drive assigns a drive letter to a shared folder so it functions like a local disk, making frequent access easier and reducing the need to re-enter UNC paths. It streamlines workflows, supports collaboration, and provides persistent access to shared resources across your network.
How do I reconnect a mapped network drive at sign‑in?
When mapping the drive, check the Reconnect at sign‑in option so Windows automatically restores the connection each time you log in. This ensures ongoing, hassle-free access to shared folders without repeating the mapping process.
How do I disconnect a mapped network drive in Windows?
Open File Explorer, click the three-dot menu, select Disconnect Network Drive, choose the drive you want to remove, and click OK. You can also right‑click the mapped drive in File Explorer and select Disconnect.

Michael has been an IT Pro since 1998. He has worked predominantly in the Windows world including client and server operating systems, on-prem systems engineering (AD, DNS, etc.), and over the last ten years or so has embraced and immersed himself in...


