Windows Server DFS Migration: A Step-by-Step Guide (Namespace, Replication, Cutover)
A guided migration approach that keeps shares online and simplifies long-term file server maintenance

DFS migration involves moving data from one or more existing file servers to the DFS servers. This process preserves existing UNC file shares and access permissions, meaning that users can continue to access their data in the usual way. Better still, data remains available during the migration process.
DFS file server migration goals
Before committing to a DFS migration, organizations should determine their migration goals. For example, an organization may use a DFS migration as an opportunity to decommission older Windows servers. These old servers may be running versions of Windows Server that are no longer supported. This may include Windows Server 2008, Windows Server 2008 R2, Windows Server 2012, or Windows Server 2012 R2. Once you have eliminated unsupported Windows Server versions, you might consider raising the domain functional level and forest functional level.
A step by step DFS migration process
The actual steps involved in a file server migration tend to vary depending on the current infrastructure and the versions of Windows Server that are in use. As an example, there are subtle differences in migrating from Windows Server 2016 and migrating from Windows Server 2019. Even so, the high level process tends to be largely consistent across Windows Server versions.
Step 1: Assess the Existing Environment
The first step in the migration process involves documenting your existing infrastructure. This means identifying all of your file servers, SMB shares, and NTFS and share level permissions. Additionally, it’s important to identify any large files or especially sensitive data. This is also a good time to verify the health of your DNS servers and your Active Directory environment. It’s especially important to make sure that Active Directory replication is working properly for all of your domain controllers.
Figure 1
Step 2: Design the DFS Namespace
The second step in the process involves designing the DFS namespace. In doing so, you will need to make some key decisions such choosing the folder structure and naming conventions that you want to use. The decisions that you make during this step can reduce the need for additional migrations in the future.

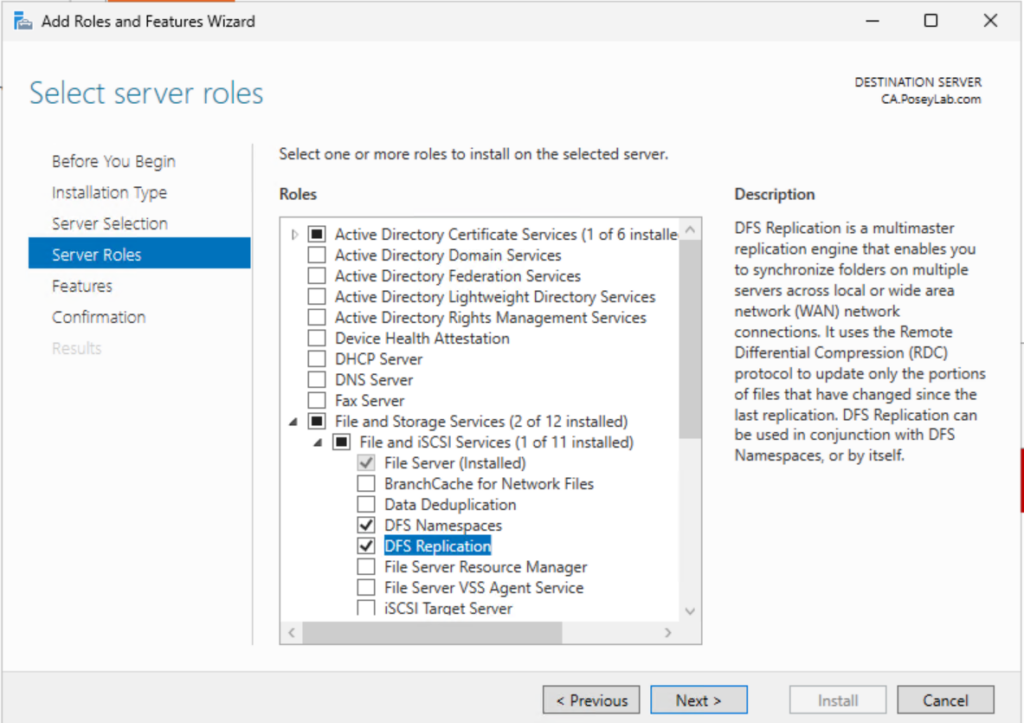
Step 3: Deploy the New Server
This is the hands-on step of the migration process. This is where you deploy the new server that will ultimately replace your old server or source server. Once you have installed the Windows Server operating system and joined the server to an Active Directory domain, you will need to install the DFS role, by using either Server Manager or PowerShell. During this part of the process, you will also need to provision the storage that the server will use.
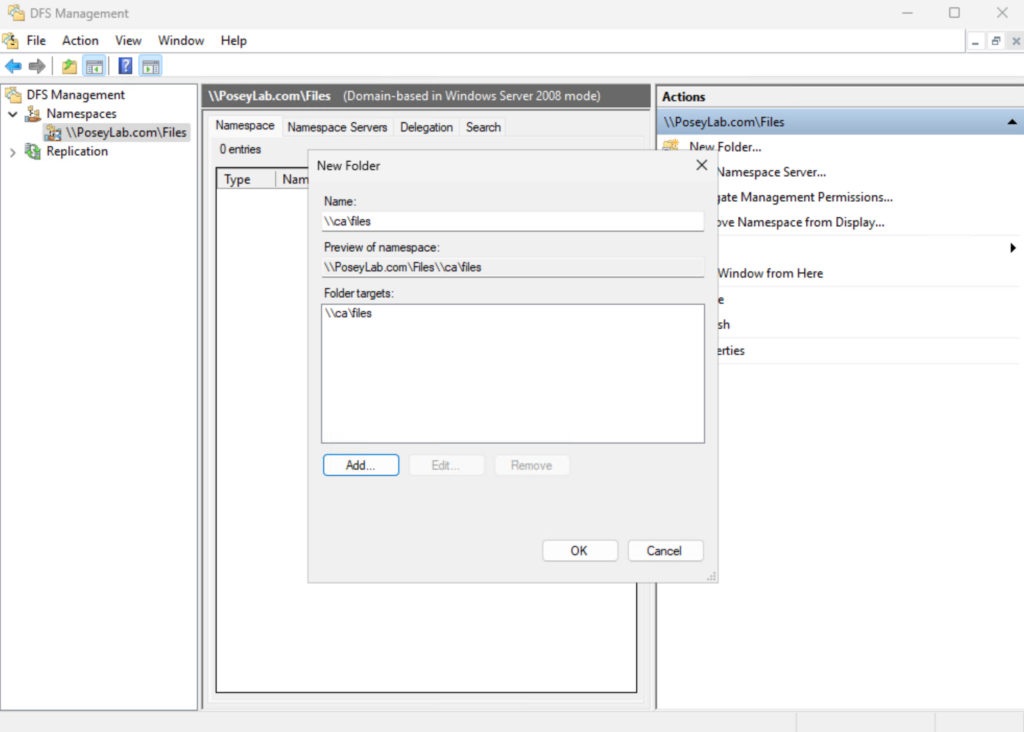
Step 4 Add the New Server as a DFS Namespace Folder Target
So far, a new file server has been provisioned, but the new server is not yet acting as a part of the DFS. As such, the next step is to integrate the server into the DFS namespace. This is done by opening the DFS Management tool and navigating to the appropriate DFS folder within the namespace. You will need to add the new server’s shared folder as a target folder. You should also add the shared folder on your old server. It is extremely important that both folder targets point to identical folder structures. Before moving on, make sure that namespace referral settings are correct.
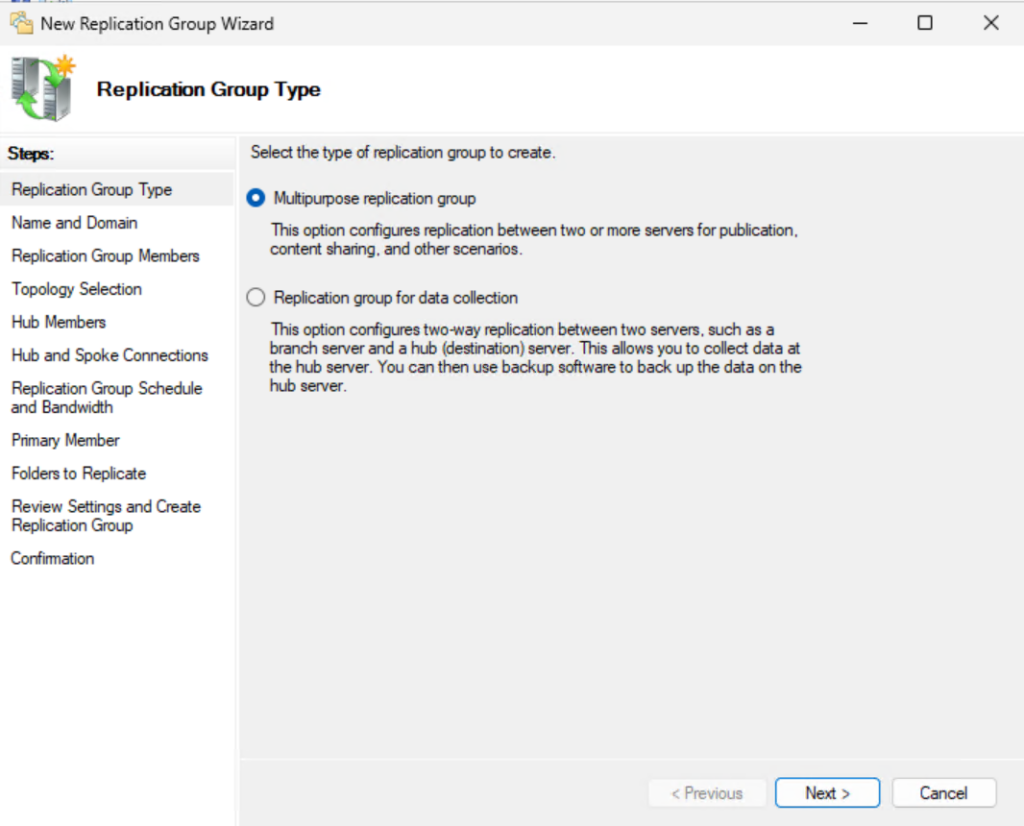
Step 5: Configure DFS Replication
Now that both targets have been added, you can configure DFS replication to synchronize data between the original server and the new server. You will want to choose a replication topology that is appropriate for your organization’s infrastructure.
At this point in the process, you should also make sure that DFSR is running on all of the DFS servers. Older versions of DFS relied on the File Replication Service (FRS) for SYSVOL replication. However, newer Windows Server operating systems use Distributed File System Replication (DFSR) instead. You can enable replication by creating a replication group and adding members to the group.
It is also worth noting that if an organization is working in a domain that was created on Windows Server 2008 or an earlier version of Windows, then it may be necessary to use the DFSRMIG tool to migrate SYSVOL folder. The SYSVOL folder is used for Group Policy and GPO processing. TechNet documentation recommends performing a SYSVOL migration before as a part of the migration process.
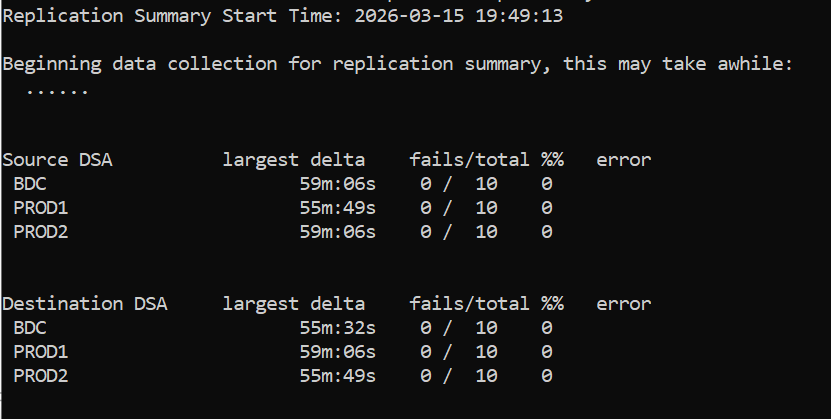
Step 6: Seed and Validate the Replication Process
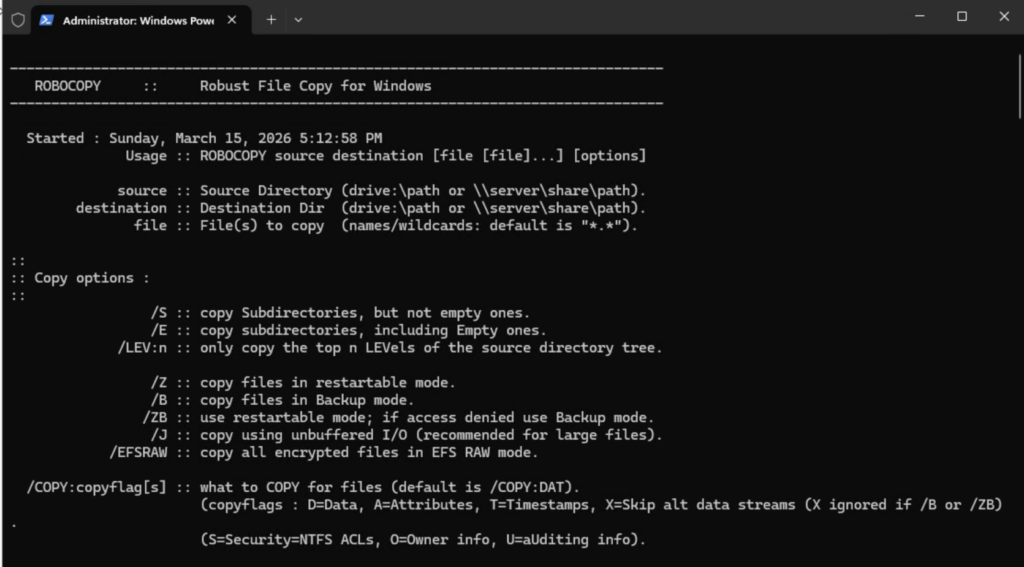
Up to this point, users are still working from the original file shares. Before you redirect the users to the newly deployed DFS environment, you will need to make sure that all of the data has been replicated from the old environment to the new environment. While you can simply wait for the replication process to copy all of the data from the replicated folders, some organizations try to expedite the process by using robocopy to pre-seed the data. This approach can be especially useful when working with large datasets.
Step 7: Redirect Clients to the New Server
The last step in the process is to redirect clients to the new server. After doing so, you will want to carefully monitor client connectivity to ensure that clients are indeed accessing data in the correct location. As a part of this monitoring process, you should also monitor the end user experience to make sure that users are seeing adequate performance.
As an internationally bestselling tech author and a former 22-time Microsoft MVP, Brien Posey has written or contributed to dozens of books and created a variety of full-length video training courses on all sorts of IT and space-related topics. He’...


