How to Enable Hyper-V in Windows 10

Windows 10 Pro, Enterprise, and Education editions contain a free virtualization software named Hyper-V. The underlying code works nearly the same as what’s provided in Windows Server. In this article, I will discuss how to enable Hyper-V on Windows 10, how to create your first virtual machine, and briefly talk about nested virtualization.
How to enable Hyper-V on Windows 10
You can enable Hyper-V on Windows 10 by using PowerShell or the Windows GUI. PowerShell is probably the easiest way to do it, and here’s how to proceed:
- Open a PowerShell console with elevated permissions.
- Run the following command:
Enable-WindowsOptionalFeature -Online -FeatureName Microsoft-Hyper-V –All
- Reboot your Windows 10 PC when prompted.
- You can now access Hyper-V and create your first virtual machine!
Keep reading for more detailed instructions on how to enable Hyper-V using either PowerShell or the Windows GUI.
What is Hyper-V?
Hyper-V is Microsoft’s free virtualization software in all editions and versions of Windows Server and Windows 10/11 Pro, Enterprise, and Education SKUs. Whether you’re an IT professional, a software developer, or a technology enthusiast, I imagine you would prefer to run multiple, independent operating systems on one computer instead of having to purchase a computer for each one. That can get expensive!
Virtual machines running in Hyper-V run on what’s called virtual hardware. Hard disks, switches, and DVD Drives are virtualized and presented to your guest OS. The guest VM doesn’t necessarily know it’s running as a virtual machine.
Hyper-V system requirements
There are a few technical and specific requirements and prerequisites before enabling the Hyper-V feature in Windows 10. First, your host computer must meet these requirements:
- 64-bit CPU with Second Level Address Translation (SLAT).
- CPU support for VM Monitor Mode Extension (VT-c on Intel CPUs).
- 4 GB Memory (you will want MORE, trust me)
There are additional requirements later on if you wish to run a virtual machine inside of a virtual machine – don’t worry, I’ll talk about nested virtualization soon enough.
Can you install Hyper-V on Windows 10 Home?
Hyper-V requires Windows 10 (or 11) Enterprise, Pro, or Education editions, and it’s not available on Windows 10 Home. However, you can upgrade from Windows 10 Home to Windows 10 Pro on your PC by going into Settings > Update and Security > Activation.
How to enable Hyper-V with PowerShell
Interestingly the steps required to enable Hyper-V in Windows 10 are relatively easy. I say interesting because being able to run another operating system ‘inside’ your current operating system is a very cool technology. And, thanks to the rather powerful and efficient tech behind Powershell, you’ll be up and running and creating virtual machines (VMs) in no time.
- Go ahead and open a new PowerShell console as Administrator.
- Run the following command to enable Hyper-V:
Enable-WindowsOptionalFeature -Online -FeatureName Microsoft-Hyper-V -All
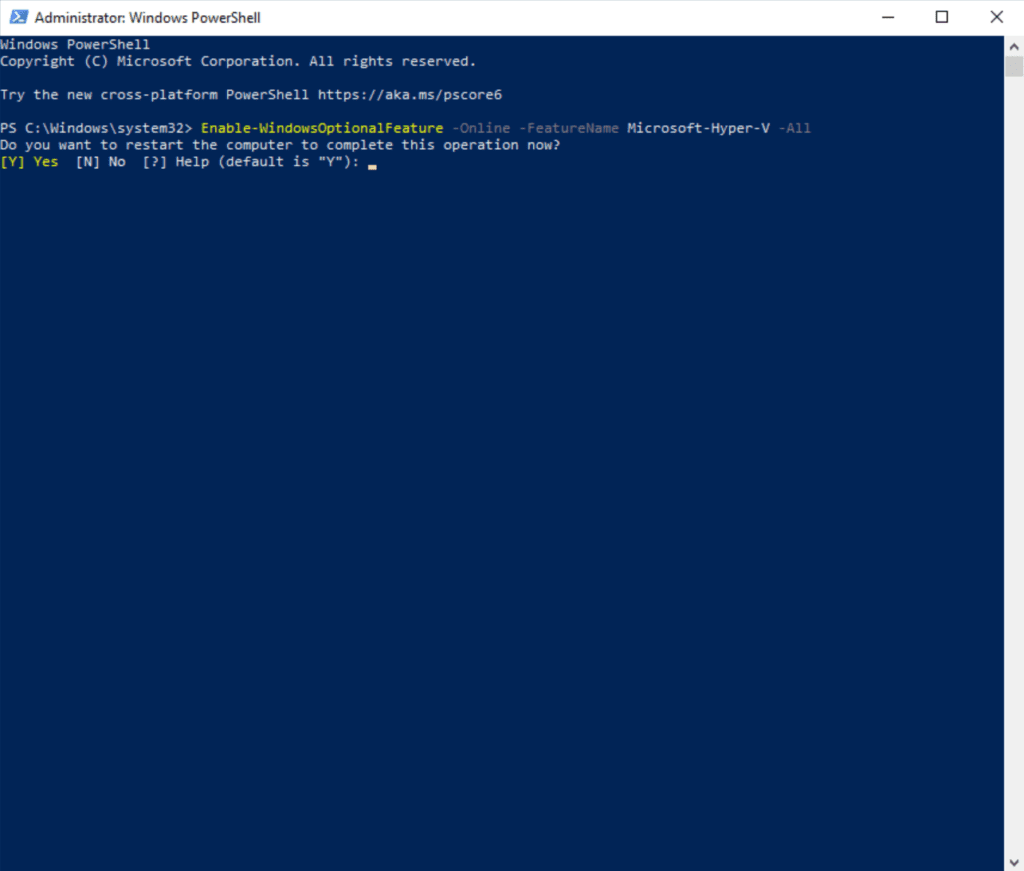
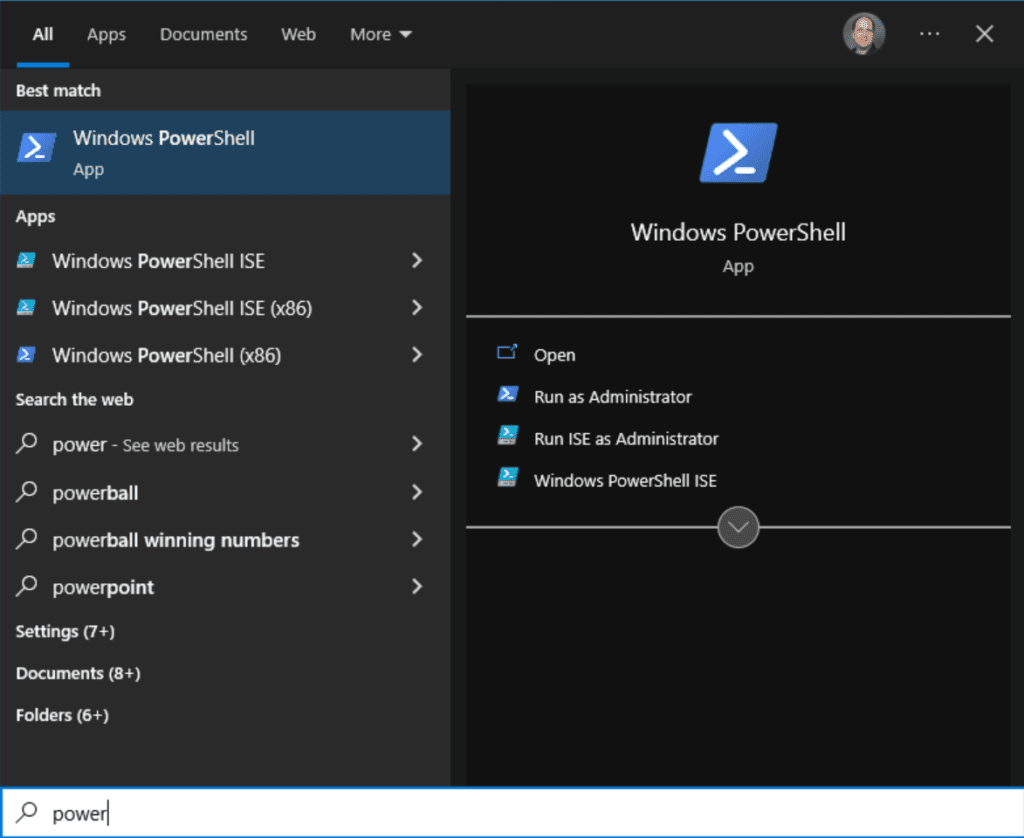
- Go ahead and restart your computer when prompted. Then, click the Start button and search for ‘Hyper-V‘.
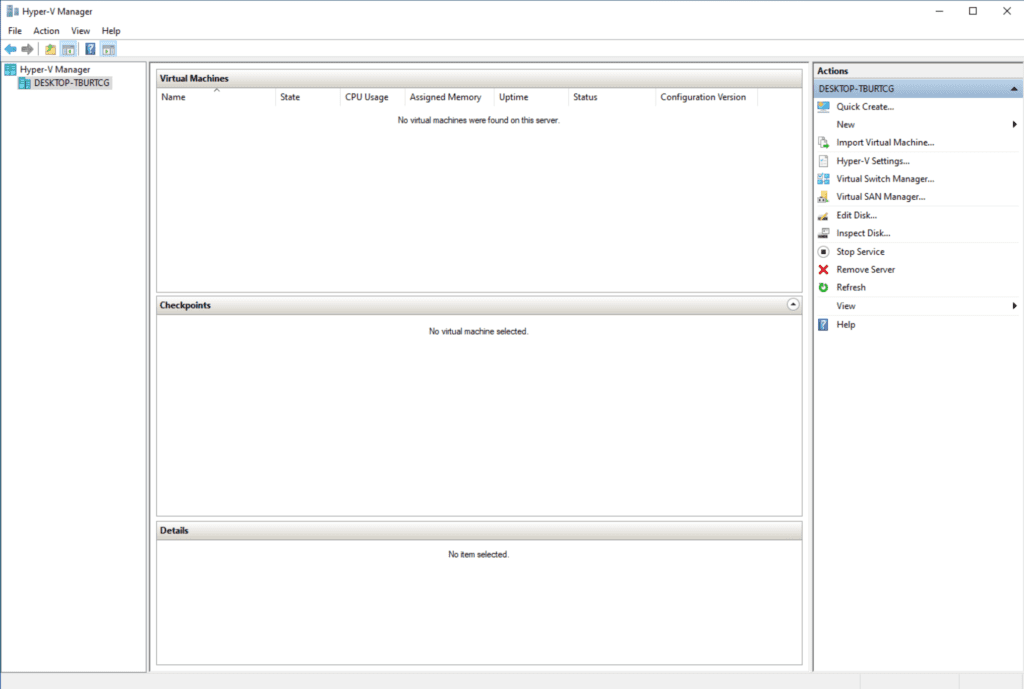
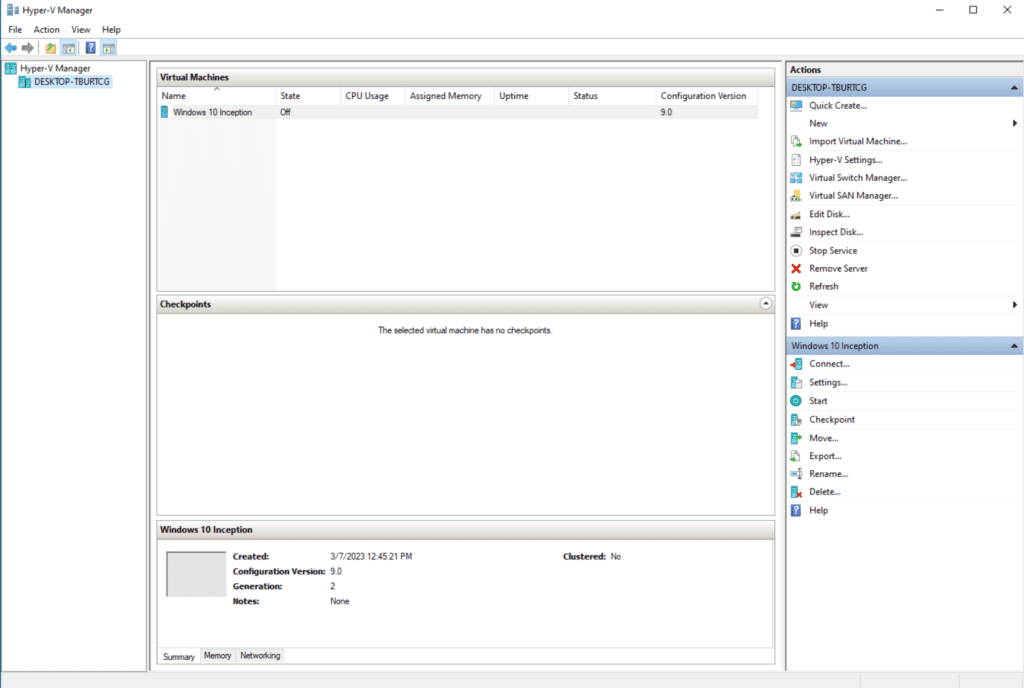
- Click to open Hyper-V Manager.
Piece of cake! We are (sort of) all set to start creating VMs. Well, I discovered an ‘issue’ here. More on that very soon.
How to enable Hyper-V with the Windows Settings GUI
Let me show you how to perform the same steps using the legacy Control Panel GUI.
- First, click the Start button and search for ‘optional features.’ Select Manage optional features.
- Click the More Windows features link in the upper-right corner.
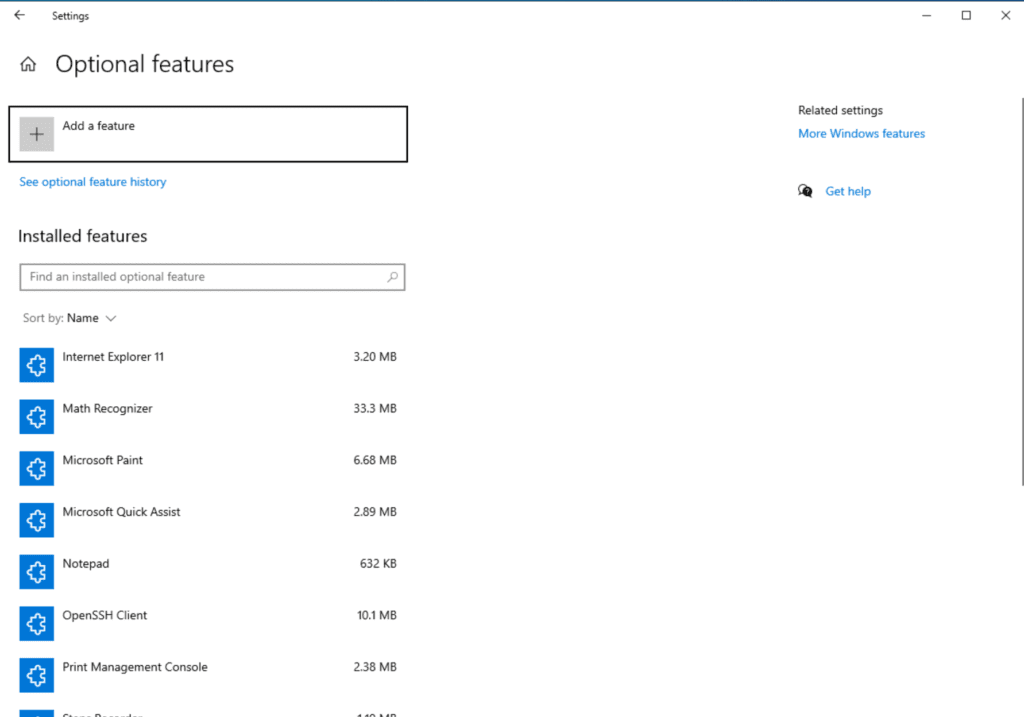
- Now, here’s where we hit a temporary block. If you scroll down to Hyper-V and expand it, you’ll see that the ‘Hyper-V Platform‘ item is greyed out.
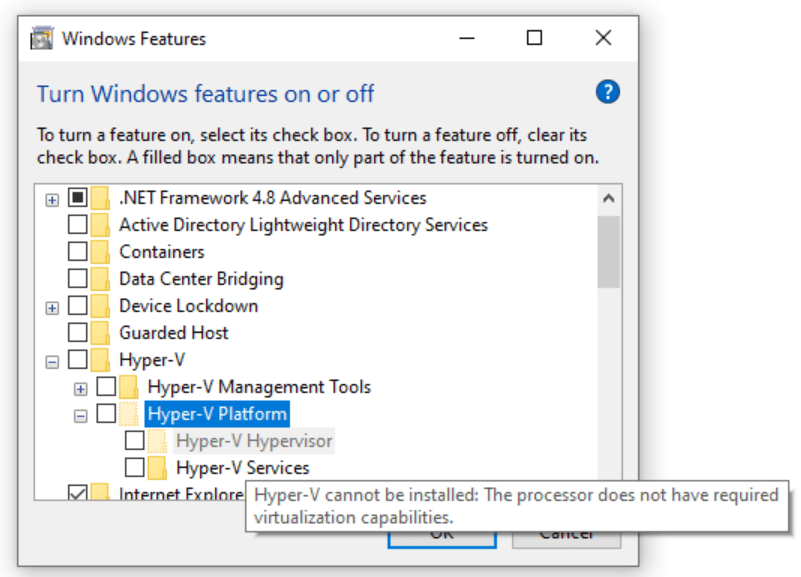
When I hover over the Hyper-V Platform item, I see: “Hyper-V cannot be installed: The processor does not have the required virtualization capabilities.”
So, how about some background? Sure. I am utilizing my Hyper-V lab on my main desktop computer running Windows 11. I am using one of my Windows 10 VMs to demonstrate the topic. I am already one layer down in the virtual world if you will (think Inception).
However, what I am asking Windows to do is called nested virtualization. I will go over this in more detail below, but basically, I need to add a second layer. Run Hyper-V as a feature inside another Hyper-V VM. I know, I had to watch Inception 5 times to wrap my head around it!
Anyway, if you aren’t already running Windows 10 in a VM (as I am), Hyper-V won’t be greyed out in the list of optional Windows Features. You’ll be able to select it, click OK, then you’ll be prompted to reboot your Windows 10 PC.
Creating a virtual machine with Hyper-V
So, we have Hyper-V enabled and ready to go. Let’s go through the basics of creating a new Windows VM. In the Hyper-V Manager, we’ll first create a new Virtual Switch so we can pass the network/Internet connection on our host machine down to our new VM.
- Click Virtual Switch Manager… under the Actions menu on the right.
- Click the Create Virtual Switch button.
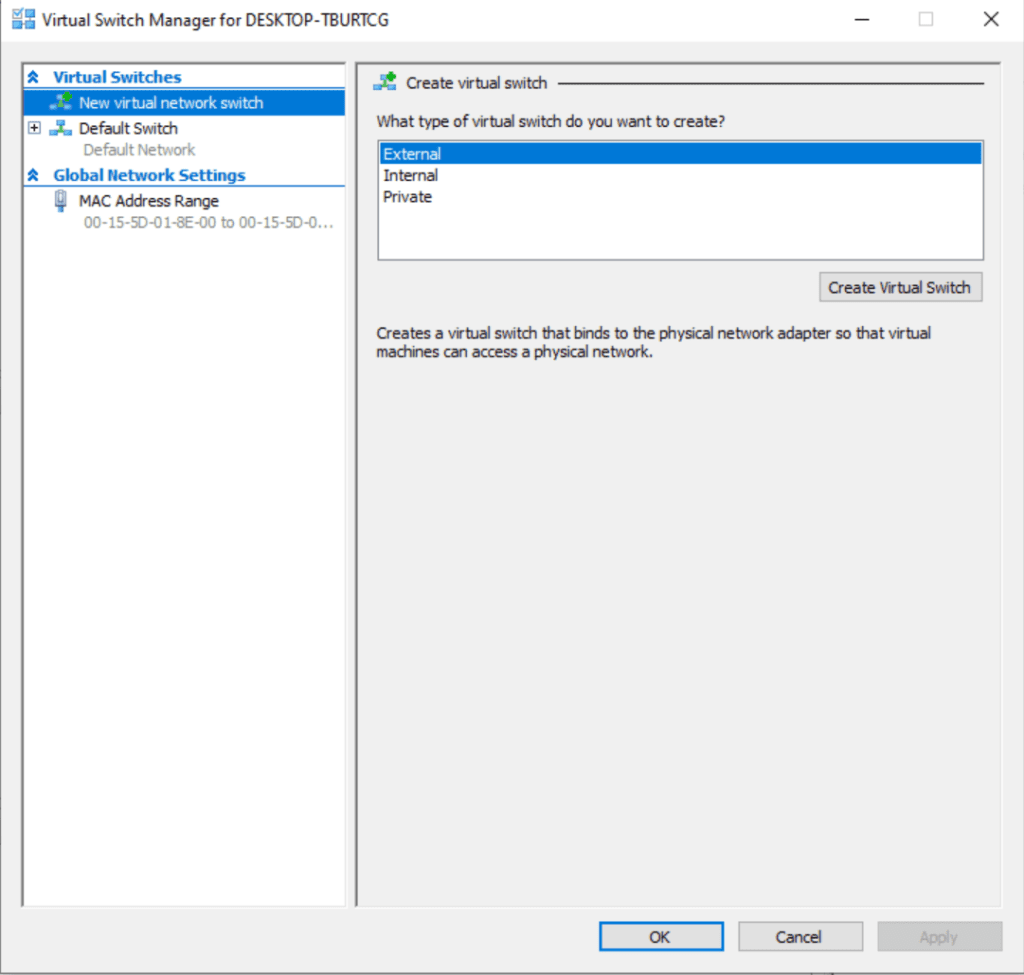
Let’s name it ‘Internet Switch.’ Then, the defaults should be good – we are using the External network and the Microsoft Hyper-V Network Adapter to pass thru whatever connection the VM host has down to the new VM. This will allow DHCP servers to give the new machine an IP Address.
- Click OK.
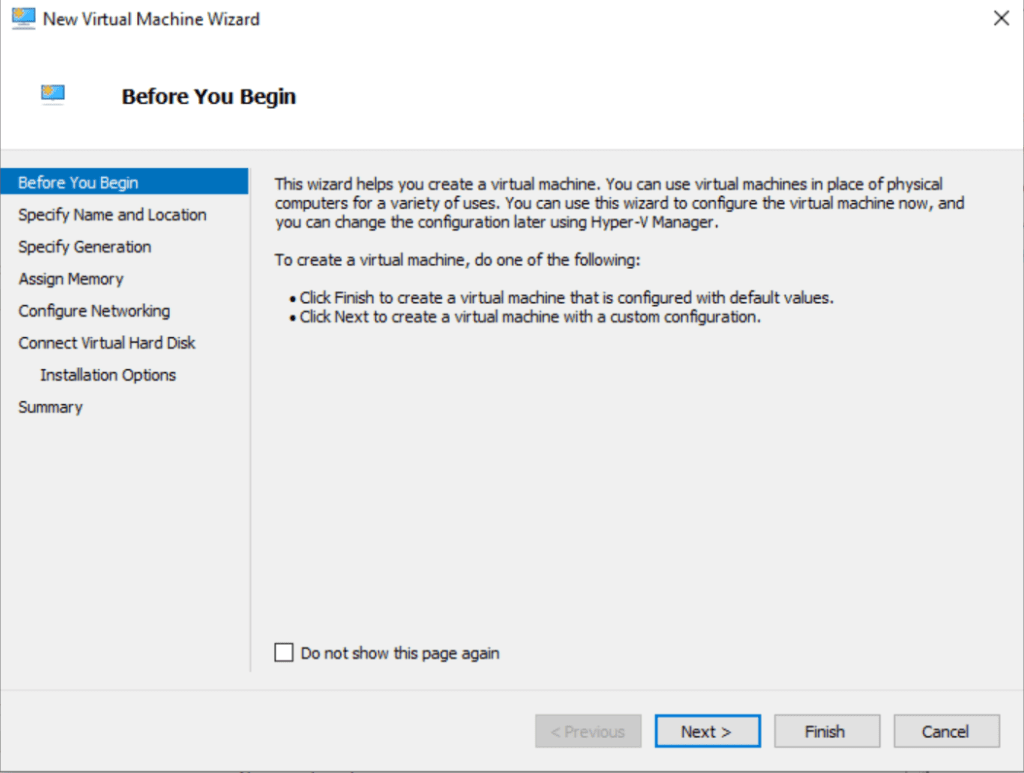
- Next, under Actions, click New -> Virtual machine…
- Click Next, and then enter a name for the new machine and click Next.
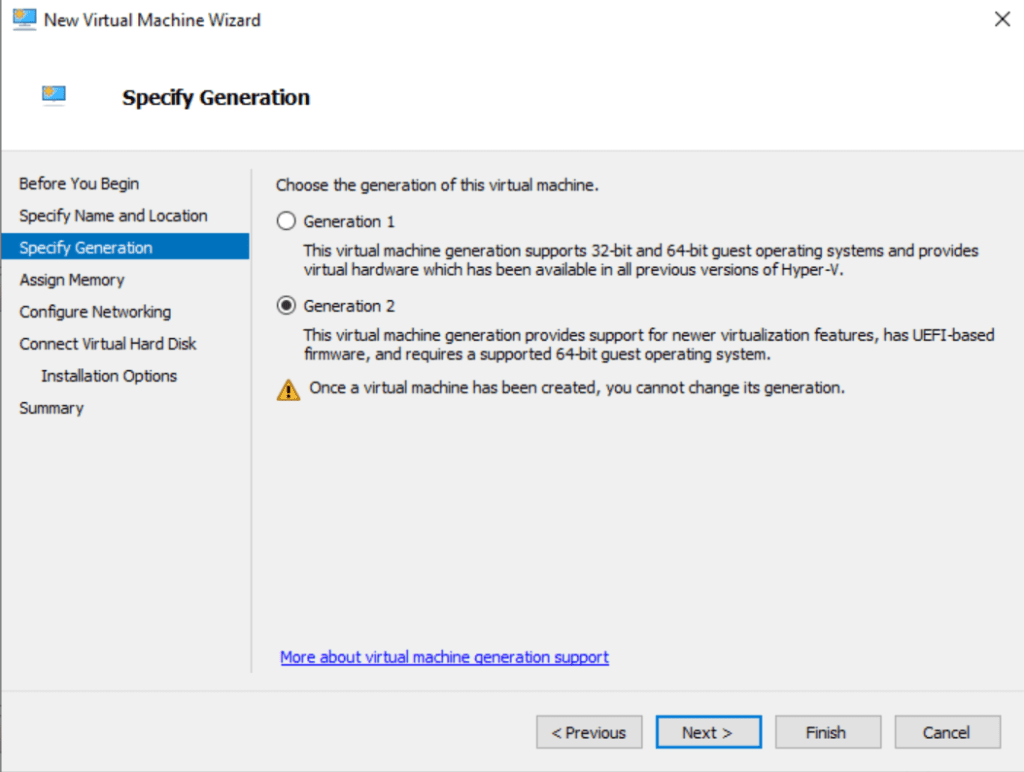
- On the Specify Generation screen, you’ll want to choose Generation 2. Click Next
- I will assign 4 GB of ram for our new machine and turn off Dynamic Memory for these demo purposes. My initial Hyper-V VM has 8 GB, so that should be fine. Click Next.
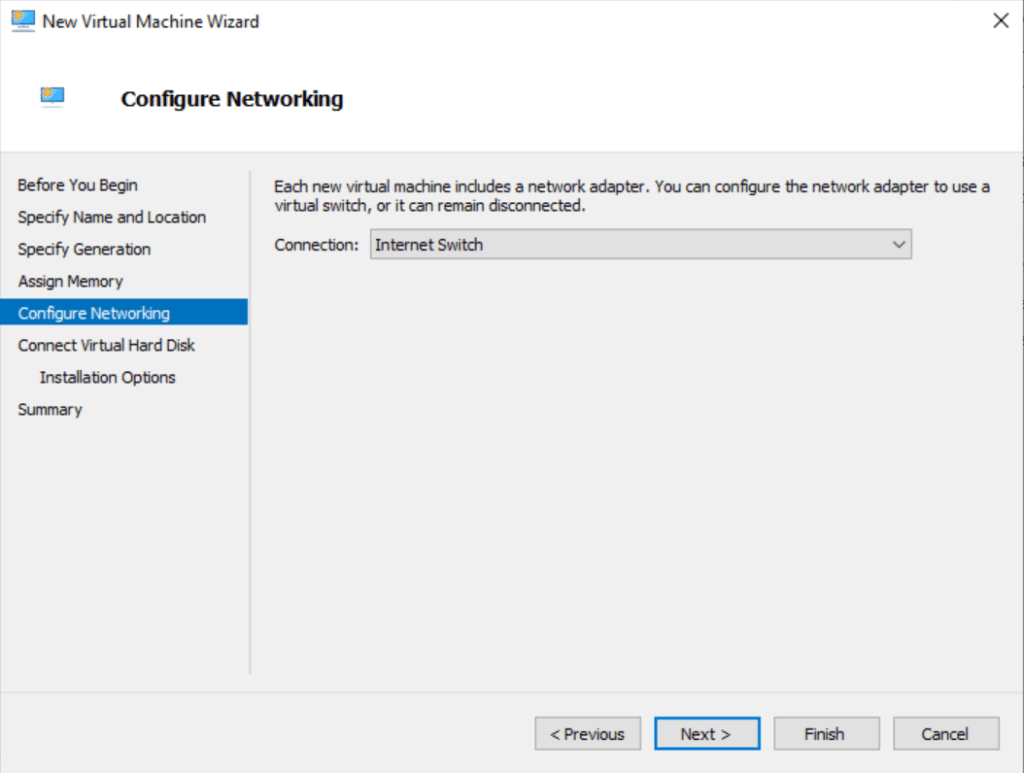
- We will choose the ‘Internet Switch‘ from the Connection dropdown on the Configure Networking screen and click Next.
- We can leave all the defaults for the virtual hard disk, click Next and choose the default to install the operating system later
- Click Next again, and then Finish!
There you have it!
Recommended configuration changes for your Hyper-V VM
I will go through a few more common config changes I make when setting up a new VM and explain them to you.
- Right-click on your virtual machine and click Settings.
- In the Add Hardware default menu, SCSI Controller should be selected. Click the ‘Add‘ button, select ‘DVD Drive‘, and then click Add again.
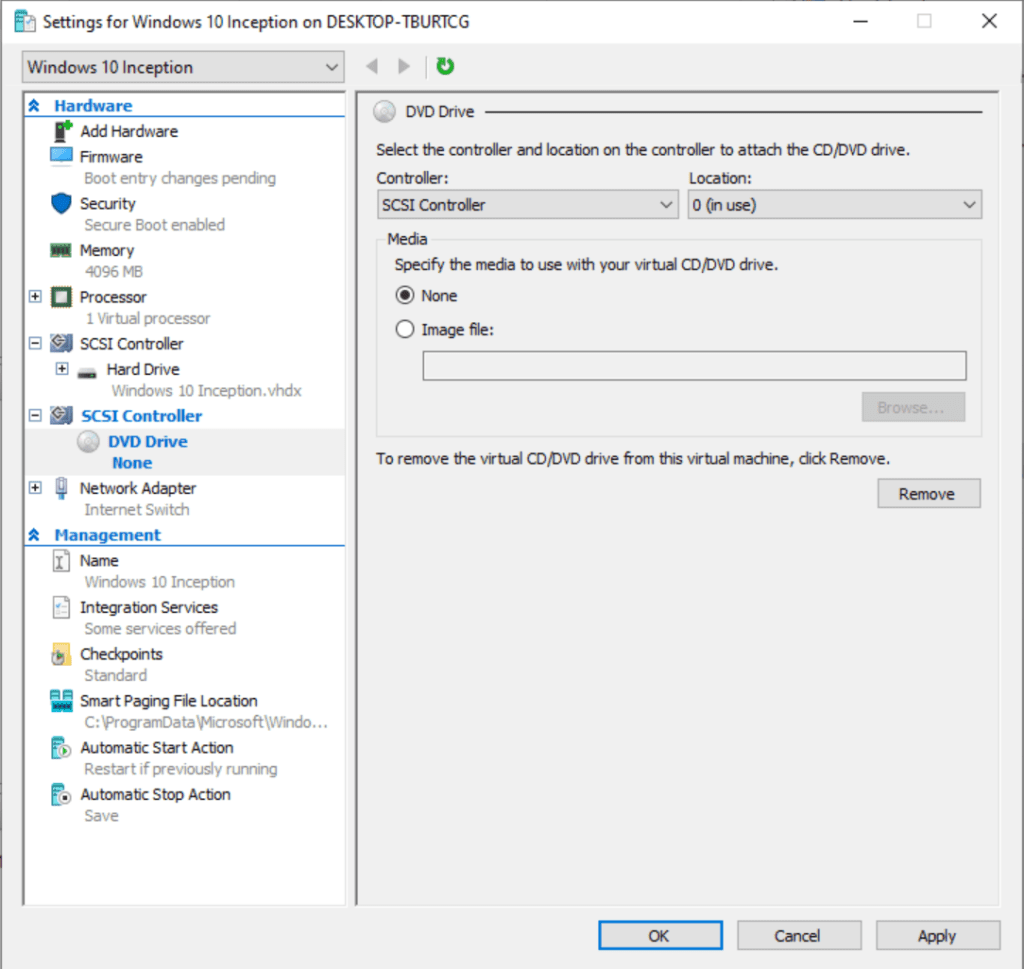
- Once you have an installation ISO file available, you can choose the ‘Image file:‘ option and browse to it.
- After you have your ISO ready, you should click the Firmware menu on the left and move the DVD Drive to the top of the list so the VM boots to it when you power it on.
- Then, click the Processor menu and verify how many virtual CPUs (vCPUs) you want to assign to it. The more you add, the faster it will run. However, this will also negatively impact your host operating system, so you’ll need to tweak these settings over time.
Well, those are the salient points and should definitely get you headed in the right direction.
Hyper-V and nested virtualization
I’ve already briefly described the concept of nested virtualization. For the scope of this article, let me ask you to get more detail by checking out our previous post on how to enable nested virtualization on Windows 10 Hyper-V.
However, I want to address a few ‘issues’ I mentioned earlier in this article. The main issue is the fact that I can’t really use the Hyper-V software until I resolve the nested virtualization requirements. Personally, I find it odd that Windows allows you to run the PowerShell command to enable the Hyper-V platform without the required prerequisites!
Being able to turn on the Hyper-V feature in a VM requires a special PowerShell command to be run from your initial host computer. Before you proceed, make sure the VM you wish to modify is powered off. I will fire up a PowerShell console as Administrator and run a few commands.
First, I will run the Get-VM command:
Get-VM
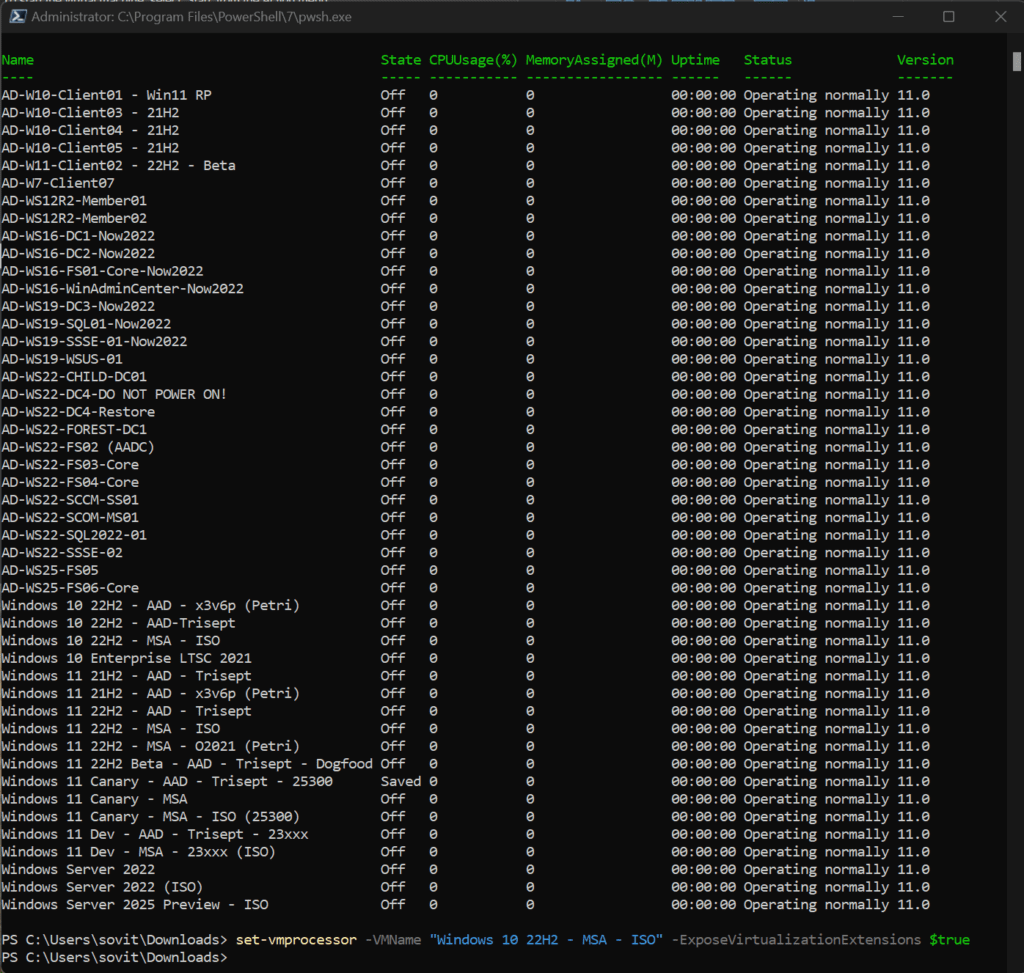
Yep, I do have a lovely assortment of machines, don’t I? The one I am working with is called ‘Windows 10 22H2 – MSA – ISO‘. So, I will run this command to enable the special CPU features for that specific VM.
Set-VMProcessor -VMName "Windows 10 22H2 - MSA - ISO" -
ExposeVirtualizationExtensions $true
Simply power up your VM and now you’ll be able to enable Hyper-V in it. You can refer to the steps above using PowerShell or the GUI.
Conclusion
Hyper-V is a free, easy-to-use virtualization solution built right into Windows. I have been using it ever since it became a part of Windows, back in the Windows 8 days!
I strongly encourage you, as IT Pros, to use it for your day-to-day testing needs. There is no need to buy another desktop or laptop just to see if an older version of Adobe Acrobat will work on Windows 11. Just fire up a new Windows 11 VM and give it a go!
Please leave any comments or questions below. I would love to assist you if you run into any configuration issues. Thanks for reading!
FAQs
Can I enable Hyper-V in Windows 10 if my CPU doesn’t support virtualization?
No, to enable Hyper-V Windows 10, your CPU must support virtualization. You can check this in BIOS/UEFI settings and ensure that virtualization features are enabled at the hardware level.
Will enabling Hyper-V Windows 10 affect my computer’s performance when not using virtual machines?
Yes, enabling Hyper-V in Windows 10 can slightly impact system performance as it runs as a Type 1 hypervisor, meaning it takes priority over your host operating system, even when not actively using virtual machines.
Can I run Android emulators after enabling Hyper-V in Windows 10?
Some Android emulators may conflict with Hyper-V in Windows 10. However, newer versions of popular emulators like BlueStacks have introduced Hyper-V compatibility modes to work alongside it.
Does enabling Hyper-V in Windows 10 automatically configure firewall settings for virtual machines?
When you enable Hyper-V in Windows 10, default firewall rules are created automatically, but you may need to configure additional rules depending on your virtual machine networking requirements.
Can I transfer my Hyper-V enabled Windows 10 virtual machines to another computer?
Yes, you can export and import virtual machines to another computer that also has Hyper-V enabled, but first, ensure both systems meet the minimum hardware requirements.

Michael has been an IT Pro since 1998. He has worked predominantly in the Windows world including client and server operating systems, on-prem systems engineering (AD, DNS, etc.), and over the last ten years or so has embraced and immersed himself in...
