How to Set Up (Microsoft Entra) Azure AD Domain Services

In this article, I’ll show you how to set up Azure AD Domain Services and configure DNS. In the second part, I’ll discuss password hash synchronization requirements and how to perform a domain join operation.
Azure Active Directory (AAD) Domain Services allows organizations to “lift-and-shift” apps that use on-premises AD for authentication to the cloud, extending the capabilities of Azure Active Directory (AAD) to provide many of the features of on-premises Windows Server Active Directory (AD) but without the effort of installing domain controllers (DCs), setting up Azure ExpressRoute or a VPN to connect on-premises domain controllers (DCs) to Azure.
Domain Services extends AAD to support Kerberos, NTLM, Group Policy, domain join, LDAP bind and read, Secure LDAP, custom domain names, DNS management, and custom Organizational Units (OUs). In addition to these features, it provides high availability, account lockout protection, and management using familiar tools.
How to set up Azure AD Domain Services
Before you can set up Domain Services in Azure, you’ll need an Azure subscription and at least one Azure Active Directory tenant. It’s also worth noting that Domain Services isn’t available in all regions. To check availability for the region you intend to work in, see Microsoft’s website here. If you’re not familiar with Azure AD, check out What is Azure Active Directory? on Petri.
Let’s get started and deploy a new Domain Services resource in Azure. Log in to Azure and follow the instructions below.
- Click + Create a resource on the left of the Azure management portal.
- In the search box in the New dialog, type domain services, and then select Azure AD Domain Services from the list.
- In the Azure AD Domain Services pane, click Create.
- In the Basics pane, under the Resource Group dropdown menu, click Create new. In the popup dialog, enter a name for the new resource group and click OK. I’ll call my new resource group ‘aadds’. Optionally, you can change the subscription, location, and DNS domain name. In this example, I’ll leave the default settings. Click OK to continue.

- In the Network pane, click Select a virtual network. In the Choose virtual network pane, click + Create new.
- In the Create virtual network pane, leave all the default settings and click OK.

- Click OK again in the Network pane.
- In the Administrator group pane, click AAD DC Administrators
- In the Members pane, click + Add members.
- Select one or more users and then click Select. Click Refresh in the Members pane. The user(s) you added should be displayed. You can always add users to the AAD DC Administrators group at a later stage.
- Close the Members pane.
- In the Administrator group pane, click OK.

- In the Synchronization pane, decide whether you want to sync all users from AAD to Domain Services, or select groups. For the sake of simplicity, leave the default setting of All and click OK.
- In the Summary pane, check the details are correct and then click OK.
It will take a few minutes to create the Domain Services resource. You should get a notification in the top right of the Azure management portal when the deployment has completed. If not, refresh the console in the browser.
Configure DNS
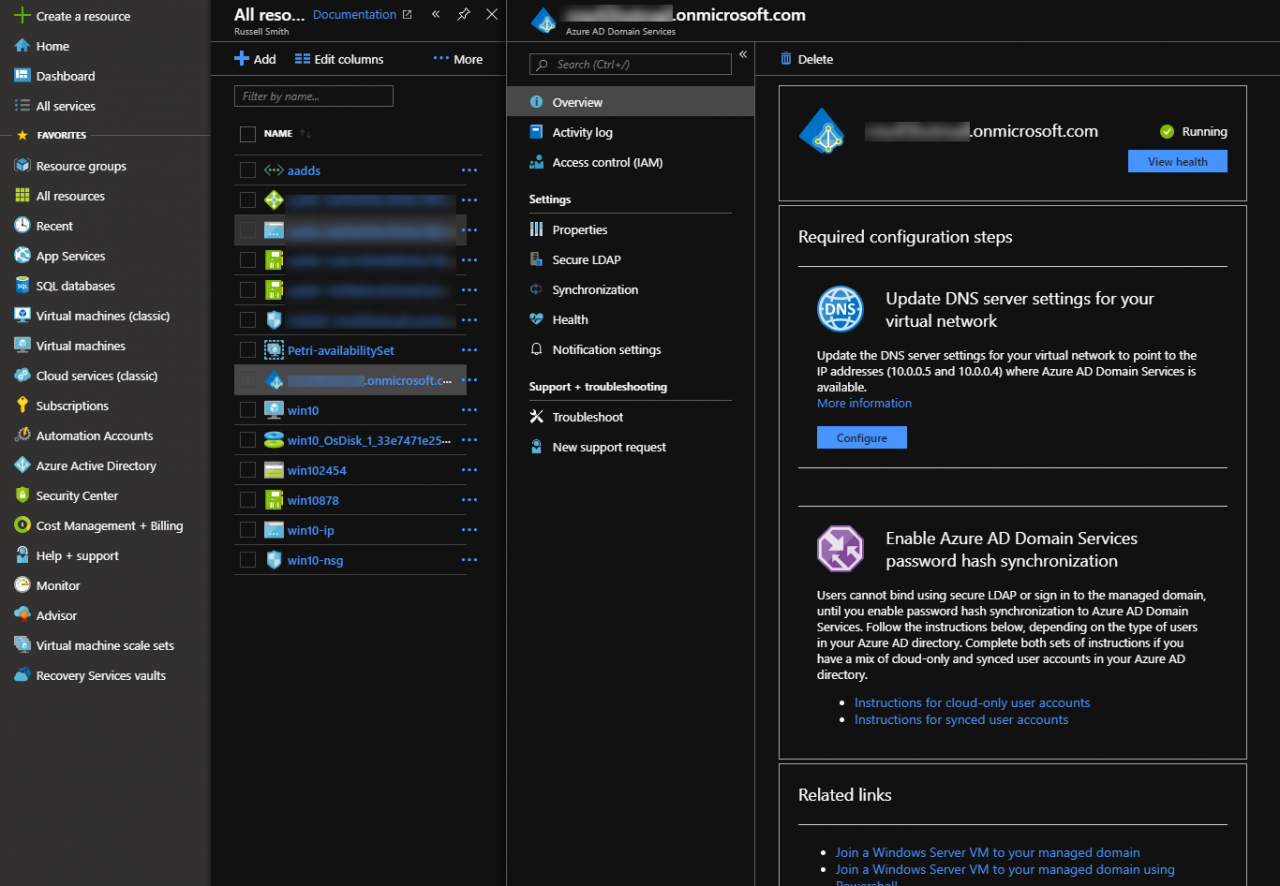
Now we need to update the DNS configuration for the VNET so that VMs can find the new domain. If you are not automatically redirected to the Overview page for the new Domain Services resource, you’ll need to manually find it.
- Click All resources in the left pane of the Azure management portal.
- Find the new Domain Services resource in the list and click it.
- Under Update DNS server settings for your virtual network, click Configure.
Any VMs that are running will need to be restarted to pick up the changes to DNS configuration.

Synchronize password hashes
Before you can use Domain Services with your AAD user accounts, password hashes must be synchronized between AAD and Domain Services. In this example, I’m going to assume that you have cloud-only users in AAD. Cloud-only users must change their passwords to synchronize password hashes to Domain Services. Users can change their account password in the Azure AD Access Panel if self-service password resets are enabled in AAD. This feature requires AAD Premium licenses.
If you want to force a password change for an existing user, you can do so in the Azure management portal by clicking Reset password in the Profile pane for the user. You will be provided with a temporary password for the account which you must give to the user. They will be required to change it at the next login. But if you would like users to change their own password, give them the following instructions.
- Log in to the AAD Access Panel.
- Click the profile in the top right of the Access Panel and then click Profile in the menu.
- Under Manage account, click Change password.
- On the change password page, type the old account password, and then type and confirm a new password for the account.
- Click submit.
You should wait 30 minutes before logging in to AAD Domain Services using the account.
Create a VM for AAD Domain Services management
Once AAD Domain Services is set up and you have at least one account that can access it, managing the domain is much like managing any other Windows Server Active Directory domain. All you need is a virtual machine (VM) that can connect to the domain’s subnet and the right tools, like the PowerShell module for Active Directory or the Remote Server Administration Tools (RSAT). The easiest way to get started is to deploy a Windows VM in Azure. There are a few requirements:
- It must be on the same VNET as your AAD Domain Services, or a VNET that is connected to your AAD Domain Services subnet.
- Should be on a different subnet from Domain Services.
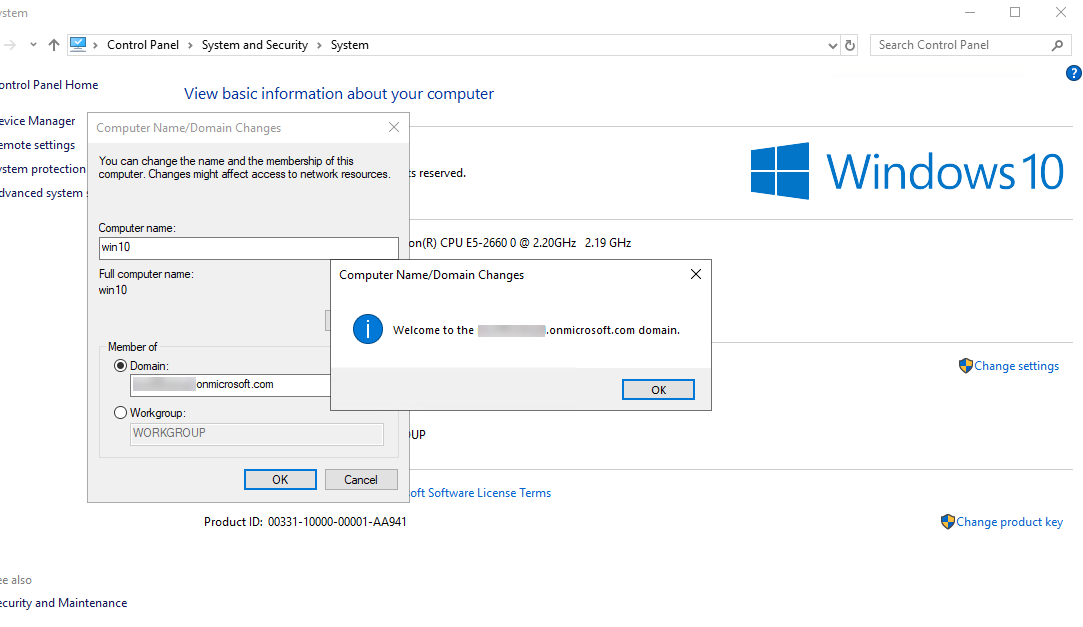
You can join a Windows VM to Domain Services in the same way that you join a device to Windows Server Active Directory. Use the instructions in Joining Windows Server 2012 to a Domain on Petri, skipping straight to the section ‘Join the computer to a domain’. This works for newer versions of Windows Server as well. You will need the fully qualified domain name (FQDN) of your Domain Services domain that you entered as part of the instructions in the first part of this series and a user account that is a member of the AAD DC Administrators group. The AAD DC Administrators group is added to the local Administrators group as part of the domain-join operation.

If you don’t already have a Windows Server VM running in Azure, you can provision one using the instructions in Create a Virtual Machine in the Azure Cloud on Petri.
For example, if your Domain Services FQDN is petriad.onmicrosoft.com and you have a user called ‘admin’ that is a member of the AAD DC Administrators group, when you are requested for a username and password, just type admin as the username and then whatever the password is for the admin account. You will be required to restart the VM to complete the domain-join operation.

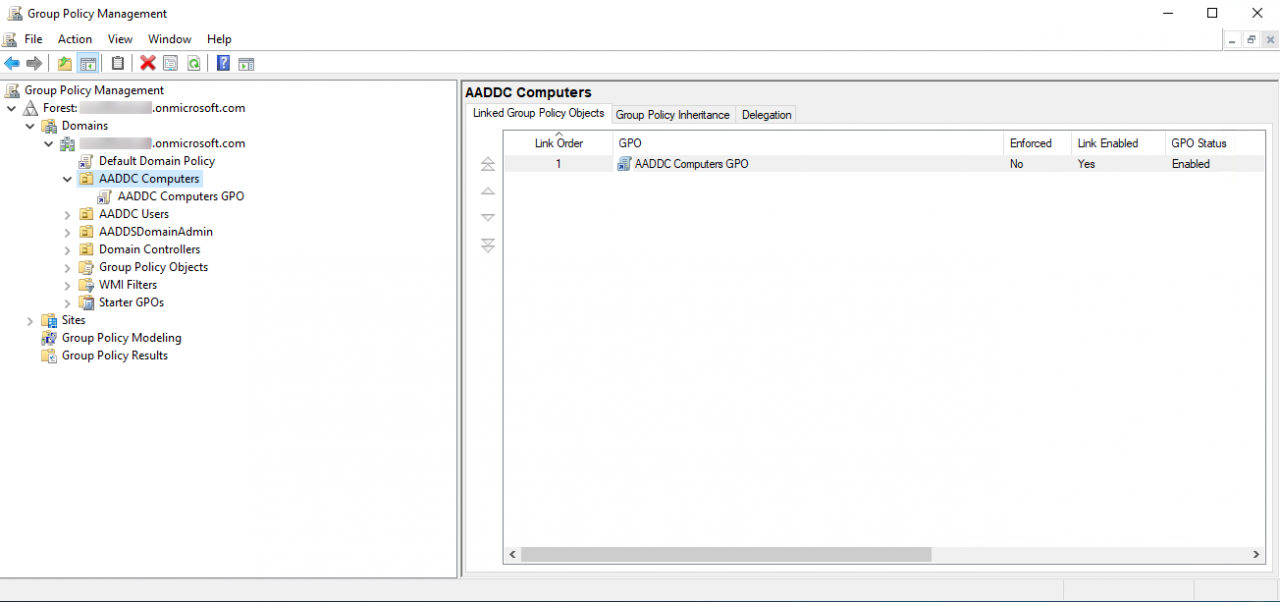
After rebooting, log in to the VM using an account that is a member of the AAD DC Administrators group. You can then use any standard tools, like Group Policy Management, to manage Domain Services. For more information on working with RSAT, see How to Install the Remote Server Administration Tools in Windows 10 on Petri.


