How To Enable Archive Mailboxes In Office 365

In the ever-evolving digital landscape, organizations are generating an increasing volume of emails and other electronic communications. Efficiently managing this growing influx of messages while maintaining compliance with regulatory requirements has become a critical aspect of modern business operations. One effective solution offered by Microsoft’s Office 365 suite is the archive mailbox feature. In this tutorial, I’ll show you how to enable archive mailboxes in Office 365 feature to help manage large volumes of emails and ensure regulatory compliance.
What is an archive mailbox in Office 365?
An archive mailbox is an additional mailbox storage space within Office 365. It allows users to offload and preserve older emails, documents, and other data using in-place archiving while keeping their primary mailbox uncluttered. This feature is particularly beneficial for organizations that need to retain emails for extended periods due to legal, regulatory, or business reasons.

To handle your compliance and retention needs, you can create retention policies for your organization. As an example, after archive mailboxes are created, you can create a policy that will take emails from a user’s mailbox that match certain retention criteria (age, etc.) and move them to the user’s archive mailbox.
Advantages and disadvantages of using archive mailboxes in Office 365
Enabling archive mailboxes in Office 365 provides several advantages. It helps streamline mailbox management by separating active emails from older, less frequently accessed messages, enhancing overall mailbox performance and search capabilities.
Furthermore, archive mailboxes ensure compliance with data retention policies, facilitating legal discovery processes and regulatory audits. Another boon is not needing to export and manage .pst files. That is a headache you clearly don’t need!
After enabling archive mailboxes in Office 365, you can also use the auto-expanding archive feature. With this enabled for your users, once their archive mailboxes reach their quota, Microsoft will automatically add 10 GB of space to them with no steps needed from your users or IT pros!
The main disadvantage of using archive mailboxes, however, is that it adds another layer of complexity for IT pros responsible for email and storage. However, in terms of retaining users’ emails and information, IT pros can easily manage these mailboxes and run PowerShell cmdlets to check quotas.
Do you need permissions to enable archive mailboxes in Office 365?
You need to have the appropriate administrative permissions to enable an archive mailbox in Office 365. The specific permissions required may vary depending on the version of Office 365 and the roles assigned to your account.
Here are the common permissions needed:
- Exchange Administrator: To enable an archive mailbox, you generally need to have the Exchange Administrator role or equivalent permissions. This role allows you to manage Exchange Online settings, including archive mailboxes.
- Organization Management: In some cases, the Organization Management role might be required. This role grants full administrative access to all aspects of Office 365, including Exchange Online.
- Compliance Management: If you are enabling an archive mailbox for compliance purposes, you may need the Compliance Management role or equivalent permissions. This role enables you to manage compliance features and settings within Office 365.
- Mailbox Import Export: The Mailbox Import Export role or equivalent permissions are necessary to import or export data to or from the archive mailbox.
I am using my Microsoft 365 Developer tenant in my Hyper-V lab, and I am logged into the Exchange admin center with my primary account in the Global Administrator role. This grants me all necessary permissions, with tiny exceptions. For example, the Mailbox Import Export role is NOT assigned to ANY account or role by default. It must be explicitly added. As I recall, I enabled it from a previous post here on Petri.
How to enable the archive mailbox in Office 365 for a specific user
Let’s get started and enable an archive mailbox for this user named Diego Siciliani.
- First, I will click on his name in the Mailboxes view of the Exchange admin center (EAC).
- Next, I’ll click on the ‘Others‘ tab on top.
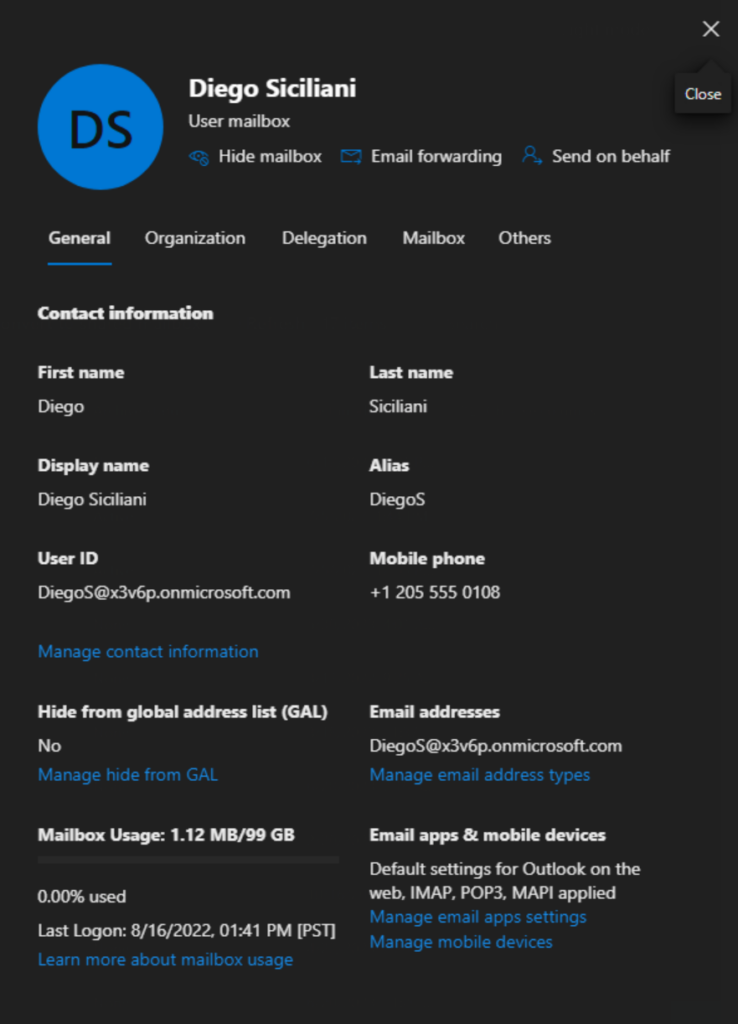
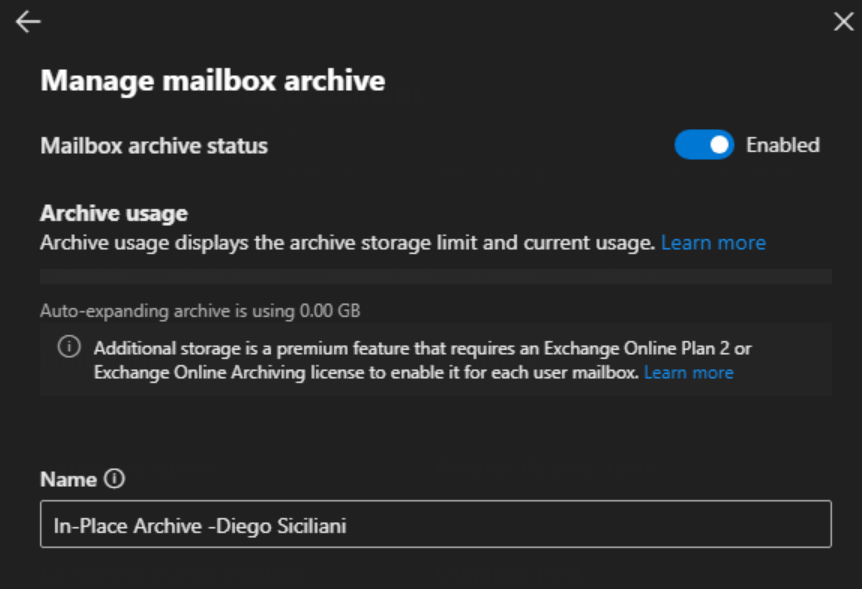
- In the ‘Manage mailbox archive’ section, it shows that the feature is disabled.
- Here, I simply click the Enable option and click Save at the bottom.
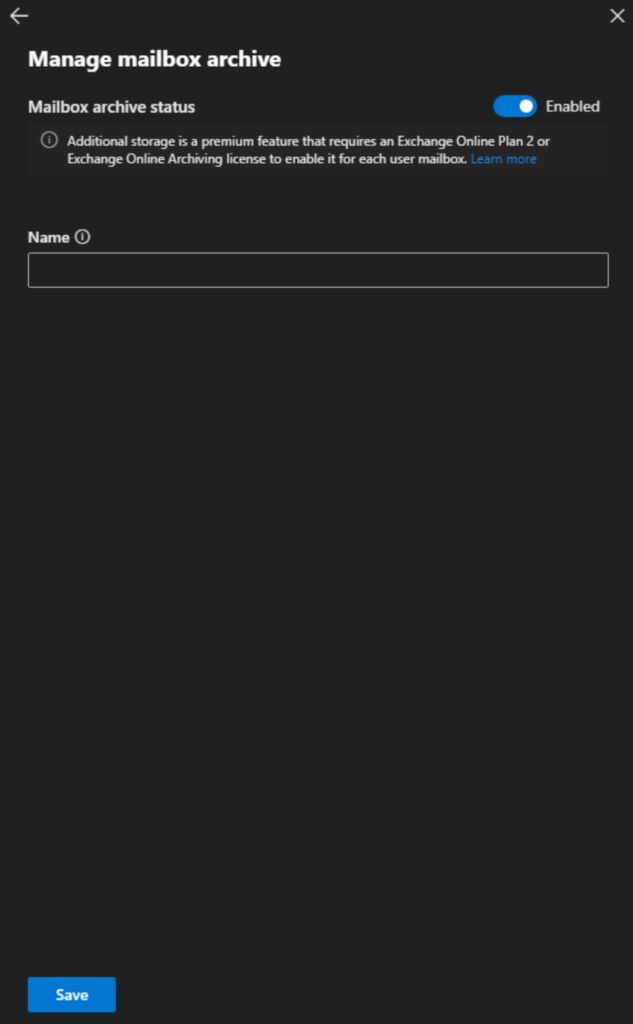
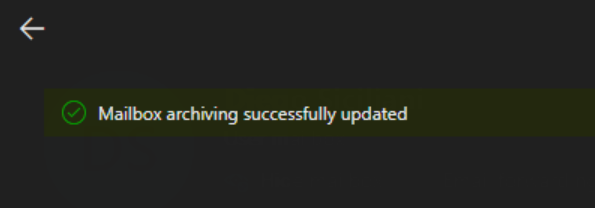
- There we go, our archive mailbox has been created.
How to verify an archive mailbox for a user
After enabling an archive mailbox, you’ll need to wait up to 15 or 20 minutes, usually. Sometimes it’s quicker, sometimes longer. Anyway, I waited a few minutes, refreshed the mailboxes list, and voila!

There’s the Archive status column showing ‘Active’ for Diego. They now have additional storage space to manage their emails. I will show you some PowerShell commands later on in this article for further confirmation and validation.
How to access an archive mailbox in Outlook Office 365?
Let me show you how to access your archive mailbox if you’re using Outlook on the web:
- The archive mailbox is in the ‘Folders’ list on the left. In my case, it is displayed as ‘In-Place Archive – Michael Reinders.’
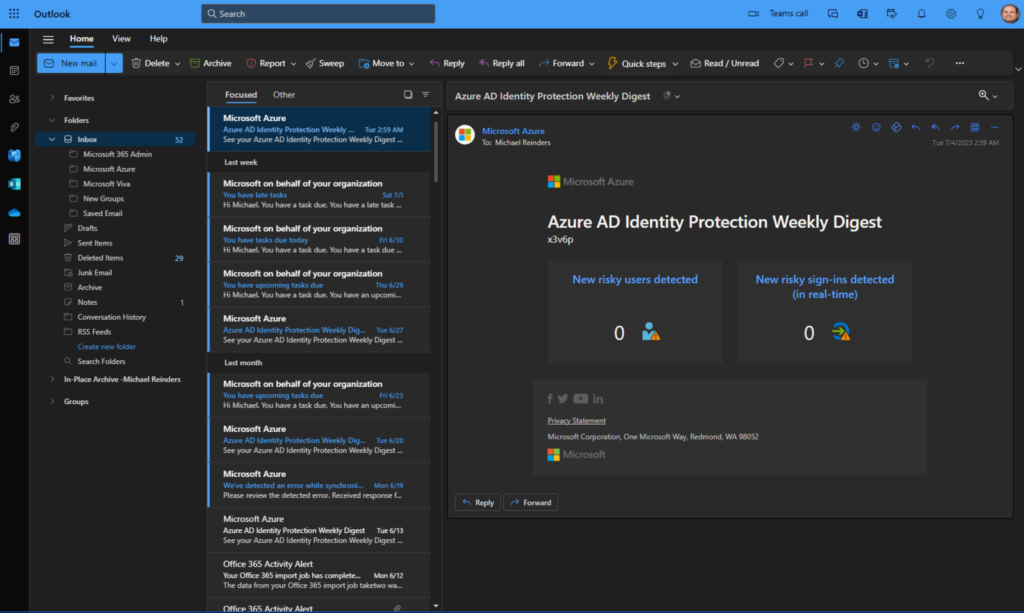
- Simply click on it and it will expand just like your primary mailbox.
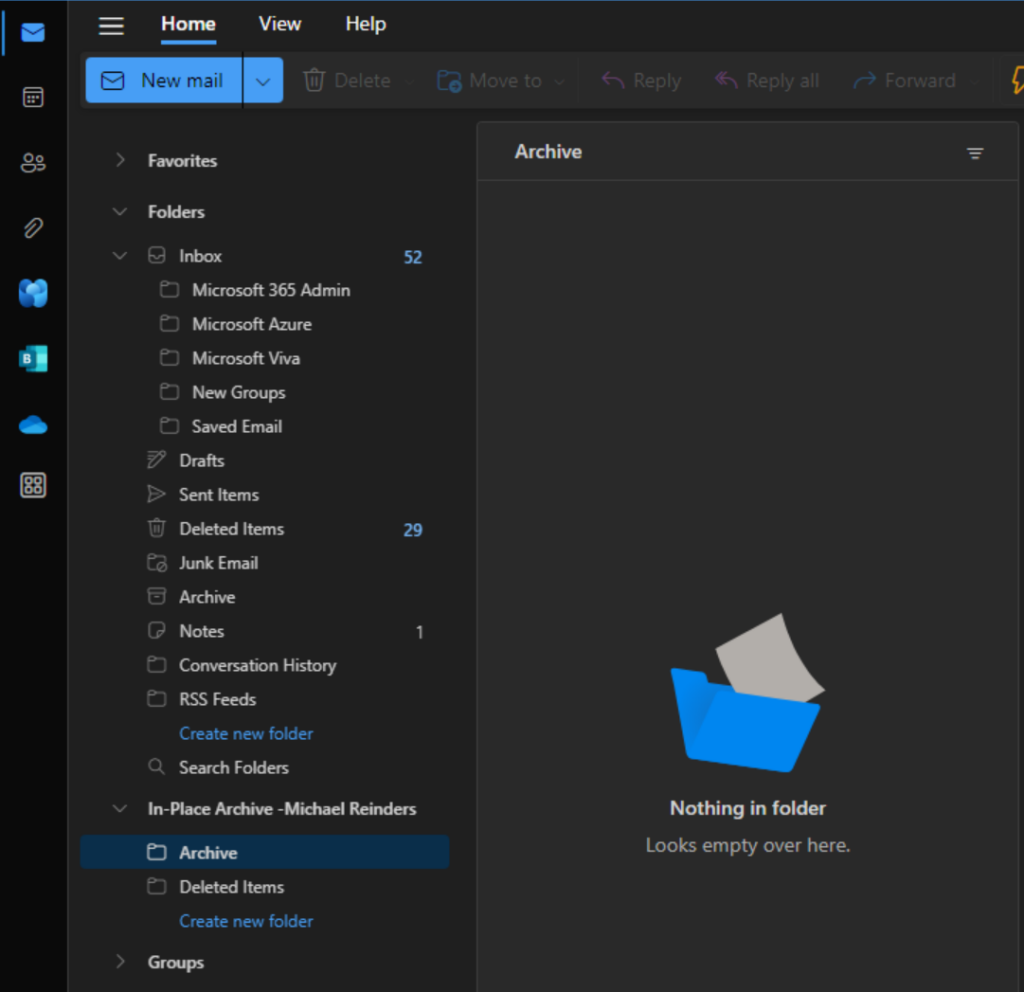
Again, as retention policies start to kick in, emails and calendar items will move to this new mailbox. And, as users desire, they can simply drag and drop emails at will to their archive mailbox to clean things up.
How to disable an archive mailbox in 365 for a specific user
I just showed you how to enable archive mailboxes in Office 365, and thankfully, the procedure for disabling an archive mailbox in Office 365 is straightforward:
- Click on the user and then click the ‘Others‘ tab on top.
- Click on the Manage mailbox archive link.
- Simply click the toggle again to disable the archive mailbox.
That’s all there is to it!
How to enable archive mailboxes in Office 365 with PowerShell
There are a good number of cmdlets available in the Exchange Online module in PowerShell to fully manage all your archive mailbox needs in Office 365. Let’s first enable an archive mailbox for Alex Wilber ([email protected]):
- First, connect to the cloud service by using the Connect-ExchangeOnline cmdlet.
Connect-ExchangeOnline

- Next, we’ll use the Enable-Mailbox cmdlet to enable the archive mailbox for this single user.
Enable-Mailbox -Archive -Identity [email protected]
Note: you can use the following command as an alternative.
Enable-Mailbox -Identity [email protected] -Archive

- Go back to the Exchange admin center, refresh the Mailboxes view, and see that Alex’s Archive status is set to ‘Active.’

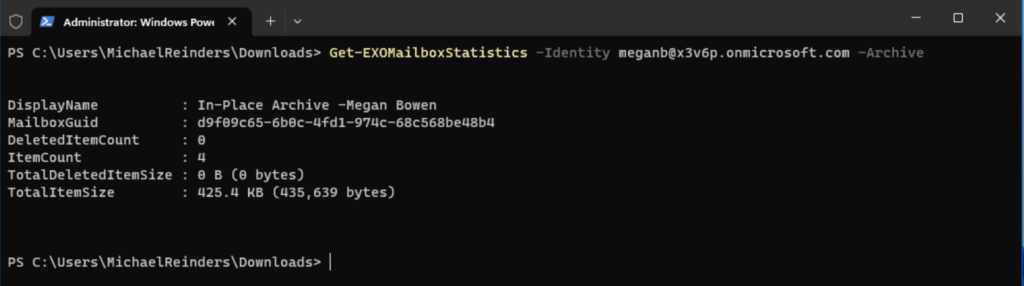
- Let’s view an archive mailbox’s basic statistics with the Get-EXOMailboxStatistics cmdlet. Here, adding the ‘-Archive’ flag at the end tells PowerShell to query the stats for the user’s archive mailbox in particular.
Get-EXOMailboxStatistics -Identity [email protected] -Archive
- To disable an Archive mailbox, you can run the Disable-Mailbox cmdlet.
Disable-Mailbox -identity [email protected]
Can you enable archive mailboxes for shared mailboxes in Office 365?
It is not possible to enable an archive mailbox directly for a shared mailbox in Office 365. Archive mailboxes are typically associated with user mailboxes rather than shared mailboxes.
Shared mailboxes in Office 365 have a default storage limit of 50 GB, and there is no separate archive mailbox for them. If you require additional storage for a shared mailbox, you can either increase the primary mailbox size or consider converting the shared mailbox to a user mailbox, which would allow you to enable an archive mailbox for it.
However, please note that Microsoft’s offerings and features are always changing.
Archive mailboxes in Office 365 give organizations more flexibility
When you enable archive mailbox Office 365, your organization gains a powerful solution for managing the ever-increasing volume of emails and preserving critical data. By separating older, less frequently accessed messages from the primary mailbox, archive mailboxes help improve mailbox performance and search capabilities.
Additionally, the feature ensures compliance with data retention policies, facilitating legal discovery processes and regulatory audits. With the flexibility to enable archive mailboxes in Office 365 for individual users or across an entire organization, businesses can streamline email management, enhance productivity, and meet their data retention requirements effectively.
Please leave me a comment or question below and thank you for reading!
FAQs
Can I enable archive mailboxes in Office 365 without a license?
No. To enable archive mailboxes in Office 365, you need an appropriate license like Exchange Online Plan 1, Exchange Online Plan 2, or Microsoft 365 Business Premium. Without the proper licensing, the archive feature won’t be available.
What happens to my archive mailbox in Office 365 if I exceed the storage limit?
When you enable archive mailboxes in Office 365 and reach the storage limit, the auto-expanding archive feature automatically adds storage space in increments, preventing any disruption to your archiving process.
Can I enable archive mailboxes in Office 365 for external users?
No. Archive mailboxes can only be enabled for internal users within your Office 365 tenant. External users or guests cannot have archive mailboxes assigned to them.
Is it possible to migrate PST files when I enable archive mailboxes in Office 365?
Yes. After you enable archive mailboxes in Office 365, you can import PST files directly into the archive mailbox using the PST Import service or third-party migration tools.
What happens to my archive data if I switch between different Office 365 plans?
When switching between Office 365 plans that support archive mailboxes, your archived data remains intact. However, if you downgrade to a plan that doesn’t support archiving, you’ll need to export your archived data before the switch.
Related Article:

Michael has been an IT Pro since 1998. He has worked predominantly in the Windows world including client and server operating systems, on-prem systems engineering (AD, DNS, etc.), and over the last ten years or so has embraced and immersed himself in...


