How to Securely Elevate Privileges in PowerShell Scripts
- Blog
- PowerShell
- Post
If you are using PowerShell scripts to automate tasks in your environment, sooner or later, there’s a good chance that you will need to deal with elevating privileges to access resources that require a different set of credentials than those being used to run the script.
For example, you might need to access a file share that only administrators of the fileserver can access. Or maybe you need to restart a Windows service in your script, but the script isn’t running with administrator privileges. I think it goes without saying that adding credentials to your scripts in plaintext is a bad idea. And encrypting scripts adds a whole layer of complexity that you probably don’t want to deal with.
The easiest way to manage credentials in PowerShell scripts is to store sensitive information in a vault. PowerShell secrets management is now available in the PowerShell Gallery and it lets you create secure storage vaults. You can safely retrieve the information from vaults to use in your PowerShell scripts. PowerShell secrets management can be used to create local vaults (SecretStore) in Windows and Linux. You can also use remote vaults, like Azure Key Vault.
Install PowerShell secrets management modules
There are two PowerShell modules for secrets management: SecretManagement and SecretStore. You can install the modules in PowerShell by running the following command:
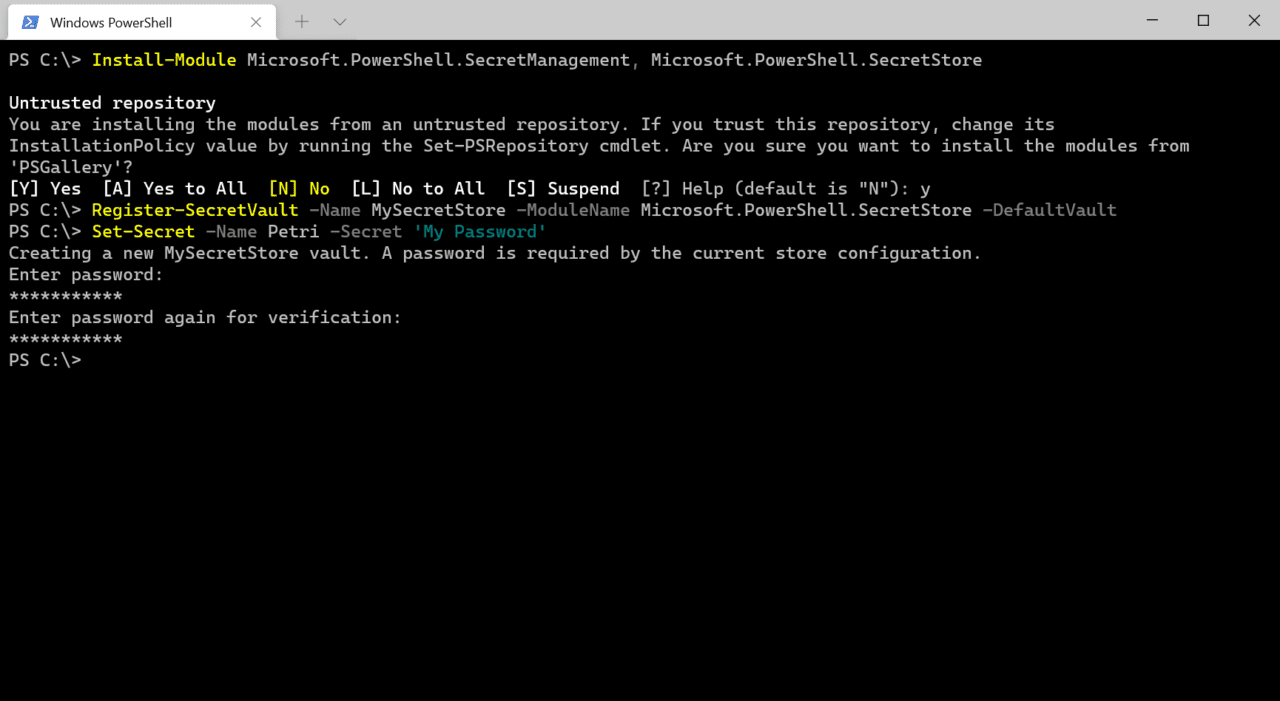
Install-Module Microsoft.PowerShell.SecretManagement, Microsoft.PowerShell.SecretStore
When prompted to install modules from an untrusted repository, type y in the PowerShell window and press ENTER.
Create a local vault using SecretStore
Now that the modules are installed, you can create a default local vault on your device using the Register-SecretVault cmdlet. In the example below, I’m going to call my vault ‘MySecretStore’, but you can replace this with any name you like.
Register-SecretVault -Name MySecretStore -ModuleName Microsoft.PowerShell.SecretStore -DefaultVault
Storing a secret in your vault
Now that we have a local vault, there a five data types that you can store in it:
- byte[]
- string
- SecureString
- PSCredential
- Hashtable
To create a secret in the vault, use the Set-Secret cmdlet. The first time you write a secret to a local vault, you’ll also be required to enter and confirm a password to protect the secrets. In the example below, the secret is called ‘Petri’ and its value is set to ‘My Password’. You can replace the values for both these parameters with whatever you like, providing that the value of the -Secret parameter matches one of the data types listed above.
Set-Secret -Name Petri -Secret 'My Password'
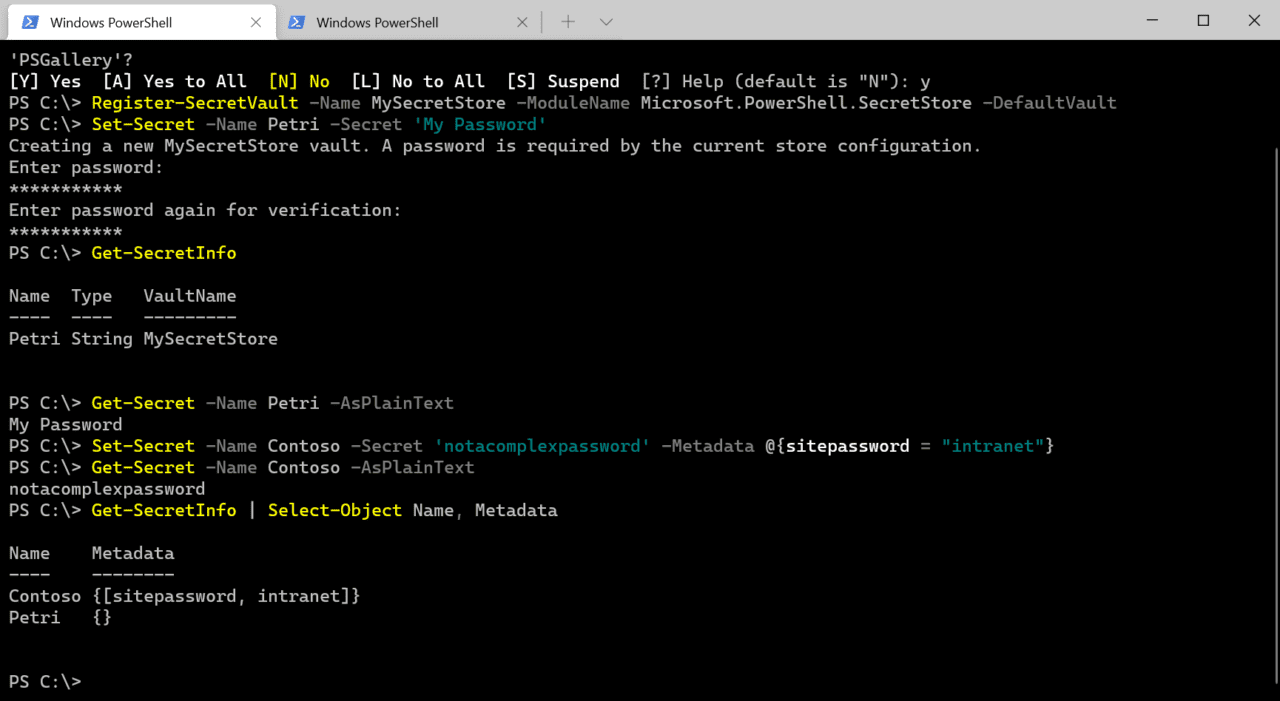
To see the secrets that you have stored in a vault, run Get-SecretInfo.
To see a secret in your vault, displayed in plaintext, use Get-Secret:
Get-Secret -Name Petri -AsPlainText
If you have more than one vault registered, you can create secrets in different vaults by specifying the vault name in the -Vault parameter:
Set-Secret -Name Petri -Secret 'My Password' -Vault MySecretStore
Setting secrets metadata
You can even add metadata to your secrets. For example, the command below adds addition data so we know what the secret can be used for. Metadata isn’t encrypted, so you shouldn’t use it to store sensitive information.
Set-Secret -Name Contoso -Secret 'notacomplexpassword' -Metadata @{sitepassword = "intranet"}
If you want to see your secrets’ metadata, use the Get-SecretInfo cmdlet:
Get-SecretInfo | Select-Object Name, Metadata
Creating a vault in Azure Key Vault
If you want other people to have access to your vault, the best solution is to use a secure cloud vault, like Azure Key Vault. Start by installing the Azure Key Vault module on your local device:
Install-Module Az.KeyVault
When prompted to install the module from an untrusted repository, type y in the PowerShell window and press ENTER. You’ll need to know the name of an Azure Key Vault in your Azure subscription or create a new vault. And you will need your Azure subscription’s ID number. Replace the values for $vaultName and $subId to correspond with your vault and subscription.
$vaultName = 'Petri'
$subId = 'XXXXX-XXX-XXX-XXX-XXXXXX'

Register-SecretVault -Module Az.KeyVault -Name Petri -VaultParameters  @{ AZKVaultName = $vaultName; subId = $subID}
Once you have registered the vault, you can access it using the cmdlets we used above, like Get-SecretInfo, Get-Secret, and Set-Secret etc.
And that is it! PowerShell secrets management provides an easy way to automate tasks without exposing sensitive credentials.
Related Article:


