- Blog
- PowerShell
- Post
Master the Power of File and Directory Management with Get-ChildItem in PowerShell

The Get-ChildItem PowerShell cmdlet is a powerful tool for listing files and folders in a variety of ways. In this blog post, we will explore the different features of the Get-ChildItem cmdlet and show you how to use it to get the most out of your PowerShell experience.
What is Get-ChildItem?
At a high level, the Get-ChildItem PowerShell returns a list of all the items in a specified location. The items can be files, folders, or other objects such as registry keys, or certificates.
When I discover and research these commands in PowerShell, I can see the overall vision and purpose for them. Everyone (in the Windows world) knows what ‘dir’ does. But, as the underlying technology behind the command itself remains stagnant (for the most part) over the years, PowerShell allows developers, engineers, and product managers to build new tools from the ground up. PowerShell can be used to offer the features IT Pros have been clamoring for. Windows Terminal is a wonderful example of what you can do when you start fresh!
Basic Get-ChildItem usage and examples
Let me go through and start with the most basic examples of what you can do with Get-ChildItem. After this, we will delve a little deeper into filtering your results, and then more advanced techniques to handle your environment’s unique needs.
How to use the Get-ChildItem for basic file retrieval
To begin, we start with our PowerShell prompt. Let’s start with the most basic possible – just run Get-ChildItem by itself. In the command’s default mode of output, it lists files in the current working directory.
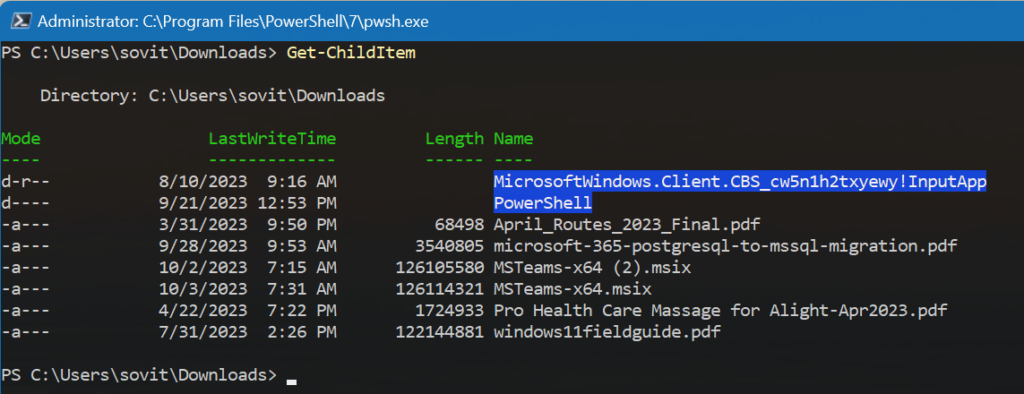
As you can see, it looks pretty darn close to what the dir command displays. It is identical. (And, the same as the ‘ls’ command from the Unix world…)
Using the -Path parameter
We can display the files in a specific folder regardless of where we are by using the -Path parameter, see below.
Get-ChildItem C:\Windows
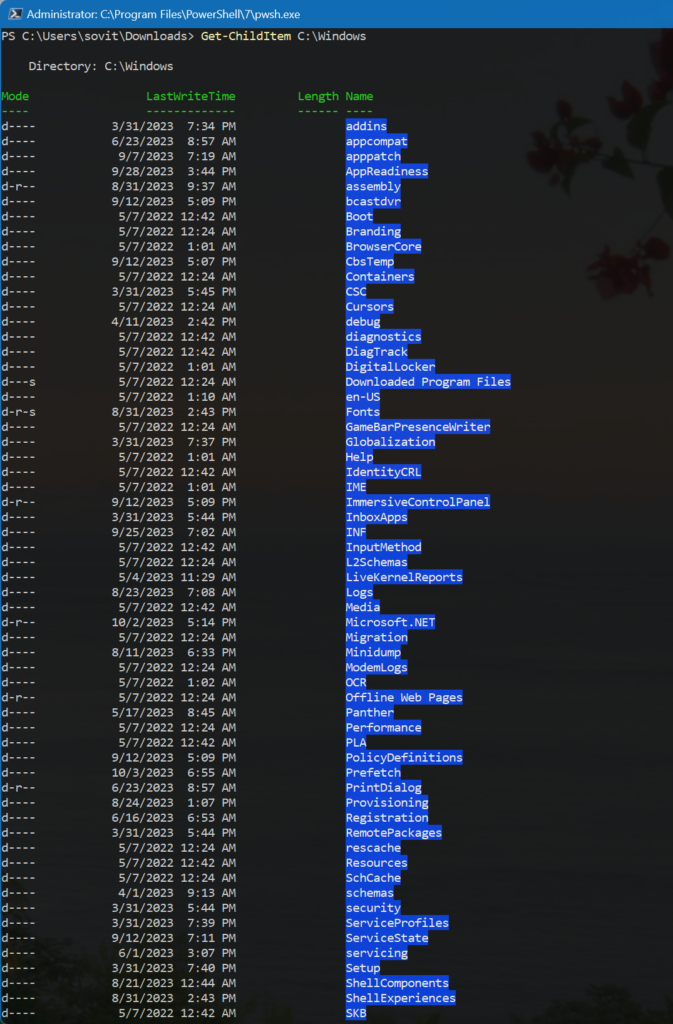
Nice and efficient! You can also use wildcards with the -Path parameter to retrieve items that match a specific pattern. Let me show you an example in the next section.
Retrieving child items with -Recurse
To retrieve all files with a .exe extension in the C:\Windows directory and its subdirectories, you can use the following command.
Get-ChildItem -Path C:\Windows\*.exe -Recurse
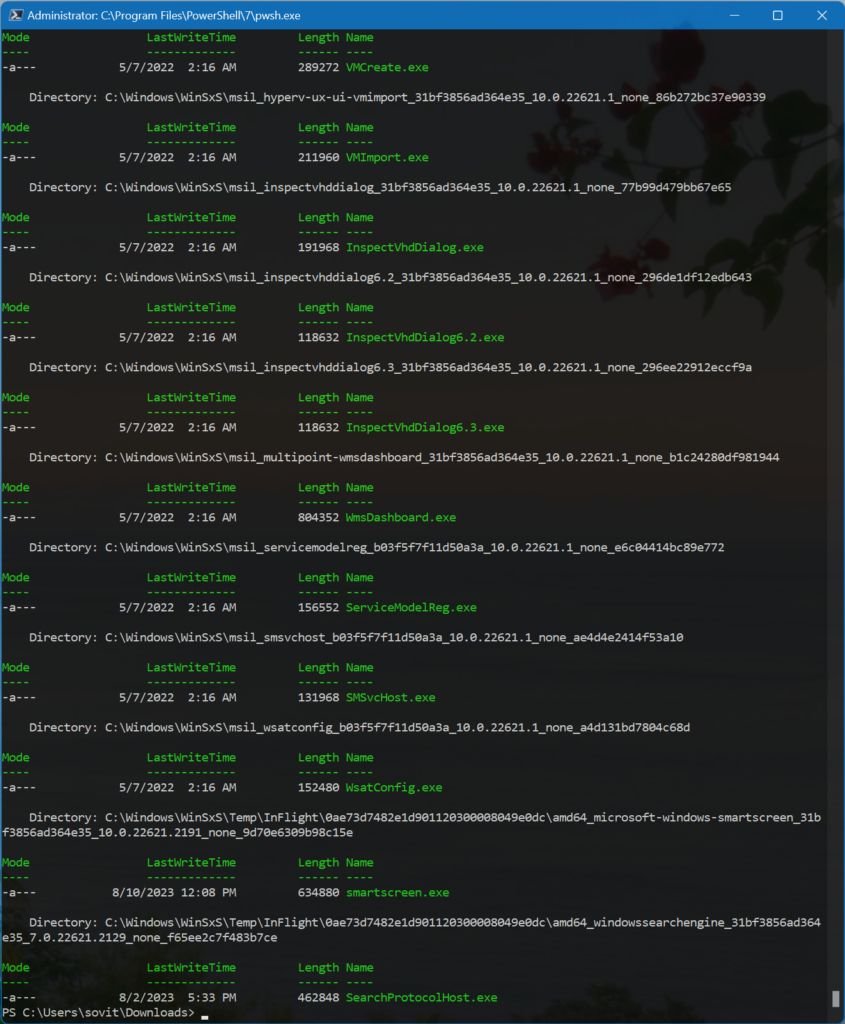
By the way, this took a while to run…you can just imagine how many executable (.exe) files there are in the C:\Windows folder and all its subfolders! (C:\Windows\WinSxS is the real culprit). However, this easily demonstrates the power of PowerShell.
Get registry keys using PowerShell
To retrieve registry keys using the Get-ChildItem cmdlet, you can use the -Path parameter to specify the registry key path. Let’s try HKEY_LOCAL_MACHINE\Software.
Get-ChildItem -Path HKLM:\Software
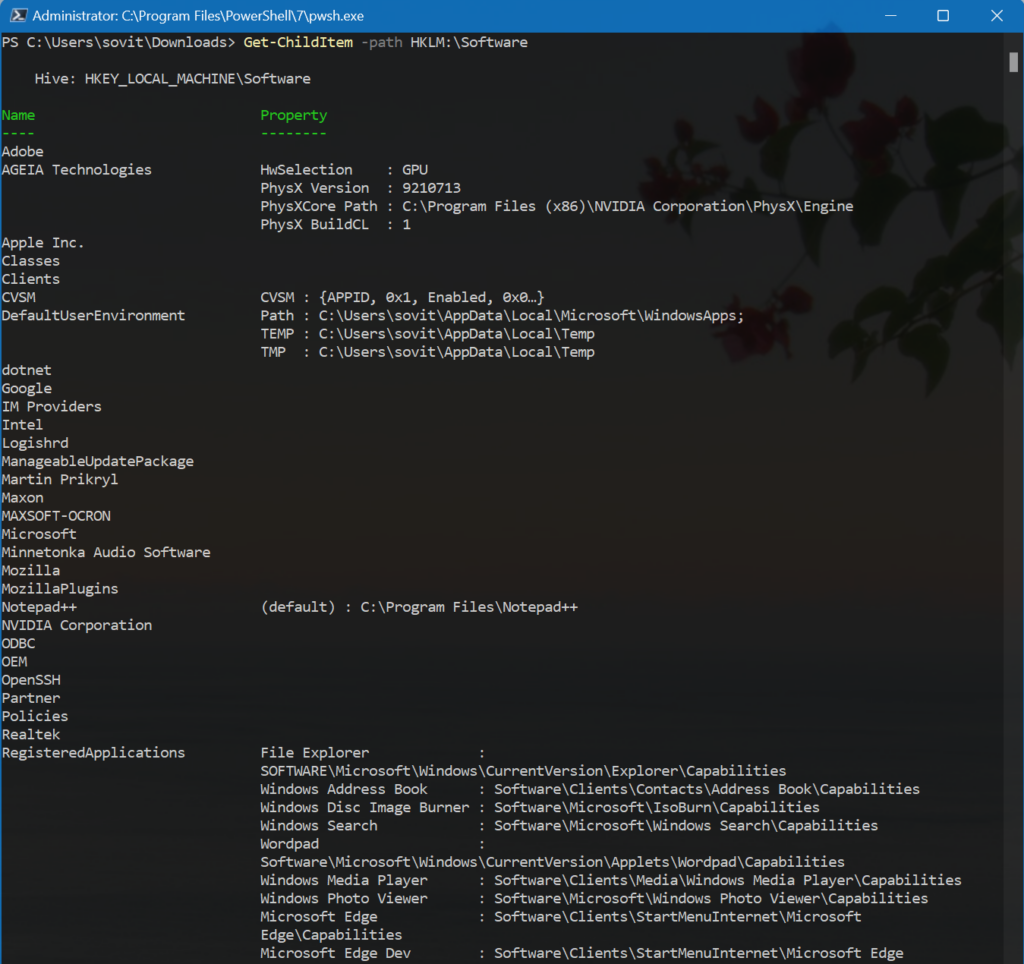
Pretty cool actually. I was unaware of this functionality.
Listing and filtering your results
There is a multitude of options for how we display and filter our results. I’ve touched on them up to this point, but let me go into greater detail here.
Filtering switches for file types
We can use the -Filter parameter to view files by filename extension. Here is an example of how to view all the .txt files in the C:\Windows directory and subdirectories.
Get-ChildItem -Path C:\Windows -Filter *.txt
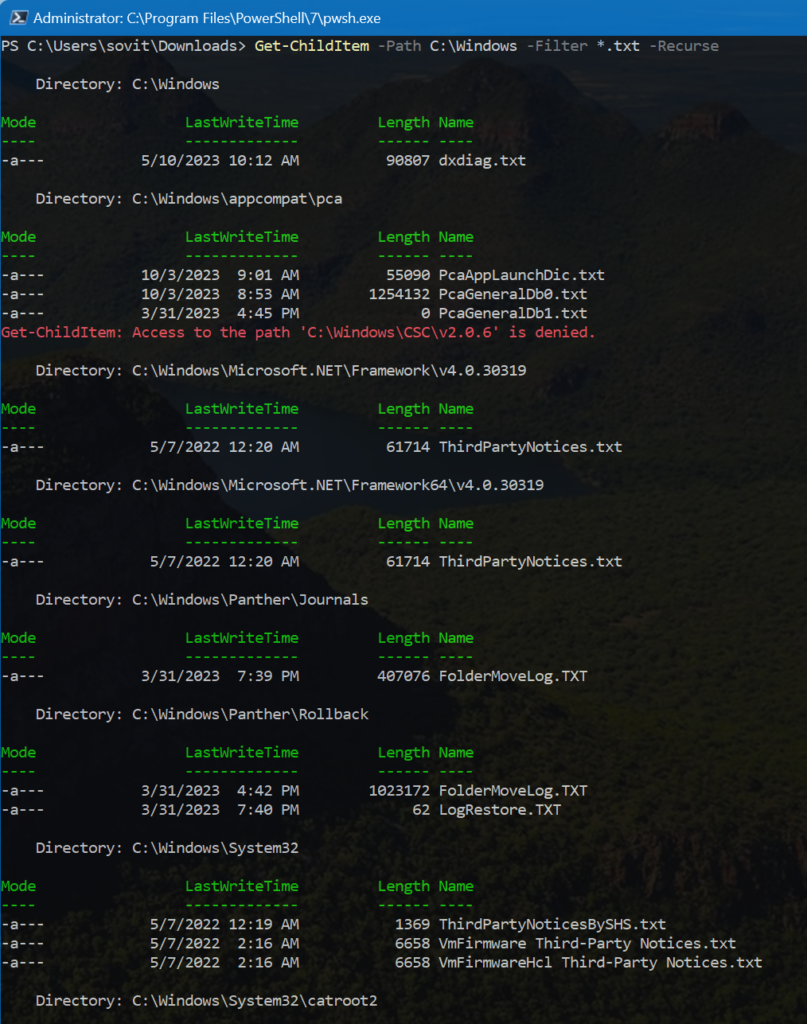
There were certainly more files to display. There are a good deal of .txt files in the Windows subfolders!
Exclude specific child files
You can use the -Exclude parameter with the Get-ChildItem cmdlet to exclude specific child files or directories from the results. Here is an example of how to use the Get-ChildItem cmdlet with the -Exclude parameter to exclude all files with the .pdf extension from the results.
Get-ChildItem -Path C:\Users\sovit\Downloads -Exclude *.pdf
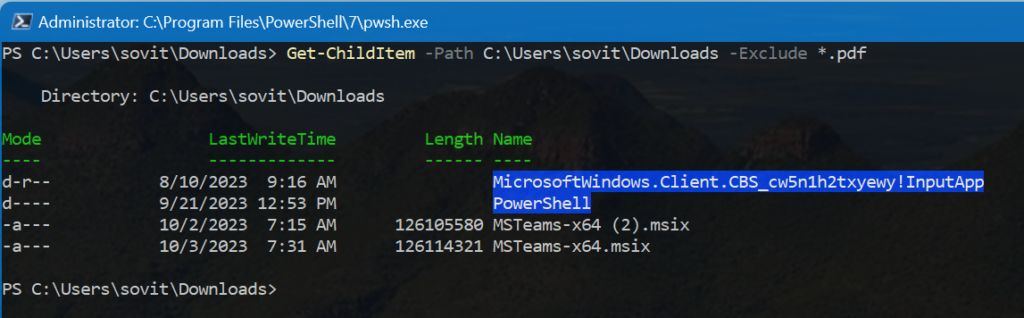
Nice and easy. This would also be potentially helpful for developers if they wanted to list all of their Visual Studio project files but exclude all ‘temp’ files. Cool!
Get files with specified attributes
We can also use the -Attributes parameter with the Get-ChildItem cmdlet to retrieve files and folders with specified attributes. Let me show you an example of how to use Get-ChildItem -Attributes to retrieve all hidden files in a directory.
Get-ChildItem -Path C:\Windows -Attributes Hidden
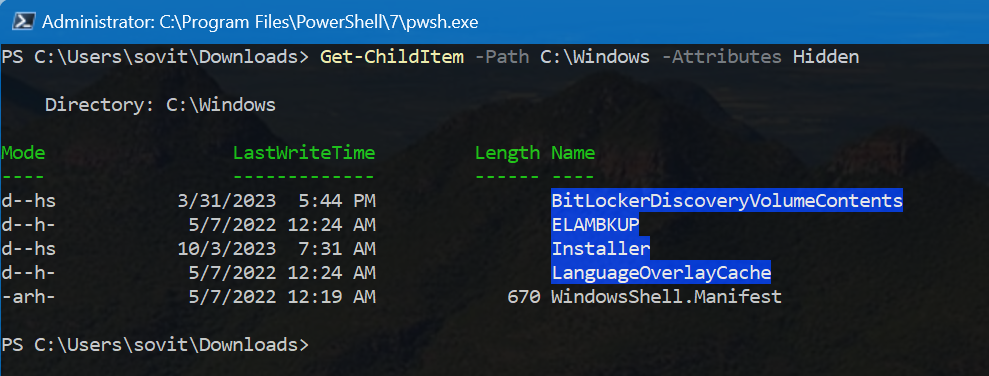
This is also a very nifty feature when you want to find all the hidden files in the Windows folder, or maybe Program Files. Nice!
Oh, and speaking of efficiency, many parameters in PowerShell have shorter abbreviations or aliases available. For example, you can use ‘-At’ instead of ‘-Attribute’. And, you can even use one for Get-ChildItem – ‘gci’.
Sorting with the -Sort parameter
Next, let’s hit on another helpful feature – sorting. You can sort files by other properties such as length, creation time, and last write time. For example, to sort files in a directory by length in descending order, you can use the following command.
Get-ChildItem -Path C:\Windows | Sort-Object Length -Descending
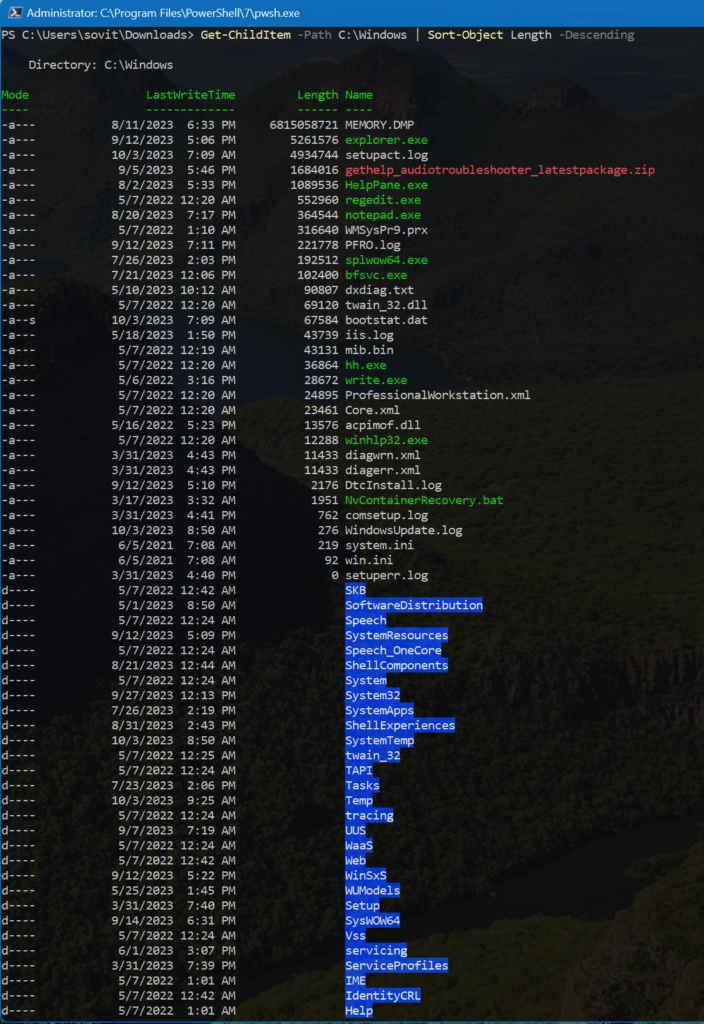
This is super helpful…yes did you notice that huge MEMORY.DMP file? 6.6 GB! Now I think I’ll delete that.
Searching the certificate store
There is one more example in the basic sense – accessing the certificate store in Windows. To find items in the certificate store using Get-ChildItem, you can use the following PowerShell command.
Get-ChildItem -Path Cert:\ -Recurse
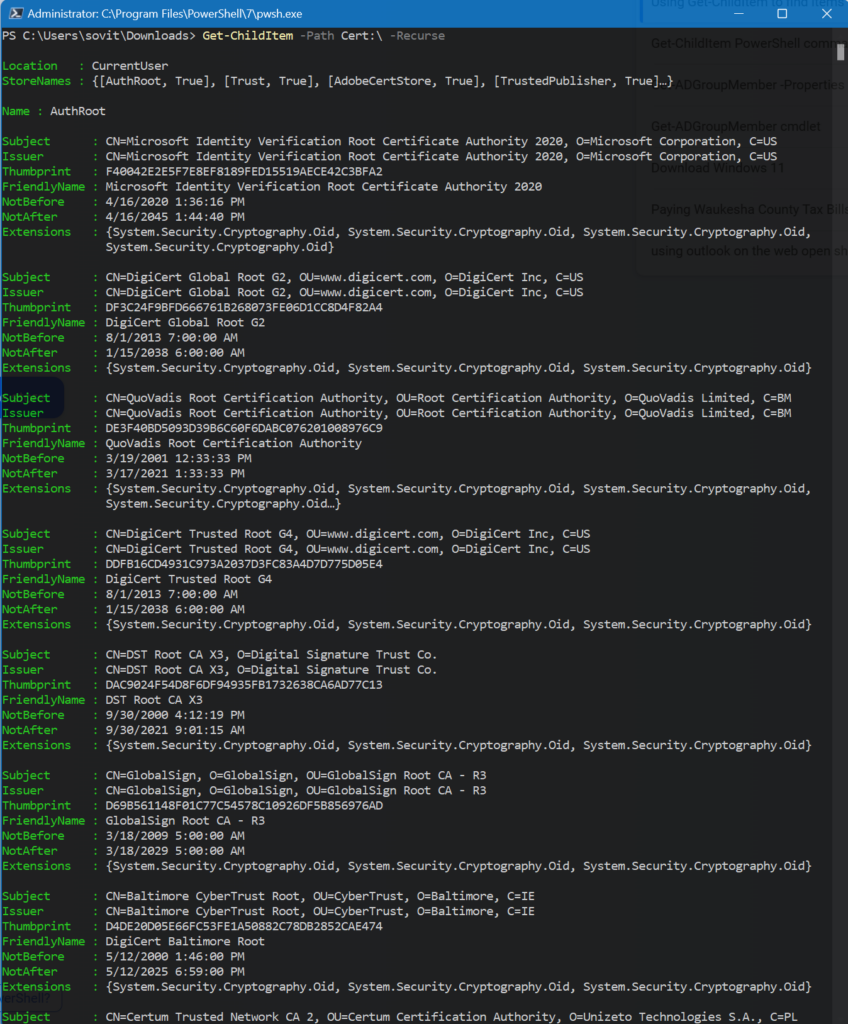
This is a dream…not having to open the GUI for this, just run this command!
Advanced filtering techniques and examples
There are a good number of more advanced techniques we can use with Get-ChildItem that will answer more of our ‘IT Pro feature requests’. Let’s go through some examples.
Using -Force to display hidden and system files
There are multiple ways to display hidden and/or system files. The -Force parameter is used to display them when not normally visible.
If we run another example here in the ever-popular C:\Windows\System32 folder, let’s check out what we get.
Get-ChildItem -Path C:\Windows\System32 -Force
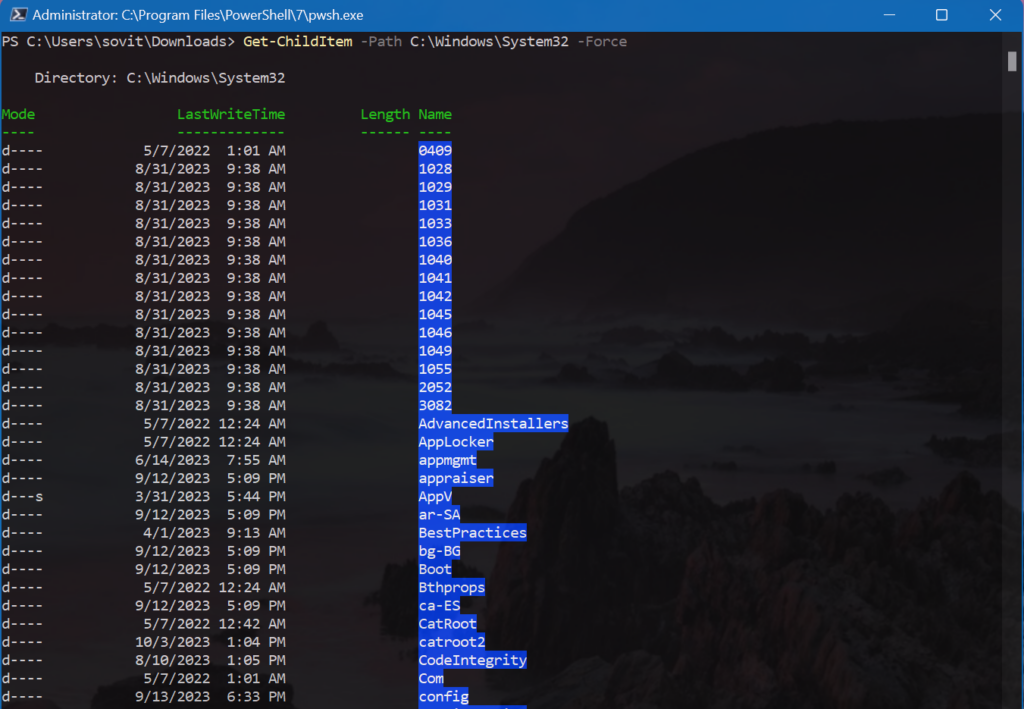
Lots and LOTS of files…all files are displayed with this simple and quick switch!
Searching for files using PowerShell Get-ChildItem
We’ve certainly covered this general topic with prior examples, but let me offer additional details and examples on how to find specific files, especially in a directory and subdirectories.
I need to find all my Hyper-V .vhdx files (Virtual Hard Disks) on my D: drive. I can use this quick and easy command.
Get-ChildItem -Path D:\ -Recurse -Filter *.vhdx
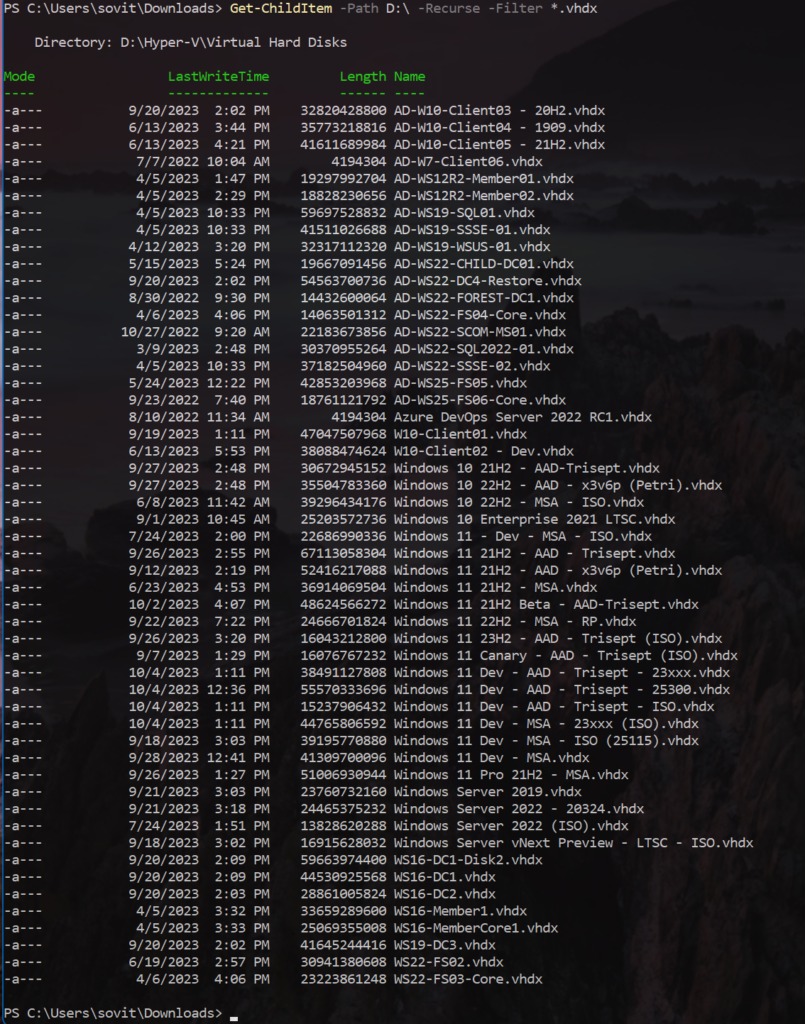
Nice and quick!
Find large files using PowerShell Get-ChildItem
For our final example, let’s filter by file size and restrict to files that are greater than 25GB in my Hyper-V file repository.
Get-ChildItem -Path D:\ -Filter *.* -Recurse | Where-Object { $_.Length -gt 25GB }
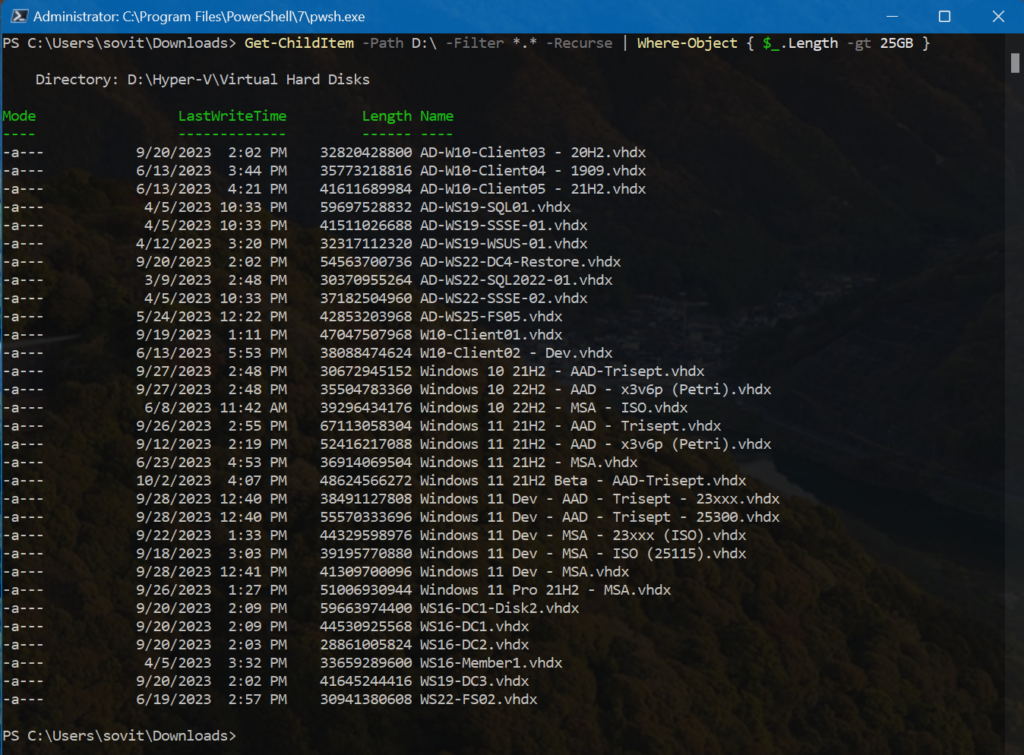
So slick! Just to show what we did here – we are checking the entirety of my D: drive. We’re then piping that content into the ‘Where-Object‘ cmdlet to find all files where the length is greater than (-gt) 25GB in size. This is what I love about PowerShell. One command, one line of text and you get all this filtered, precise output!
Optimizing performance in large directories
When working with large directories, the Get-ChildItem cmdlet can be slow due to the time it takes to retrieve all the items in the directory. As the number of subdirectory levels goes up, the depth of recursion increases – the time to iterate across an entire tree can increase a lot!
Let me show you some tips to optimize performance when using Get-ChildItem with large directories.
- Use the -Filter parameter to limit the number of items retrieved by the cmdlet. This can significantly reduce the time it takes to retrieve items from a large directory.
- Use the -Recurse parameter with caution, as it can cause the cmdlet to retrieve items from all child containers, which can be time-consuming.
- Use the Sort-Object cmdlet to sort files based on specific properties, such as name or length. You can do this and grab the output at the beginning then just Ctrl-C the command to abort it.
- Use the -OutBuffer parameter to increase the buffer size and improve performance when working with large directories.
Powerful file discovery with Get-ChildItem
The Get-ChildItem cmdlet is a powerful tool in PowerShell that allows you to retrieve items and child items from various locations, including file system directories, registry hives, and other locations in Windows. With the help of various parameters such as -Path, -Filter, -Recurse, -Force, and others, like the include parameter, you can filter and sort the results based on specific criteria.
Other criteria that can be filtered are things like lastwritetime, general fileattributes, read-only items, hidden items, and more! You can utilize wildcard characters with ease.
In this blog post, we covered the basics of using the Get-ChildItem cmdlet to retrieve items from a file system directory, filter results based on specific criteria, and sort files based on various properties such as name, length, and creation time. We also discussed some tips for optimizing performance when working with large directories.
By using the Get-ChildItem cmdlet effectively, you can save time and effort when working with files and folders in PowerShell. I hope this guide has been helpful in getting you started with using the Get-ChildItem cmdlet.
If you have any further questions or comments, please let me know!

Michael has been an IT Pro since 1998. He has worked predominantly in the Windows world including client and server operating systems, on-prem systems engineering (AD, DNS, etc.), and over the last ten years or so has embraced and immersed himself in...


