- Blog
- PowerShell
- Post
Navigating the File System with PowerShell: A Step-by-Step Guide to Changing Directories
Change directories efficiently and streamline your workflow using PowerShell cmdlets

This step-by-step guide will help you master changing directories in PowerShell and navigating your file system. You will learn how to use basic and advanced techniques to change directories efficiently and streamline your workflow using PowerShell cmdlets like Set-Location, aliases like cd, and path shortcuts.
Changing directory in PowerShell
Changing file directories is essential when working with the filesystem in Windows and other operating systems like Linux and macOS. There are several commands, syntax, and tricks to efficiently move around with the command-line using PowerShell. Let’s go through the most common commands and tasks you’ll need to perform when navigating your file structure on your device.
Changing to a child directory
If you want to change the directory path to one of the child directories underneath your present position, you can use the ‘cd’ command. First, let’s see where we are.
dir
The prompt shows that we are in the C:\Users\mreinders folder name. If we want to go to the Downloads folder, we can use the cd command, which is short for Change Directory and an alias for the Set-Location cmdlet:
cd DownloadsDone. We’ve moved down one child folder. Remember to enclose the path name in double quotes if any part of the path contains spaces (e.g. cd “Script Tests”).
Changing to a parent directory
What if we want to move ‘backward’, up the structure? It’s even simpler. We can use the periods to move up to the parent folder.
cd ..
This tells PowerShell to move up one. If I go back to the Downloads folder and type in this:
cd ..\..\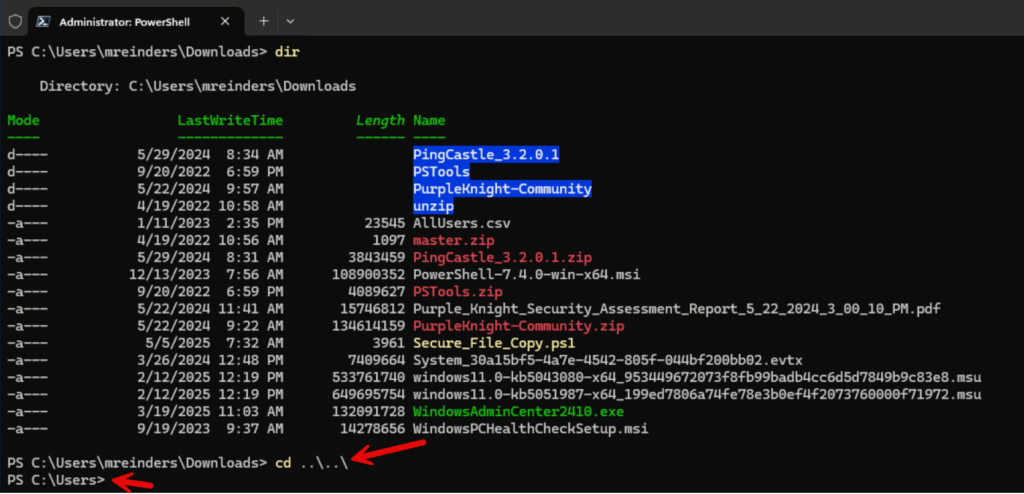
You’ll see that I went back TWO parent folders, to the Users folder.
Changing to the root of a drive
How do we quickly get to the root directory of a drive? Simple. Use this command:
cd \
We are in the root of the C: drive. Easy as pie.
How do I change the drive in PowerShell?
I have an additional drive on this VM with the E: drive letter and a mirrored F: drive. Let’s go to the F: drive. Just type this command in:
F:
This took us right to the root of the F: drive. As long as Windows has a drive letter mapped and the logged in user has permissions to access it, this will work. You can also use the Set-Location cmdlet to change drives:
Set-Location f:\Or one of the aliases for Set-Location, which is sl:
sl f:\What is my current location in PowerShell?
Most of the time, the shell you’re using will show the current directory in the prompt. Windows Terminal does this by default, but there may be times when you’re using a shell that does not. Let’s find out how to see what directory we’re in with PowerShell. The easiest is to simply use this:
$PWD.PathThis outputs the contents of the variable $PWD. Nice and easy to always have available.
Other commands to gain insight
However, some more robust PowerShell cmdlets can assist us with determining the current directory and even changing directories. Let’s explore those next.
Using Get-Location
Let’s start with Get-Location. This will output the current working directory.
Get-Location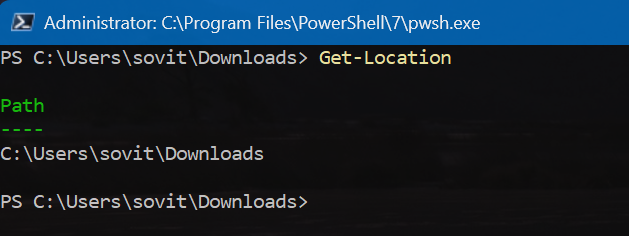
Nice and simple.
Using Set-Location
But, this post is about changing directories, right? We can use Set-Location cmdlet to move all around our device. And, a nice tip – ‘cd’, ‘sl’, and ‘chdir’ are aliases for the Set-Location command. Let’s start with changing to a different directory.
Set-Location -Path "C:\Users\mreinders\downloads"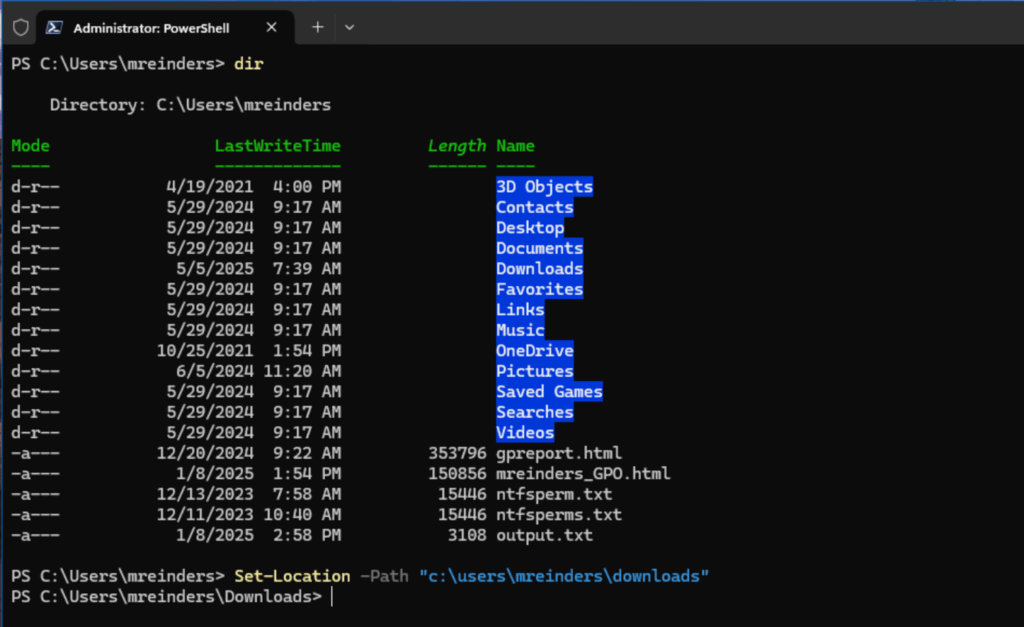
This will take us directly to the path in the -Path parameter.
We can also jump directly to a specific directory on another drive using Set-Location.
Set-Location -Path "F:\Scratch"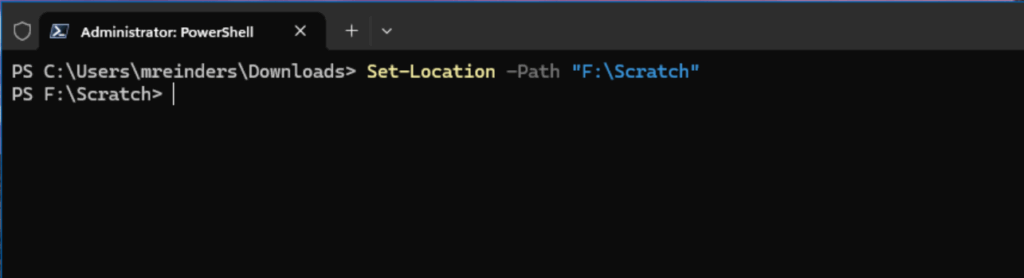
Tips, Best Practices & Other Tricks
Let me complete this article with a smattering of other nice tips on changing directories with PowerShell and other solid tricks.
Did you know you can use PowerShell to view and edit the Registry? You need to be careful, of course, but here is how you can change what tree you’re referencing.
Set-Location -Path "HKLM:\"
You could perform some nifty work with the right PowerShell scripts here to set some common keys, if necessary.
I want to explain the concept of absolute paths and relative paths.
Absolute Path: This is the full path to a file or directory from the root directory – no ambiguity. It always starts from the drive letter (e.g., C:\Scripting\\Documents) or the root (/ in Linux-based systems). No matter where you are in the directory structure, an absolute path will always point to the same location.
Relative Path: This is a path that is defined in relation to the current working directory. In contrast to starting from the root of the drive, this uses the current location as a reference point. So, if my current working directory is C:\Scripting\Documents\, a relative path to the Documents folder would simply be Documents\.
Another very useful concept is using the Push-Location and Pop-Location cmdlets. These cmdlets allow you to push and pop locations in a last in, first out order from what’s called a named stack. Let me start.
Push-Location -Path 'c:\Scripts' -StackName "Scripting"
This will push the listed location into a stack called Scripting. Next, I’ll add another location directory to the stack:
Push-Location -Path 'F:\More_Files' -StackName "Scripting"We then use Set-Location to set this StackName as the default, and Get-Location to list the paths.
Set-Location -StackName "Scripting"
Get-Location -Stack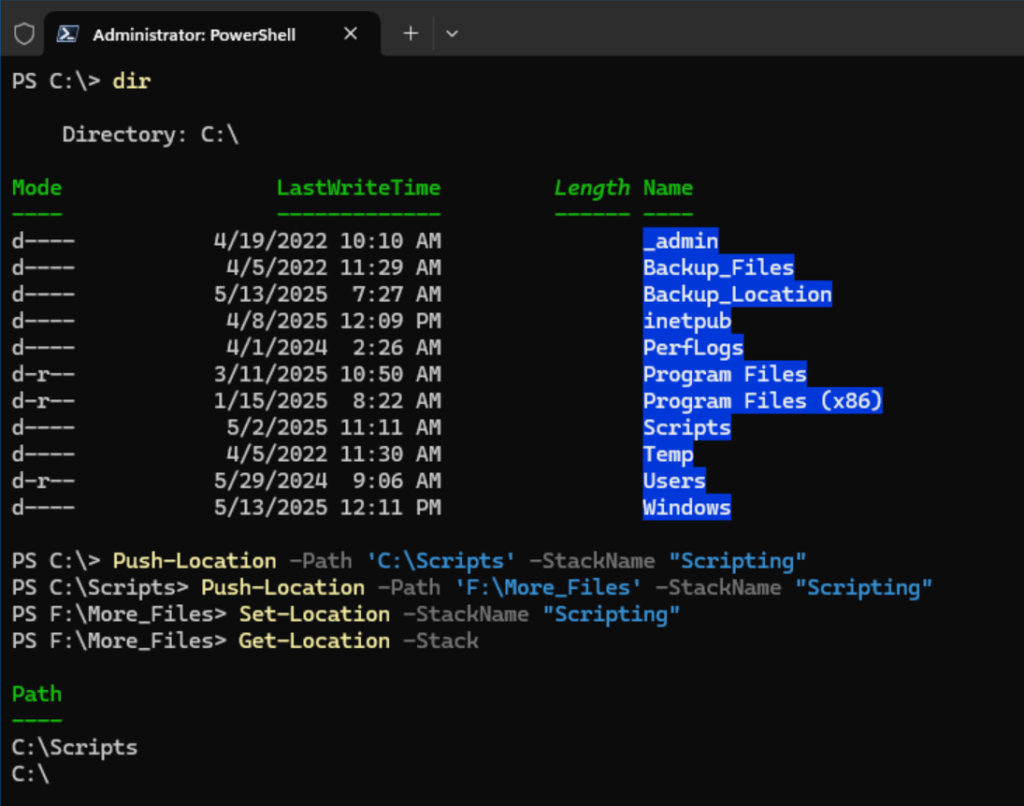
This shows we have two locations stacked, where the last location is pushed to the top.
And if we then run Pop-Location, we go back to the location at the top of the stack (C:\Scripts).
Pop-Location
Pretty cool tech here.
Are there alternative file managers for Windows Terminal? Yazi, LF, and ZTree
Although PowerShell and the Windows Terminal shell have robust capabilities for handling bulk file operations, sometimes it helps to get a visual perspective of the file system. Are you sure that the PowerShell command/script you’re about to execute will do exactly what you want?
This is where apps like Yazi and LF come in. Yazi is a very fast terminal file manager written in Rust, designed for efficiency and customization. It uses asynchronous I/O, which can handle multiple tasks simultaneously without slowing down. IT pros can benefit from Yazi’s powerful async task scheduling, built-in code highlighting, multi-tab support, and integration with other popular tools. It’s ideal for managing files quickly and efficiently in a terminal environment.
I used winget to download and install Yazi very quickly using this command:
winget install yaziI then typed yazi to launch it. You basically use the arrow keys to go up and down in the current directory of files, and left and right to go up one folder (parent) or down (child).
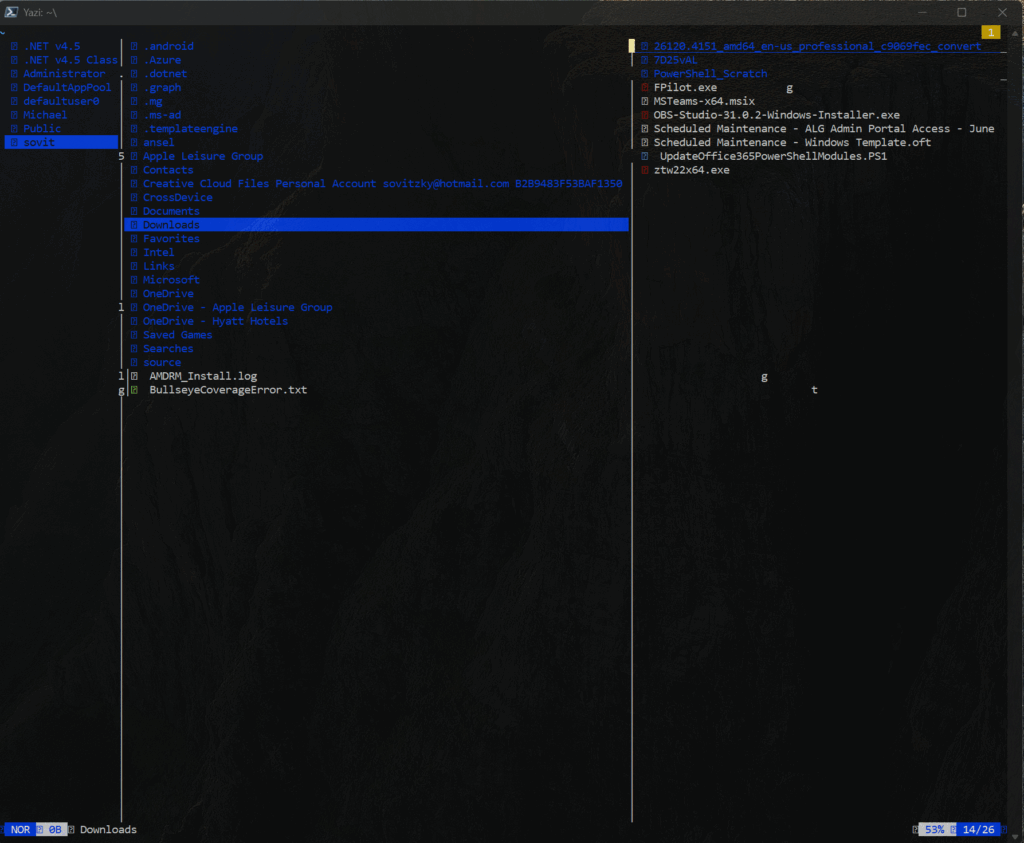
It takes some getting used to, but the speed at which you can accomplish common tasks is impressive.
LF focuses on simplicity and speed. It provides Vim-like keybindings, preview capabilities, and minimal dependencies, making it a great choice for IT pros who prefer a streamlined workflow.
However, I’ll age myself wonderfully here, but I remember using ‘XTree’ – a DOS-based file directory manager way back in the 80s. The last developed version along this line was called XTreeGold (for Windows). But it appears Zedtek developed ZTree, modeled closely on XTreeGold. You can download it here.

Pretty nostalgic, I must say.
Thank you for reading my post on changing directories with PowerShell. Please leave a comment or question below.
Frequently Asked Questions
How to change directory in PowerShell?
To change directories in PowerShell, use the Set-Location cmdlet or its alias cd or chdir. Here’s a basic example:
Set-Location "C:\Users"
or simply:
cd "C:\Users"
PowerShell accepts both relative and absolute paths. If your path contains spaces, wrap it in quotes.
How to change directory in PowerShell from C: to D:?
If you’re currently on drive C: and want to switch to drive D:, just type:
D:
This switches the current session to the D: drive. If you want to change a directory on a different drive without switching first, you can use:
Set-Location "D:\FolderName"
How to change directory to Program Files in PowerShell?
Because Program Files contains a space, you need to wrap it in quotes:
cd "C:\Program Files"
For 64-bit systems that have both Program Files and Program Files (x86):
cd "C:\Program Files (x86)"
You can also use environment variables:
cd "$env:ProgramFiles"
How to change directory to Desktop in PowerShell?
To go to your current user’s Desktop, use:
cd "$env:USERPROFILE\Desktop"
Alternatively, you can navigate to it using an absolute path:
cd "C:\Users\YourUsername\Desktop"
Replace YourUsername with your actual Windows username.
How to change directory in PowerShell using relative paths?
You can move around using relative references:
cd ..– Go up one directory.cd .– Stay in the current directory.cd .\SubfolderName– Move into a subfolder of the current directory.
Relative paths are especially useful in scripts or when working in deep folder structures.

Michael has been an IT Pro since 1998. He has worked predominantly in the Windows world including client and server operating systems, on-prem systems engineering (AD, DNS, etc.), and over the last ten years or so has embraced and immersed himself in...


