How to Install Windows 11 on a Mac with Parallels Desktop

Windows 11 is the first version of Windows that Mac users can’t install natively on Mac. That’s because Intel-based Macs don’t need the minimum requirements for the new OS, while Apple Silicon Macs have dropped support for Apple’s Boot Camp multi-boot utility. In this article, I’ll explain how to install Windows 11 on Mac using Parallels Desktop 18 for Mac, which is now an officially-supported scenario.
Parallels Desktop for Mac is the most popular virtualization solution for virtualizing Windows and Linux on a Mac. Parallels Desktop for Mac added support for Windows 11 back in 2021, but Microsoft didn’t recognize it as a supported scenario for running the latest version of Windows until February 2023.
How to install Windows 11 on a Mac with Parallels Desktop (article snippet)
Here’s how to install Windows 11 on a Mac with Parallels Desktop in a couple of easy steps:
- Download Parallels Desktop for Mac from the company’s website
- Install Parallels Desktop on your Mac
- Let the Installation Assistant in Parallels Desktop install Windows 11 in a virtual machine
- Once Windows 11 is installed, create your free Parallels Desktop account.
- You’re now ready to use Windows 11 virtual machine on your Mac!
Parallels Desktop offers a 14-free trial, but after that, you’ll need to pay for a license. If you want to use Windows 11 without any restrictions, you’ll also need an activation key.
Can you install Windows 11 natively on Intel or Apple Silicon Macs?
Unfortunately, it’s not possible to install Windows 11 on a Mac using Apple’s Boot Camp multi-boot utility. The M1 and M2-based Macs released since the fall of 2020 have dropped support for Boot Camp, and it’s not clear yet if Apple will ever bring it back to Apple Silicon Macs.
As for Intel-based Macs, these models can only use Boot Camp to install Windows 10, but upgrading it to Windows 11 isn’t supported. That’s because the latest Intel-based Macs don’t meet the minimum hardware requirements to install Windows 11.
Why Windows 11 can’t run natively on Macs?
For Apple Silicon Macs, the absence of the Boot Camp multi-boot utility means that it’s not possible to install any other OS than macOS on these devices. For Intel-based Macs, however, Windows 11 can’t be installed natively via Boot Camp because these Macs lack a TPM 2.0 security chip.
Even though all Intel-based Macs that have been released since 2016 actually come with the TPM 2.0 security chip that Windows 11 requires, Apple has actually never supported the technology on these Macs. While some hacks exist to install Windows 11 on Intel-based Macs by creating a custom ISO that bypasses the TPM 2.0 requirement, this is out of the scope of this article and not something I recommend you should do.
The supported scenarios for running Windows 11 on Macs
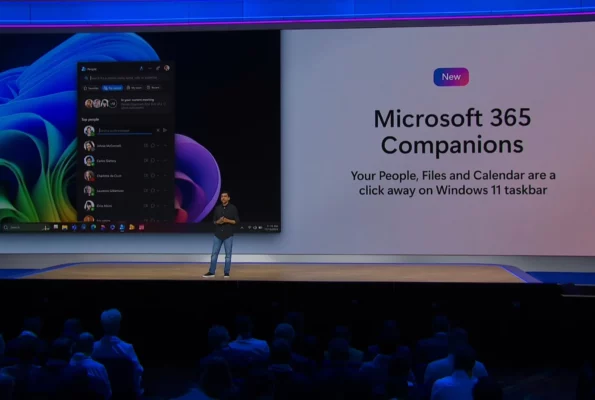
A little more than a year after the release of Windows 11, Microsoft has now clarified that there are two options for Mac users to run Windows 11: Windows 365 Cloud PCs and Parallels Desktop for Mac version 18.
Running Windows 11 on Macs with Windows 365
Windows 365 is Microsoft’s software-as-a-service solution for running Windows 11 on a cloud PC on a per-user, per-month basis. Microsoft offers different pricing options for Windows 365, starting at $31 per user per month for a Cloud PC with 2 virtual CPUs, 4GB of RAM, and 128GB of storage.
For Mac users, running Windows 11 via a Windows 365 Cloud PC offers the convenience of accessing a personalized Windows 11 desktop via a web browser. For developers, Windows 365 also supports virtualization-based workloads, something that Parallels Desktop for Mac is missing. I’ll have more details on that later.
You can learn more about how to set up Windows 365 in our dedicated article on Petri.
Running Windows 11 with Parallels Desktop for Mac
Parallels Desktop 18 for Mac, the latest version of the virtualization app is the other supported way to run Windows 11 on a Mac. Parallels Desktop added support for Windows 11 back in 2021, with the version 17 of the app introducing a virtual TPM 2.0 chip to ensure hardware compatibility with the latest version of Windows.
Parallels Desktop 18 for Mac, which was released last year, supports running Windows 11 in a virtual machine on both Intel-based and Apple Silicon Macs. On Macs with M1 and M2 chips, however, it’s the ARM version of Windows 11 that will be installed in a virtual environment.
Unfortunately, running Windows 11 on ARM via Parallels Desktop for Mac comes with some limitations. Features such as DirectX 12 and nested virtualization aren’t supported, and I’ll have more details on that below.
Parallels Desktop for Mac 18 has a 14-day free trial. After that, you can either purchase a Parallels Desktop Standard license or subscribe to Parallels Desktop Pro or Parallels Desktop Business Edition:
- Parallels Desktop Standard Edition ($99.99) targets students and home users, and it’s limited to 8GB of vRAM and 4 vCPUs.
- Parallels Desktop Pro Edition ($119.99/year) supports up to 128GB of vRAM, up to 32 vCPUs, and it’s recommended for installing Windows 11 Pro or Enterprise.
- Parallels Desktop Business Edition ($149.99/year) offers everything included in the Pro Edition plus centralized administration and management, unified volume license key for mass deployments, and other features for IT departments.
Installing Parallels Desktop on Intel-based and Apple Silicon Macs
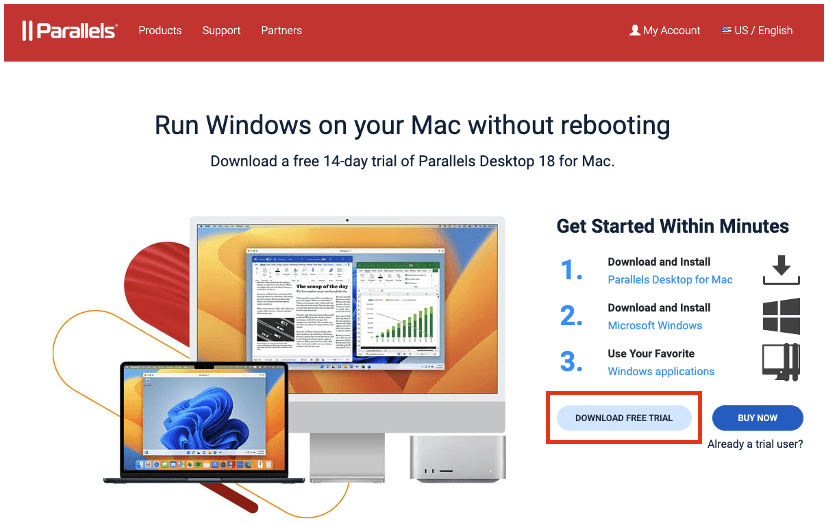
Let’s install Parallel Desktop 18 for Mac, which comes with a 14-day free trial. Visit the Parallels Desktop for Mac product page on the company’s website and click on Try now. On the next page, click on Download Free trial.
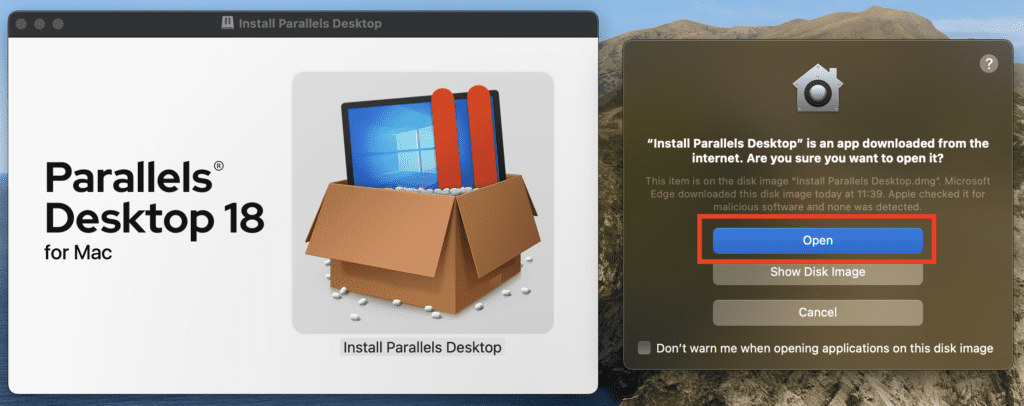
Once the installer has been downloaded, open it and double-click on Install Parallels Desktop. You may see a pop-up window asking you if you really want to install this app downloaded from the Internet. Click Open.
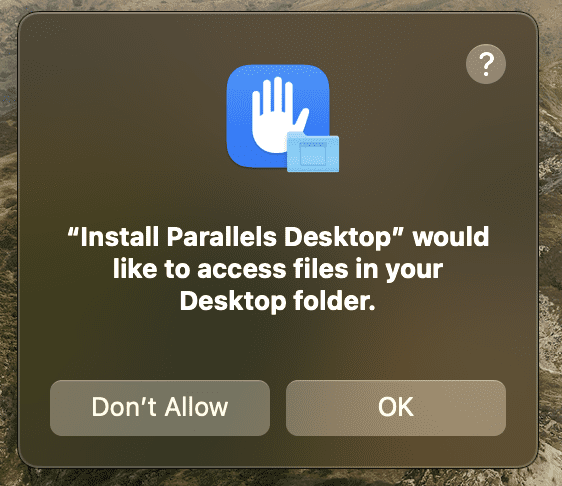
During the installation process, the installer will ask for access to files in your Desktop folder. Click Ok on the pop-up window.
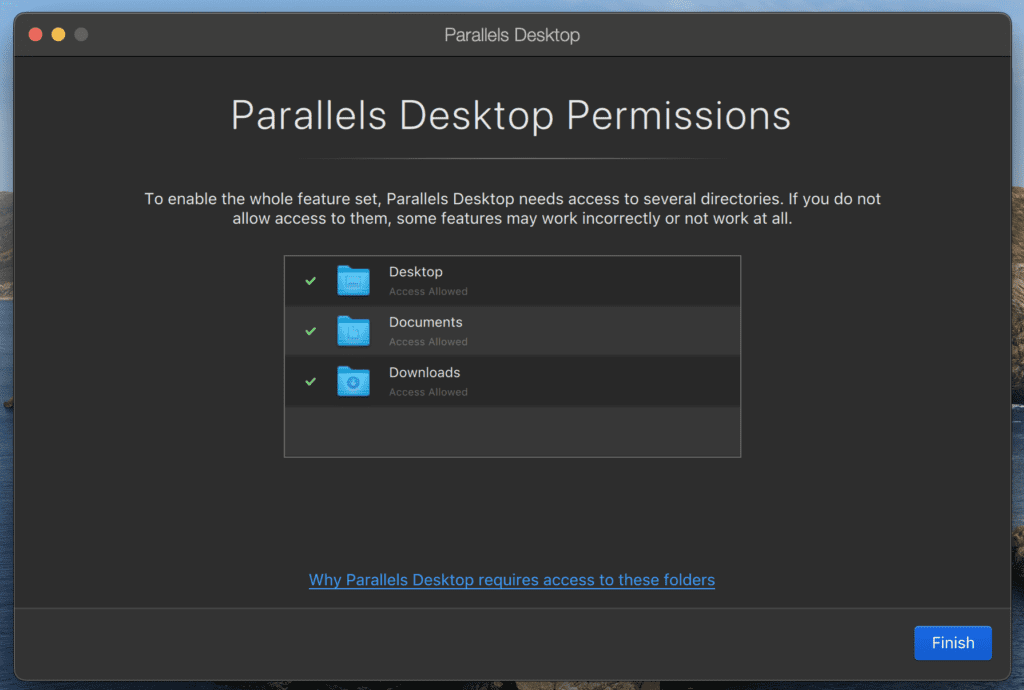
The installation of Parallels Desktop for Mac 18 will begin, and it will take a couple of minutes. Once it’s installed, the app will ask you to enable access to several directories: Click Ok to allow the app to access files in your Desktop folder (again), your Documents folder, and your Downloads folder. Click on Finish when you’re done giving the app all these permissions.
How to download and install Windows 11 with Parallels Desktop for Mac
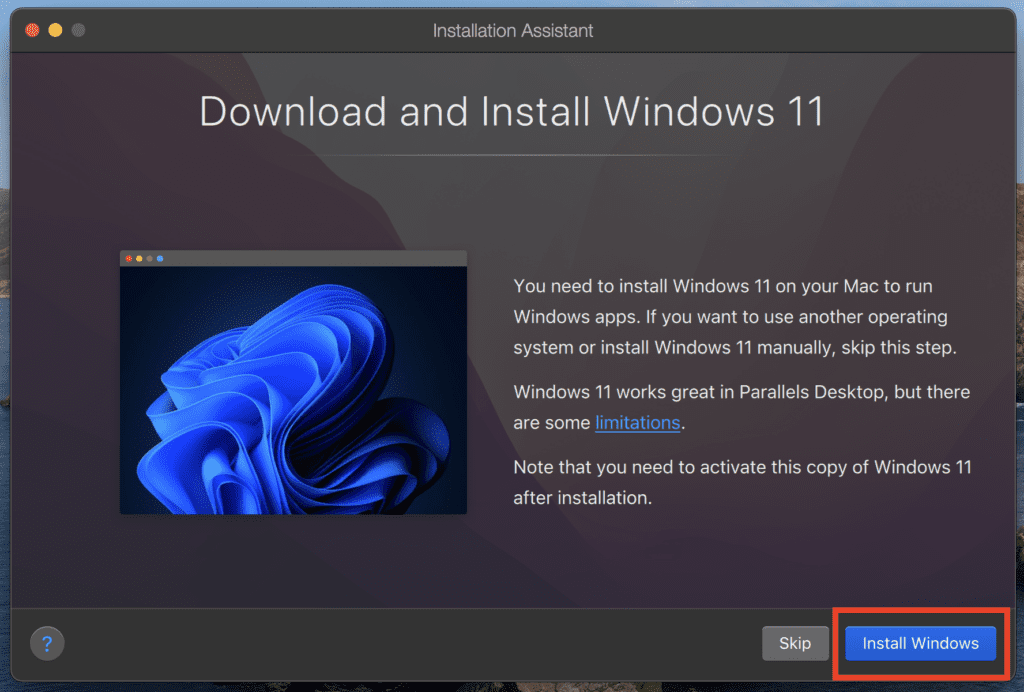
Now, Parallels Desktop will ask you to download and install Windows 11 on your Mac. You’ll see a message informing you that you’ll need to “activate this copy of Windows 11 after installation”, but you don’t need to worry about that right now.
- Click on Install Windows to begin the installation process.
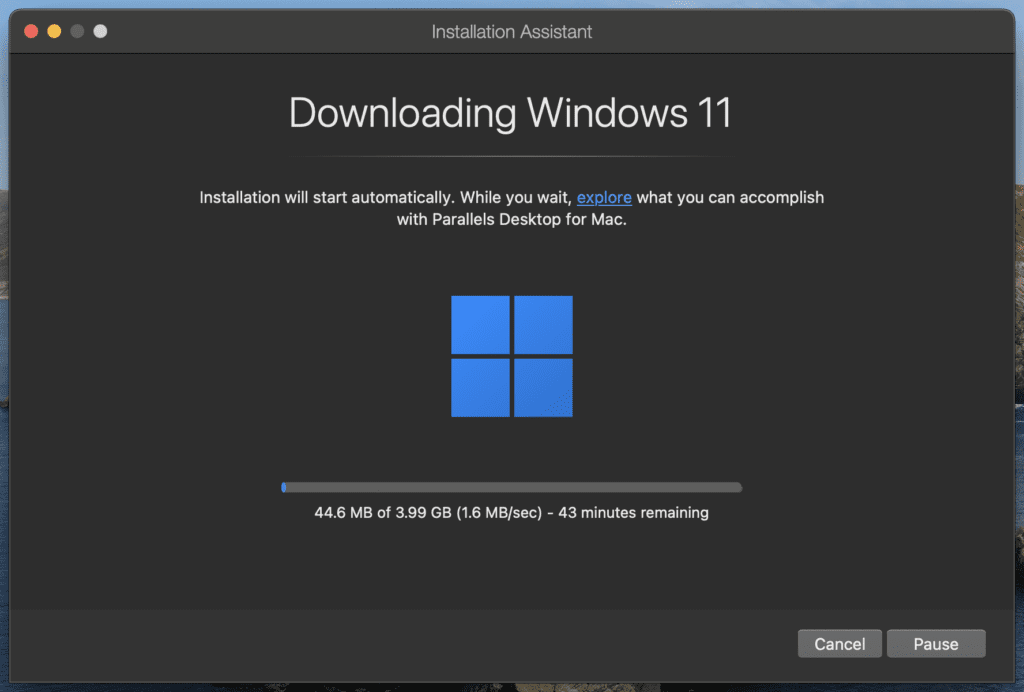
- The app will then start downloading the Windows 11 on ARM ISO. It should take less than an hour depending on the speed of your Internet connection.
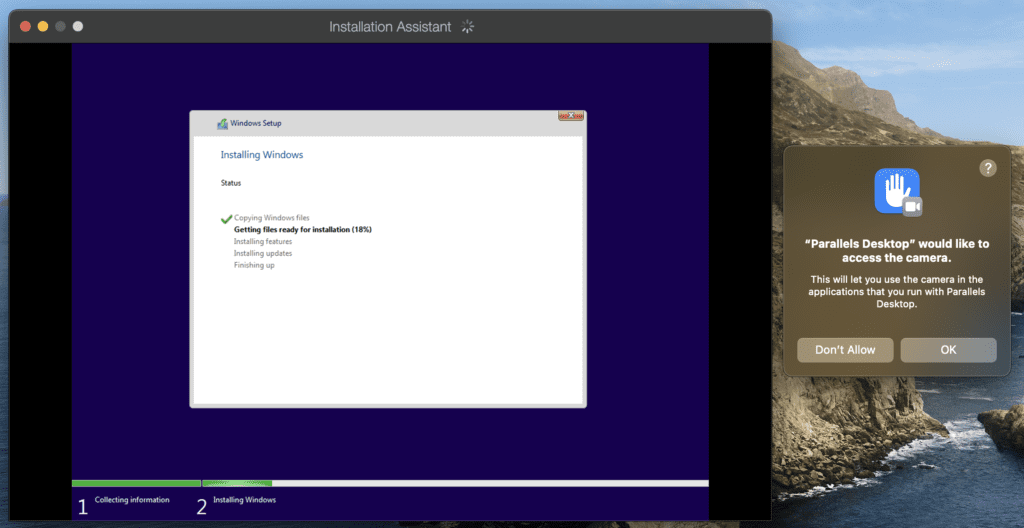
- Once the ISO file has been downloaded, the installation of Windows 11 in a virtual machine will begin. Parallels Desktop will also ask you to access your camera and microphone during that step, but this is optional. It will take some time for the installation of Windows 11 to complete, so just be patient during the out of box experience
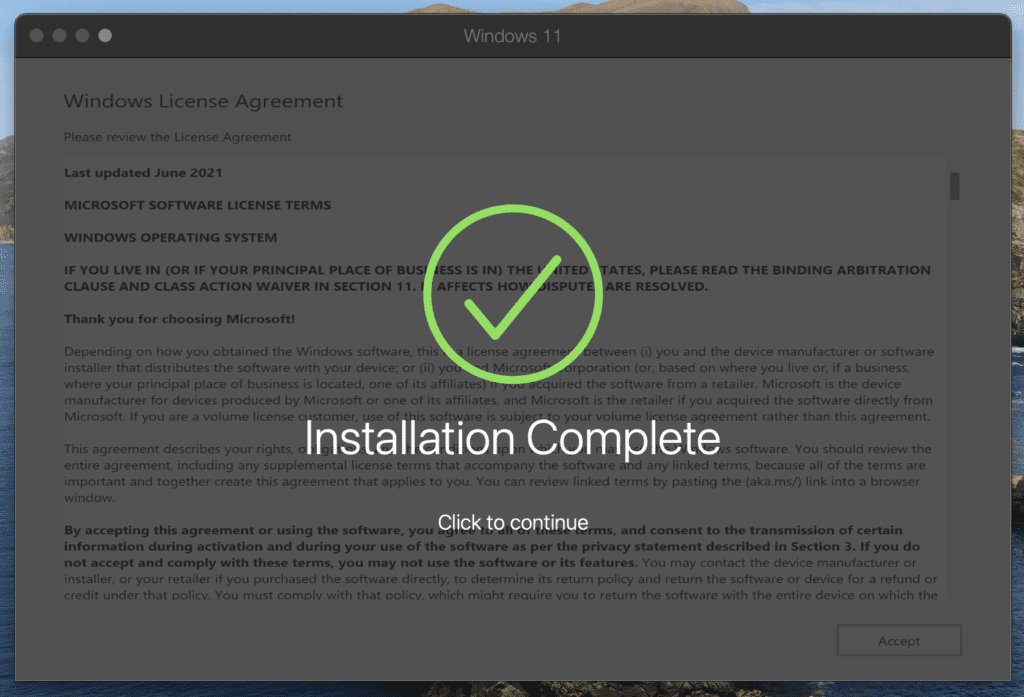
- The installation of Windows 11 is now finished. The virtual machine is currently running in windowed mode on my M1 MacBook Air, and I’m now asked to accept the Windows License agreement.
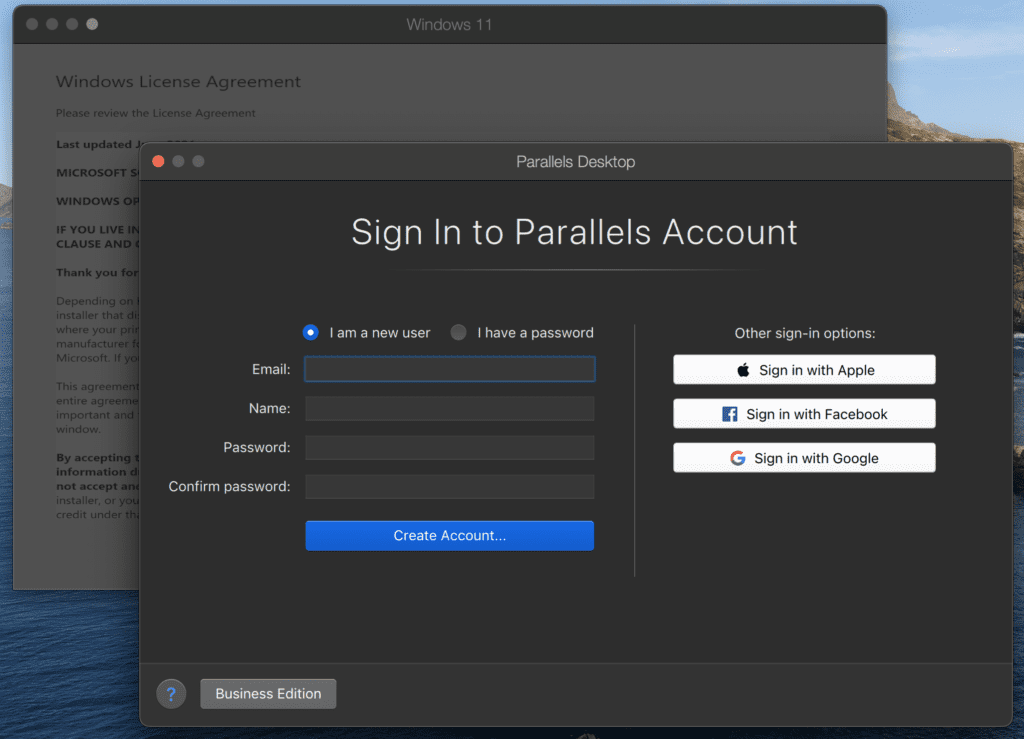
- When you click on the screen, a pop-up window will open and Parallels Desktop will ask you to sign in to a Parallels account. If you don’t have one already, choose “I am a new user” at the top and create your free account.
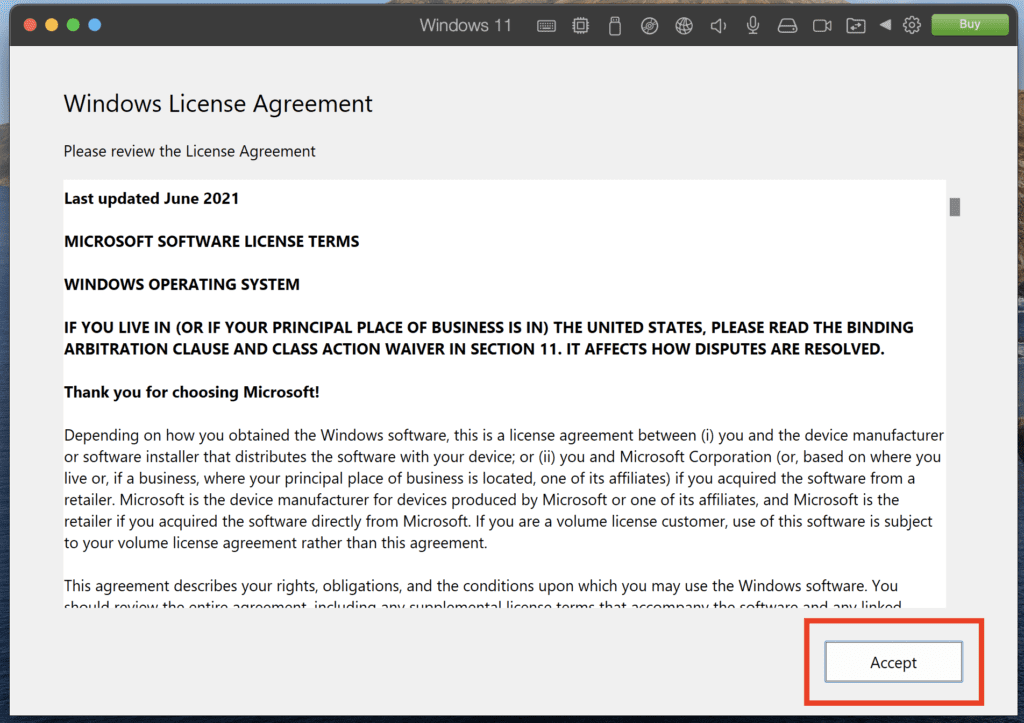
- Now, you can proceed with accepting the Windows License Agreement in your Windows 11 VM. Click on Accept at the bottom right corner of the window.
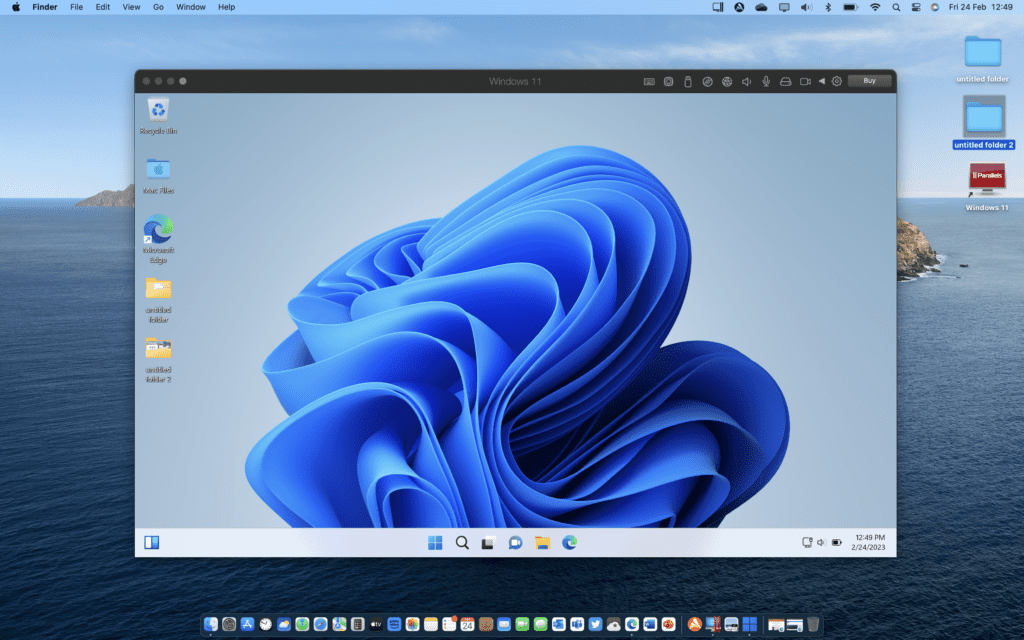
That’s it! Our Windows 11 on ARM virtual machine is now up and running on our Apple Silicon Mac. Now, I’ll show you how to adjust the amount of resources you want to allocate to your virtual machine.
Adjusting settings for your Windows 11 virtual machine
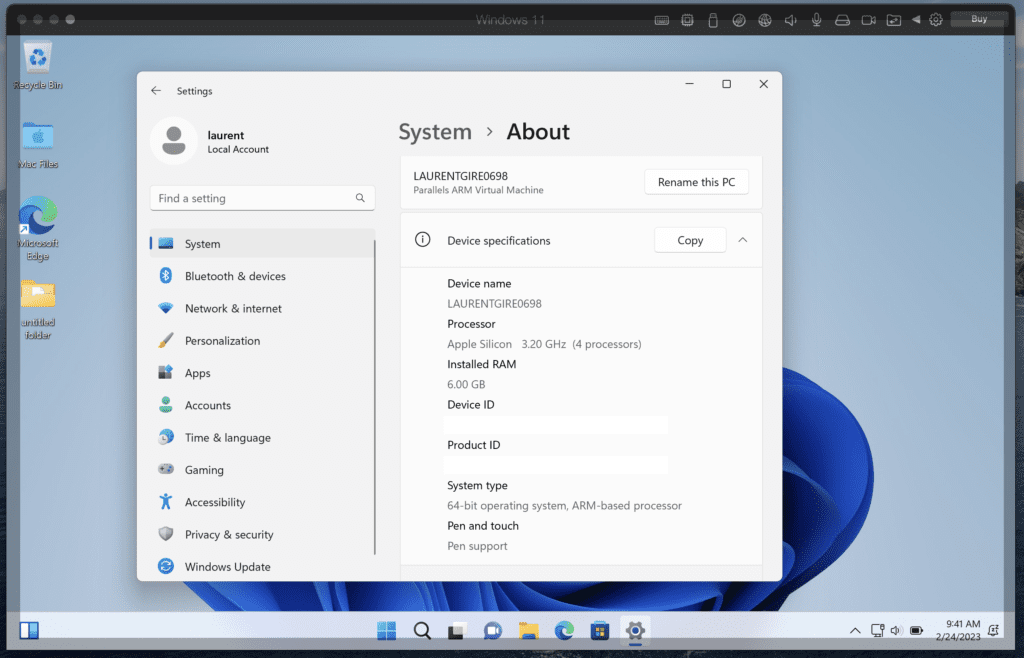
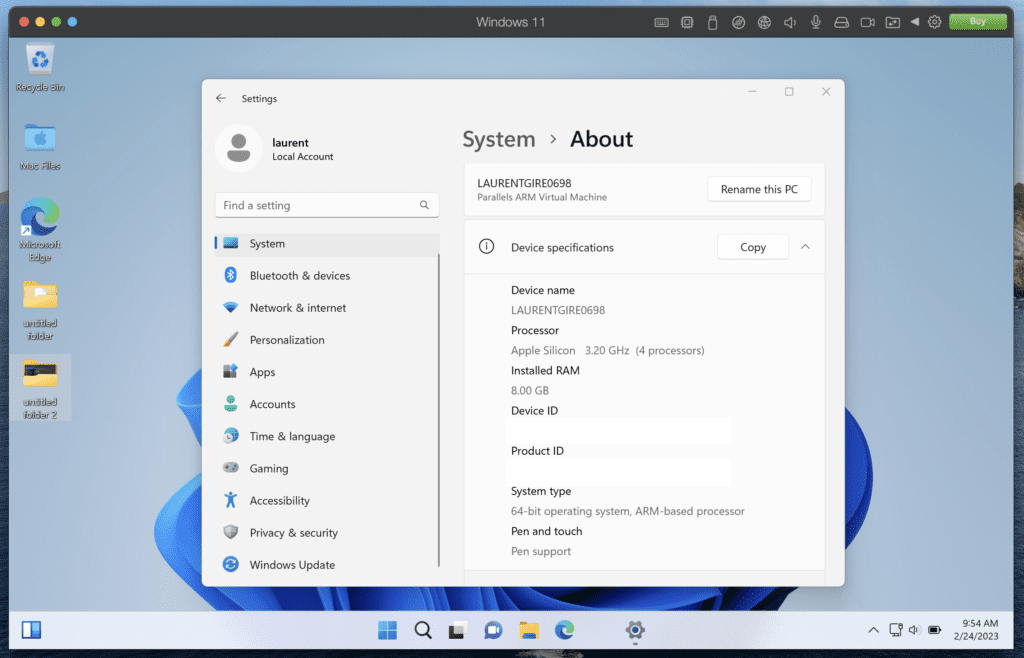
If I go to System settings on my Windows 11 virtual machine, I can see that it’s using 4 CPUs and 6GB of RAM by default. That’s more than enough for running Windows 11 in good conditions.
However, if you need more resources for your Windows 11 VM, you can allocate them in Parallels Desktop Settings.
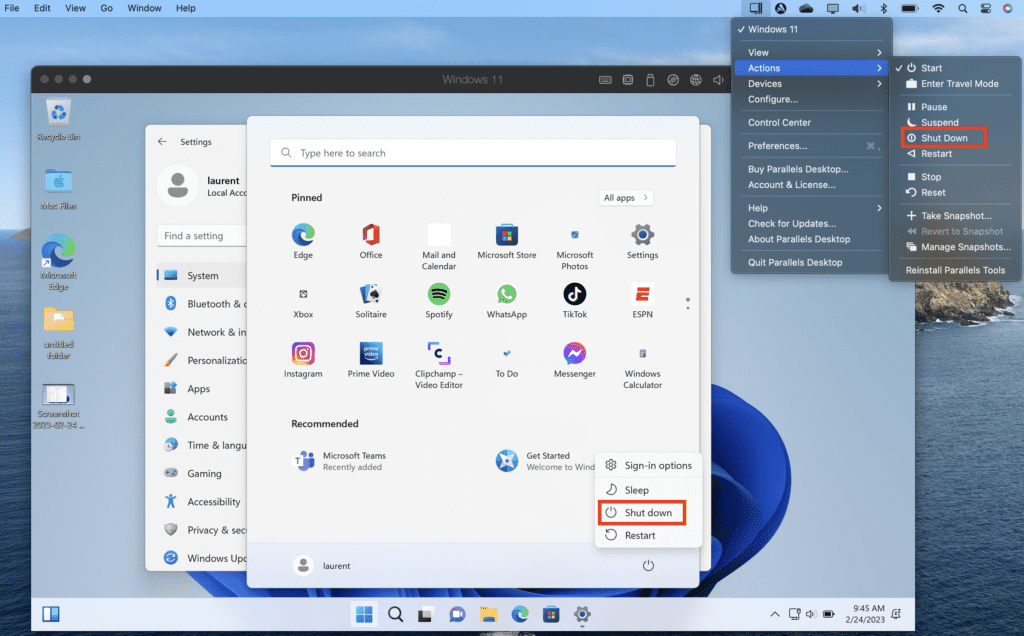
- First, you need to shut down your VM. You do that by opening the Windows 11 Start Menu, clicking the power button, then clicking on Shut down.
- Alternatively, you can click on the Parallels icon on the macOS menu bar, then go to Actions > Shut Down.
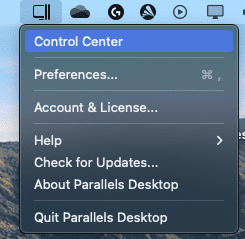
- Next, click again on the Parallels Desktop icon in the macOS menu bar, and click on Control Center.
- The Control Center displays all the VMs you have installed. Click the cog button under your Windows 11 VM
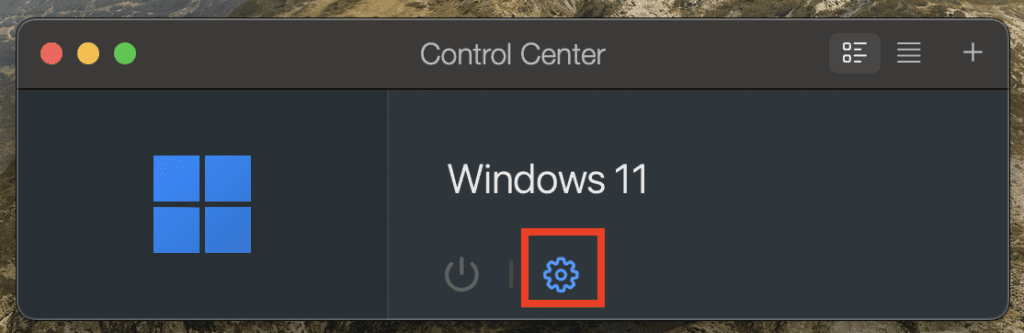
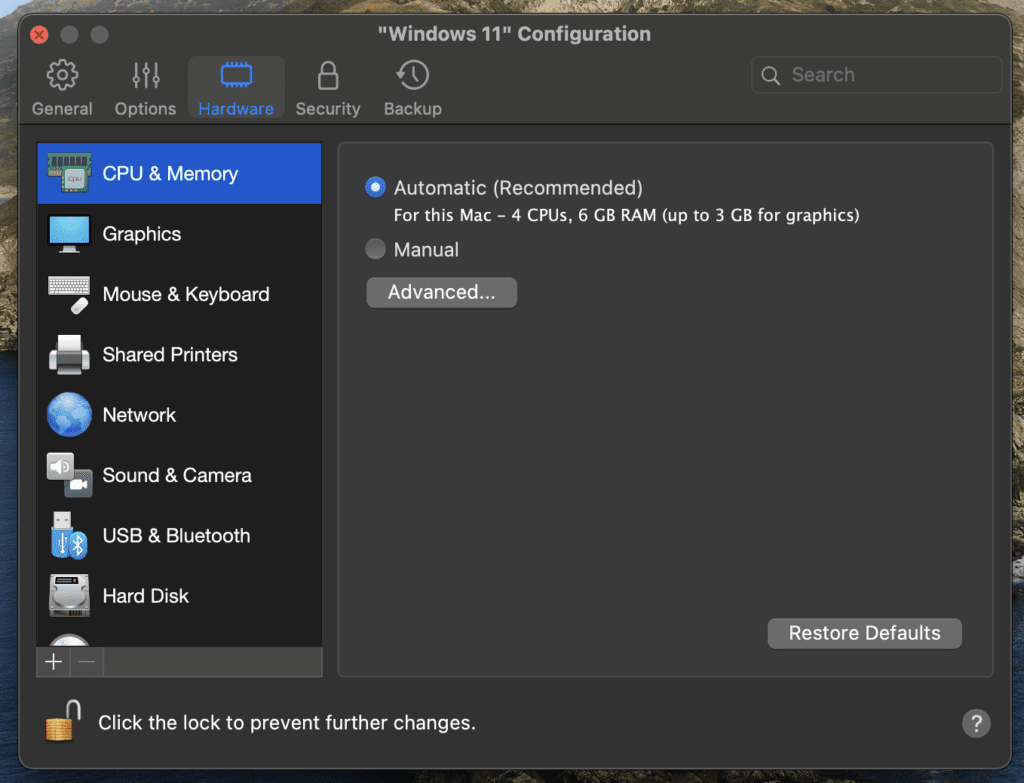
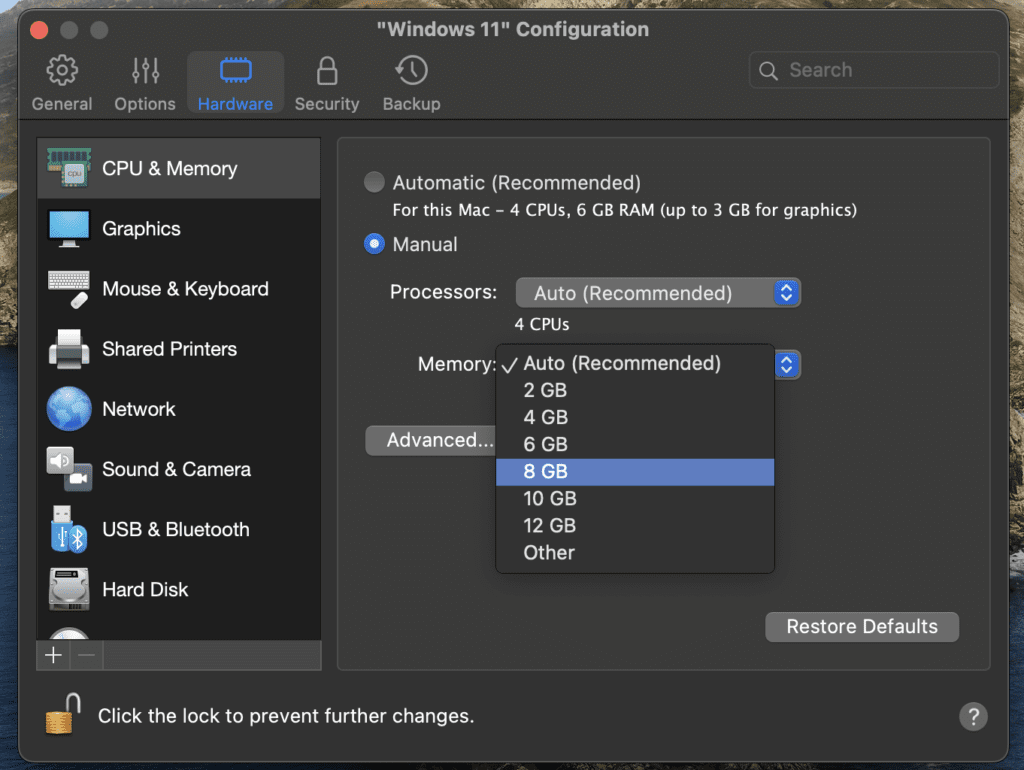
- Here, you can see that my Windows 11 VM is using the recommended settings for my M1 Mac: That’s 4 CPUs and 6GB of RAM. If you need to change that, click on Manual.
- I actually have 16 GB of unified memory on my M1 MacBook Air. If I want to allocate 8 GB of RAM or more to my Windows 11 VM, I’ll just select what I want in the Memory field.
- I can now close down the Settings and relaunch my Windows 11 VM from the Control Center. As you can see, the Windows 11 Settings app now shows that the VM has 8GB of RAM.
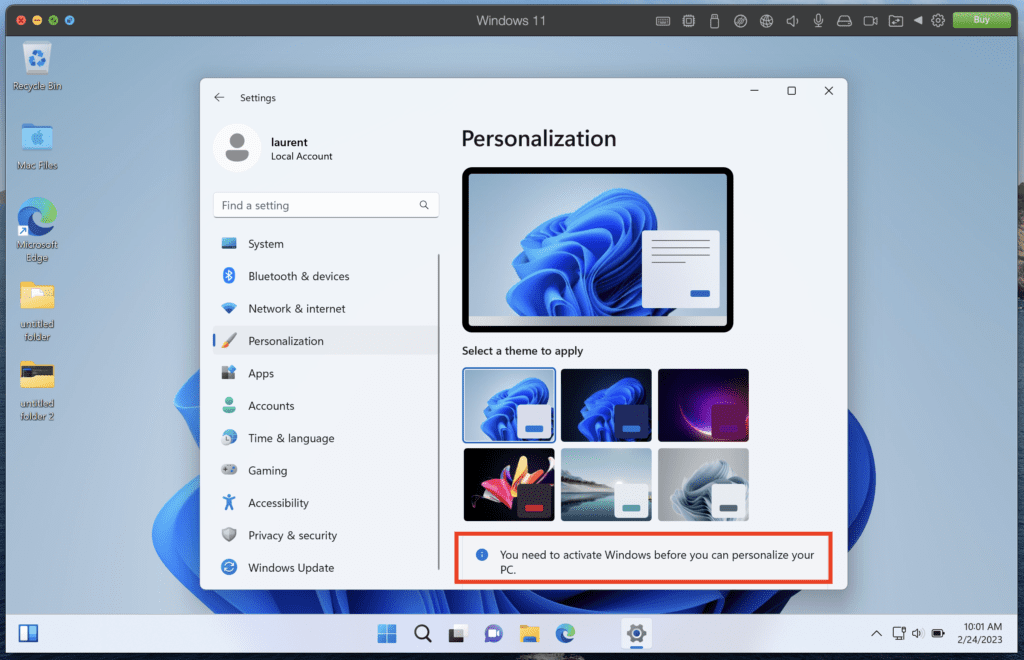
Do you need to activate Windows 11 on your virtual machine?
As you use your Windows 11 VM on your Mac, you’ll sell a pop-up window asking you to activate Windows. You can either buy a product key from Microsoft or enter one you already have one.
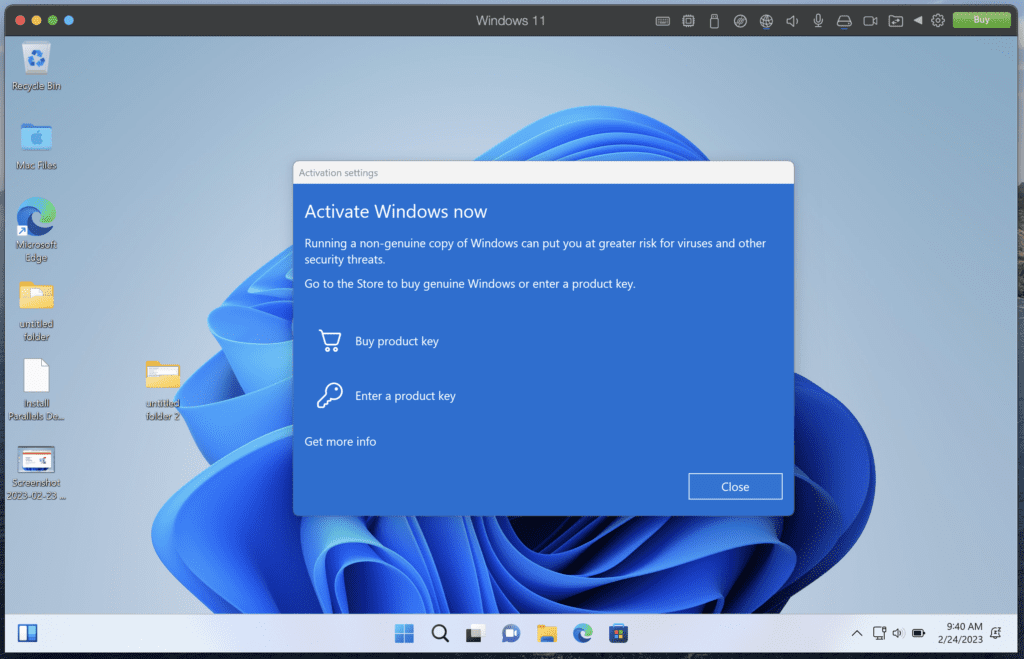
You’re actually not required to activate Windows, though some features will be restricted if you don’t. Simple things like personalizing your background won’t be available without first activating Windows.
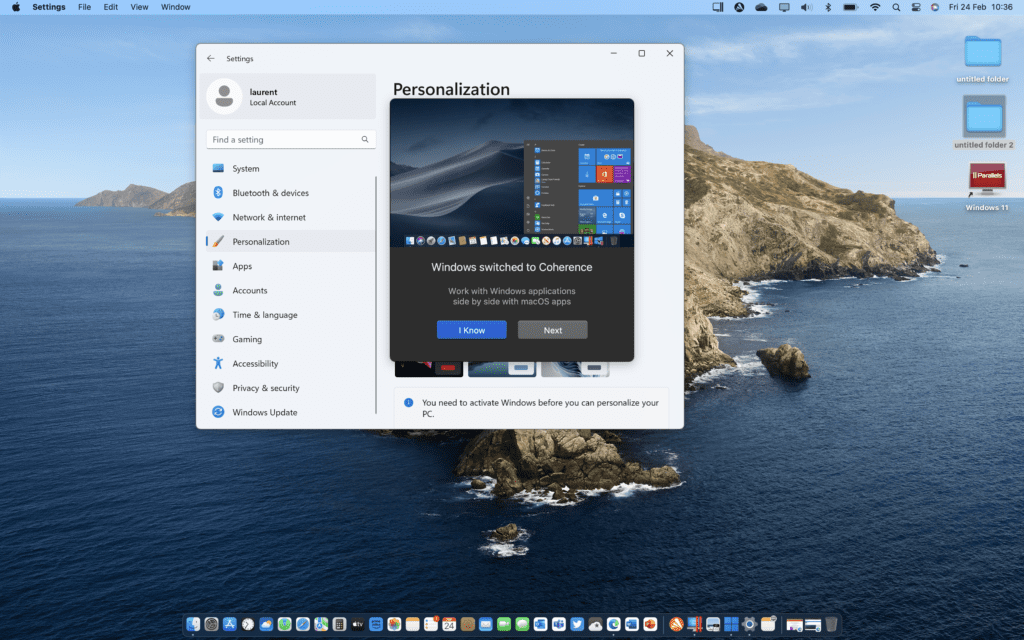
How to use Windows 11 apps from the macOS desktop with Coherence mode
Parallels Desktop for Mac lets you run your Windows 11 in windowed mode and full-screen mode, but there’s also a Coherence mode that lets you hide the VM completely. You can activate it by clicking on the blue icon at the top left corner of your VM window. Alternatively, you can click on the Parallels Desktop icon in your menu bar, scroll down to View and choose Enter Coherence.

After entering Coherence mode, your VM will disappear and you’ll be able to use Windows apps from your macOS desktop.
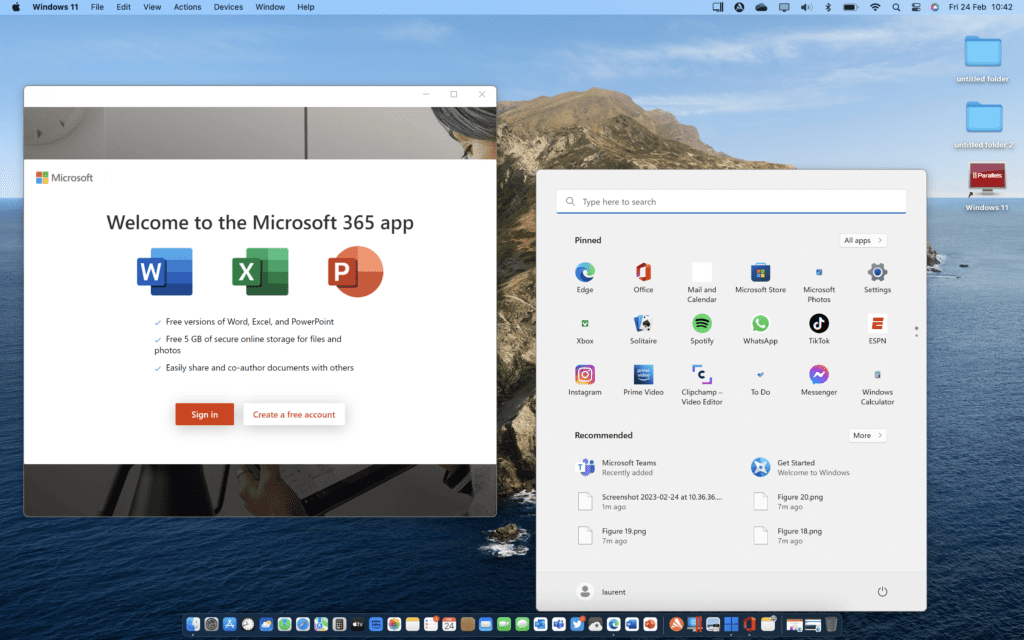
When you click on the Windows 11 icon in your macOS dock, the Windows Start Menu will show up and you can launch any Windows app you have installed and run it side by side with macOS apps. Pretty neat!
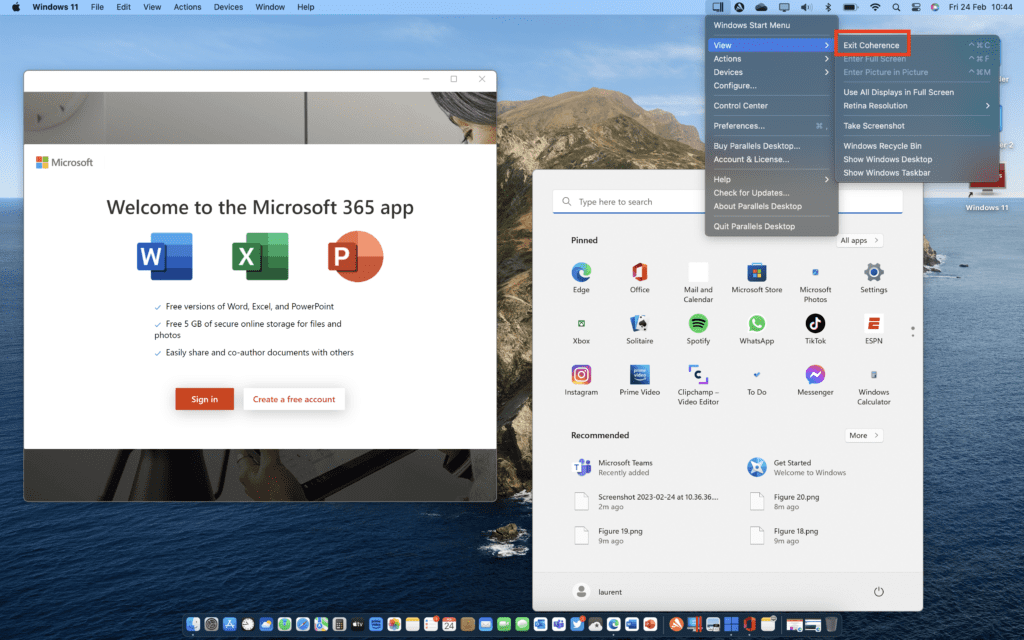
To exit Coherence mode, you can once again click the Parallels Desktop icon on the macOS menu bar, scroll down to view, then click on Exit Coherence
Windows 11 on ARM VM on M1 Macs: What are the limitations?
Windows 11 on ARM has some limitations when it’s running in a virtual machine on Apple Silicon Macs. Nested virtualization isn’t supported, which may affect the workloads of app developers. But some Windows apps also won’t be compatible.
Here are the main limitations of Windows 11 on ARM running on a Mac via Parallels Desktop:
- Any app that requires DirectX 12 or OpenGL 3.3 or newer won’t be compatible
- 32-bit ARM Windows apps are also unsupported, leaving Mac users with just native 64-bit ARM apps and emulated x64 or x86 Windows apps.
- The Windows Subsystem for Linux and the Windows Subsystem for Android are also not supported
- The Windows Sandbox environment that lets users run Windows apps in isolation is also unsupported
- Virtualization-based Security (VBS), a new Windows 11 feature that lets users create and isolate a secure region of memory from the normal operating system is also not supported.
That’s quite a lot of asterisks, but this shouldn’t have too much of an impact on most workloads. If you really miss the Office apps for Windows on macOS, Parallels Desktop for Mac is a great way to get them back. Even better, you can run Office for Windows alongside other macOS apps with Coherence Mode, letting you enjoy the best of both worlds.
Conclusion
As someone who’s been using Parallels Desktop for Mac for many years, I’d say this remains a great solution for running Windows 11 or Windows 10 on Mac. Performance is really solid on Apple Silicon Macs, and Apple’s M1 and M2 chips still deliver an unmatched level of performance per watt on laptops.
Parallels Desktop’s Coherence mode, which lets users run Mac and Windows apps side by side is probably the app’s killer feature. Parallels Desktop gets major updates every year with new features and performance improvements, and I highly recommend taking advantage of the 14-day free trial to check out if virtualizing Windows 11 can help you get more value from your Mac.

Laurent was the Editorial Manager of the Petri IT Knowledgebase from 2022-2023. He's currently the Senior News Editor of Thurrott.com.