Protect Your Organization’s Assets: Disaster Recovery with Azure Backup

Azure Backup can be used to back up not only an organization’s critical cloud workloads but also all types of on-premises resources, even if they are running on Azure Stack HCI or Azure Stack Hub.
Before explaining how Azure Backup can be set up and used for disaster recovery (DR), I want to get a common backup misconception out of the way: Backup is not the same as disaster recovery.
Find out more at Cayosoft.com
Backup vs. disaster recovery
In the case of Azure, Azure Backup keeps your data and workloads safe and recoverable by backing them up to the Azure cloud. For example, if a user deletes a file from an Azure File Share, you can restore that file; or if a virtual machine (VM) is no longer responsive or bootable, you can restore it from a backup.
In addition to Azure Backup, there is Azure Site Recovery, which serves as a cloud disaster recovery solution. It allows you to replicate workloads running on physical servers or VMs, both inside and outside of Azure, from a primary site to a secondary location. In the event of an outage at your primary site, you can fail over to the secondary location, access all applications and workloads from the secondary site, and subsequently fail back to the primary site once it is operational again.
Resilience in hybrid environments
To achieve comprehensive resiliency in a hybrid environment, it is vital to ensure the high availability of all your resources in addition to implementing backups and disaster recovery.
But in this article, our focus will be Azure Backup. We will begin by discussing the types of resources that can be backed up and restored using Azure Backup, and this list is currently quite extensive, as illustrated below:
- On-premises files, folders, system state, VMs (Hyper-V and VMware), and other on-premises workloads
- Azure VMs (Windows and Linux)
- SQL Server in Azure VMs
- SAP HANA databases in Azure VMs
- Azure File Shares
- Azure Database for PostgreSQL servers (preview)
- Azure Managed Disks (preview)
- Azure blobs (preview)
It is important to note that backup capabilities may vary depending on the type of workload, including the availability of different features. Furthermore, it’s worth mentioning that some resource types are still in the preview phase at the time of writing.

Once you get started with Azure Backup on the Azure portal, the wizard will guide you through choosing the workloads to back up and their location.
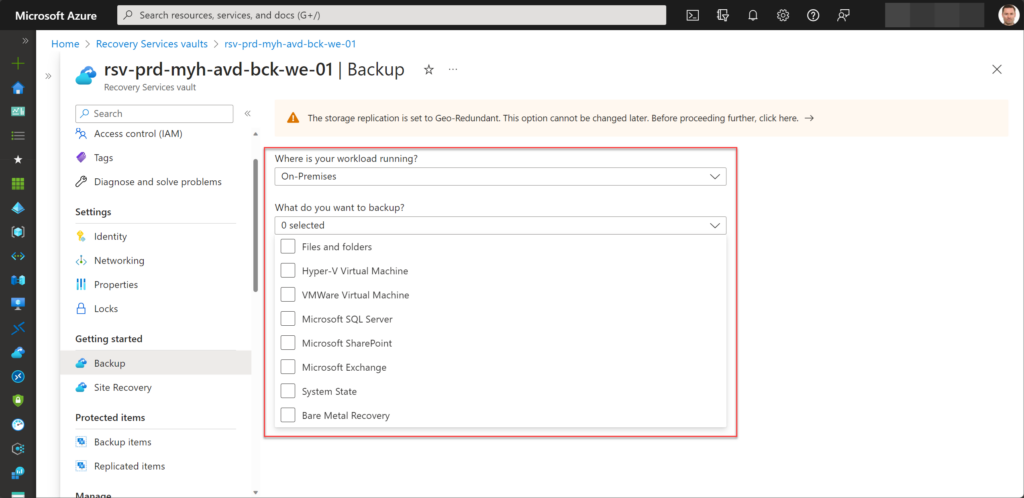
How to use Azure Backup
To begin backing up your workloads with Azure Backup, you will need an Azure subscription to create a Recovery Services vault. This vault serves as an online storage entity that enables you to back up workloads to or from Azure, following the Azure Resource Manager model.
Storage and replication
When creating a Recovery Services Vault using tools such as Azure Resource Manager (ARM), Azure Bicep, Terraform, or Azure PowerShell, it is crucial to select the appropriate backup storage. This choice will impact your Azure Backup pricing, in addition to the type of workload that is being backed up, which we will discuss in detail later on.
You have the option to choose between locally redundant storage (LRS), zone redundant storage (ZRS), geo-redundant storage (GRS), or read-access geo-redundant storage (RA-GRS) as the replication type for your backup storage.
Note: When you enable Cross Region Restore, your backup GRS storage will automatically be upgraded to RA-GRS storage. Enabling this option will let you restore your backup data in a secondary paired region, but it will also affect your Azure Backup pricing.
Figure 3
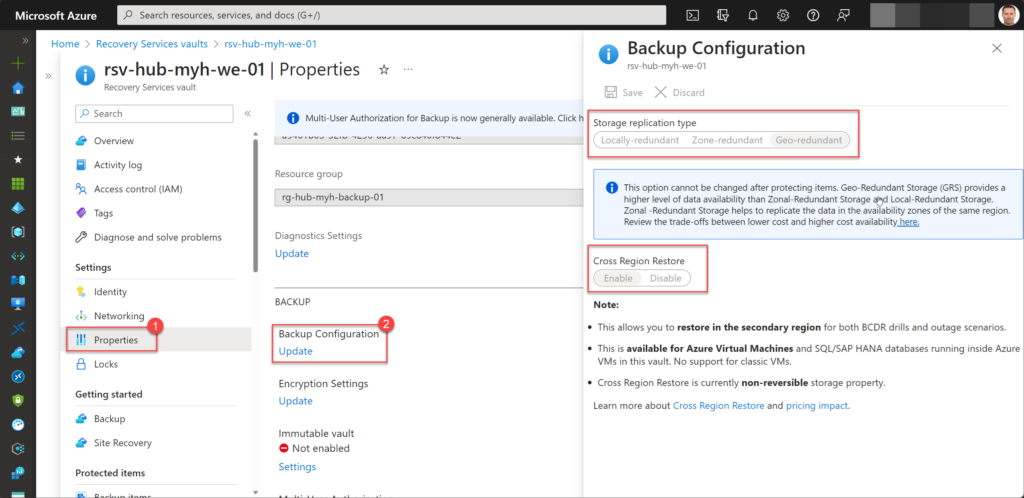
When it comes to backing up business-critical or production resources, it is advisable to set the replication type to GRS (or ZRS). For non-production resources, the replication type can be set to LRS to reduce costs. If both types of resources coexist within the same subscription or if resources from different regions exist in the same subscription, it is better to deploy two separate Recovery Services vaults.
Naming and tagging convention
Furthermore, like your other Azure resources, it is essential to establish a solid naming and tagging convention for your Recovery Services vault(s), as described in your Azure Governance plan. After all, this enables you to locate specific recovery vaults more efficiently during various management tasks, including cost optimization or when restoring resources.
You can build up an example naming convention for your Recovery Services vaults in the following manner:
rsv-<environment>-<customer abbreviation>-<landing zone type(optional)>-<rsv type>-<location>-<##>
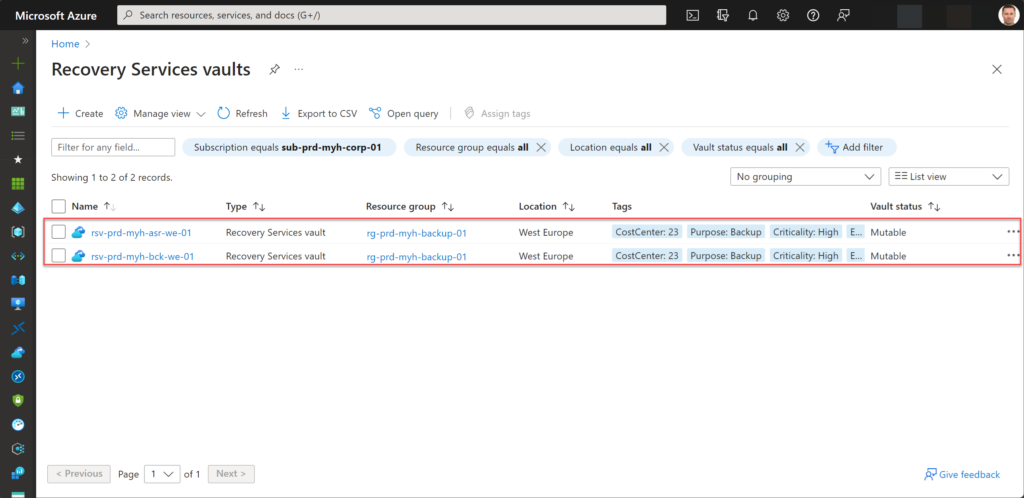
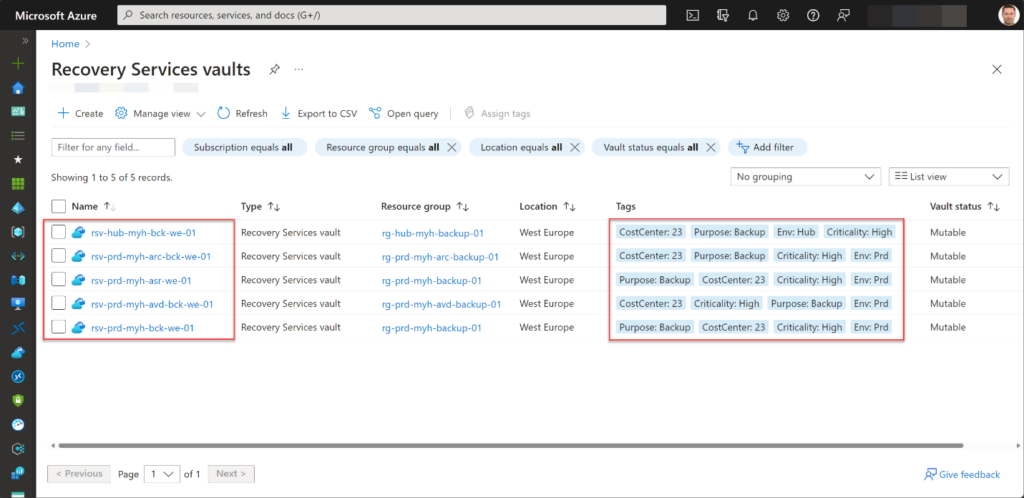
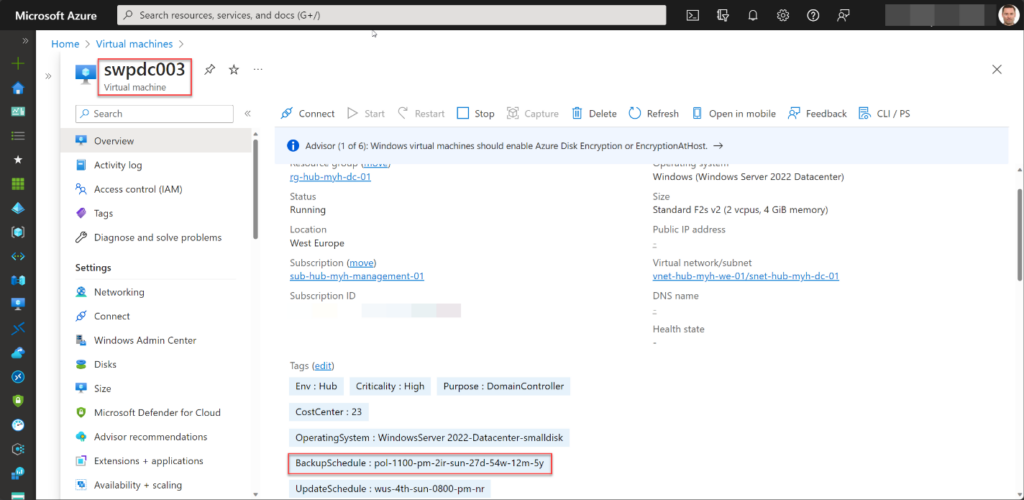
You can also refer to the example screenshot below, which showcases both the naming convention and a set of tags that can be utilized in conjunction with Azure Backup.
A very useful example of a tag to use in combination with Azure Backup, alongside commonly used tags like Environment, Criticality, and CostCenter, is a tag that describes the backup policy. This way, it is quite easy to determine if a resource is backed up and to see what backup policy is being used.
Here is an example:
BackupSchedule: pol-vm-1100-pm-2ir-3th-sun-27d-4w-12m-5y; BackupSchedule: pol-fs-0900-pm-2nd-sat-27d-4w-12m-3y
Here is another example:
As well as using a robust naming convention and tagging structure, it is also essential to adhere to other Azure Governance best practices, like granting backup administrators the least privilege access to perform their backup-related tasks by assigning them to specific Azure AD groups with an explicit role-based access control (RBAC) role.
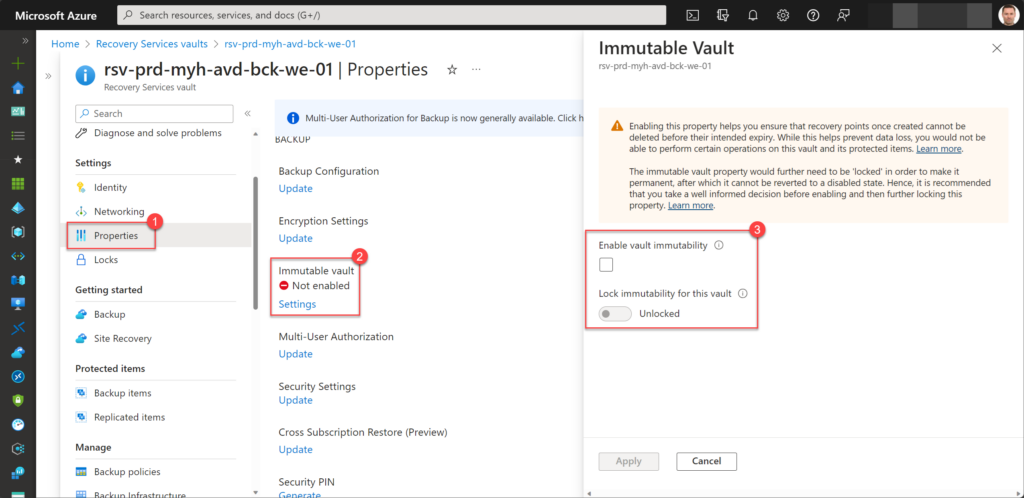
Also, to apply the necessary security and monitoring settings, like configuring the soft delete retention period, you need to set your vault as immutable or configure diagnostic settings.
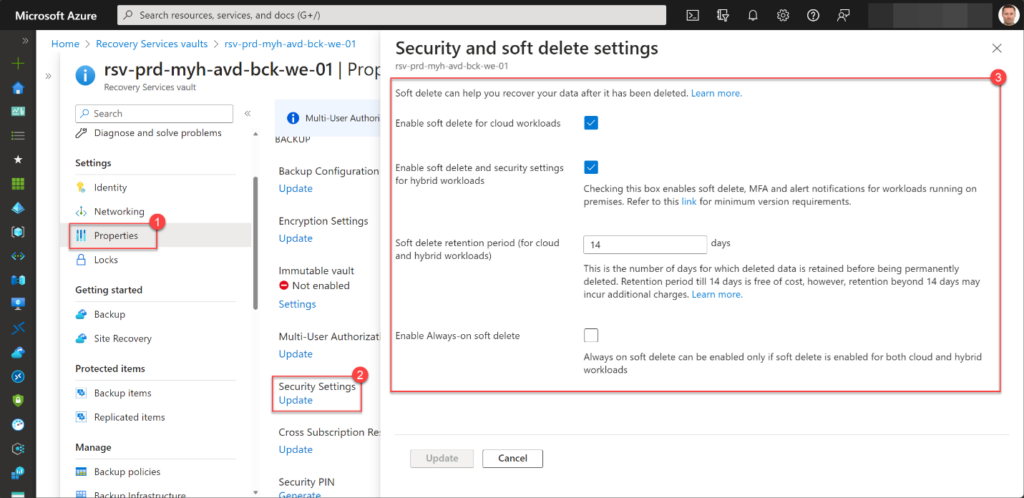
You can also set vault immutability to ensure recovery points cannot be deleted before the set expiry period.
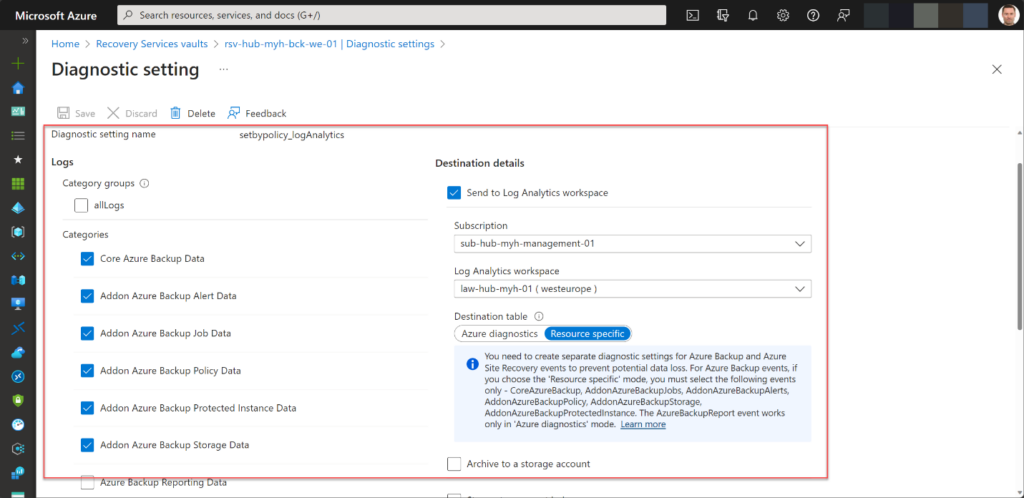
Diagnostic settings can be used to configure streaming export of logs and metrics.
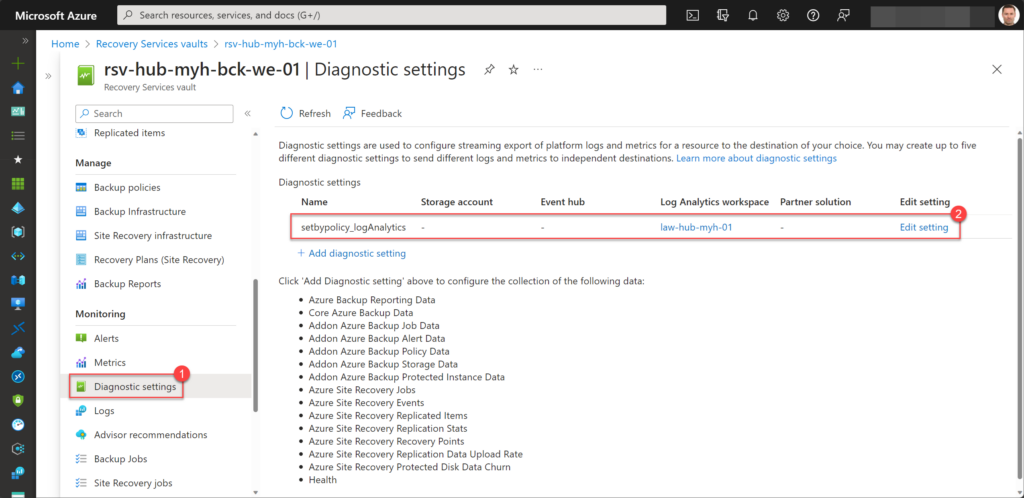
There are several different options for storing logs and metrics:
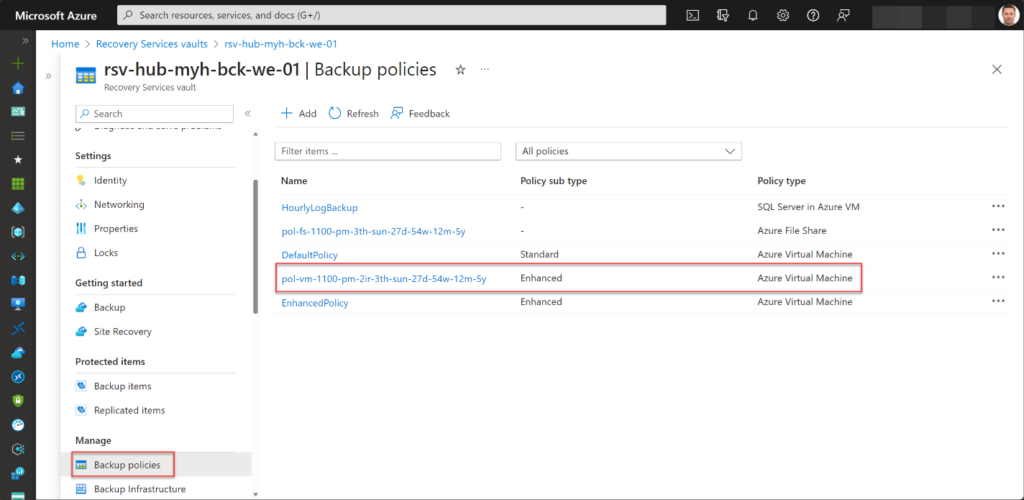
Backup policies
Once you have set up and configured your required Recovery Services vault(s), you can proceed to add the necessary backup policies, which should be created based on resource type and criticality.
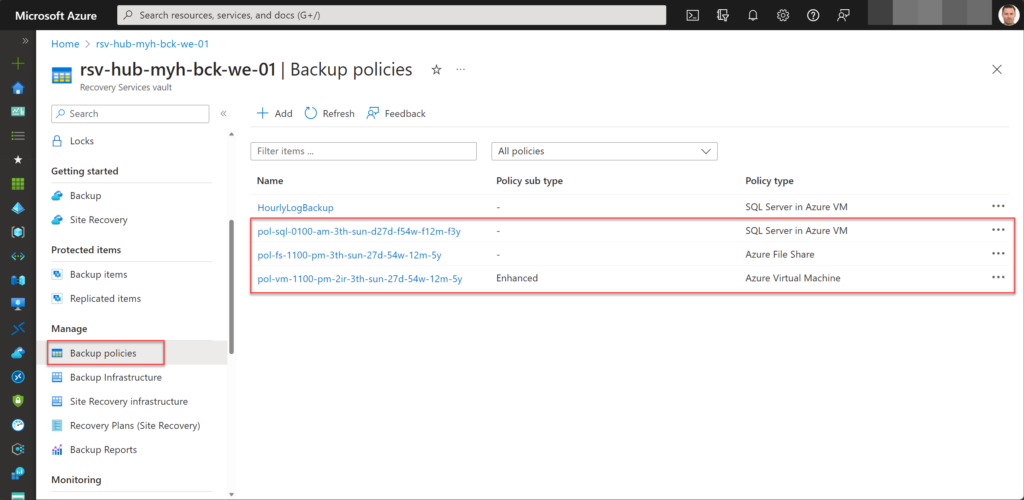
While there are default policies available, as shown in the screenshot below, it is advisable to create your own based on your specific Recovery Point Objective (RPO) and Recovery Time Objective (RTO).
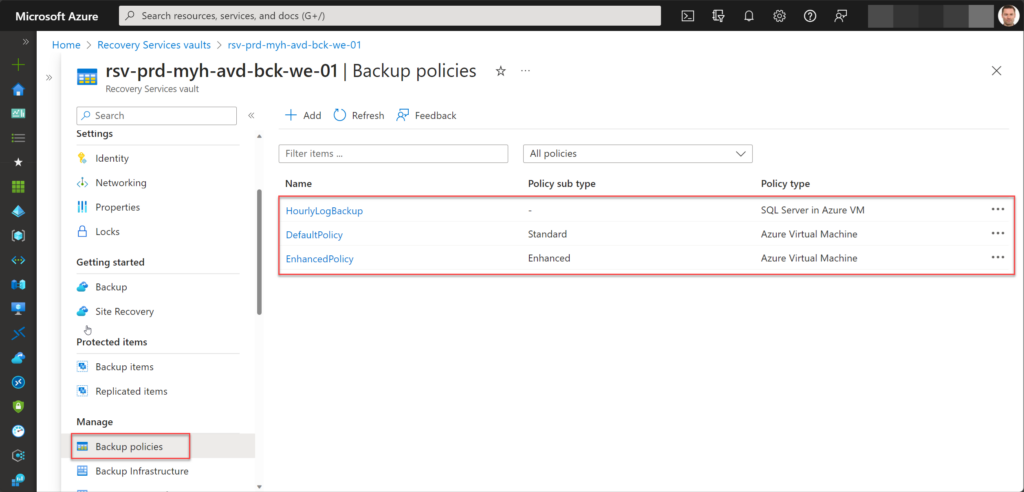
Before creating a backup policy, it is crucial to ask yourself a few questions: What retention settings (daily, weekly, monthly, or yearly) are necessary? How many instant recovery snapshots do we require? Do I need the capability to back up multiple times a day? And so on.
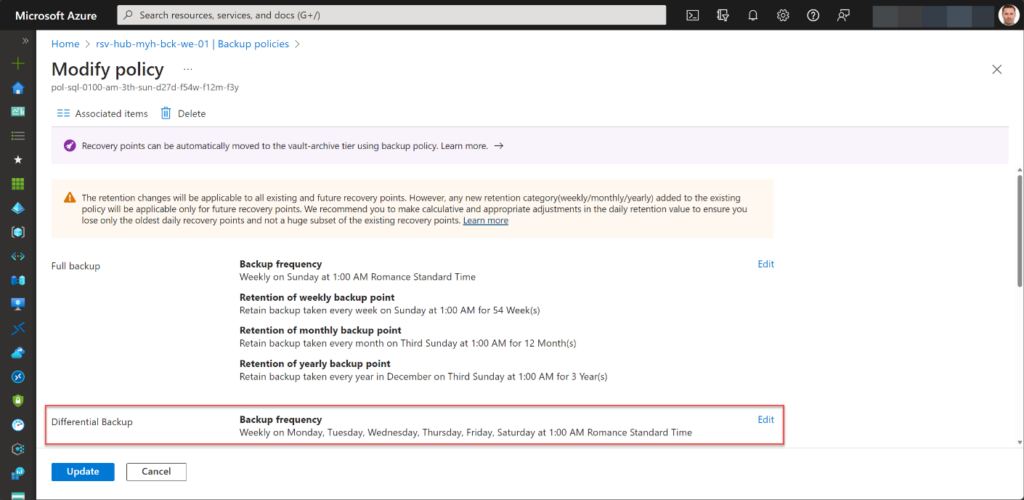
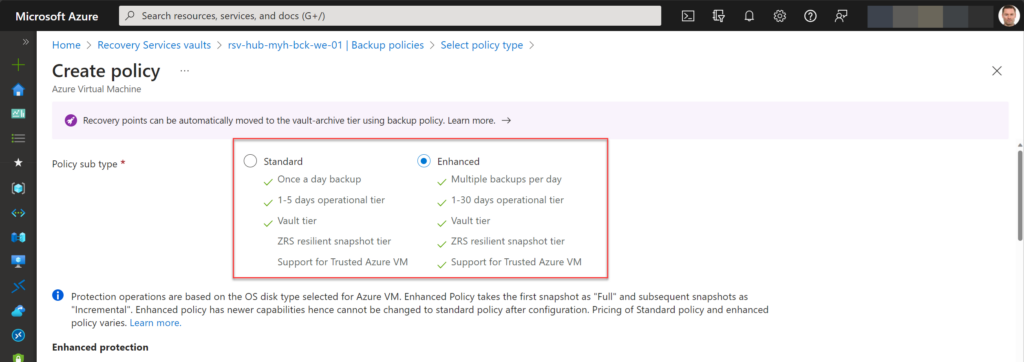
Next to that, also keep in mind that there are various settings available depending on the resource type you are backing up, such as the choice to foresee differential backups when backing up SQL Server in an Azure VM. Or the option to select between a standard backup policy or an enhanced policy when backing up Azure VMs.
If you opt for an enhanced policy, you can choose between once daily, multiple backups a day, and other advanced configurations.
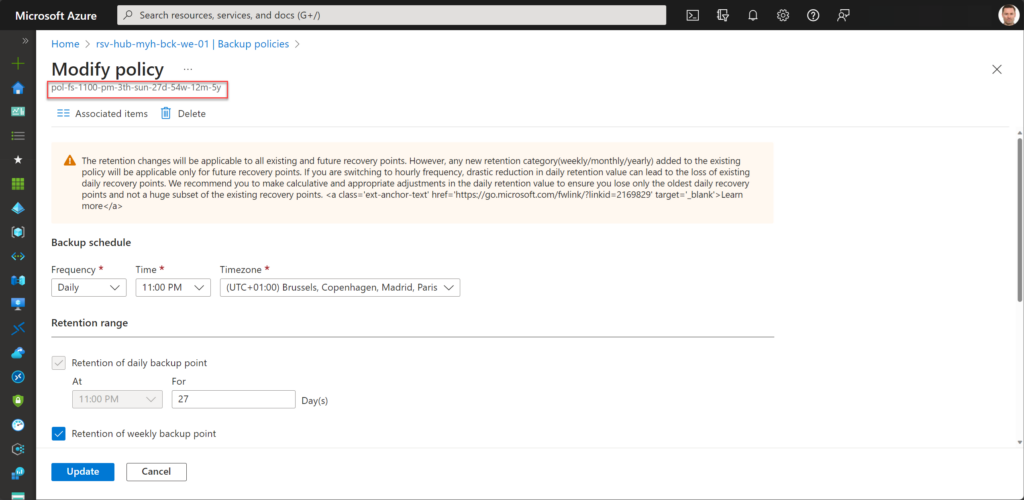
Furthermore, I recommend you assign a name to your policy that describes its backup settings, such as the number of instant recovery points and the retention ranges utilized. As previously mentioned, you can also use this backup policy name as a tag to be able to better govern and foresee backup-related automation tasks for specific resources within your environment.
Some examples of backup policies are:
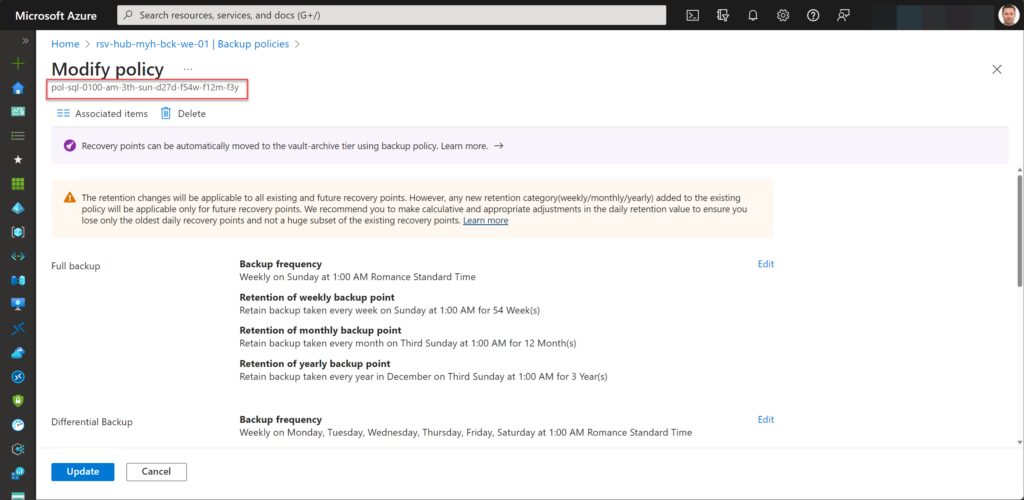
Azure File Share: pol-fs-1100-pm-3th-sun-27d-54w-12m-5y; SQL Server in Azure VM: pol-sql-0100-am-3th-sun-d27d-f54w-f12m-f3y (d = differential backup, f = full backup)
Again, using descriptive backup policy names will help you manage Azure Backup.
Here is another backup policy with a descriptive name.
Restoring data using Azure Backup
Backup is important, but what matters most is having the capability to restore data whenever it becomes necessary. Therefore, setting expectations for data restoration and describing your requirements within a backup and disaster recovery plan is crucial.
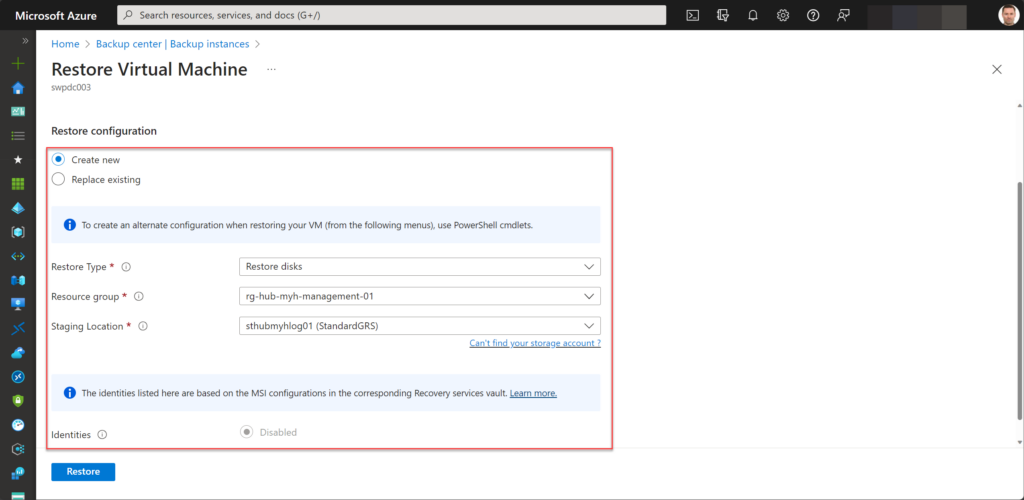
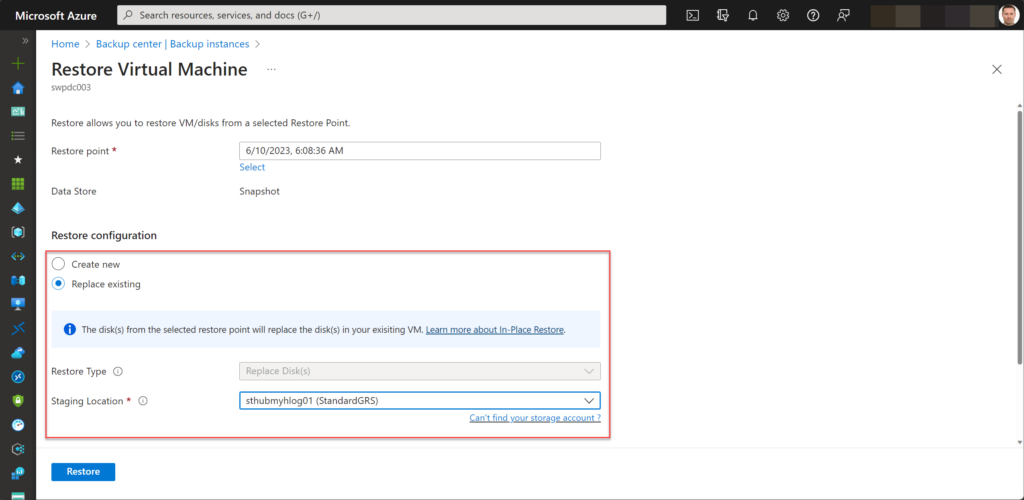
When using Azure Backup, you have various options for restoring workloads or data, depending on the type of data source type you have backed up. For instance, when you have backed up an Azure VM, you can choose to restore the VM, which gives you the possibility to either create a new VM, restore disks, or replace the disk(s) of the existing VM. You also have the option to restore specific files.

You also get to choose the restore type, group, and location when recovering a virtual machine as a new instance.
If you want to replace an existing VM from backup, you can choose the staging location.
You also have the option to recover individual files.
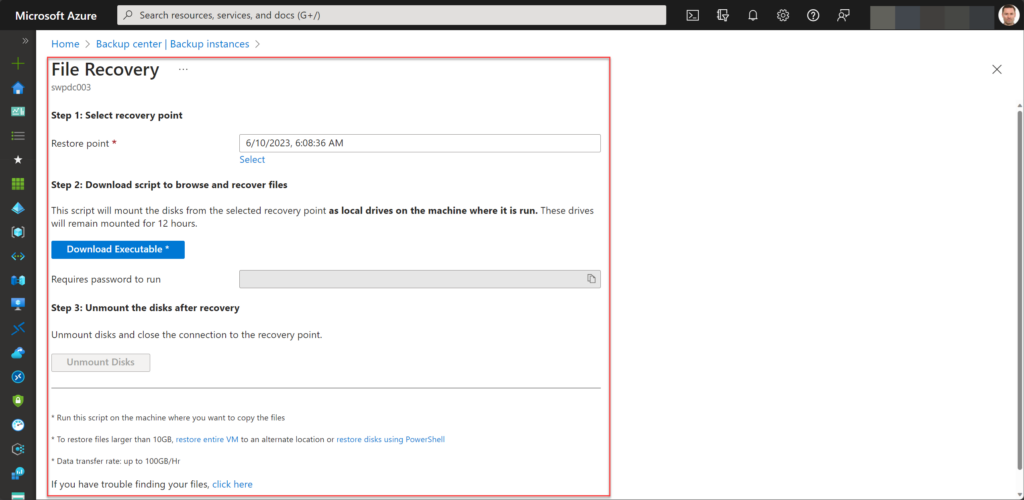
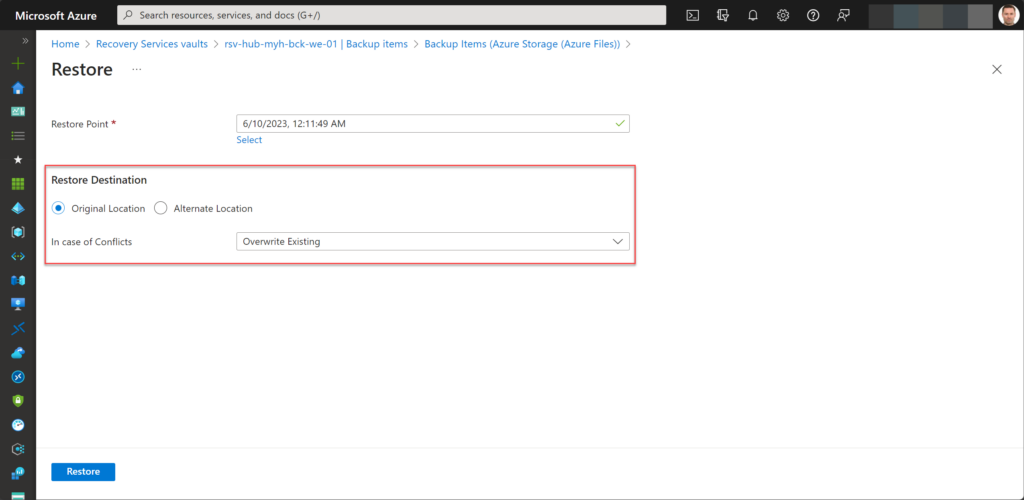
If your backup data source is an Azure File Share, you have the choice to restore the entire share to either its original location or an alternate location. Moreover, similar to an Azure VM, you also have the option for file recovery.
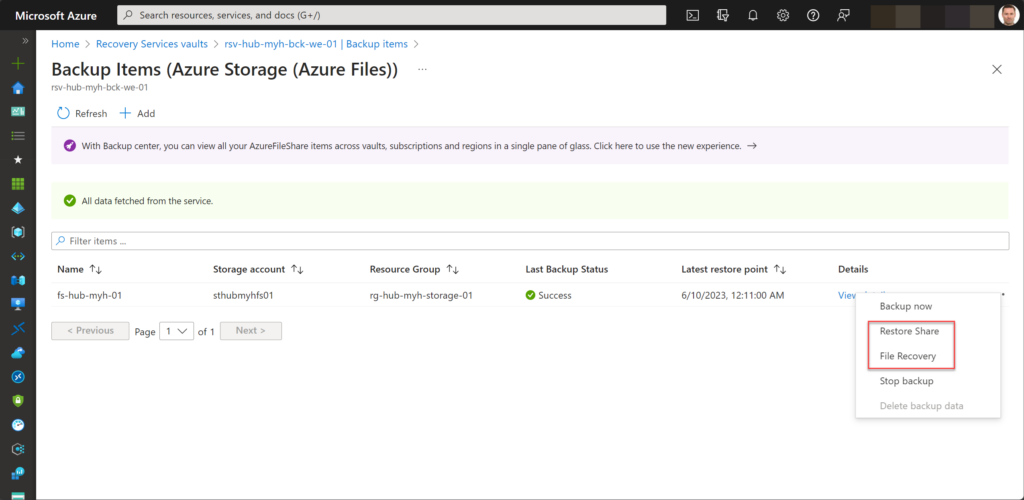
When choosing the restore location, you can choose between the original location or an alternate one.
The Azure Backup Center provides a centralized and unified way of managing your backup operations across multiple subscriptions and regions. It offers a consolidated view of all your Azure backups and complete backup infrastructure, making it easier to monitor, govern, and manage backups at scale.
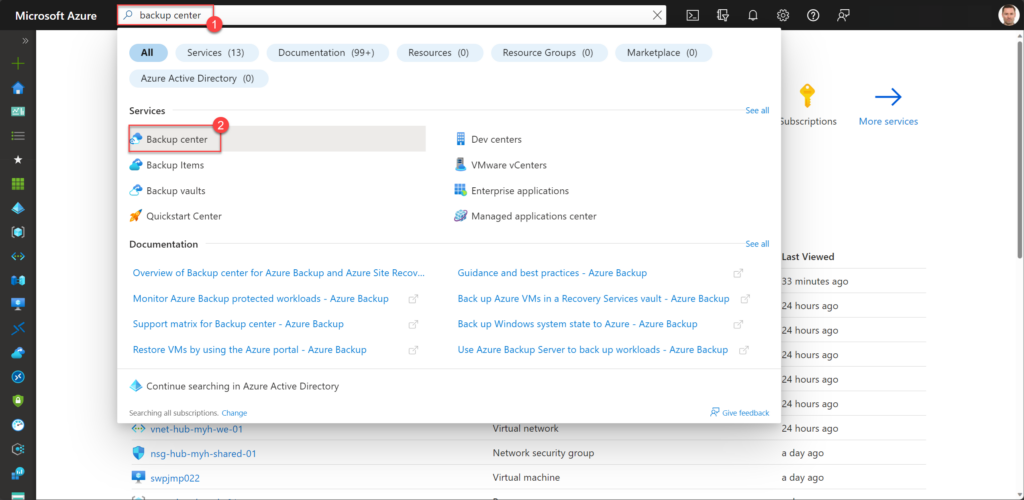
To navigate and start using Backup Center, simply search for “Backup center” in the Azure portal global search bar, and under services, select Backup Center to open the dashboard.
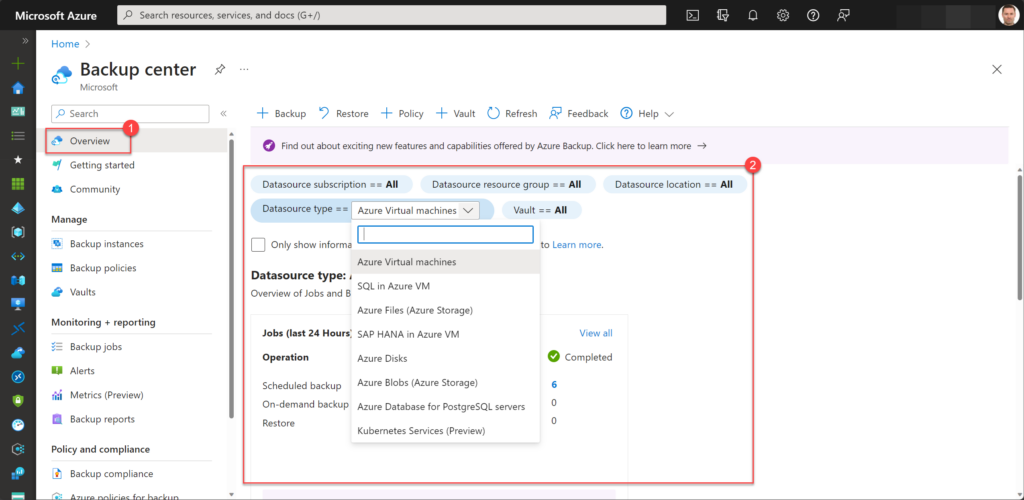
On the Overview blade, you will find a comprehensive summary of all backup jobs and instances, which can be filtered using various tiles.
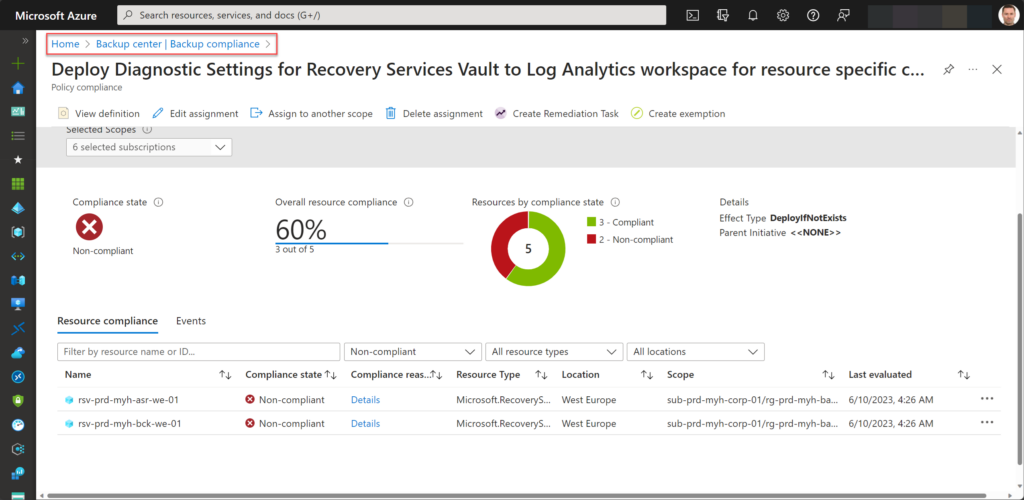
The Backup Center also provides various options to help you with monitoring, reporting, implementing policies, and ensuring compliance within your Azure Backup environment. As an Azure Backup administrator, backup reports and backup compliance, for example, provide valuable insights into the overall status of your resource backups and compliance.
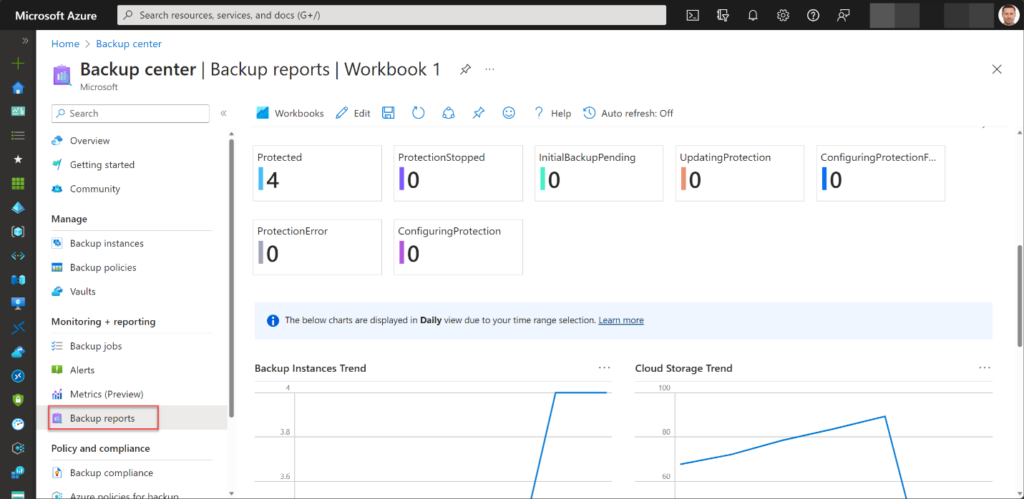
Below, you can see an example of a Backup compliance report.
Azure Backup offers reliable and scalable data protection
As you have hopefully seen and read, Azure Backup can really help you safeguard your organization’s vital assets by providing you with reliable and scalable data protection for your hybrid or cloud environment.

