5 Ways to Get Things Done More Efficiently in Microsoft 365

It can seem at times we all have an overwhelming amount of things to do and information to deal with. Solutions like Microsoft 365 are supposed to help us collaborate and be more productive. But unless you understand the tools and how to best create a process that works for you and your team, it can still be difficult to stay on top of your workload. In this article, I look at 5 ways you can get things done in Microsoft 365.
1. Keep as much information as possible in Microsoft 365 to avoid costly context switching between apps
Frequent context switching between applications is known to drive down productivity. And it can be frustrating to have to search for information across many different systems. Microsoft has an article What context switching is and how it’s messing up your workday with more information about the negative impact of context switching.
Keeping as much of your data inside Microsoft 365 has several advantages:
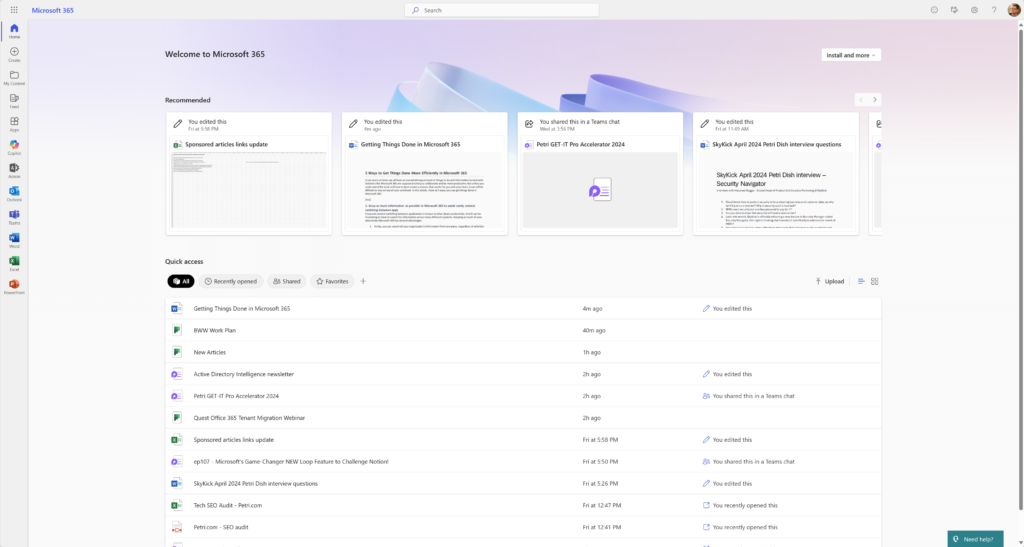
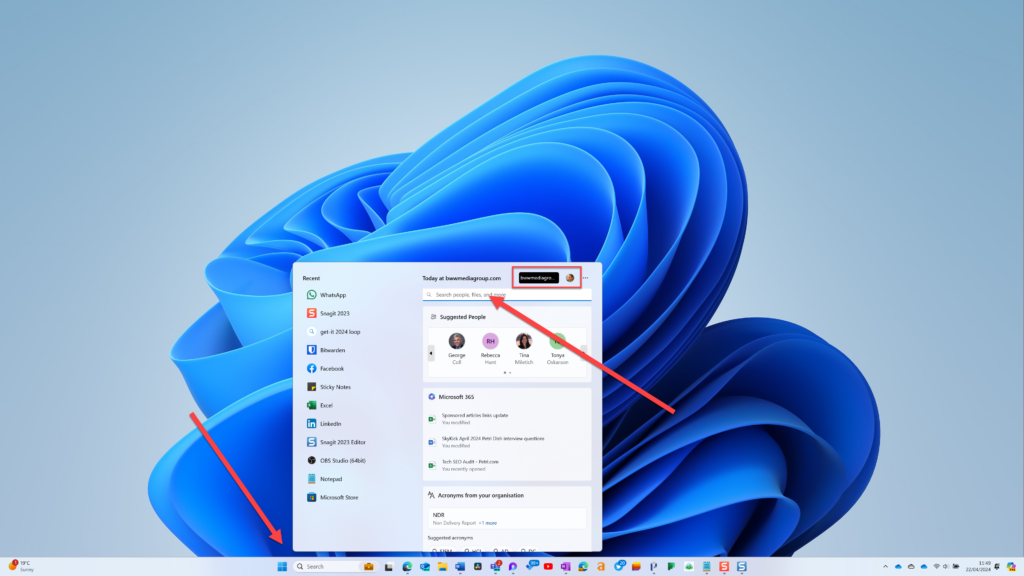
- Firstly, you can search all your organization’s information from one place, regardless of whether it arrived by email, is in a Teams chat or channel, or in a document, using Microsoft 365 Search. Search is deeply integrated into Microsoft 365 and it is accessible in many different places, including in apps, on the Office.com homepage, and it’s even integrated with search in Windows (taskbar and File Explorer). Make sure you add your Microsoft 365 account to Windows so you have access to search your organization’s tenant.
- Access and permissions gets easier because you can centralize control in one place.
- As Microsoft ramps up its AI offerings, Copilot will only be useful if it has access to your data. If that data is not stored in Microsoft 365, then things start to get more complex and out-of-the-box, Copilot is going to be limited in the value it provides.
- If you don’t use OneDrive for document storage, you lose out on all the collaboration features in the Office apps and the ability to easily attach links to files in email.
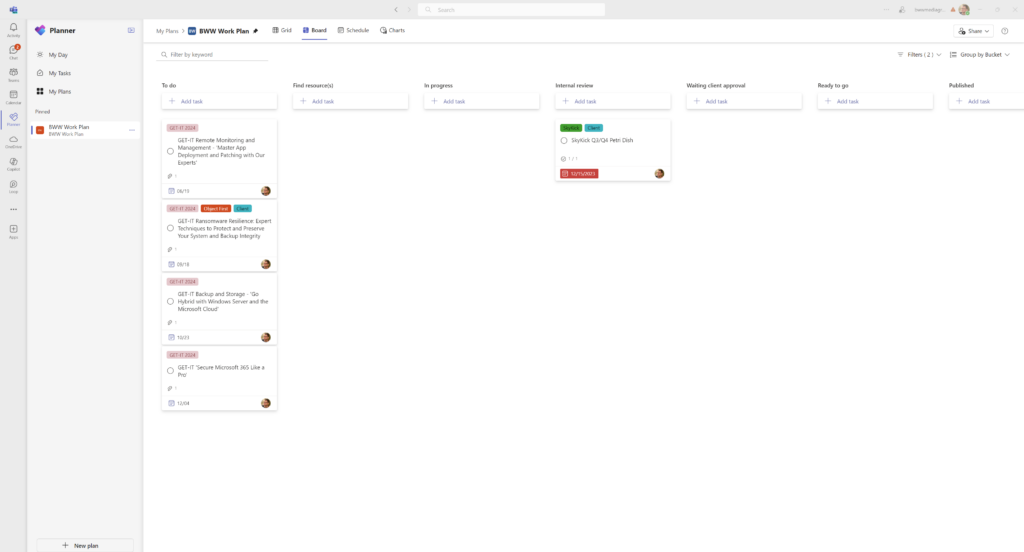
2. Create one Planner board for each team – not for each project
Managing access and permissions in Microsoft 365 can seem daunting, especially when it also includes external guest access. Understanding how you build a process around Planner can help you work things out. Planner is a lightweight project management app for teams that don’t have a dedicated Project Manager. Planner is based around the idea of a Kanban board, which is a series of cards that represents each task. The cards are moved along a process that you define from left to right towards completion. The great thing about Kanban boards is that they provide you with an overview of your team’s work in an easy to digest visual format. Task lists are great when you have a simple project with only a handful of tasks. But they can become overwhelming quickly.
If the idea of using a Kanban board sounds scary, don’t be put off. Once you get the idea, they’ll be no going back to task lists. And Planner lets you view your Kanban board in the form of a task list when you need to. Task lists can be useful when you need to sort and filter large amounts of tasks into a single view. With Planner, you get the best of both worlds.
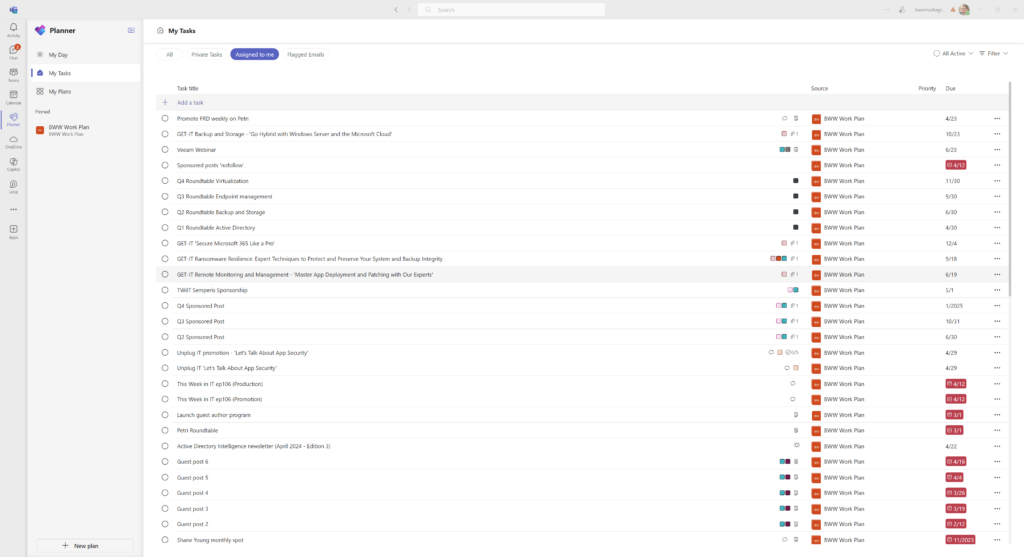
The Planner app in teams aggregates all the tasks you create, or that are assigned to you, across Microsoft 365. Even emails you flag for follow up, providing you are using Microsoft 365 for your email, appear as a task. You can turn Teams messages into tasks, flagged OneNote pages also appear in your Planner tasks list. You get the idea.
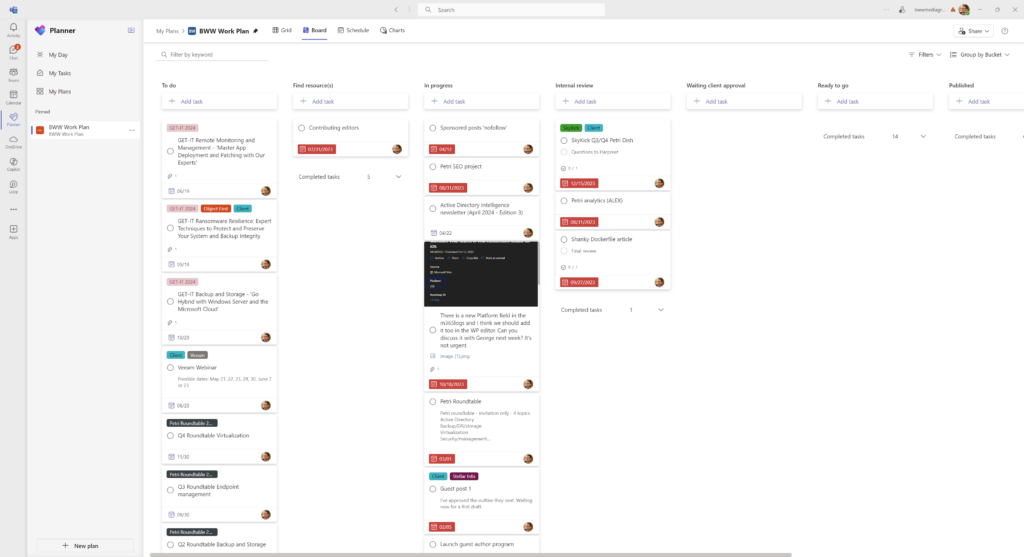
Before you run off to start creating Kanban boards, it’s best to consider how you will organize your projects. I recommend creating a single Planner board for each team. Not for each project. There are a few reasons:
- Creating a single board for your team helps you get an overview of the overall workload on your team’s plate.
- You don’t need to keep context switching to see the status of all the different projects your team is working on.
- It helps to simplify managing access and permissions.
But doesn’t that get messy quickly? It could do. But not if you organize the board properly. I recommend creating a label for each project and assigning each card you create with the correct label. Then you can easily filter the board if you need to see a visual status of a particular project, or several related projects, in a single view. You can also color code your labels to make the board easier to digest when no filters are applied.
While creating and assigning labels is important, so is making sure the title of each task is descriptive enough that you can easily find it by searching. Bear in mind that labels are not included in search, so you might need to repeat the name of the project in the task title.
Creating a Planner board for your team
What’s the best way to create a Planner board and give access to users?
- Create a ‘team’ in Microsoft Teams for your team. Creating a team automatically creates a Microsoft 365 Group, which is used in the background to manage access and permissions to everything in the team. You can invite internal and external users as you create the team.
- Once the team has been created, open the Planner app and click + New plan.
- In the New plan dialog, click Basic or select one of the templates.
- Give the plan a name and then select a group to associate it with. You should find the team you just created in the list of available groups.
- Optionally, check Add to my pinned plans if you intend to use it regularly.
- Click Create to complete the process.
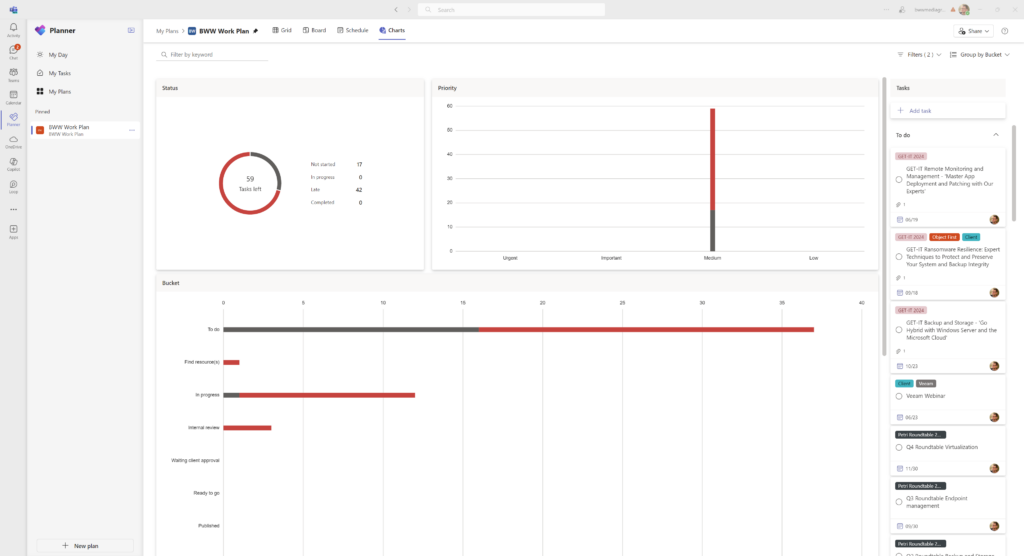
5 tips to get the best out of Microsoft Planner
Here are several more tips to consider when using Planner:
- When you create a new task, assign it to somebody with a due date and priority level straightaway. Without this information, the Kanban board is simply less useful.
- Higher priority tasks should sit at the top of each bucket (column).
- You can add subtasks, notes, files, and files to a task card. These can be displayed on the card. Images are especially useful to help you navigate your board more easily.
- If it’s not already, add the Planner app to Teams and pin it to the to the left-hand side of the Teams app so it is always available.
- Store all related documents in your team. This will make it easy for you to attach them to cards in Planner.
3. Establish ‘one source of truth’ for files
Stop creating multiple versions of a file and physically attaching it to emails. If you are working on a document internally or with an external team, Outlook gives you the option to send a link to the file. From there on, OneDrive for Business will handle file versioning. Once you have many versions of a file, which often end up located in several different locations, not only are you creating more data bloat with unnecessary files but also confusion about where the file is located and which is the latest version. Plus, collaboration features in Office apps work best if you and your team are all working on the same copy of a file.
With ‘one source of truth’ for your files, search can surface what you are looking for more efficiently and Copilot can better digest the information to give more relevant results. I can cannot count the number of times that multiple versions of the same file has caused changes to be lost, mistakes to be made, and revisions to take longer.
4. Use Copilot and Loop to organize meetings
Let’s start with Loop because that doesn’t require you to have a separate subscription.
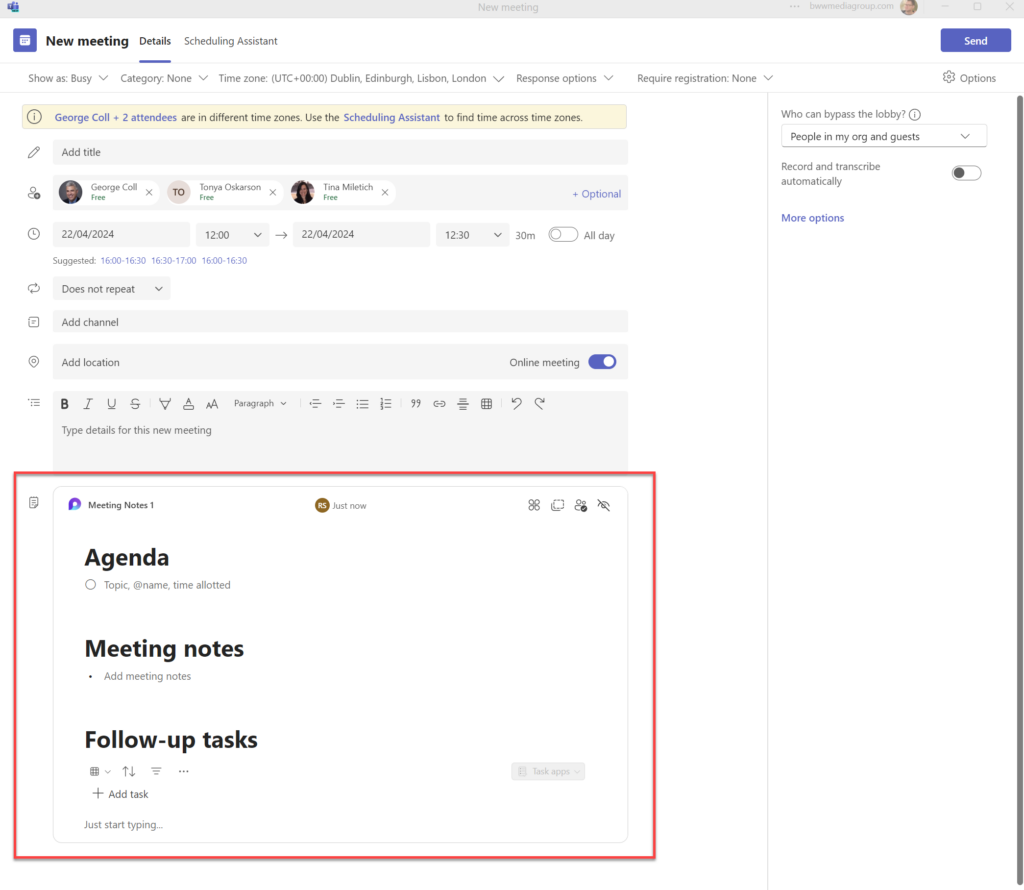
Loop agendas for Teams meetings
Last year, Microsoft released a new feature for Teams meetings that allows you to attach an agenda to each meeting as a portable Loop component. Creating an agenda, and then being able to refer to it before and after a meeting, can help you stay focused on what you need to achieve and what was decided along the way. Loop agendas cannot be added to existing meetings.
If you are using Google Workspace or other email and calendaring solution, you cannot add Loop meeting agendas to Teams meetings at this time.
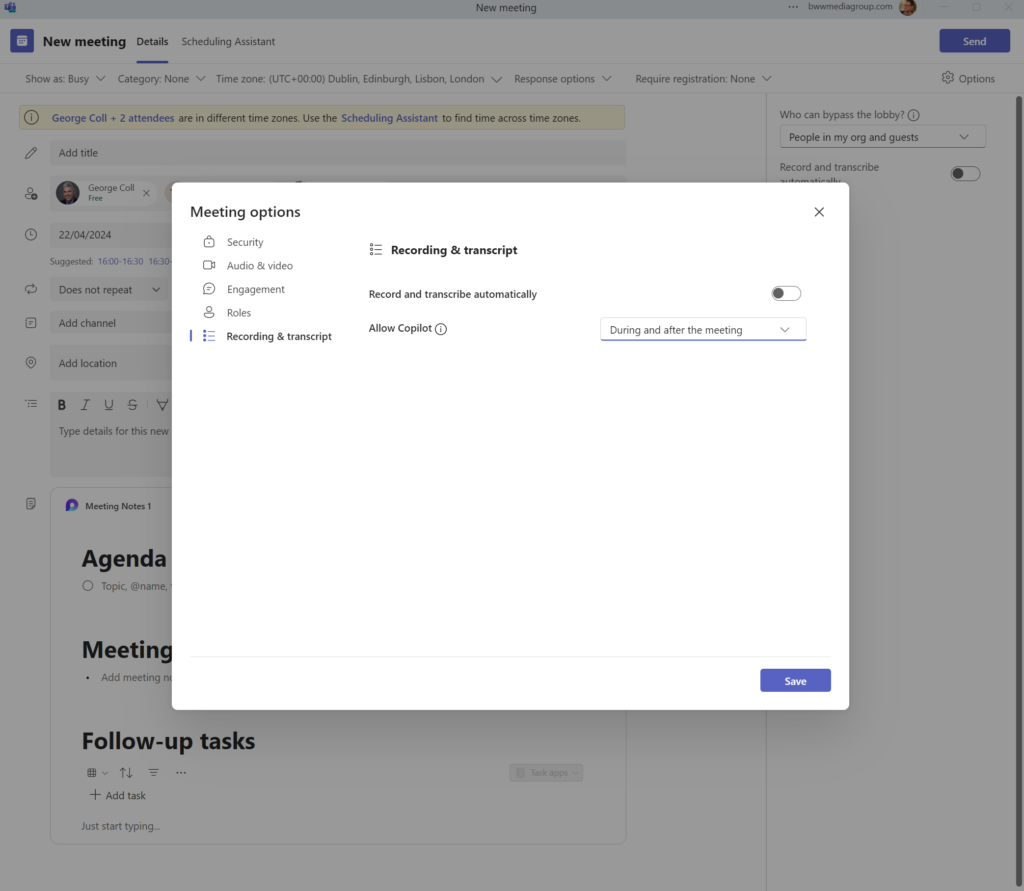
Copilot for meetings
Like with Loop, Copilot can be enabled for new meetings. And it is only available for meetings created in the Teams app. Copilot transcribes meetings and then provides a summary of what was discussed. You can also use Copilot to quickly find information from past meetings.
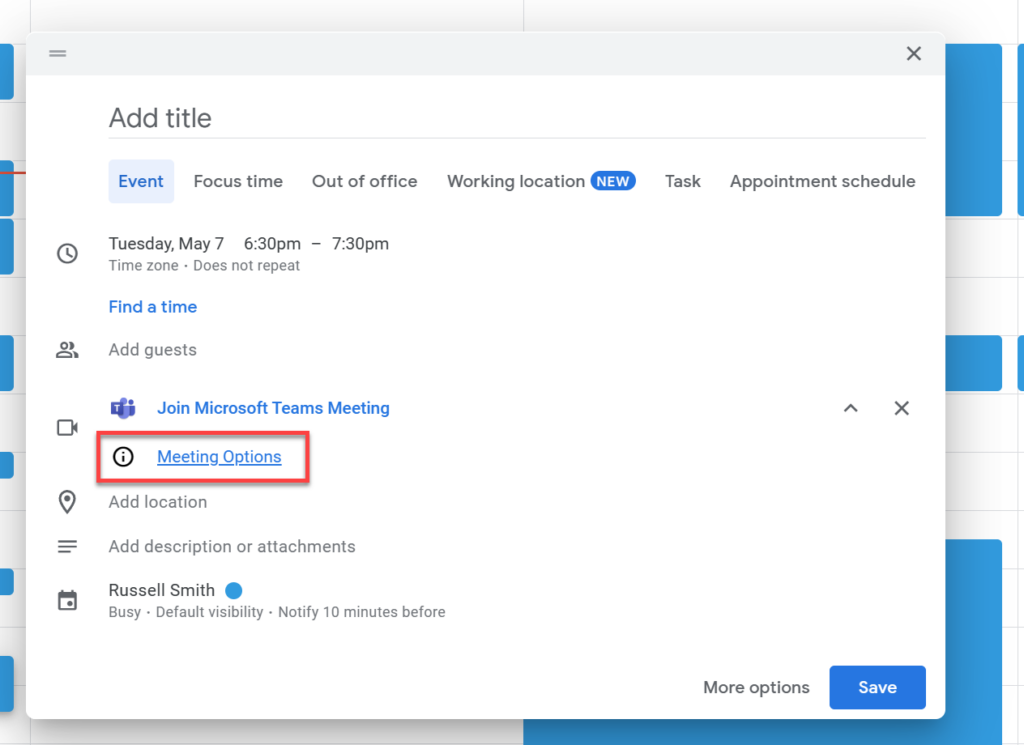
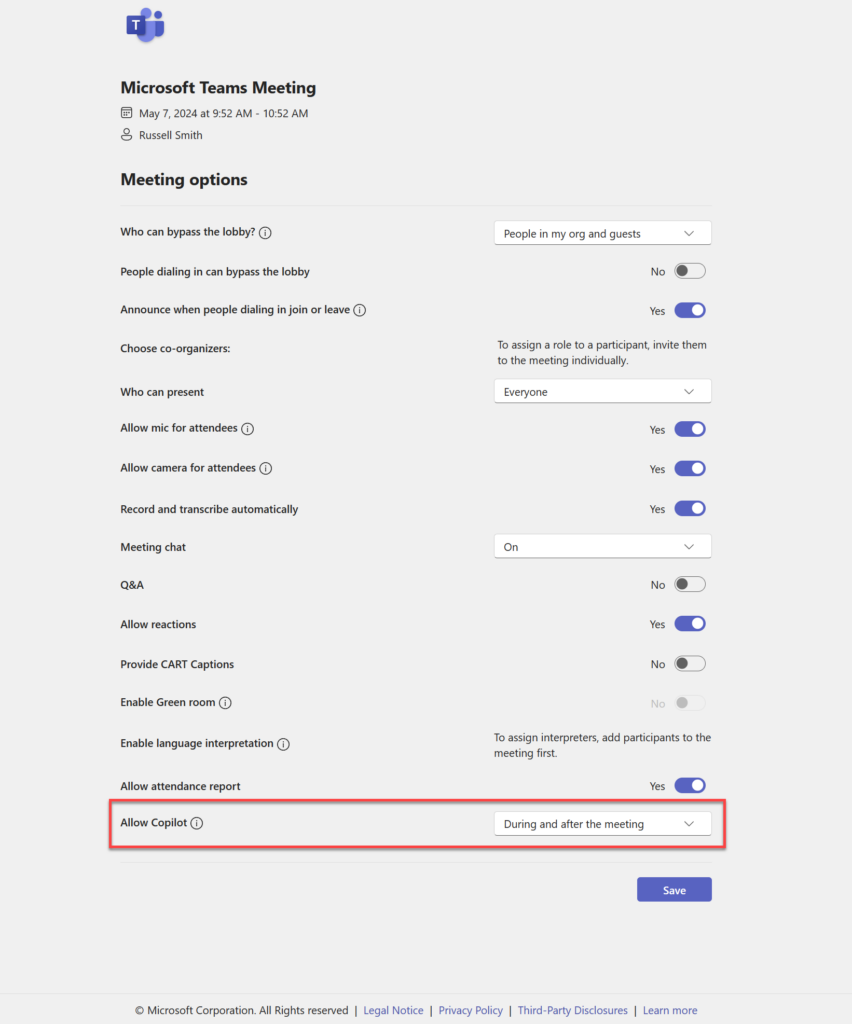
To enable Copilot using Google Workspace or other email and calendaring solution that supports the creation of Teams meetings, you’ll need to click Meeting Options below Join Microsoft Teams Meeting.
This will open a separate tab where you get the option to enable settings like recordings, transcriptions, and Copilot.
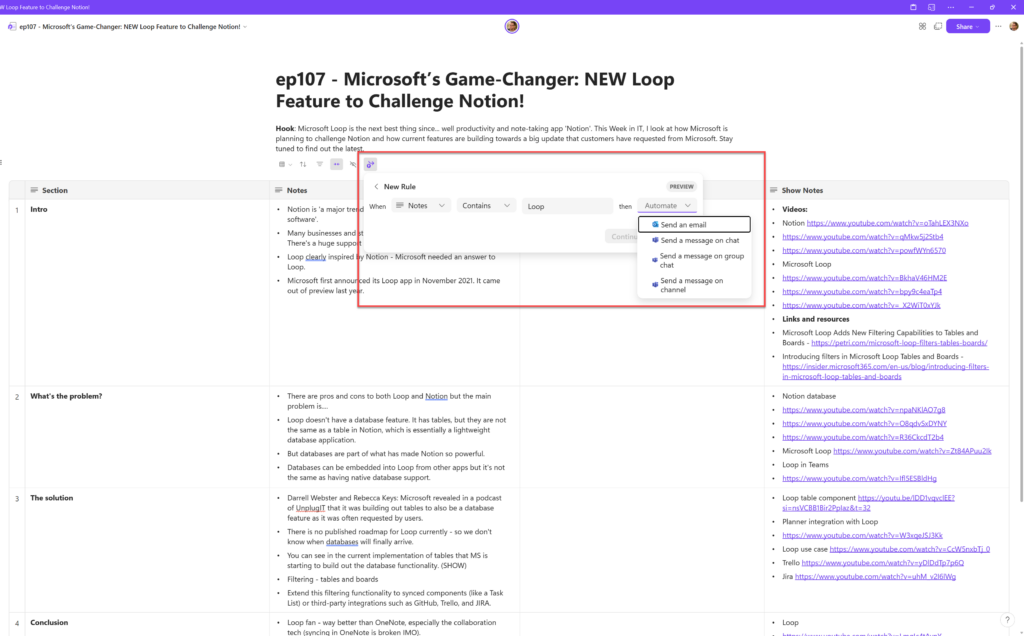
5. Automate workflows with Power Automate
Finally, and this is optional, you can use Power Automate to create workflows across Microsoft 365. For example, if somebody adds a document to a Teams channel or updates a table in Loop, you can use a simple process to create a workflow that sends an update to the necessary people. One of the biggest challenges organizations have is communicating the different parts of a process to team members.
The more you can automate processes, the more likely you will be successful in getting tasks complete efficiently. Nobody wants to have to communicate every small change that is made to a document to team members. But those changes could be important and have a knock on effect to something else.
Russell Smith, the Editorial Director at Petri IT Knowledgebase, has over two decades of hands-on experience in IT, in both small business settings and government IT infrastructure projects. Russell started writing for Windows IT Pro Magazine in t...