How to Configure Windows Autopatch: A Step-by-Step Guide

Windows Autopatch is a new Microsoft service that organizations can use to automate the patching of Windows, Microsoft 365 apps for Enterprise, Microsoft Edge, and Microsoft Teams. It aims to complete patching cycles within the least amount of time, whilst keeping downtime to a minimum.
In this guide, we’ll show you how to configure Windows Autopatch in your organization. Before we go into the details about how the service works, though, we’ll briefly cover why we patch, and what we patch.
What is Windows Autopatch?
There are three main reasons we patch Windows devices and apps that run on them:
- Security: Fixing vulnerabilities and protecting the OS from evolving threats.
- Quality: Fixing issues or bugs that impede the user experience.
- Features: New capabilities that Microsoft adds to Windows over time.
These three reasons match nicely with the 2 types of updates that Microsoft provides: Quality & security updates and Feature updates.
- Quality & security updates are released each month, usually on the second Tuesday of the month.
- Feature updates are released less regularly – roughly every 12 months.
As IT pros, we typically apply patches to the Windows operating system and Microsoft 365 Apps for Enterprise: This includes apps like Word, Excel, PowerPoint, Microsoft Edge, and Microsoft Teams, as well as non-Microsoft apps that are installed on a device.
As Microsoft’s update services do not support patching of third-party apps, Windows Autopatch will only manage updates for the core Windows operating system, Microsoft 365 Apps for Enterprise, Microsoft Edge, and Microsoft Teams.
The origins of Windows Autopatch
In November 2021, Microsoft announced the private preview of Microsoft Managed Desktop P1, a mini-version of the company’s complete IT outsourcing service, Microsoft Managed Desktop. Throughout the preview, Microsoft dropped the Microsoft Managed Desktop branding and marketed the solution as exactly what it was – a managed patching solution. This shift also brought the new moniker, Windows Autopatch.
While the branding changed, the underlying processes that powered Microsoft Managed Desktop P1 are still in place. This can be seen through the similarities in the enrollment process for both Windows Autopatch and Microsoft Managed Desktop.
Differences between Windows Update for Business (WUfB) and Windows Autopatch
Windows Autopatch is a managed service that takes over the management of Intune update rings and update groups, and therefore Windows Update for Business. It removes the need for IT admins to plan and operate the update process and workflow.
This new service leverages the native capability of Intune and Windows Update for Business, moving the burden of management and orchestration from the organization to Microsoft itself.
Windows Autopatch licensing
Windows Autopatch requires:
- Windows Enterprise E3 or greater (including A3 and A5).
- Devices need to be managed by Intune or co-management.
- Devices also need to be Azure AD joined or hybrid Azure AD joined.
Service-level objectives (SLOs)
| Management area | Service level objective |
|---|---|
| Windows quality updates | The service aims to keep at least 95% of eligible devices on the latest Windows quality update 21 days after release. |
| Windows feature updates | The service aims to keep at least 99% of eligible devices on a supported version of Windows so that they can continue receiving Windows feature updates. |
| Microsoft 365 Apps for enterprise | The service aims to keep at least 90% of eligible devices on a supported version of the Monthly Enterprise Channel (MEC). |
| Microsoft Edge | The service configures eligible devices to benefit from Microsoft Edge’s progressive rollouts on the Stable channel. |
| Microsoft Teams | The service allows eligible devices to benefit from the standard automatic update channel. |
How to configure Windows Autopatch
The first step to leveraging Windows Autopatch in your environment is to enroll your tenant into the service.
Enrolling your tenant for Windows Autopatch
This is a quick process that starts from within the Tenant administration blade of the Microsoft Endpoint Manager admin center:
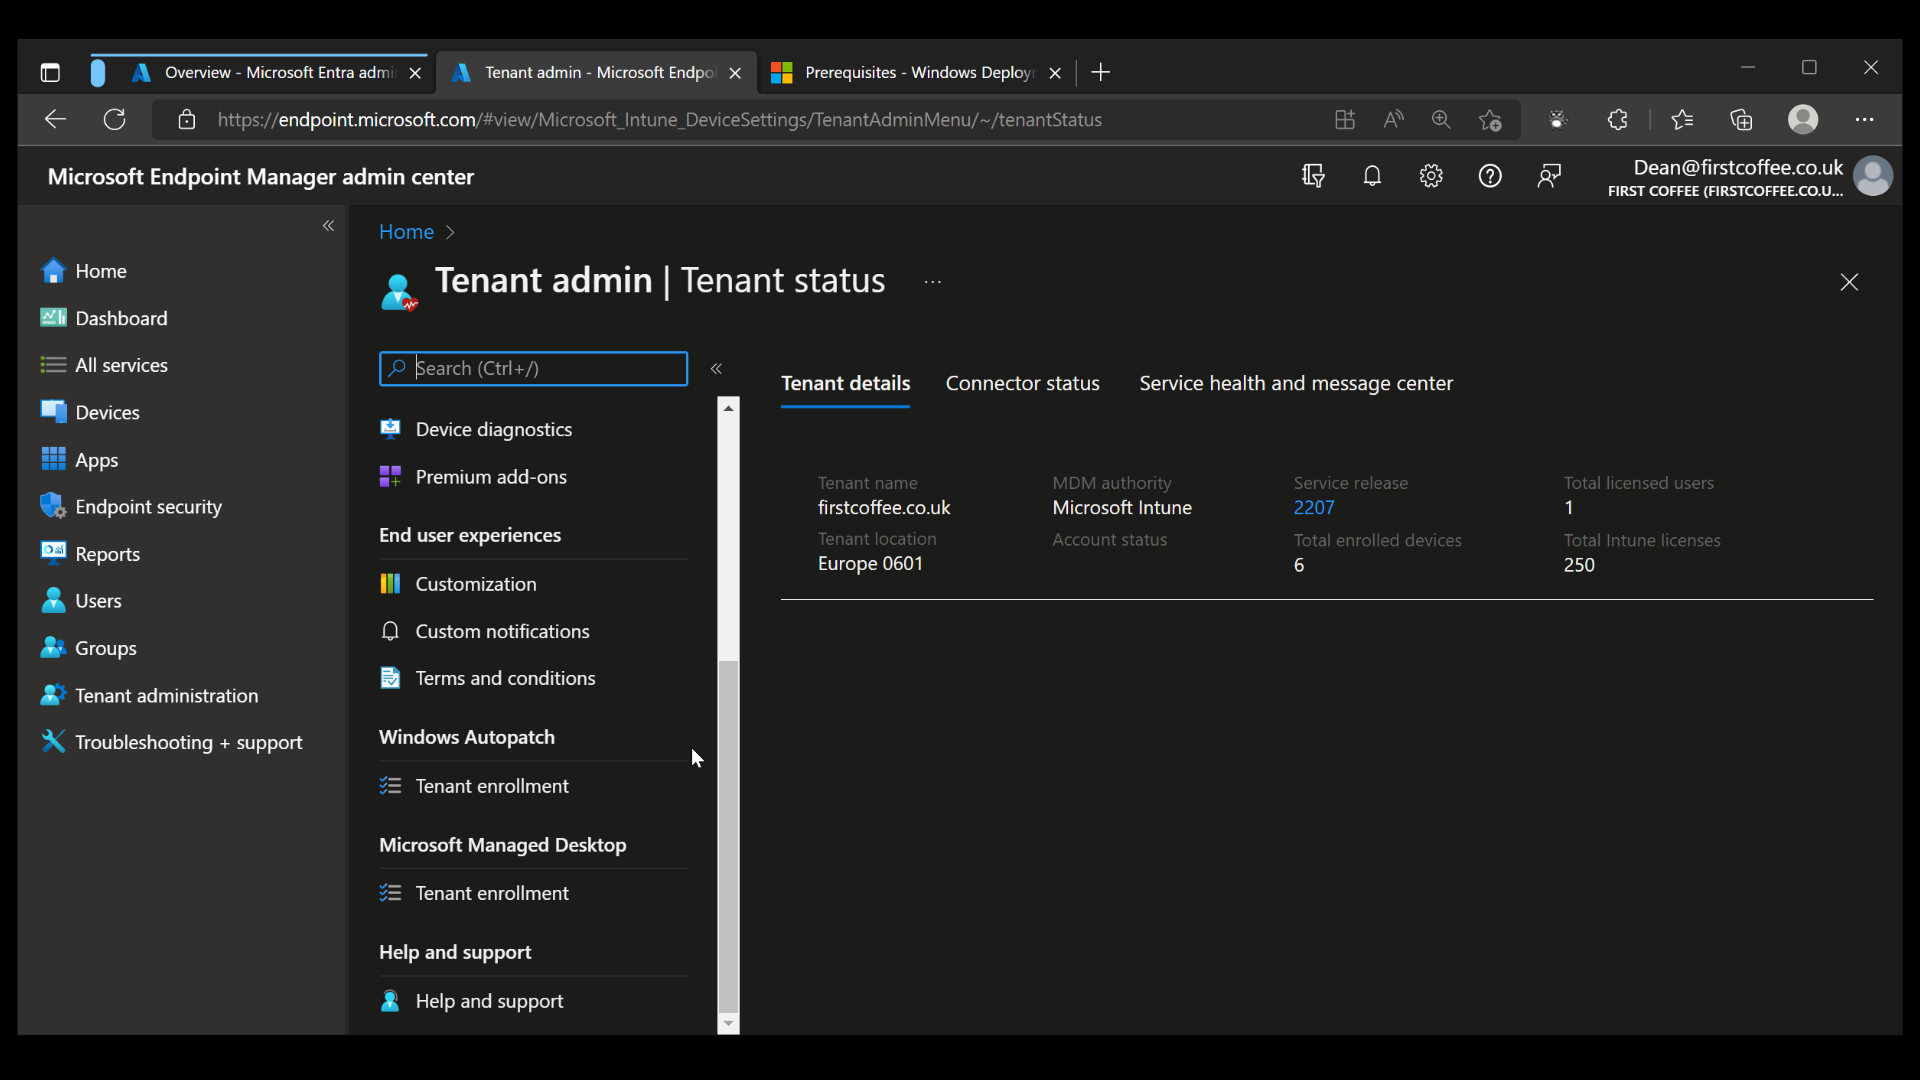
- From the Microsoft Endpoint Manager admin center, click on Tenant administration.
- From the Tenant admin blade, scroll down to Windows Autopatch and click on Tenant enrollment.
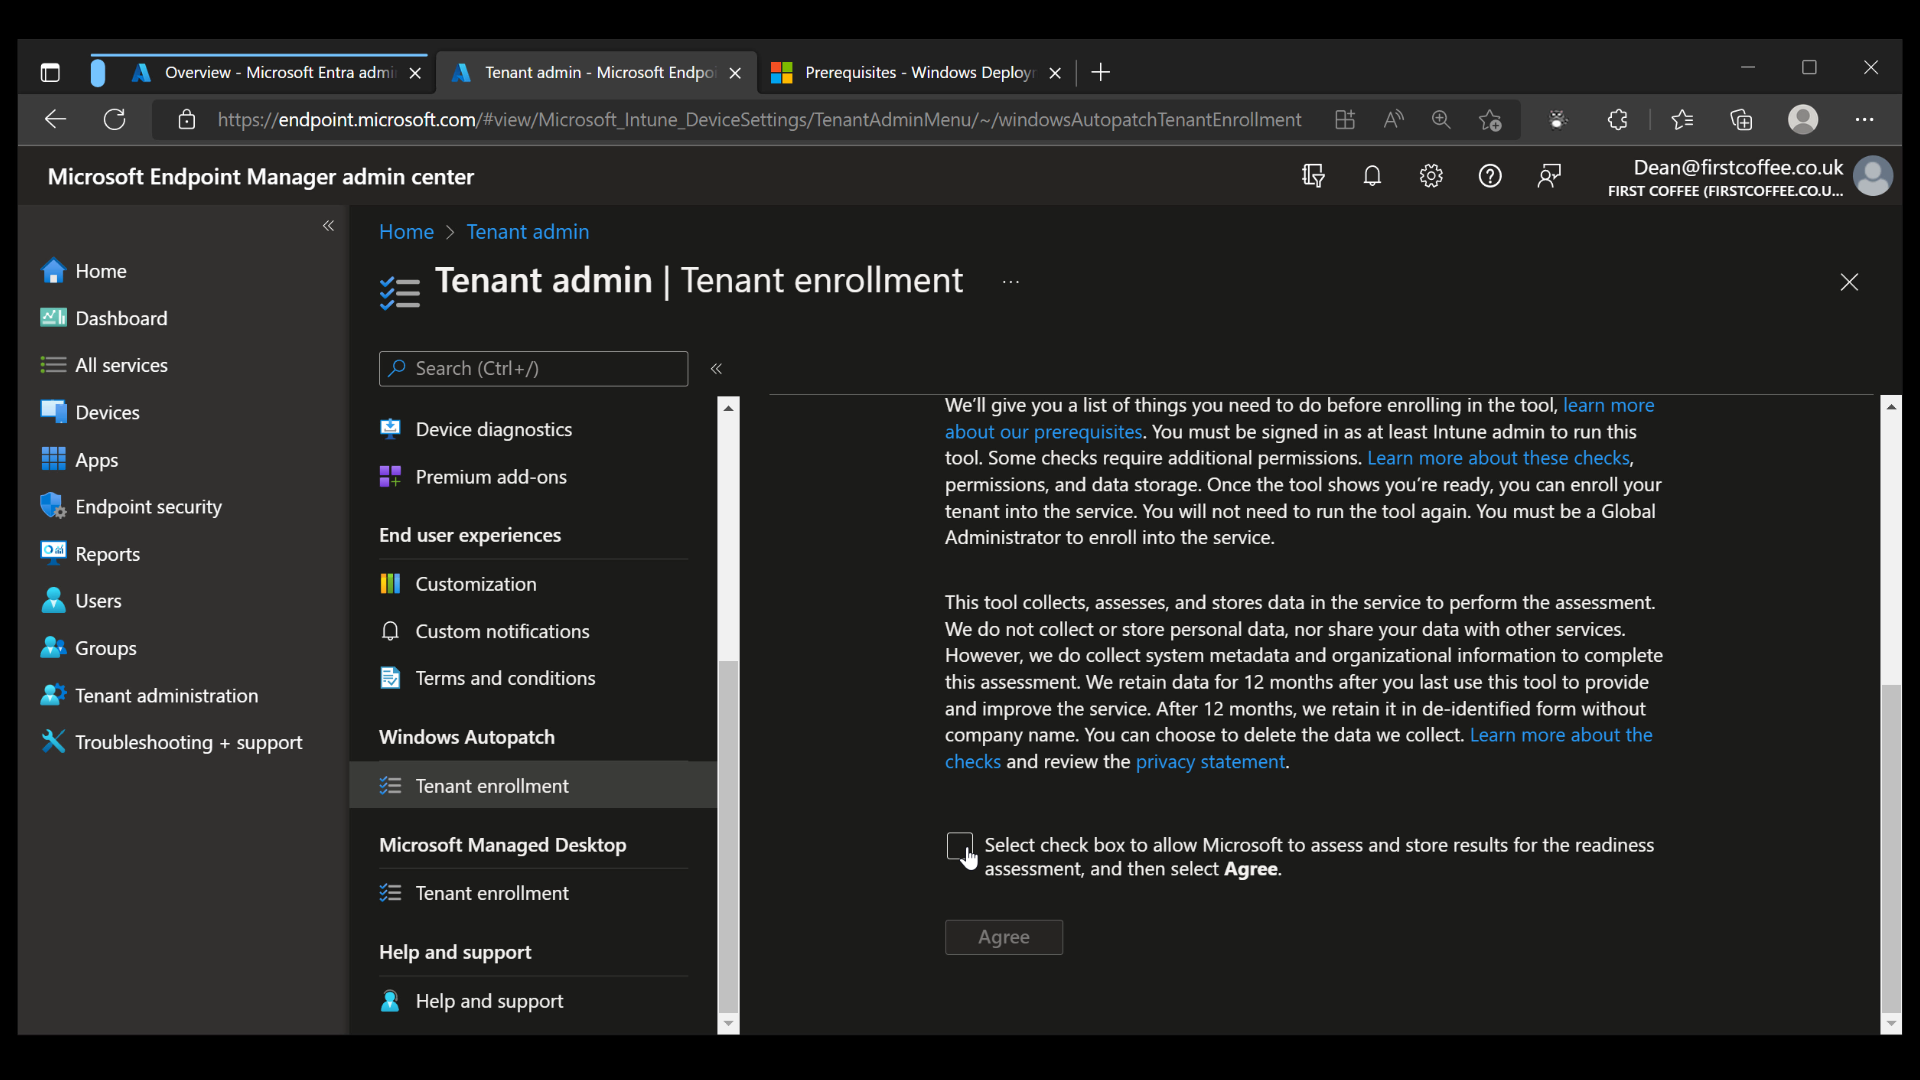
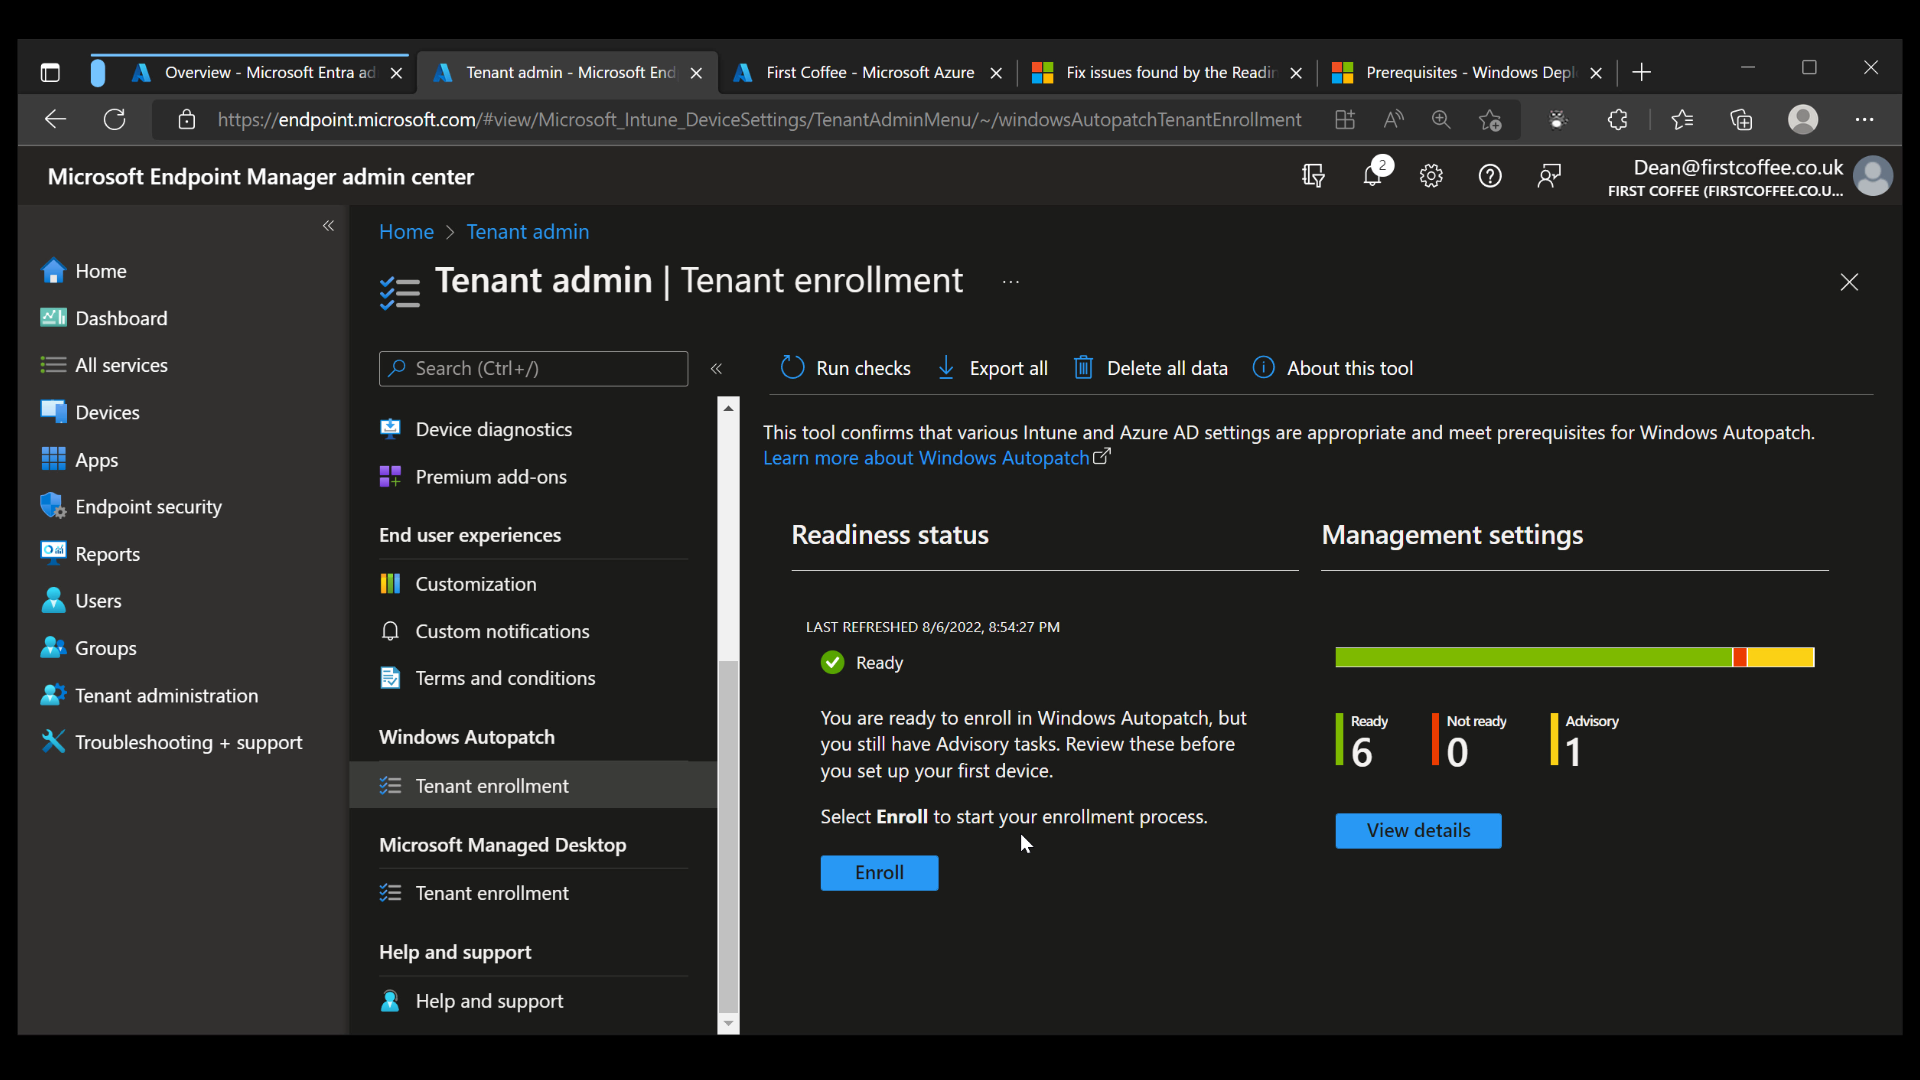
The Tenant enrollment blade will show detailed information about the service, giving links to prerequisites, documentation, and privacy statements. At the bottom of the scrolling window, you’ll need to select the checkbox to enable the Agree button.
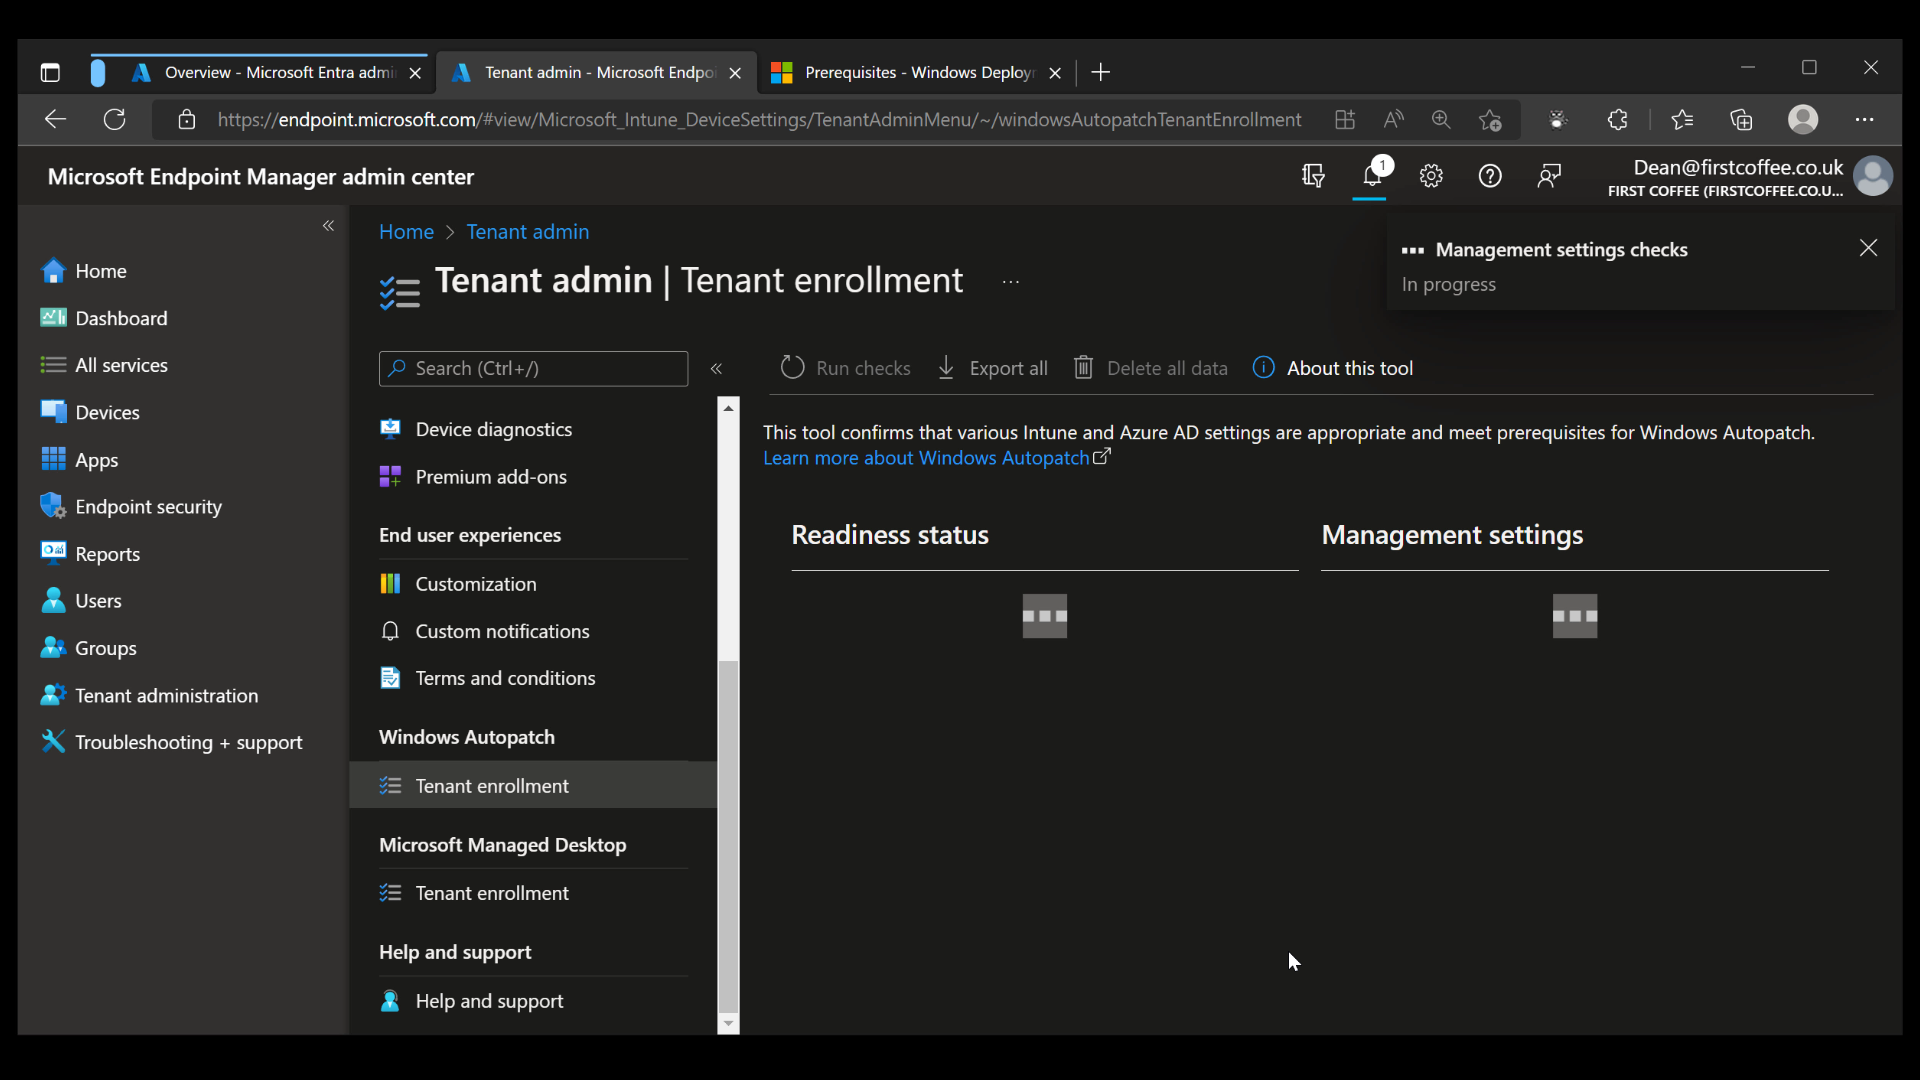
Once the Agree button is clicked, the enrollment process begins. Within a few moments, a notification appears to show the progress of the “Management settings” checks.
The Management setting checks will complete within a few minutes, providing an overview of the settings that have been checked, as well as their ‘Readiness’ state.
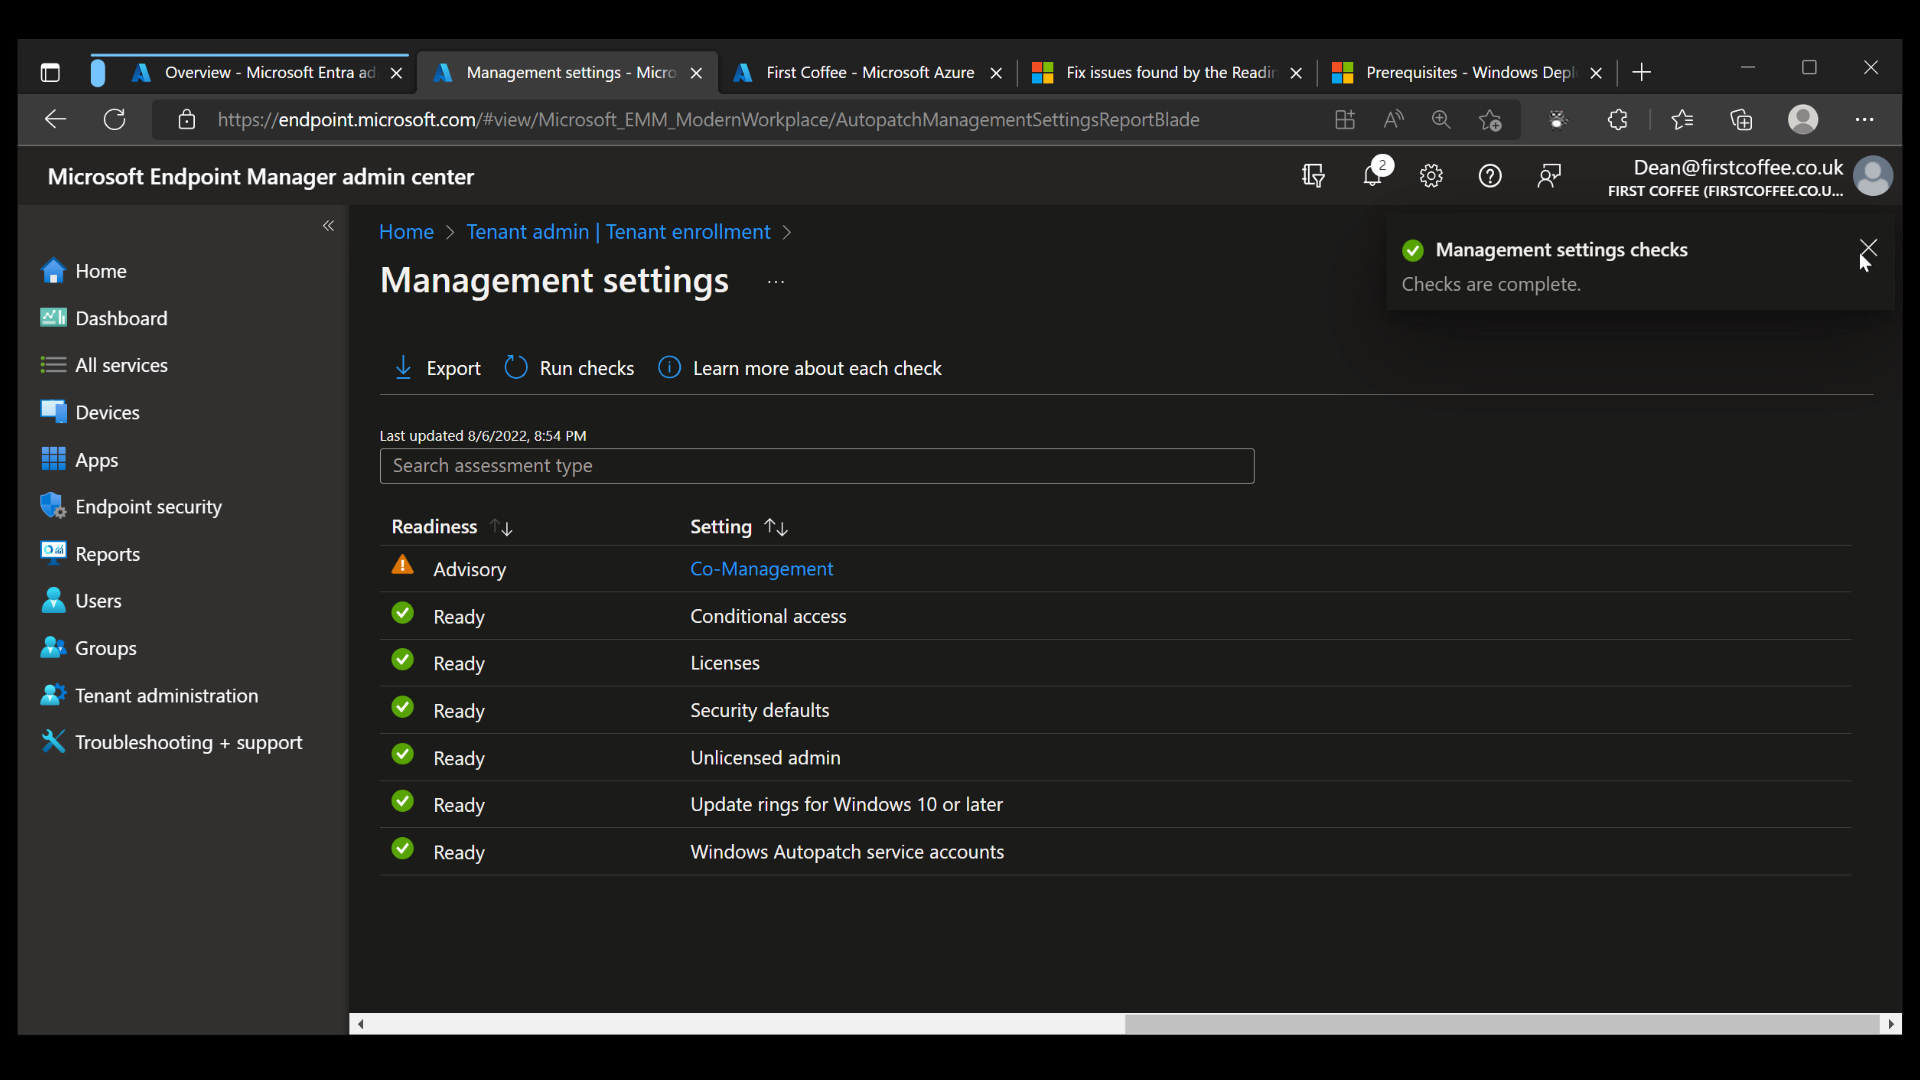
Finally, since all checks are complete and only ‘Advisory’ and ‘Ready’ items are shown, we are ready to start our enrollment process.
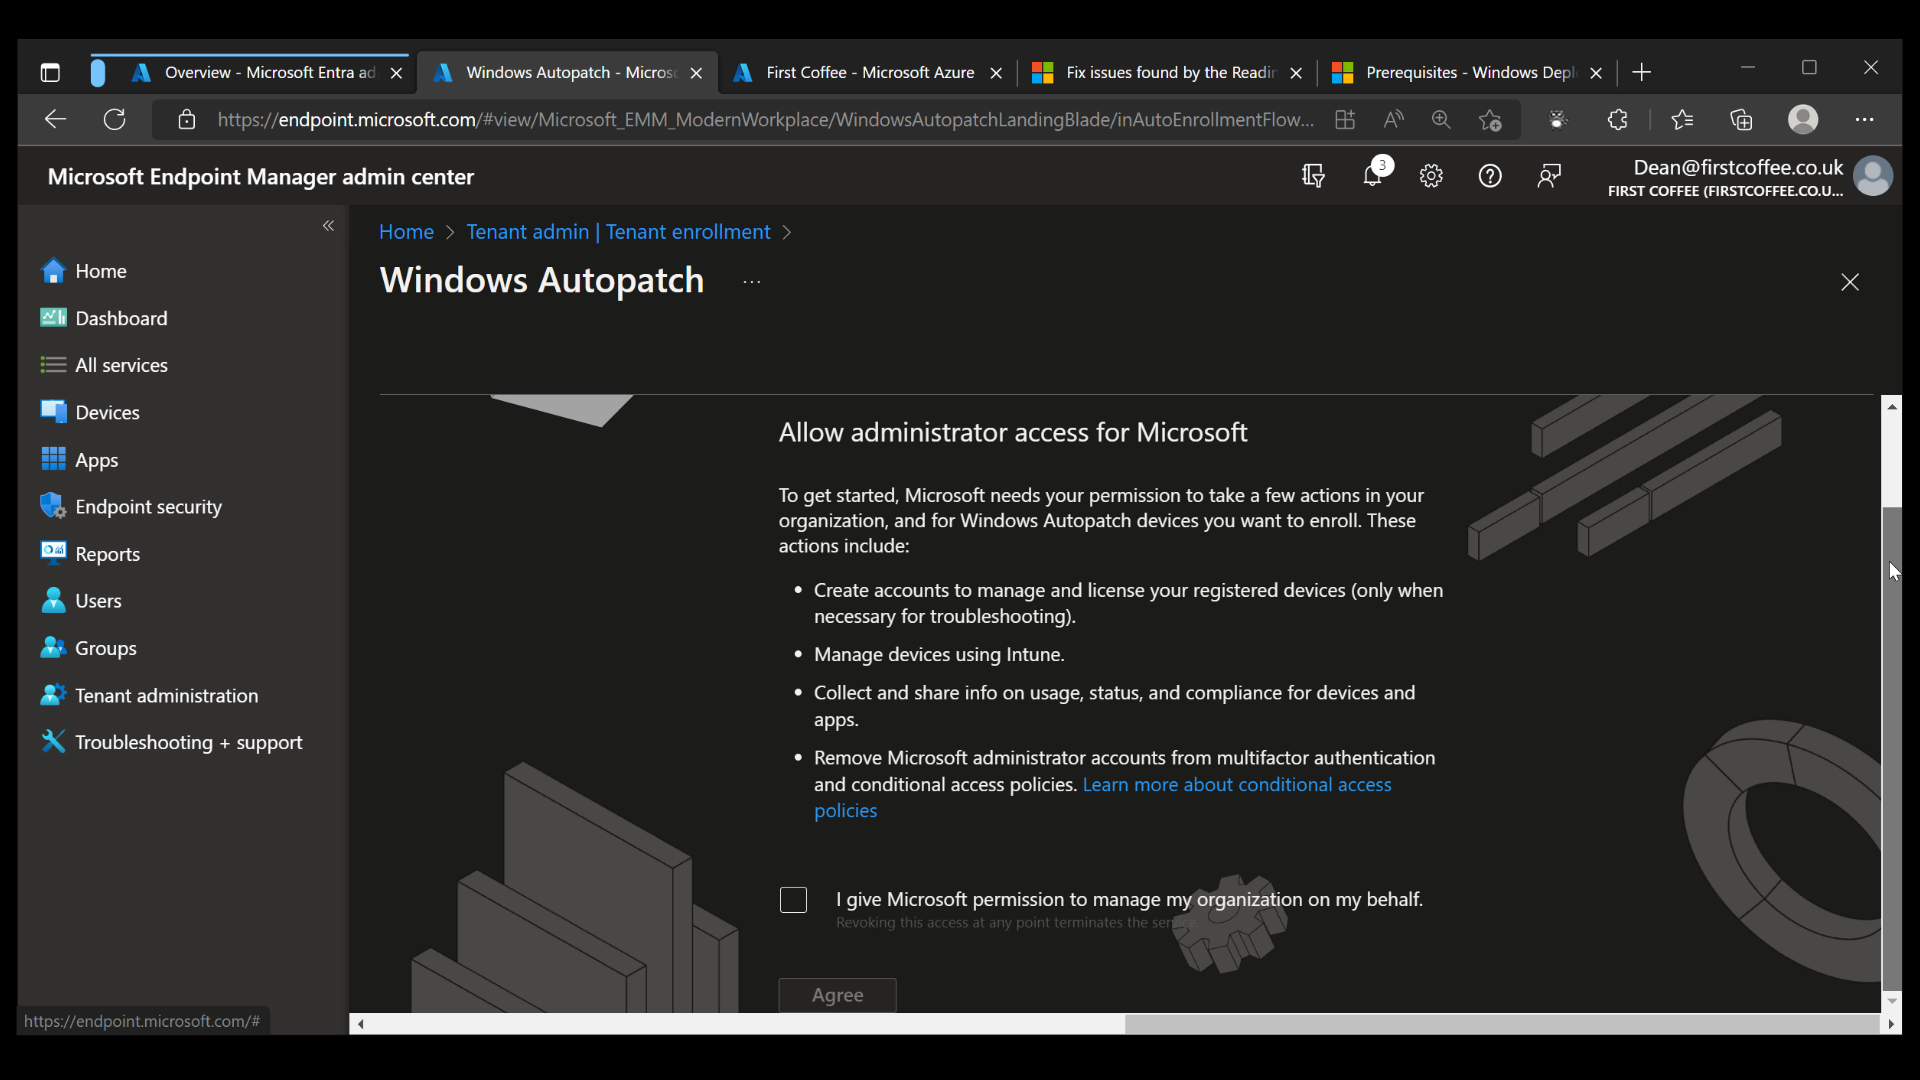
Upon clicking Enroll, we are presented with a set of permissions that Microsoft must be granted in order to manage Windows updates on behalf of your organization. If you’re comfortable with the requested permissions, simply click the checkbox and choose Agree.
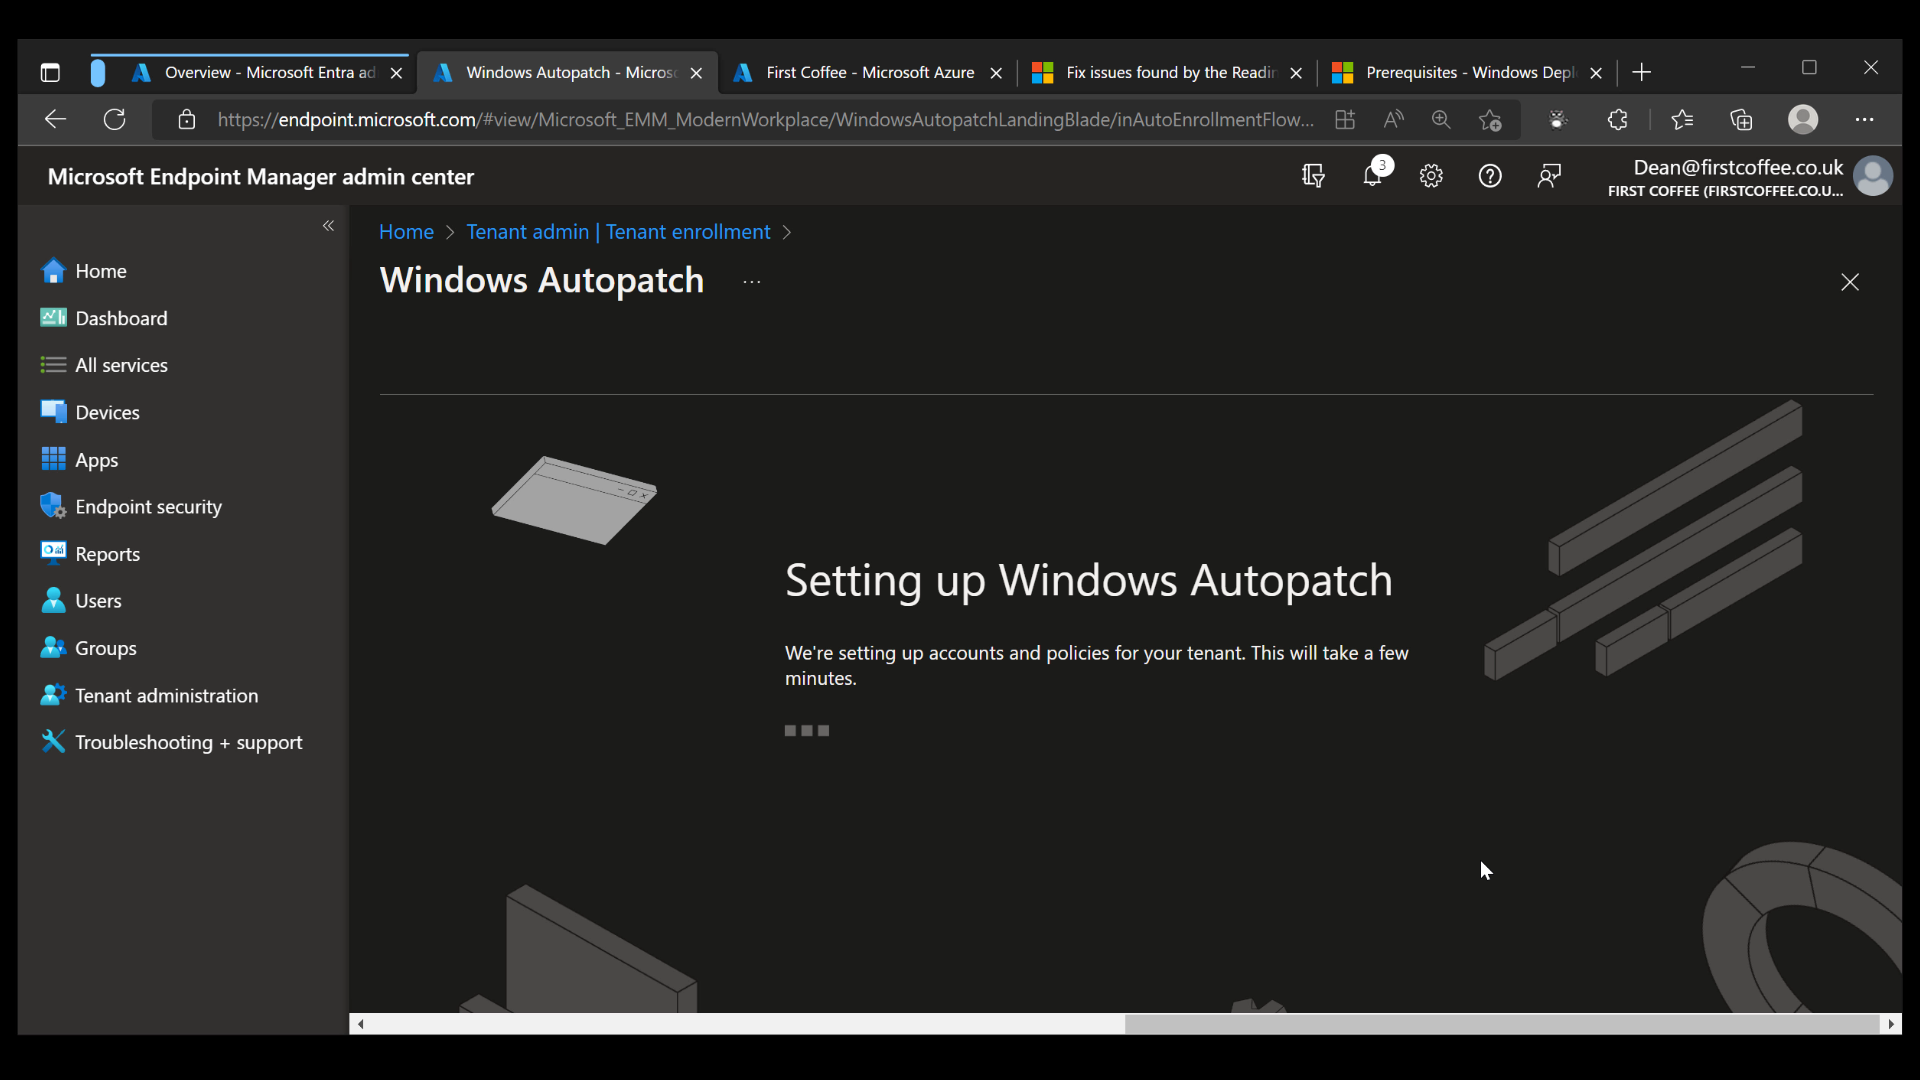
Windows Autopatch setup
Upon completion of the previous wizard, the Windows Autopatch setup will begin automatically. The service will start setting up accounts and policies for your tenant, a process that will take a few minutes
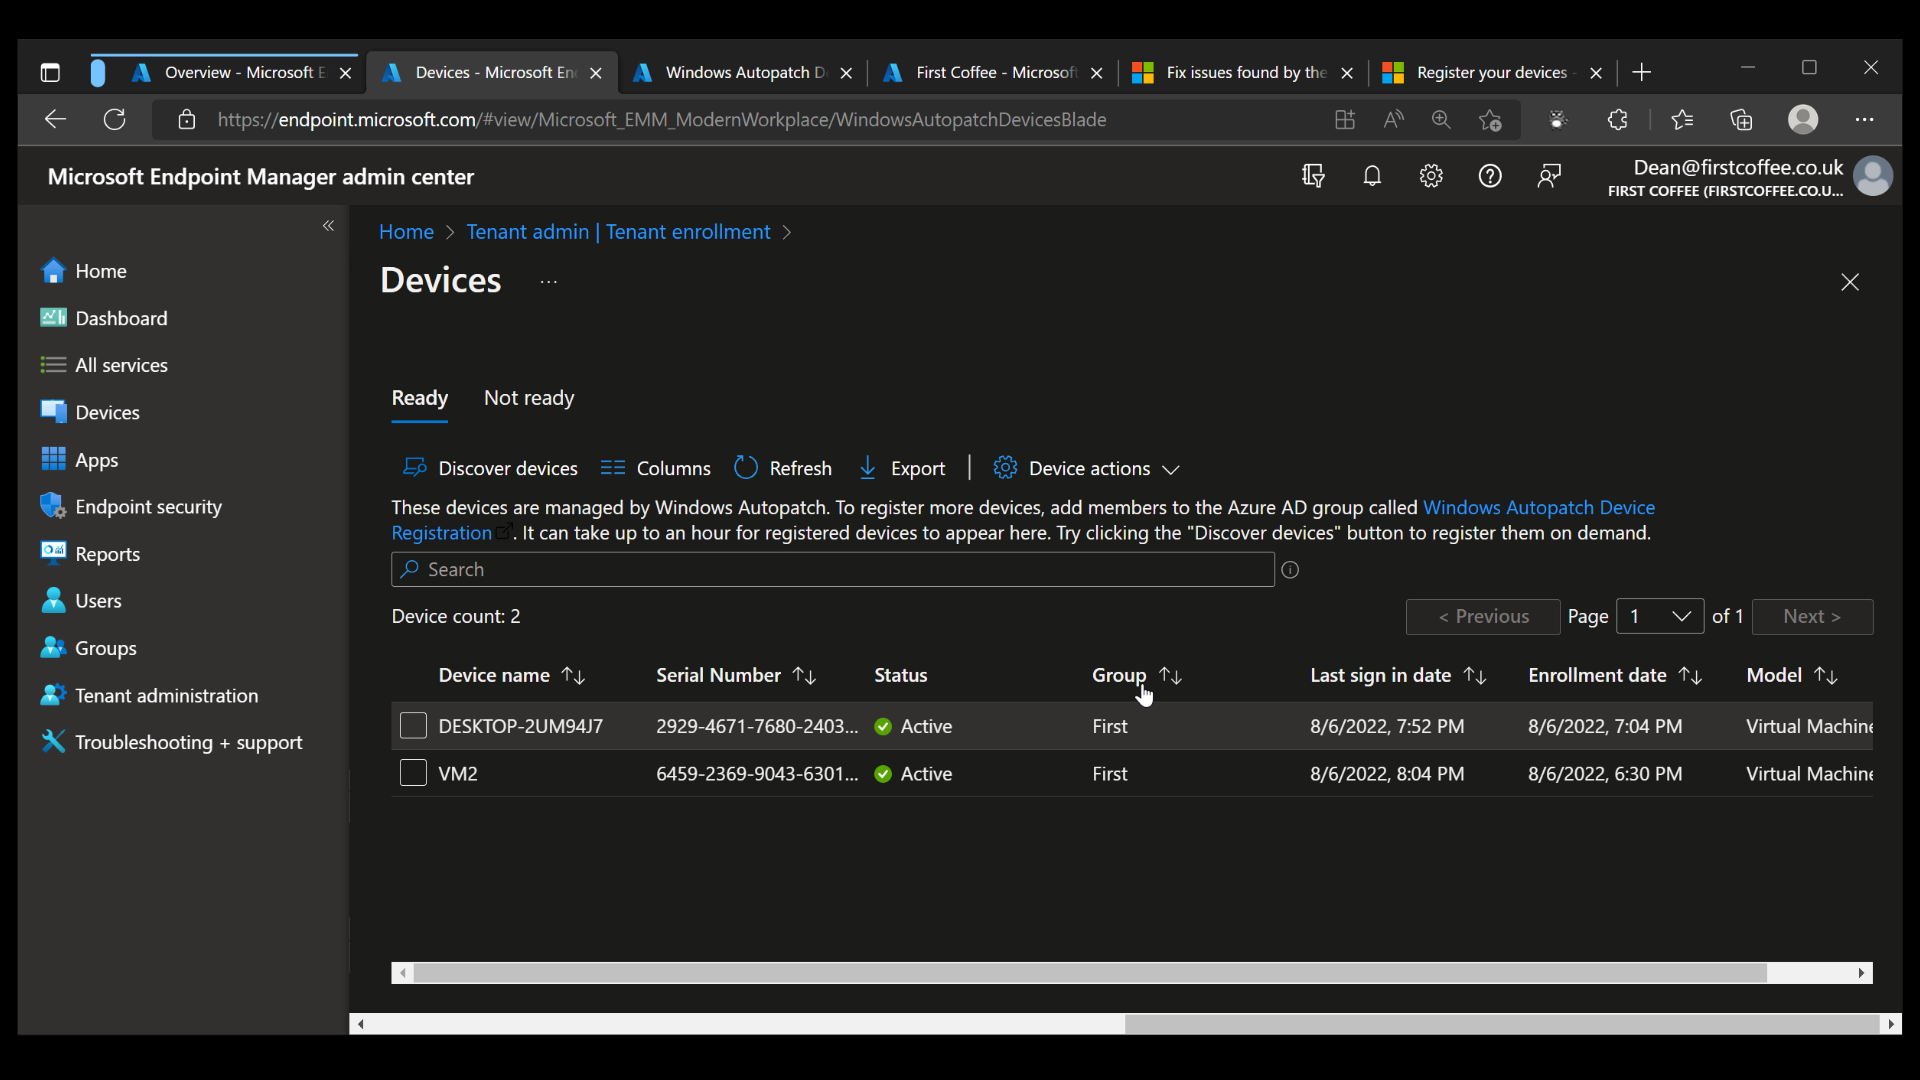
Once completed, the Devices blade will show devices that are currently registered for the service. This will be empty until you start registering new devices.
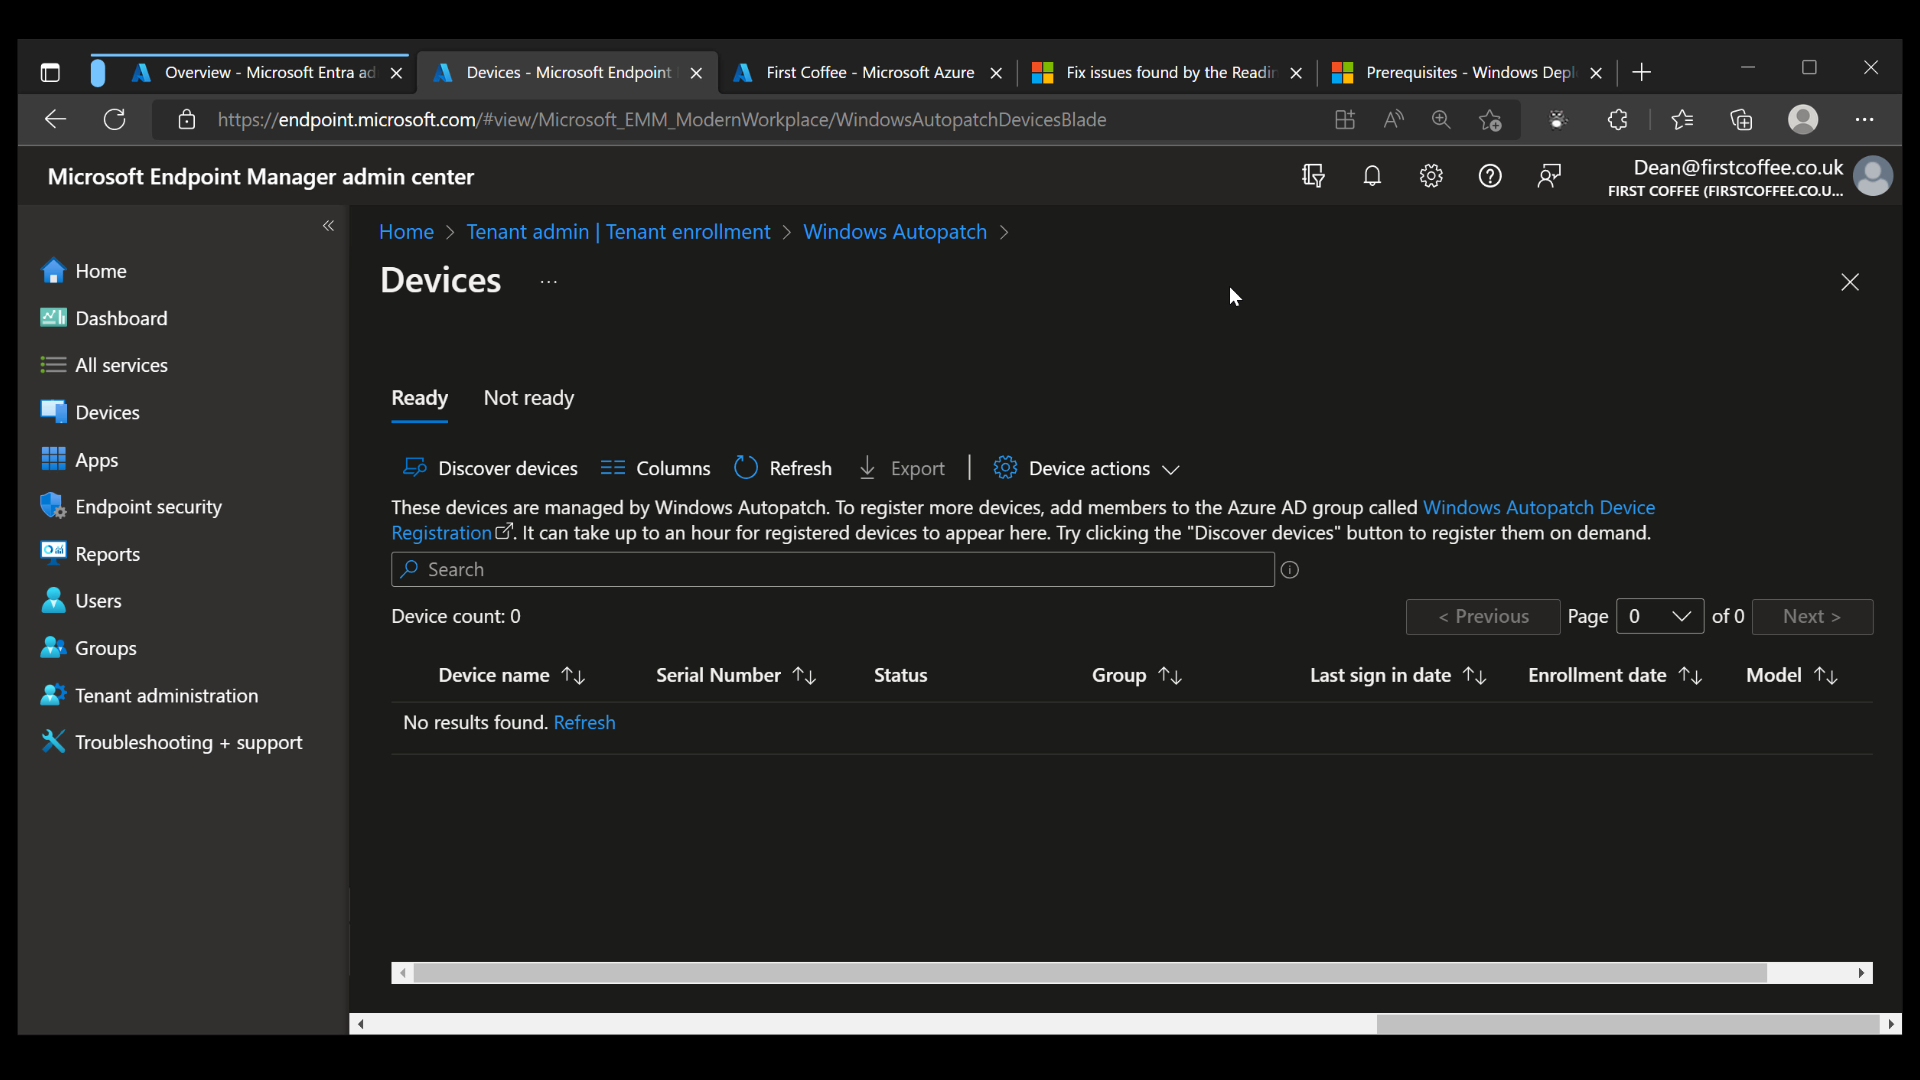
Registering devices for Windows Autopatch Setup
The next step is to get some devices to be managed by Windows Autopatch. A number of Azure AD groups are created by the service during the enrollment process, but only one of them needs to have devices added to it to get started. This is done by simply adding devices to an Azure AD group named Windows Autopatch Device Registration.
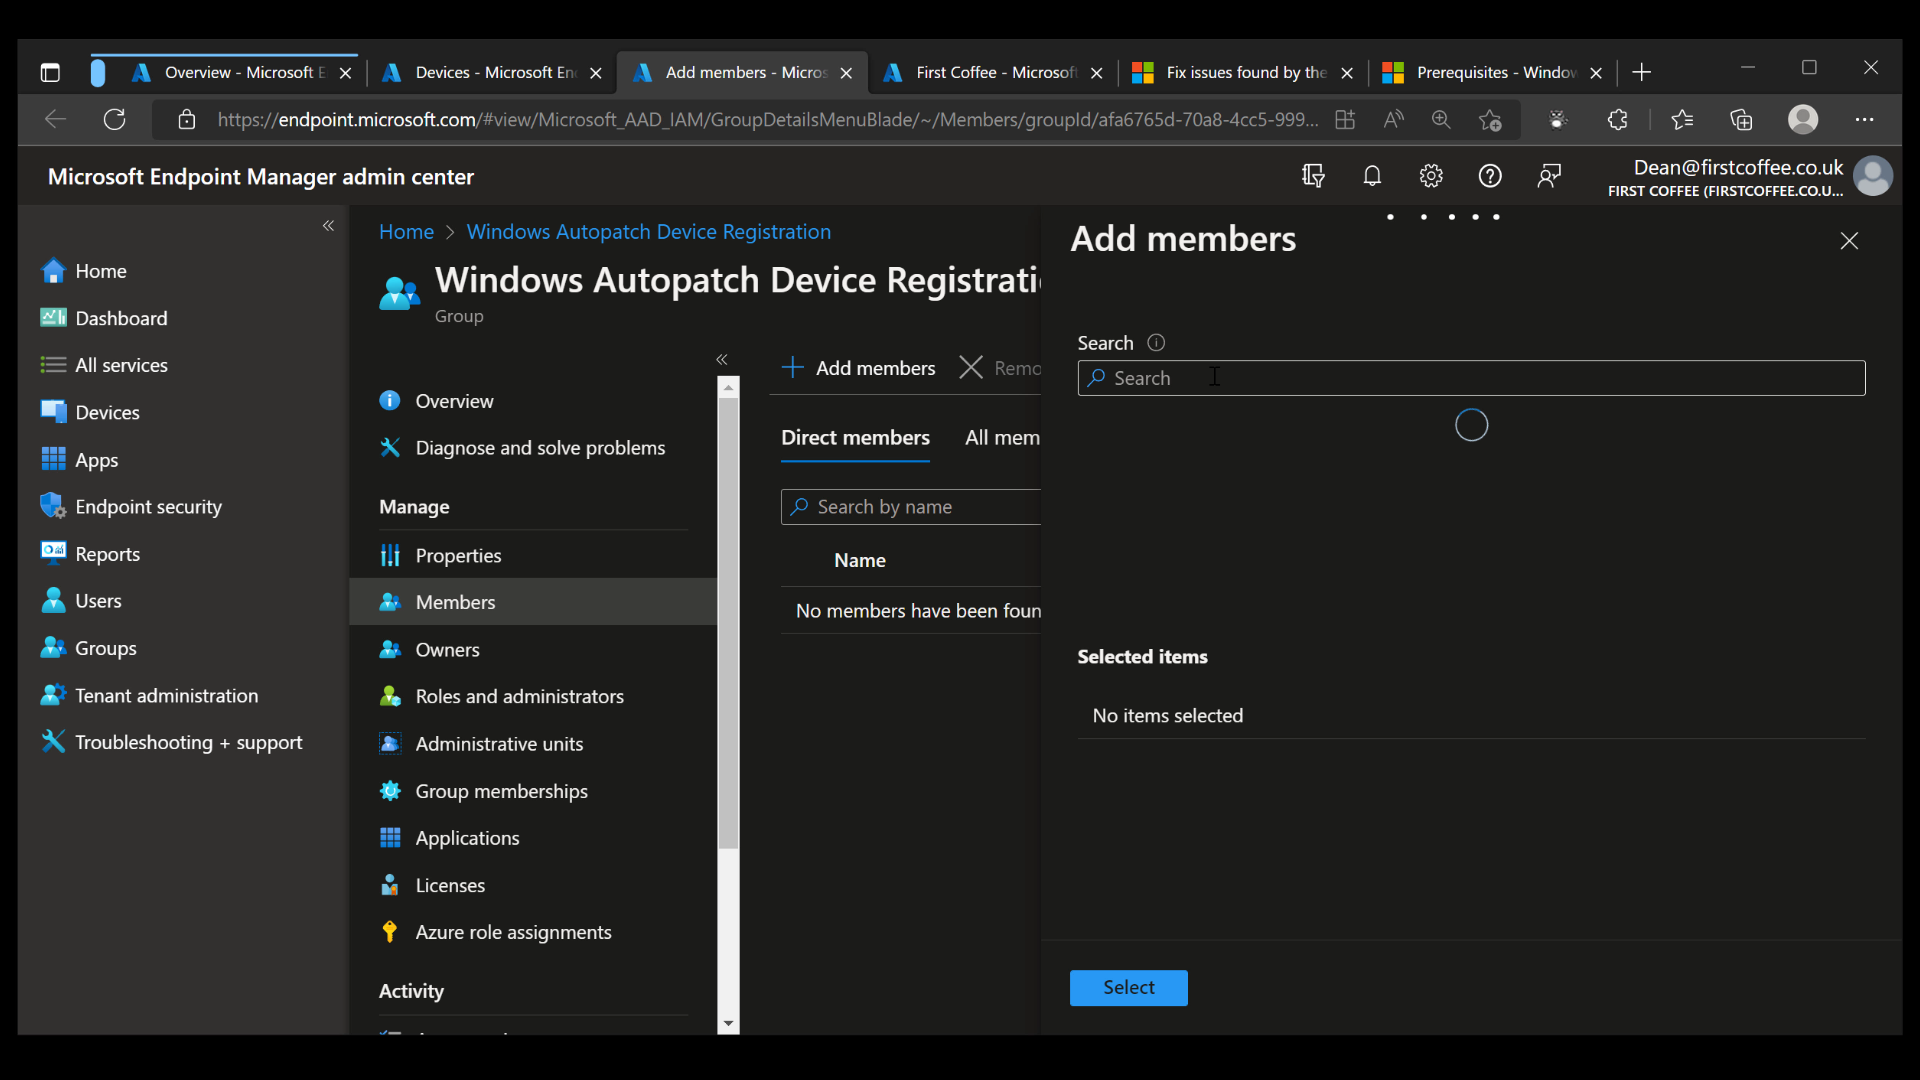
- From the Microsoft Endpoint Manager admin center, click Groups, and search for Windows Autopatch Device Registration.
- Choose the group, then choose Members, Add Members
- Add some (or all) devices to this group, either by choosing them individually or by nesting a larger group.
Once devices are added to the group, the synchronization process can take up to an hour. Once completed, devices will appear in the Devices blade.
Managing Groups and Update Rings in Windows Autopatch Setup
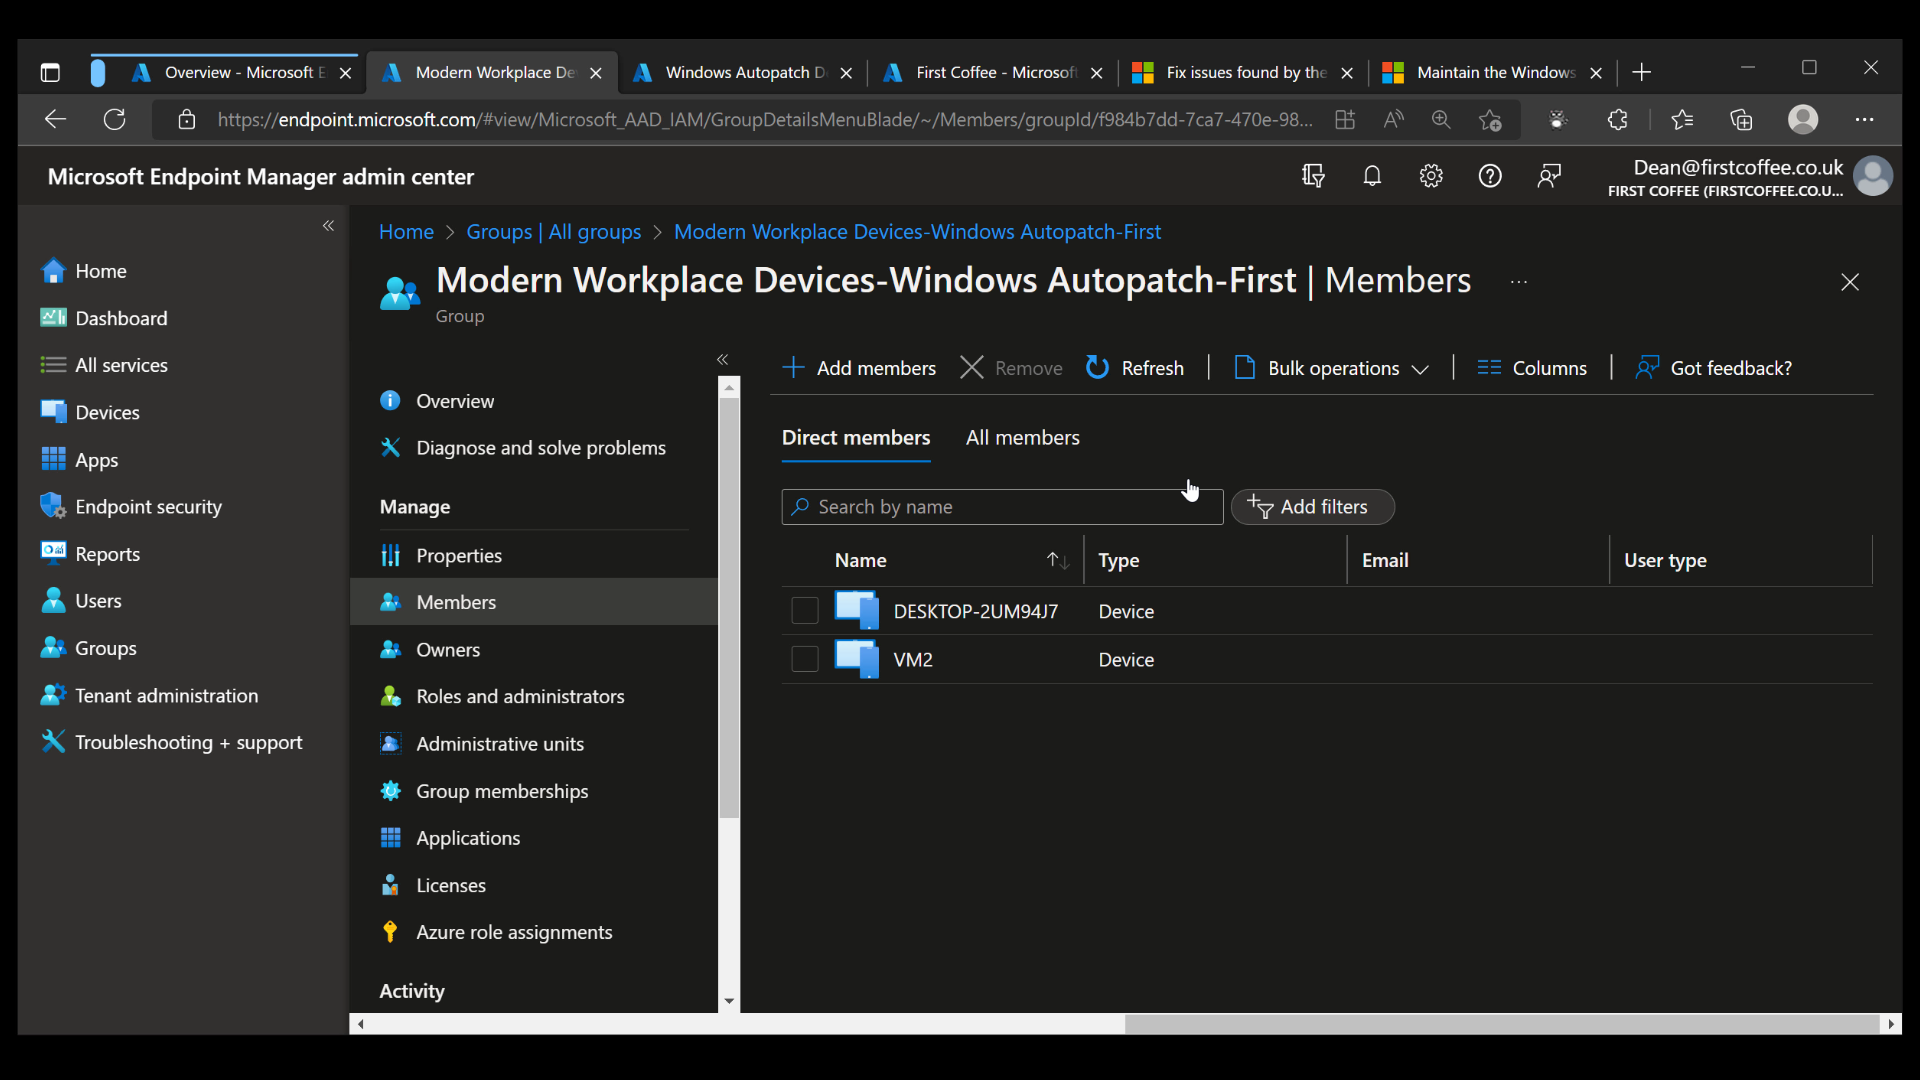
Once devices show in the devices list, you’ll be able to see which update group they have been automatically added to. In this example above, my two devices were added to the ‘First’ group, as you can see from the image below.
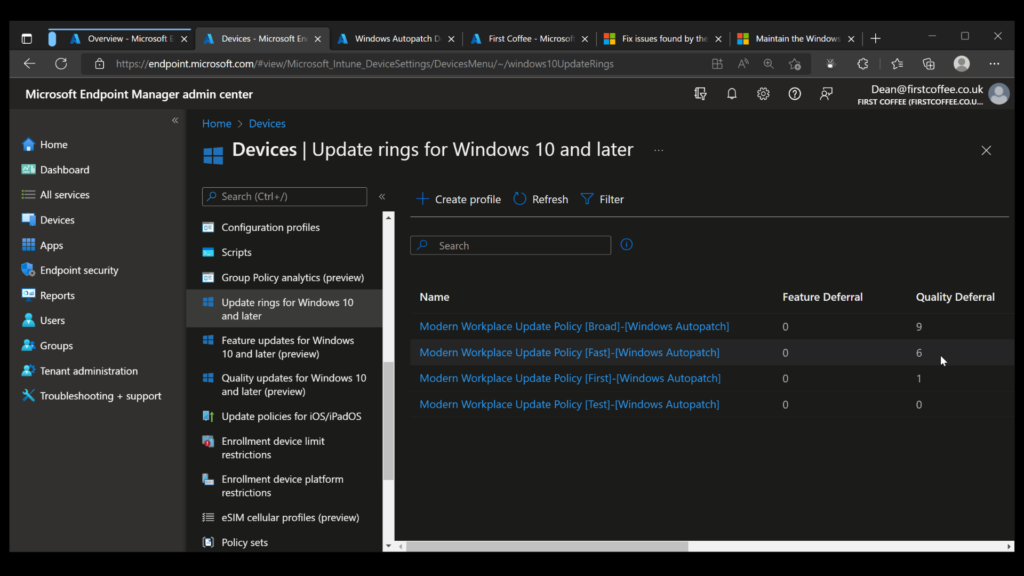
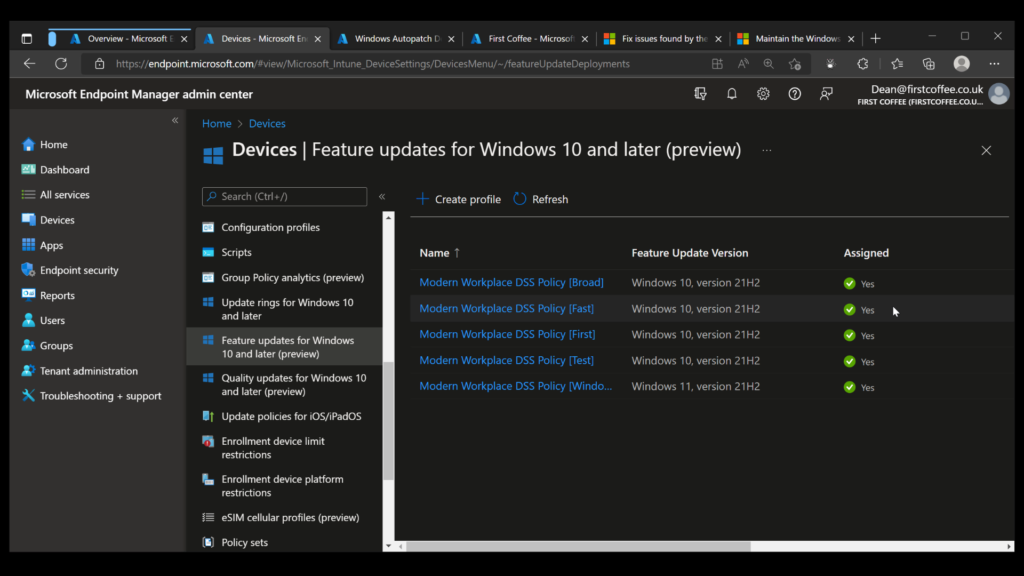
A number of update rings and feature update rings are also automatically created by the service, as shown in the following two graphics.
Once devices have been registered for Windows Autopatch, you should no longer have to worry about them. Depending on their characteristics and information gathered about their use, installed apps, etc., they will be placed into appropriate groups to determine when they will be patched.
Ultimately, the burden of managing updates for these devices is, in theory, no longer that of your organization – simply leave them to be automatically updated using a formula and process determined by Microsoft.
Conclusion
As a brand new offering, Windows Autopatch has received a mixed response so far. For organizations that are mature in their patching process and automation, this new service is probably of limited use.
However, for organizations that are new to Intune or are not quite so mature in their automation or update management, the service could be much more appealing. There’s definitely some value in a service that can automate the process of managing and rolling out updates for Windows and Microsoft 365 apps.
If you want to get more details about how to configure the service in your organization, feel free to check out my video guide covering the first few steps of Windows Autopatch enrollment.
FAQs
How does Windows Autopatch handle emergency patches outside the regular update schedule?
Windows Autopatch includes an emergency protocol that automatically deploys critical security patches within hours of release, bypassing the normal testing phases while maintaining system stability. The service monitors threat levels continuously and can trigger immediate deployment when necessary.
Can Windows Autopatch be customized for specific business hours and maintenance windows?
The Windows Autopatch service allows organizations to define custom deployment schedules, including specific maintenance windows and business hours restrictions. This helps prevent disruptions during peak operational times while ensuring updates are still applied effectively.
Does Windows Autopatch provide rollback capabilities if updates cause issues?
Yes, Windows Autopatch includes automated rollback functionality that monitors system performance post-update. If critical issues are detected, the service can automatically reverse problematic updates across the organization while maintaining security standards.
How does Windows Autopatch handle bandwidth management during large-scale deployments?
Windows Autopatch employs intelligent bandwidth throttling and delivery optimization technologies to prevent network congestion. The service coordinates update distribution across different network segments and can pause/resume based on available bandwidth.
What reporting capabilities are available with Windows Autopatch for compliance purposes?
Windows Autopatch provides comprehensive reporting tools that track update status, compliance levels, and deployment progress across the organization. These reports include detailed audit trails, success rates, and security compliance metrics required for regulatory requirements.

Dean is a Microsoft Security MVP, Microsoft Certified Trainer, and co-organizer at the Workplace Ninjas UK.


