How to Use Role-Based Access Control with Windows Admin Center

In this article, I’ll explain what role-based access control (RBAC) is and how to configure it in Windows Admin Center. Next, I will cover topics such as creating roles, assigning permissions, and adding users and groups. I’ll include best practices and tips for managing access to your resources with Windows Admin Center.
Windows Admin Center RBAC
In Windows Admin Center, Role-Based Access Control (RBAC), works by configuring your managed servers with a PowerShell ‘Just Enough Administration’ endpoint. The configuration process involves installing PowerShell scripts and using the ‘Desired State Configuration’ to finish the configuration.
This endpoint defines the roles, including what criteria of the system each role is allowed to manage. By default, users need local admin privileges on the servers they wish to manage with WAC. However, you may come across more junior admins or focused IT Pros on your team that you’d rather not give full administrator rights to. You can use RBAC in Windows Admin Center to provide those users with more limited access to the machine.
I’ll go into greater detail on how this all works very soon.
How to Control Access to the Windows Admin Center Gateway
Windows Admin Center allows you to manage what users have various access levels to the gateway and the servers managed. There are two roles:
- Gateway users – these users can connect to Windows Admin Center to manage servers through the gateway. However, they cannot change any access permissions or the authentication type used to authenticate to the gateway.
- Gateway administrators – these admins can configure who gets access to WAC and can modify its authentication. Note: local administrators on the gateway machine can always administer the WAC gateway service.
Windows Server Active Directory
By default, Active Directory or local computer groups are used to control access to the gateway. Using AD groups, you can manage which users acquire administrator access to the WAC interface.
On the Users tab, you can specify which users access Windows Admin Center as a gateway user. Once you add one or more security groups in this tab, access is automatically restricted to the members of said groups.
Smartcard
When you specify an additional group for smartcard-based security, smartcard authentication is enforced. After you add a smartcard-based security group, a user can only access Windows Admin Center if they are a member of a listed group and a smartcard group included in the list.
Similar to the Users tab, the Administrators tab is where you control access to WAC as a gateway admin. The administrators list supports smartcard authentication in similar ways to the users list – the AND condition for a specific security group and a smartcard security group.
Microsoft Entra ID
To go all in on security when designing your Windows Admin Center access, you can use Microsoft Entra ID to add another layer of security. Requiring Microsoft Entra ID authentication to access the gateway improves your security posture even more.
When you use Microsoft Entra ID, you manage WAC administrator and user access permissions from the Entra portal, rather than in the Windows Admin Center interface/UI.
Let me show you how I used Microsoft Entra ID to add a layer of security to my gateway.
After opening Windows Admin Center in my browser, I selected ‘Access‘ under the Gateway section after clicking the ‘Settings‘ gear icon in the upper-right corner of the main Windows Admin Center webpage.
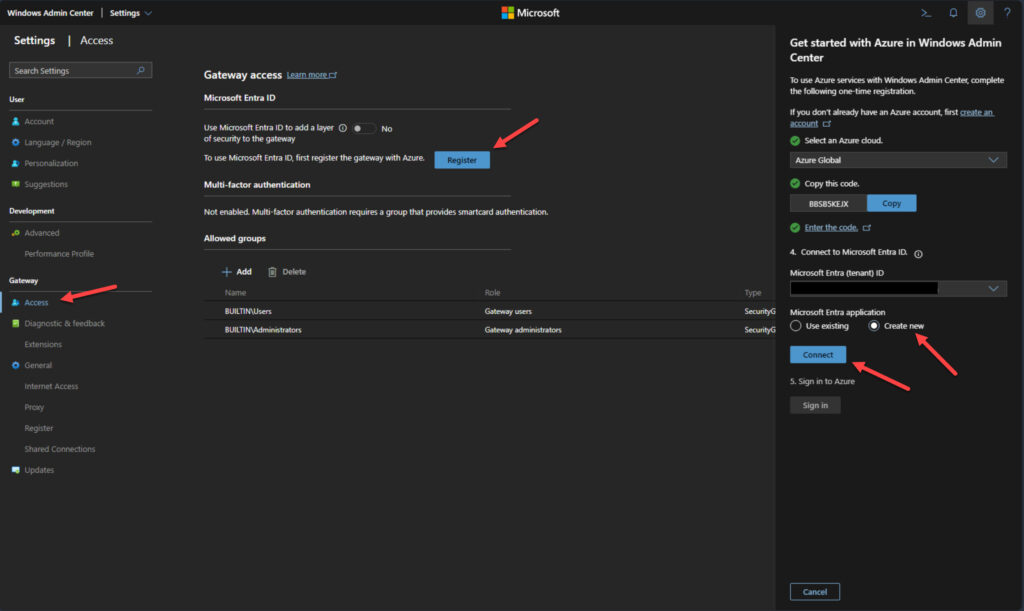
I clicked the Copy button next to the code. A new website popped up and asked me to enter the code. After doing so, I logged into my Microsoft Entra ID tenant with my Global Administrator credentials. I chose to ‘Create new‘ application in Entra ID.
After clicking Connect, another dialog opened to confirm I wanted to grant this application appropriate rights to my tenant.
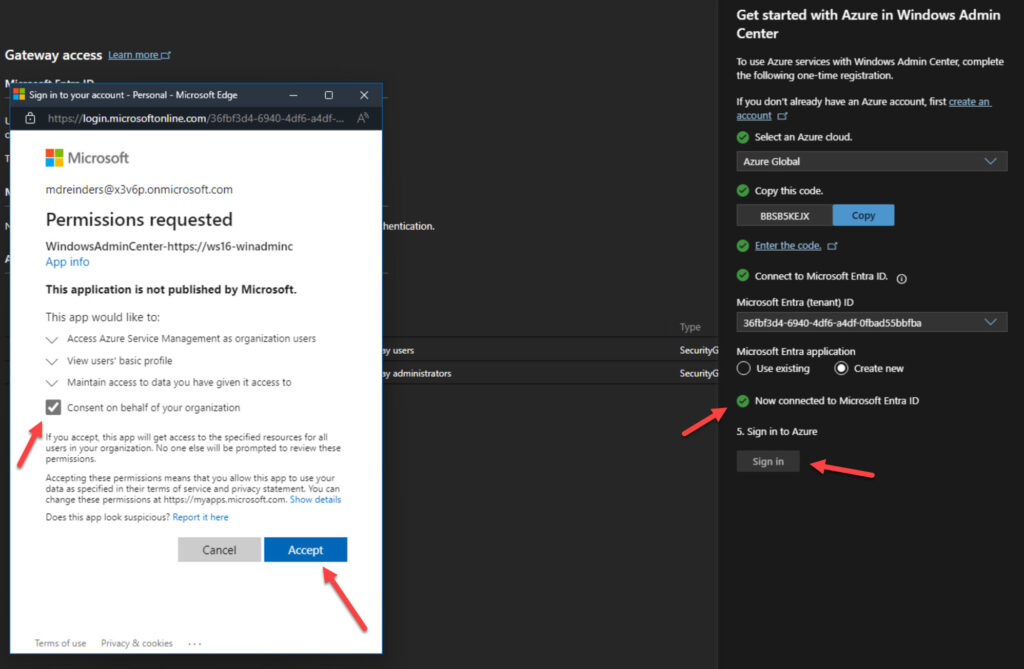
After clicking Accept, it was done! When I go back to the Gateway -> Access section of Settings, I can click the link to open the Enterprise Application in my tenant in Step #1.
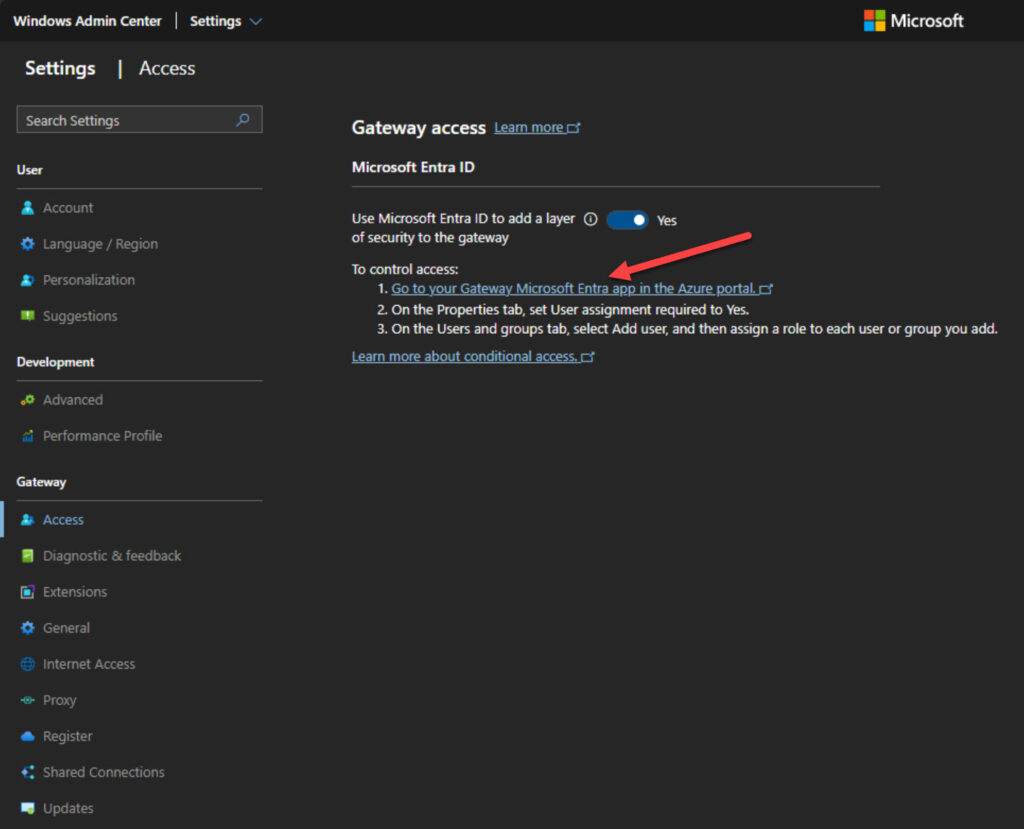
After opening the new window, click Properties on the left under Manage.
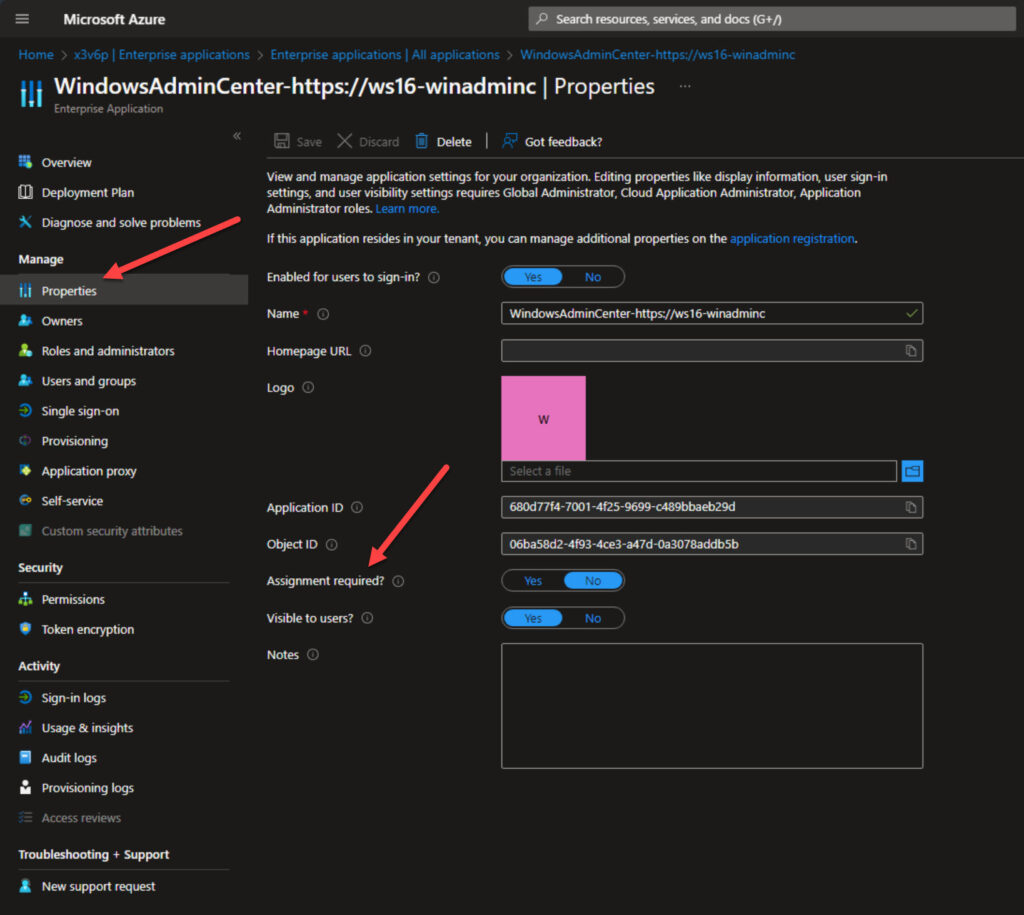
You’ll notice the ‘Assignment required?‘ option is set to ‘No‘ by default. That means any user (object) in the tenant can access the application. You can set this to ‘Yes‘, and then click on Users and groups on the left to add specific users or groups in your Active Directory domain to the list.
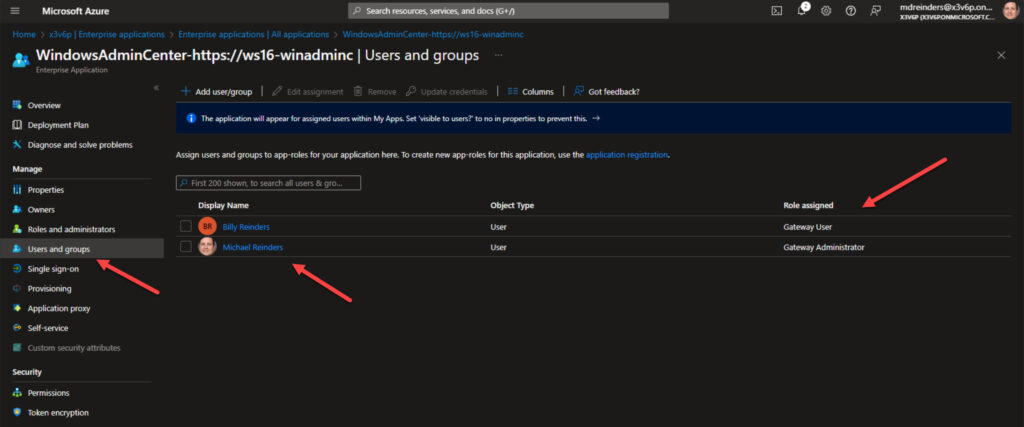
Here I added Billy Reinders as a Gateway User. This will allow Billy to log in to the Windows Admin Center gateway, but not make any permission changes or authentication changes to the gateway itself.
How to Configure RBAC in Windows Admin Center
There are several methods and options when setting up Role-Based Access Control (RBAC) in Windows Admin Center. First, let’s discuss the various Roles in WAC.
Types of Roles
There are three Roles you configure in Windows Admin Center.
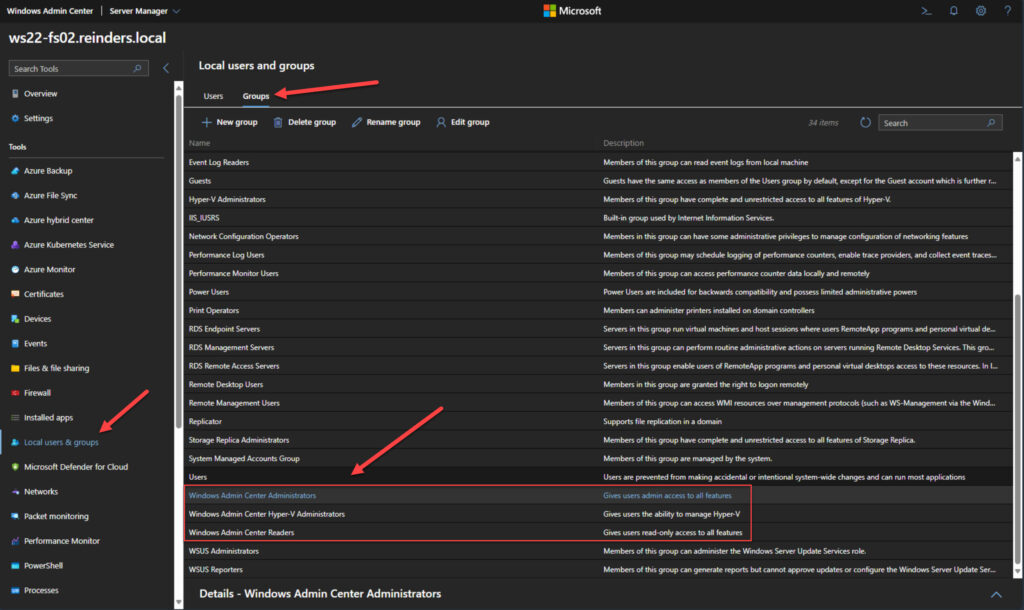
- Windows Admin Center Administrators
- Allows users to view and manage most tools.
- Windows Admin Center Hyper-V Administrators
- Allows users to manage Hyper-V virtual machines and switches. Other tools are available in read-only mode.
- Windows Admin Center Readers
- Allows users read-only access to view most tools, but doesn’t allow them to make any changes.
When you enable RBAC on a specific managed server, these local groups get created. You then add users to the new local groups giving them appropriate access to the server. I’ll show you how this all works in a bit.
Using PowerShell to deploy Just Enough Administration to endpoints
When RBAC is enabled on a target computer/server, a Windows Admin Center application process copies PowerShell scripts and invokes a configuration (using PowerShell Desired State Configuration) on the machine (this is accomplished via WinRM on the remote computer). This can take up to 10 minutes, so please be patient.
This will disconnect Windows Admin Center, WMI, and Powershell users for a short time. After the process finishes, you can refresh the page to confirm the status changes to Applied.
Note: I will show you how to deploy on a single server next, but you do have options to download the role-based access control configuration and push WAC RBAC out to multiple servers at once.
Using the Role-Based Access Control page in Windows Admin Center
Let’s run through enabling role-based access control in Windows Admin Center so I can show you how the PowerShell scripts and Desired State Configuration works.
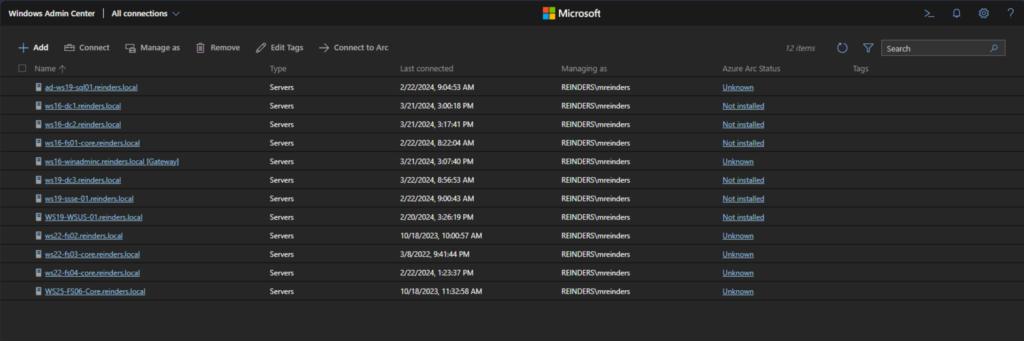
- First, we’ll select one of our member servers (WS22-FS02) to open its configuration.
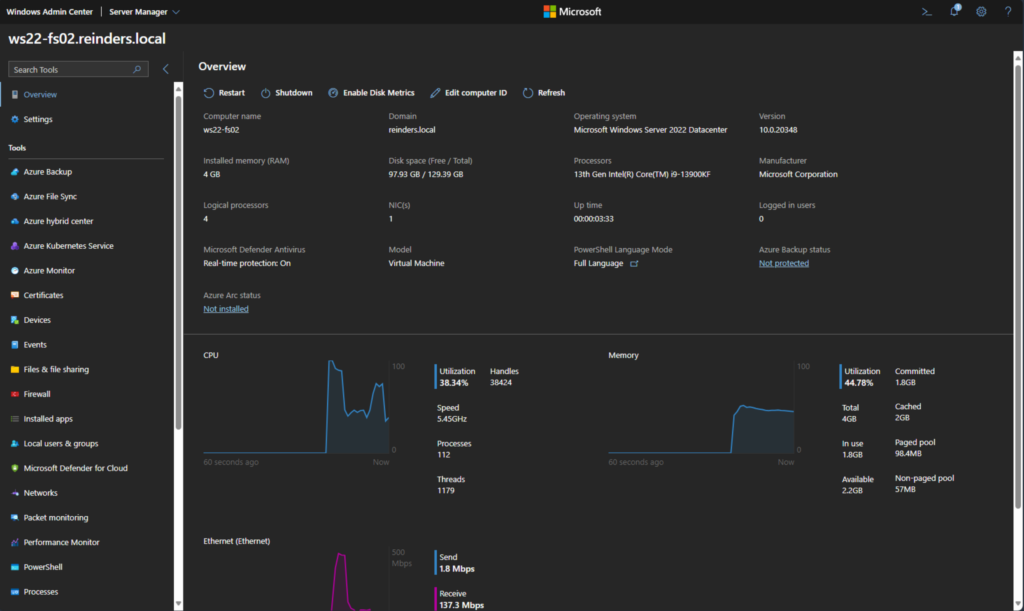
- Next, click Settings right below Overview on the left.
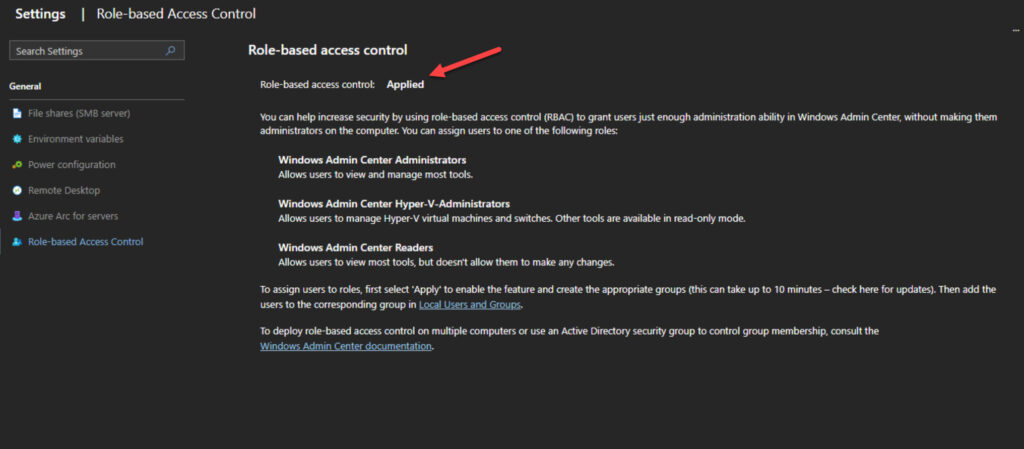
- Then, click on the ‘Role-based Access Control‘ option under General.

- Read the overview and click Apply at the bottom to start the process.
- After it has been successfully scheduled you can verify it in the Notifications pane.
- Then, after about 10 minutes, I refreshed the view and it showed Applied. All set.
Next, we can use Windows Admin Center to verify the new groups have been created.
- Click the ‘Local users & groups‘ tool on the left.
- Select the ‘Groups‘ tab on the top.
- Scroll down, and there are our 3 new groups.
- I’ll select the ‘Windows Admin Center Readers‘ group.
- Click the Details pane below.
- Then click ‘+ Add user‘.
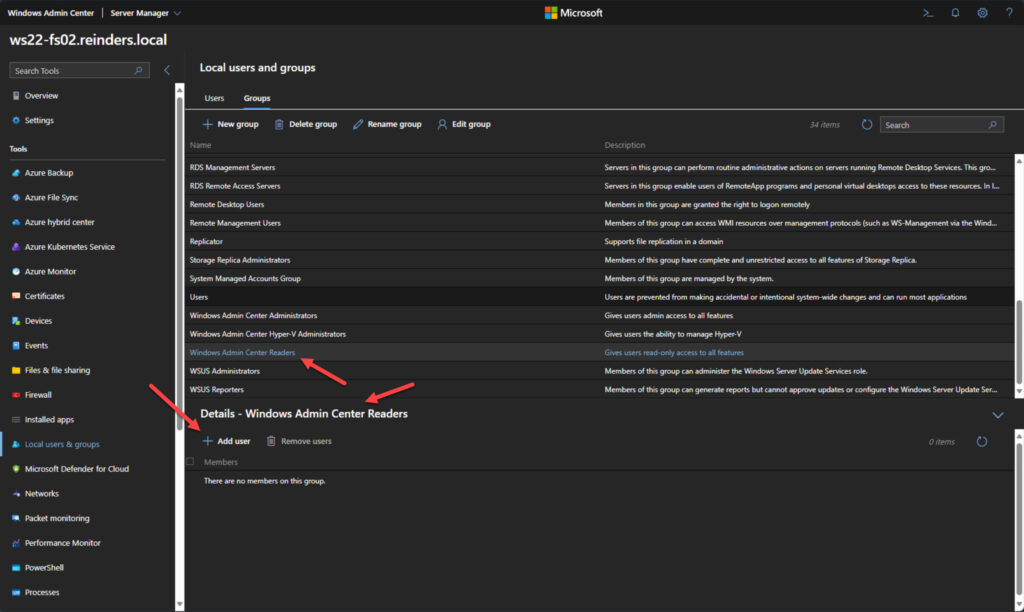
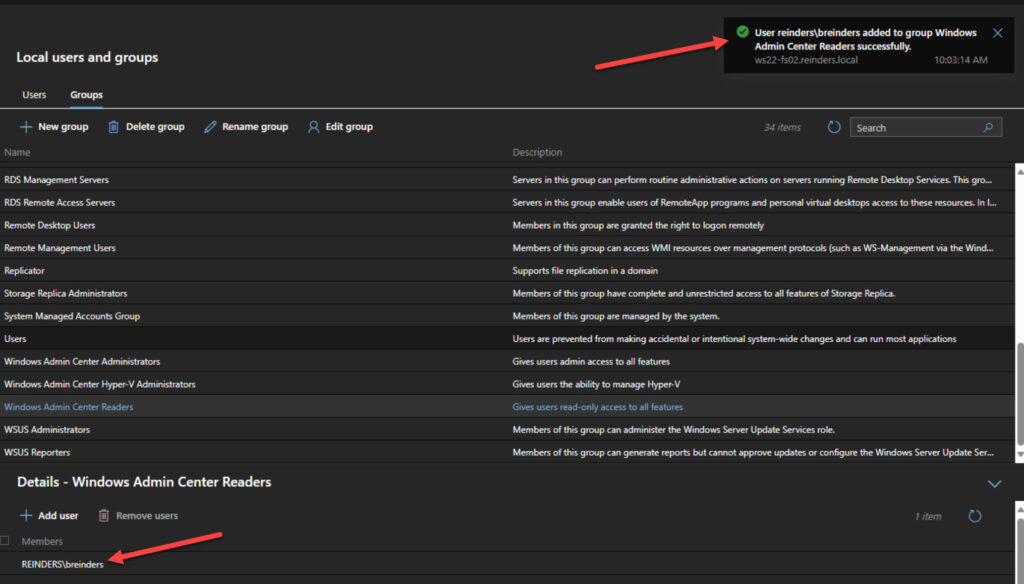
- I enter ‘reinders\breinders’ and click Submit.
And we’re done! Billy can now log in to Windows Admin Center and read the information for this server – ws22-fs02.
A ‘gotcha’ to be aware of – Role-based access control is not supported for cluster management. Features like CredSSP and Windows Failover Clustering (failover clusters) are not supported.
Azure hybrid center in Windows Admin Center
When configuring servers in Windows Admin Center, you may have noticed various items with ‘Azure’ in the name at the top of the Tools list on the left. This is one of WAC’s biggest selling points – deep integrations with your resources in Azure in addition to on-premises.
Consolidating your management tools and being able to use Windows Admin Center in your web browser without needing to browse to the Azure portal is gold.
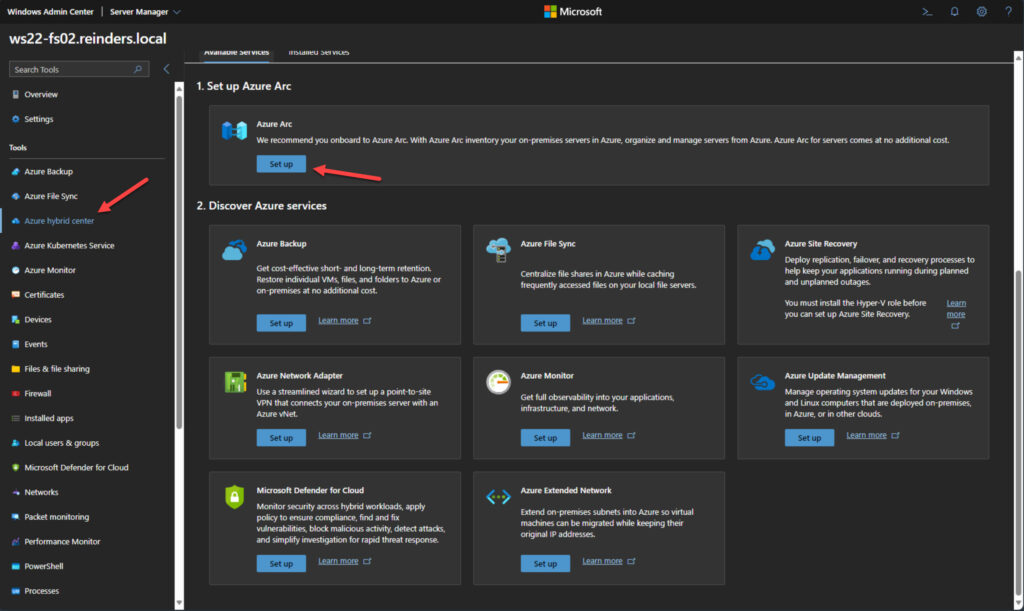
The first step is enabling Azure Arc. With this enabled, you can inventory and manage your on-premises and Azure resources in a single pane. Azure Arc is completely free.
- Click on ‘Azure hybrid center‘ in the Tools list on the left to get started.
- You can read Microsoft documentation on the subject -> here.
Conclusion
Role-based access control (RBAC) in Windows Admin Center significantly enhances security and streamlines management within your Windows Server environment. By assigning specific roles with predefined permissions to users, you ensure that individuals have the minimum access required to do their jobs and nothing more. This minimizes the risk of accidental misconfiguration or unauthorized access attempts.
Additionally, RBAC simplifies administration by allowing you to manage user permissions centrally, saving time and reducing the potential for human error.
Please leave a comment or question below – thank you for reading.

Michael has been an IT Pro since 1998. He has worked predominantly in the Windows world including client and server operating systems, on-prem systems engineering (AD, DNS, etc.), and over the last ten years or so has embraced and immersed himself in...


