How to Fix The “Trust Relationship Between This Workstation And The Primary Domain Failed” Error

The “trust relationship between this workstation and the primary domain failed” error means that the computer cannot access a network because it is offline, or that it has lost its membership to the Active Directory (AD) domain. This guide will help you understand what’s happening behind the scenes when this error occurs, and we’ll go through different methods to troubleshoot this issue.
🎬 Watch This Week in IT.
As you will see, there are quite a few possible solutions to fix the “ trust relationship between this workstation and the primary domain failed”. Notably, there’s one that’s quicker than the traditional – ‘disjoin from the domain, reboot, rejoin to domain, reboot…’ fun. Let’s get started!
Understanding the “trust relationship between this workstation and the primary domain failed” error
The “trust relationship between this workstation and the primary domain failed” error message is definitely one of the most annoying ones that IT pros encounter when working with Active Directory-joined devices. It seems to pop up out of nowhere just to put up a roadblock in your daily tasks to get things done.
How can you encounter this error?
When you join a workstation to an Active Directory domain, a computer account is created in AD. And just like with a user account, this computer account has a password, which is good for 30 days before it is updated.
Note – You do have the option of modifying the registry to change the ‘maximum machine account password age’ attribute. If you so desire, open Regedit.exe and modify the following key:
hklm-SYSTEM\CurrentControlSet\Services\Netlogon\Parameters\MaximumPasswordAge
Every time that a computer ‘logs in’ to Active Directory (during a reboot, and before a user logs in), it verifies its computer account password with the nearest domain controller (DC):
- If they are synchronous, the computer successfully authenticates to AD and life goes on.
- If the device does not have a network connection to AD, a grace period of up to 30 days is allowed.
The scenario where you encounter the “trust relationship between this workstation and the primary domain failed” error is when a domain user attempts to log in to the workstation (and the domain). If the user has previously logged in and their AD password is cached on the device, they will be able to log in from that grace period. However, if a user that hasn’t logged into the device before tries to log in, and the trust between the device and AD is unavailable, you’ll get this exact error.
Why does this error occur?
This “trust relationship between this workstation and the primary domain failed” error occurs when the computer is no longer trusted in the domain. The secure channel between the workstation and Active Directory is missing. The local computer’s password isn’t coordinated with the computer’s password in your Active Directory.
There are a few common scenarios where this error can occur, here are a few examples:
- If you re-install Windows.
- If you do a reset of Windows.
- If you restore the state of a virtual machine.
- If you replace more prominent hardware components in a device, etc.
- If you clone a device without first using Sysprep.
There are quite a few other underlying reasons that could lead to this error. Network connection issues, a problem with your AD or DNS infrastructure, and even issues with your device’s network cable! The point is to take things slow, not make ANY assumptions, and use this guide to follow through each step of this troubleshooting flowchart to resolve your issue.
How to fix the “trust relationship between this workstation and the primary domain failed” error
There are a few methods you can use to fix the “trust relationship between this workstation and the primary domain failed” error. What you need to do here is to resolve the trust relationship between your device and Active Directory. Let’s first look at some fundamentals you may sporadically overlook due to time constraints.
Checking the trust relationship with the Test-ComputerSecureChannel command
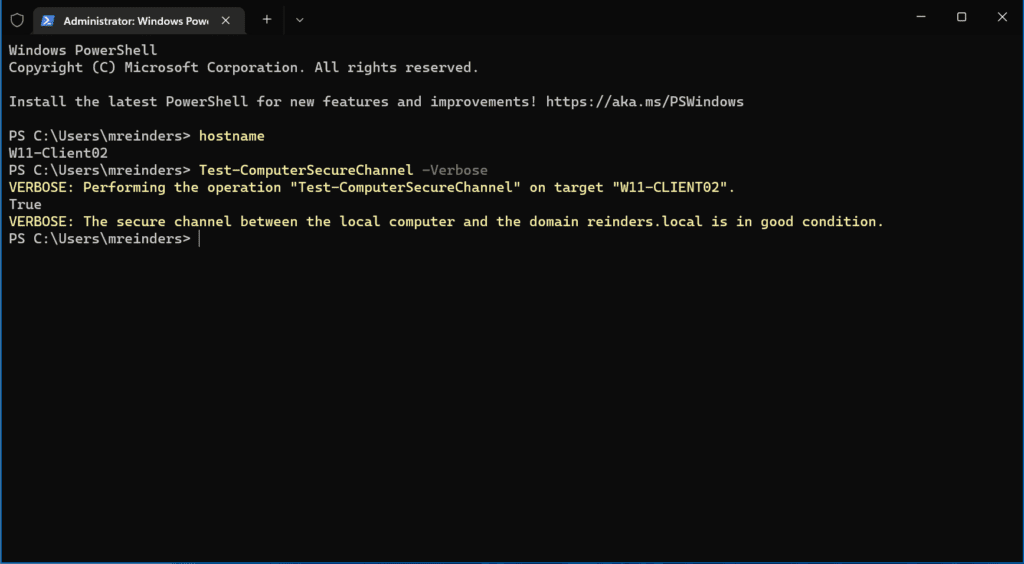
Well, look at this! A handy PowerShell gem to help repair the state of your device’s trust relationship with Active Directory. I have a Windows 11 VM in my Windows Server 2022 Active Directory Hyper-V lab environment. Let’s use the Test-ComputerSecureChannel cmdlet to verify our connection to AD.
Test-ComputerSecureChannel -verbose
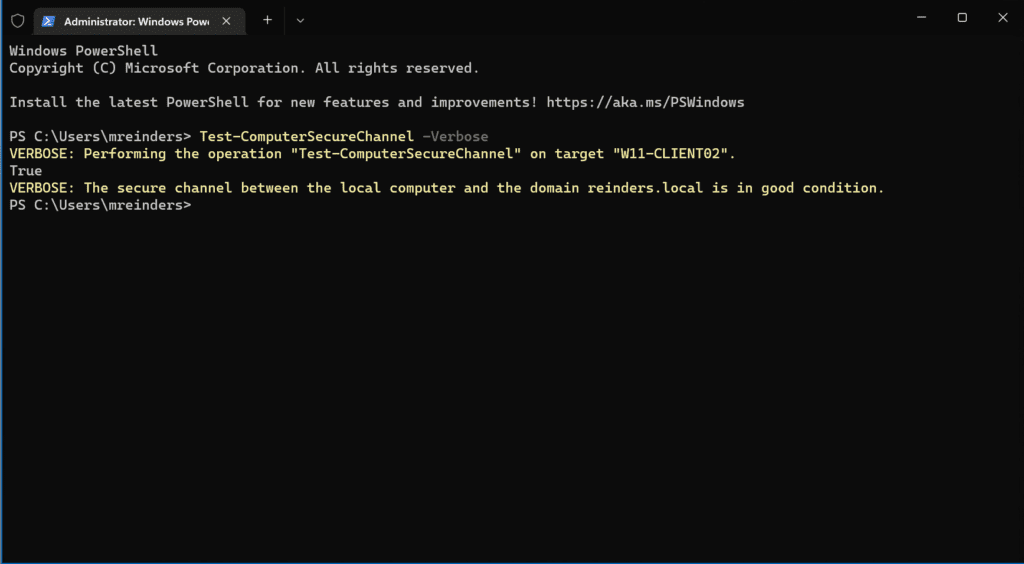
Here, ‘True’ in the output means we’re good. 🙂
Checking DHCP settings
You will want to run ipconfig at a command prompt to make sure the IP address that your workstation has is either in the same subnet as your domain controller’s (DC) or has a route to those subnets. You can also try pinging one of your DCs by name or fully qualified domain name (FQDN).
If that doesn’t work, or it doesn’t resolve, you have a more basic network connectivity issue. You’ll want to perform essential troubleshooting in this realm first before proceeding.
You can also run the ipconfig /release and ipconfig /renew commands to release your assigned DHCP IP address, and either renew it or get a new one. Sometimes, these steps resolve some pretty funky network connection issues. Go ahead and try it.
Resetting a machine account password
Let’s dive right into the more efficient and less time-consuming methods to resolve our issue. The goal here is to reset a computer account password. I’ll show you the steps to use the GUI in Windows to disjoin, rejoin, reboot, etc later on.
But wouldn’t it be nice to avoid all those reboots? Well, yes, I’m sure it would. Especially if you happen to be using a slower computer.
Using the netdom resetpwd command line tool
The first command-line tool we will use is called netdom. You can install it on a workstation by installing the Remote Server Administration Tools (RSAT), specifically the ‘Active Directory Domain Services and Lightweight Directory Services Tools‘ option. You can learn the basics of installing RSAT tools by reading my previous post on the subject.
Open an administrative command prompt and use the following netdom resetpwd command:
netdom resetpwd /Server:WS16-DC1 /UserD:administrator /passwordD:<em>password</em>
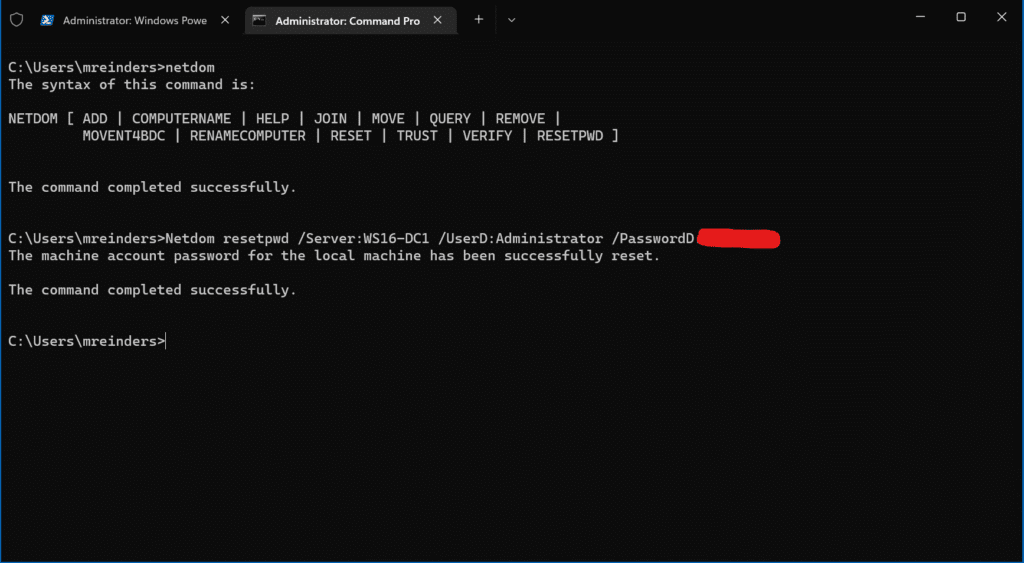
Success! The machine account password for the local machine has been successfully reset, and you don’t even need to reboot. You can simply log off and then log back on with a domain user account and you should be good.
Using the Reset-ComputerMachinePassword cmdlet
Another tool in your PowerShell toolbelt is the Reset-ComputerMachinePassword cmdlet. Like netdom, this command will change/update the computer account password with Active Directory.
Go ahead and open a PowerShell console. The basic command structure is as follows:
Reset-ComputerMachinePassword -Server DomainController -Credential DomainAdmin
So, in our instance, I will run this command:
Reset-ComputerMachinePassword -Server WS16-DC1 -Credential Administrator
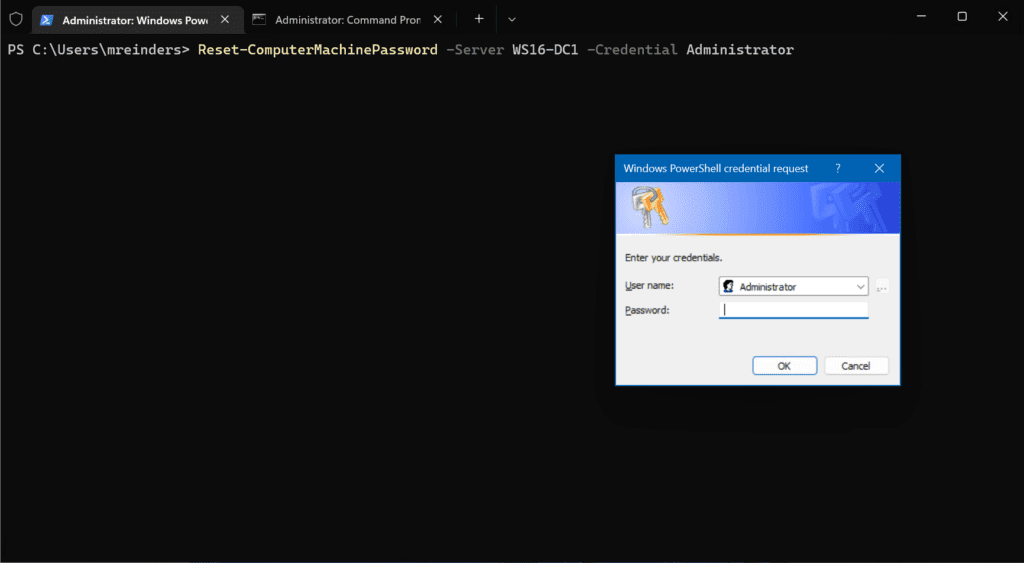
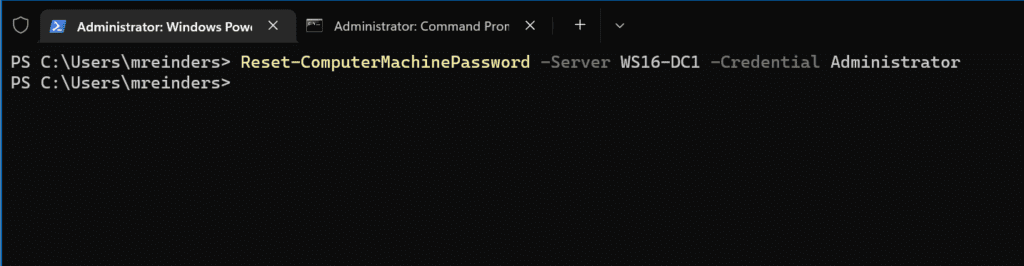
No news here is good news. 🙂
Using the Active Directory User and Computers tool
There is a very straightforward step you can take using Active Directory Users and Computers (ADUC) to perform the same function as the two previous command-line methods. Simply locate the computer workstation in your directory, right-click on the computer object, and click ‘Reset account.’
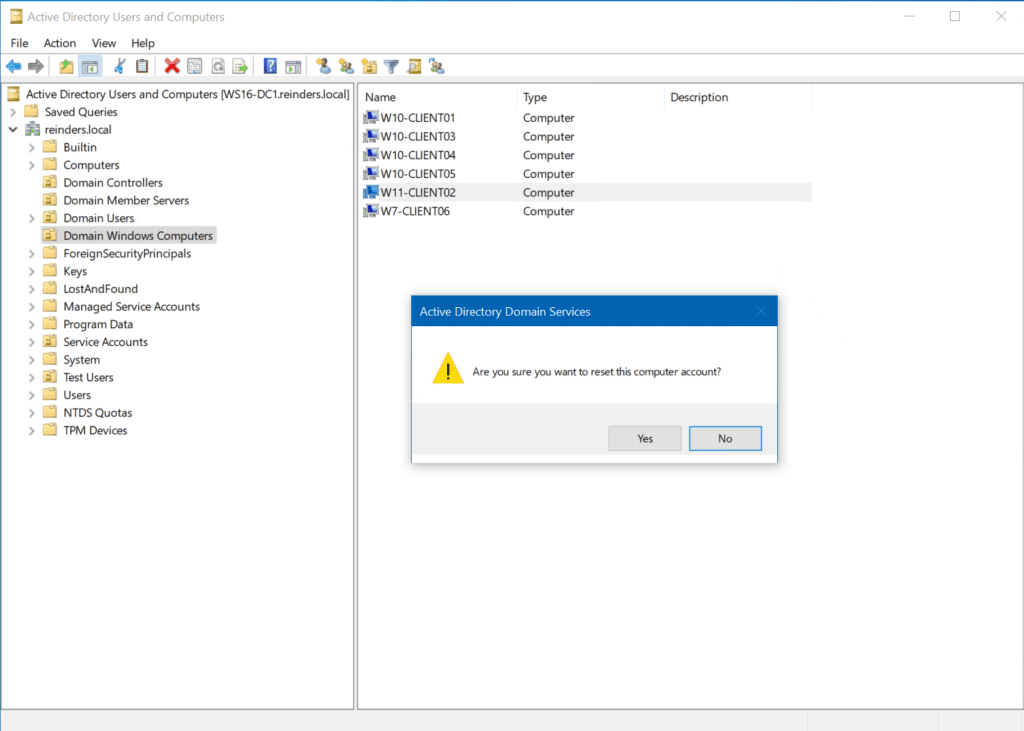
And there you go, the computer account has now been reset.
Rejoin your machine to the Active Directory domain
Alright, I’m saving the traditional, somewhat ‘unrobust’ method for last to fix the “trust relationship between this workstation and the primary domain failed” error – my recommendation is to use the command-line tools as they are more efficient, faster, and simply get the job done more reliably. You don’t need to worry about potential issues with local profiles, network connection problems on the workstation side, and other issues in Windows in general.
Anyway, for completeness’ sake, let’s show you this other method to rejoin your machine to the Active Directory domain.
Using the Remove-Computer and Add-Computer Cmdlets
Looks like I am holding out using the older GUI method for a reason. 🙂 Coming out of a warp at the last possible second to give us the tactical advantage. We can use PowerShell, again, to accomplish our goal. We can use the Remove-Computer and Add-Computer cmdlets.
Note – Make sure you know the credentials for a local admin account of the device you’re using. You’ll need those to log in after the disjoin of the workstation and the reboot.
Here’s the Remove-Computer cmdlet you need to use to remove the computer from the domain and restart it.
Remove-Computer -UnJoinDomaincredential reinders.local\mreinders -PassThru -Verbose -Restart
Ok. After only a few seconds, the reboot happened. Now, after I log in with a local administrator, I can use the ‘Add-Computer‘ cmdlet to join back into the domain.
Add-Computer -DomainName reinders.local -Passthru -Verbose -Restart

Another VERY fast operation and a reboot! And we’re back in business.
Using the GUI and a Domain Administrator account
Well, I guess I can show you the traditional, but effective method to resolve this error. We will go through the procedure of using the Windows GUI on the workstation to disjoin our device from the Active Directory domain and join workgroup mode, reboot, then rejoin our device back into AD, reboot again, then it should be mission accomplished.
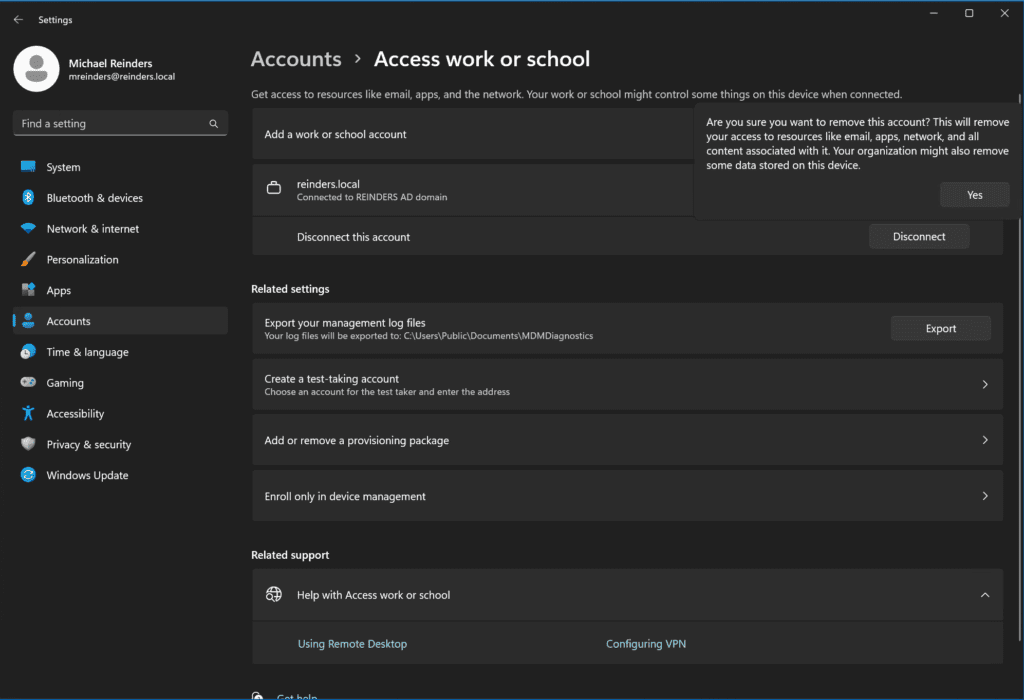
First, click Start -> Settings -> Accounts -> Access work or school. Click the dropdown arrow on the right where it shows the AD DNS domain name and click Disconnect. Click Yes.
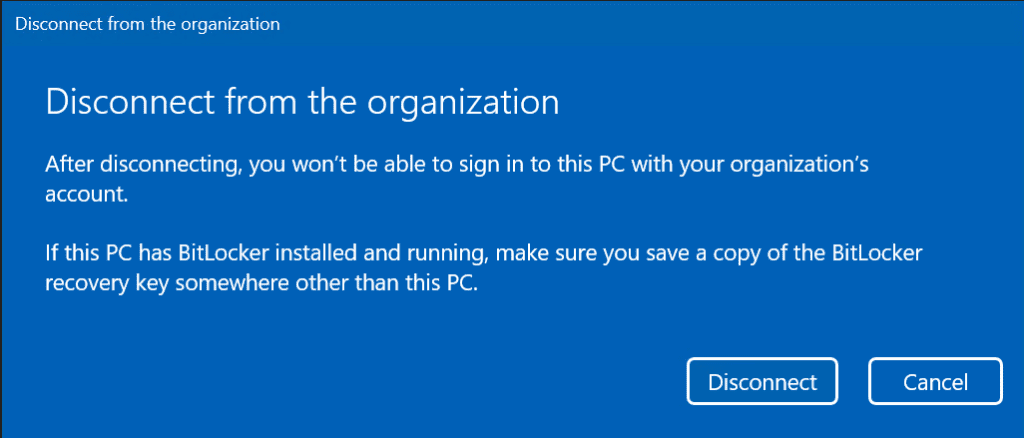
Click the Disconnect button on the following pop up window.
Here, confirm the credentials of a local account you’ll be able to log in with after your workstation is removed from the domain.
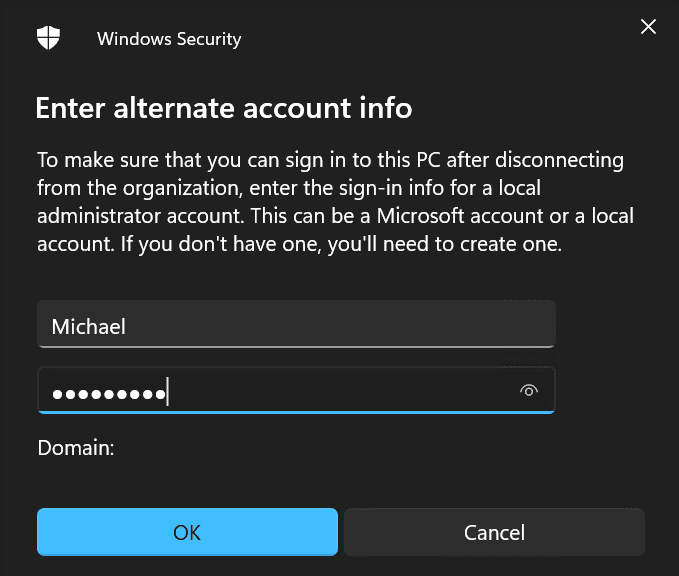
This step is important – if you don’t have access to a local account and password, you’ll need to re-install Windows or re-image your device.
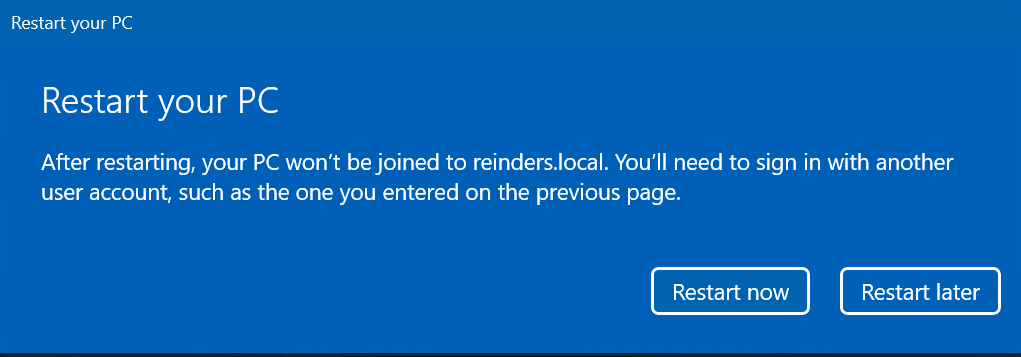
Once you’re done, click Restart now to reboot your machine.
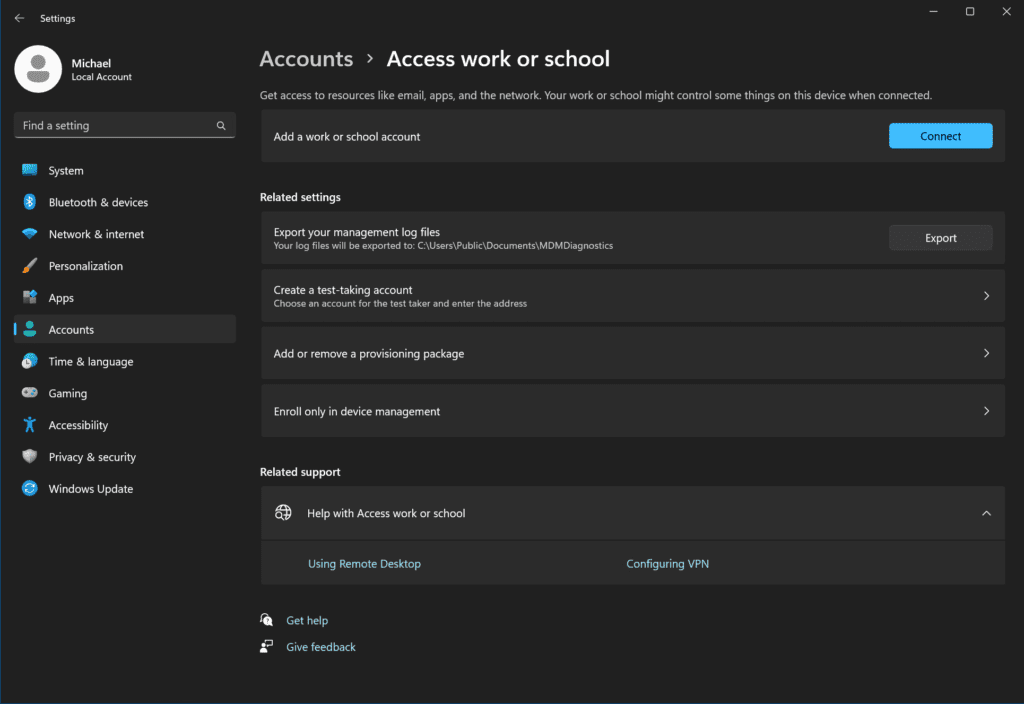
At this point, I logged in with my local ‘Michael’ account. I then proceeded to the same location: Start -> Settings -> Accounts -> Access work or school.
Here, click the Connect button next to ‘Add a work or school account.’
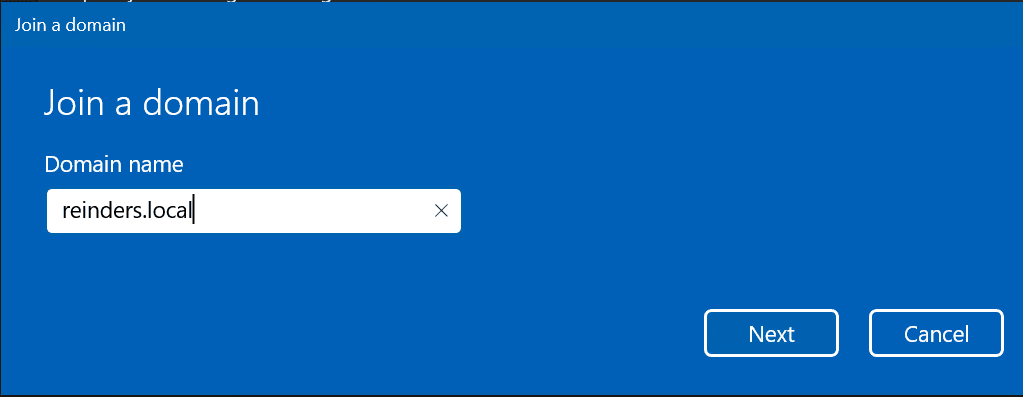
Choose the last link at the bottom: Join this device to a local Active Directory domain.

Enter the Fully Qualified Domain Name (FQDN) of your Active Directory domain and click Next.
Assuming it is able to contact your domain correctly (if not, you can read my post to assist in your troubleshooting), you will be prompted for a domain account with Domain Admins or equivalent permissions.
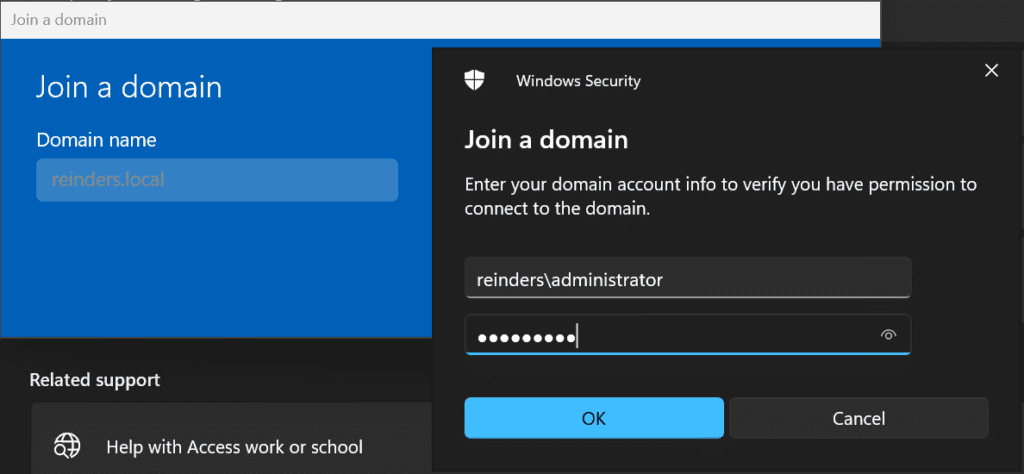
Here, I am taking the not-so-common step to add my ‘mreinders’ AD account to the local Administrator group. This is for my lab purposes, and not best practices in terms of security.
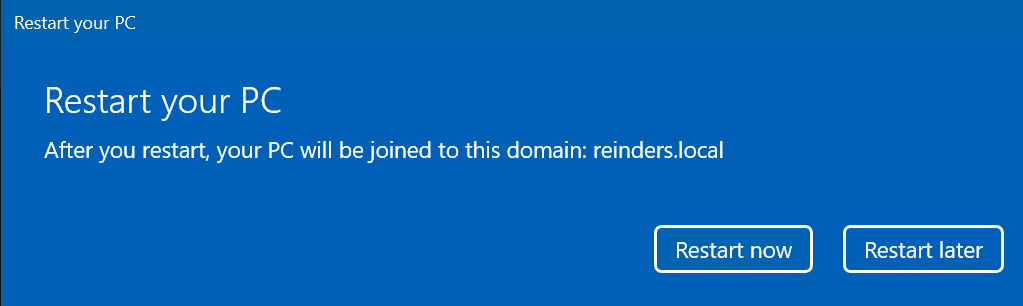
Click Restart Now, log in with your user account to the domain, and we’re there!
Conclusion
I hope this post helps you in troubleshooting the root cause of the dreaded “trust relationship between this workstation and the primary domain failed” error message. Like I said, this seems to just crop up at the worst possible time. But, that’s IT. There are many ways to resolve issues in Windows and general Systems Engineering. Thankfully, you have a respectable number here to get your job back on track!
FAQ
What preventive measures can I take to avoid the Trust Relationship Error in Windows 10?
To prevent the Trust Relationship Error in Windows 10, regularly backup your computer’s domain credentials, maintain stable network connectivity, avoid sudden shutdowns during domain-related processes, and ensure your system clock is synchronized with the domain controller.
Can the Trust Relationship Error in Windows 10 affect my local files and settings?
The Trust Relationship Error in Windows 10 primarily affects domain authentication and network access, but your local files and settings remain intact. However, you might temporarily lose access to network resources and domain-specific configurations until the trust relationship is restored.
How long does it typically take to resolve a Trust Relationship Error in Windows 10?
Resolving a Trust Relationship Error in Windows 10 usually takes between 10-30 minutes, depending on the method used and your network speed. Using PowerShell commands can significantly reduce this time compared to traditional GUI-based solutions.
Will upgrading Windows 10 trigger a Trust Relationship Error?
While normal Windows 10 updates rarely cause Trust Relationship Errors, major version upgrades or feature updates can occasionally trigger this issue, especially if the upgrade process interrupts the domain communication or modifies system security tokens.
Can remote workers fix a Trust Relationship Error in Windows 10 without accessing the office network?
Remote workers can resolve a Trust Relationship Error in Windows 10 through a VPN connection to the company network. If VPN access is unavailable, they may need to contact their IT department for temporary credentials or use cached credentials until they can reconnect to the domain network.

Michael has been an IT Pro since 1998. He has worked predominantly in the Windows world including client and server operating systems, on-prem systems engineering (AD, DNS, etc.), and over the last ten years or so has embraced and immersed himself in...