- Blog
- SQL Server
- Post
SQL Server Essentials: How to Install SQL Server 2022 and Azure Data Studio on Linux

Starting with SQL Server 2017, Microsoft has supported SQL Server on Linux, which has the same underlying database engine as the Windows version. In this article, I’ll show you how to install SQL Server on Linux, as well as Azure Data Studio. The most recent release of SQL Server is SQL Server 2022, which offers the same core relational database management features on both Windows and Linux.
Installing SQL Server on Linux: Before you start
By adding Linux support for SQL Server a couple of years ago, Microsoft allowed its platform to better compete with other native Linux database platforms such as Oracle, MySQL and PostgreSQL. To enable Linux compatibility, SQL Server uses a platform abstraction layer (PAL) that separates platform specific code from the rest of the codebase, enabling the core database engine to be operating system agnostic.
SQL Server 2022 editions on Linux
If the core database capabilities are the same across Windows and Linux, there are still some differences between the Linux version of SQL Server 2022 and the Windows version. However, just like the Windows editions SQL Server on Linux comes in the following editions:
- Enterprise: The premium edition. It provides the maximum performance, unlimited virtualization and enterprise level availability options.
- Standard: This edition delivers basic data management and BI support for departments and small organizations. It supports a maximum of 4 sockets or 24 cores and 128 GB of RAM.
- Web: This edition provides a low total-cost-of-ownership option for Web hosters, and it’s limited to 4 sockets or 16 cores and 64 GB of RAM.
- Express: This is the entry-level free edition, and it’s intended for learning and building desktop and small server. It’s limited to 1 socket or 4 cores and 1410 MB of RAM.
- Developer: This edition includes all the functionality of the Enterprise edition, but it’s only licensed for use as a development and test system. It cannot be used as a production server.
- Evaluation: This edition also includes all of the functionality of the Enterprise edition, but it is for evaluation purposes and only active for 180 days.
You can find out all of the specifics about the editions and the supported features in the Linux version of SQL Server 2022 at: Editions and supported features of SQL Server 2022 (16.x) on Linux.
Supported Linux distributions
SQL Server 2022 is officially supported on the following Linux distributions:
- Red Hat Enterprise Linux (RHEL) 8.x Server
- SUSE Linux Enterprise Server v15 (SP1 – SP4)
- Ubuntu 20.04 LTS
SQL Server on Linux can also be installed on several other Linux distributions, but these three are the only Linux distributions supported by Microsoft. In addition, Microsoft provides Docker container images that can be run of virtually all Linux platforms that support Docker.
Each distribution has a somewhat different installation process, but the features that are provided by SQL Server 2022 are exactly the same for each of the different distributions.
How to install SQL Server on Linux (Ubuntu 20.04)
Installing SQL Server on Linux is quite different from installing it on Windows. There is no self-contained installation executable on Linux, so you’ll need to run a series of commands from the Linux Terminal to install SQL Server 2022.
The different Linux distributions have slightly different installation processes. Microsoft provides installation instructions for Red Hat Enterprise Linux 7.2, Ubuntu 16.04 and SUSE Enterprise Server v12 SP2. In this article, I’ll be detailing how install SQL Server on Ubuntu 20.04.
- First, open the Terminal by right clicking on the desktop, then selecting the Open in Terminal option from the popup menu.
- Next, we’ll be installing the mssql-server package. First, import the public repository GPG keys for the this package with the following command:
wget -qO- https://packages.microsoft.com/keys/microsoft.asc | sudo tee /etc/apt/trusted.gpg.d/microsoft.asc
- Next, use the following command with sudo privileges to register the SQL Server Ubuntu repository:
sudo add-apt-repository "$(wget -qO- https://packages.microsoft.com/config/ubuntu/20.04/mssql-server-2022.list)"
- Finally, run the following apt-get commands to install SQL Server on Ubuntu:
sudo apt-get update
sudo apt-get install -y mssql-server
When these commands have finished running, your Terminal display will look something like the following figure.
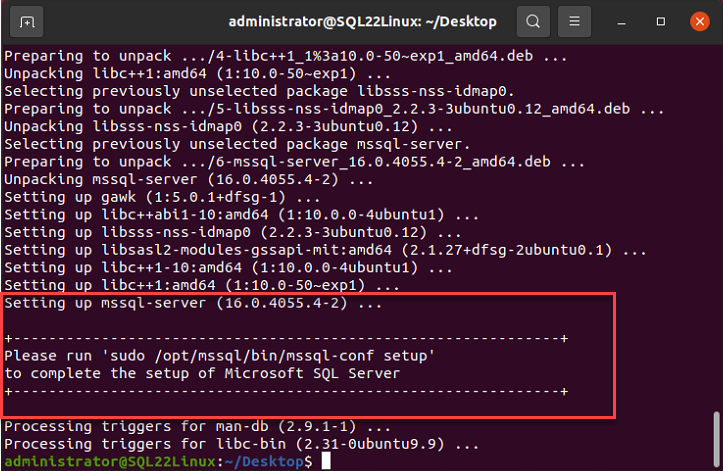
- After the installation of the mssql-server package is finished, you’ll be prompted to run the mssql-conf setup. This program enables you to provide SQL Server with its initial startup values. To proceed with the installation, you can run the following command:
sudo /opt/mssql/bin/mssql-conf setup
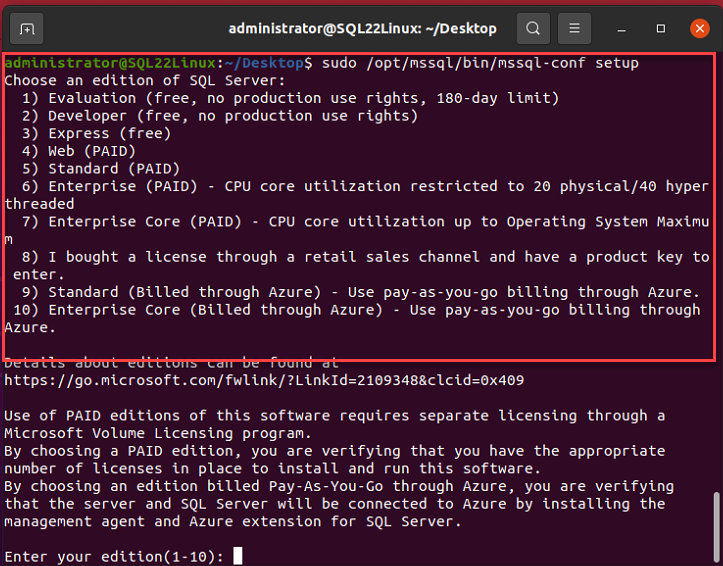
- The mssql-conf setup program will display a list of text prompts that allows you to select your SQL Server edition (Reminder: the SQL Server Evaluation, Developer, and Express editions are free).
- You’ll also be prompted to accept the license terms and provide a system administrator (sa) password.
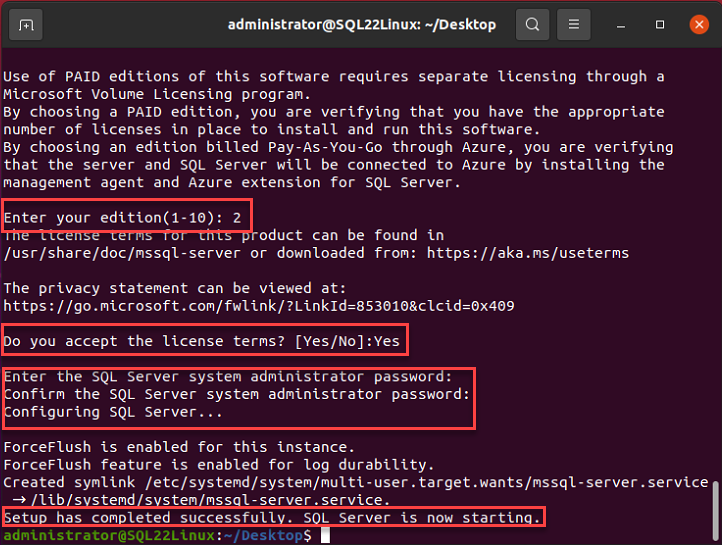
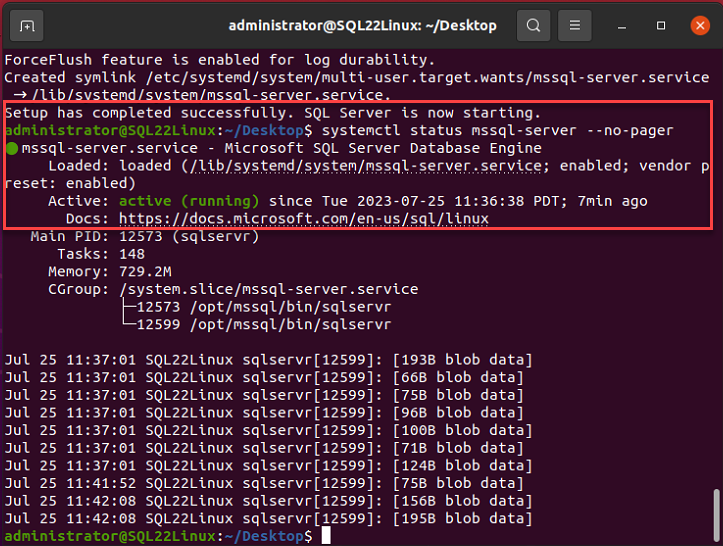
The entire setup and initial configuration process is quite fast – it should only take a few minutes from start to finish. Once the mssql-conf setup has finished, the SQL Server service will start. You can verify that the mssql-server service is running by using the following command:
systemctl status mssql-server --no-pager
If you want networked client systems to be able to connect remotely, you will also need to open the SQL Server default TCP port 1433 on your Linux firewall.
At this point, SQL Server is up and running on Ubuntu, and you can connect to it using either command line tools or SQL Server management and development tools such as SQL Server Management Studio (SSMS) or Azure Data Tools (ADT).
How to connect to SQL Server 2022 on Linux
After SQL Server on Linux has been installed, you’ll want to connect to it for development, management, data transfer, and other database actions. There are a number of different Microsoft tools that you can use to connect to the SQL Server database engine on Linux including:
- SQL Server Linux Command Line Tools (mssql-tools – sqlcmd & BCP from Linux)
- SQL Server Management Studio (from Windows)
- Azure Data Studio (from Linux or Windows)
- Visual Studio with SQL Server Data Tools (from Windows)
- Visual Studio Code (from Linux or Windows)
How to install Azure Data Studio on Linux
Azure Data Studio (ADS) is a great option for your initial connection and management of SQL Server 2022 on Linux. It’s a native Linux application, it’s also easy to install and has an easy-to-use graphical user interface. ADS provides both development and management capabilities that can help you get your SQL Server on Linux projects up and running quickly and easily.
- To install Azure Data Studio on Linux, navigate to the Azure Data Studio download page that you can see in the following figure.

- For a Ubuntu installation, click on the .deb installation option. This will download the azuredatastudio-linux-144.1.deb file to your local system. You should note the actual release number of the install file changes with newer releases of ADS.
- When the file has been downloaded, open it to launch the Azure Data Studio installer.
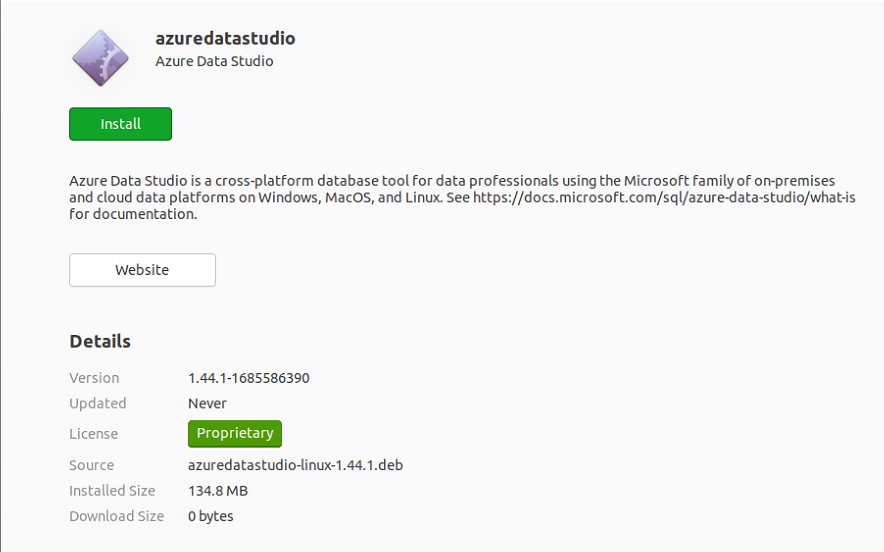
- Clicking the Install button to set up Azure Data Studio on your Ubuntu system. When this runs, you’ll be prompted to authenticate with an administrative account in order to modify the system.
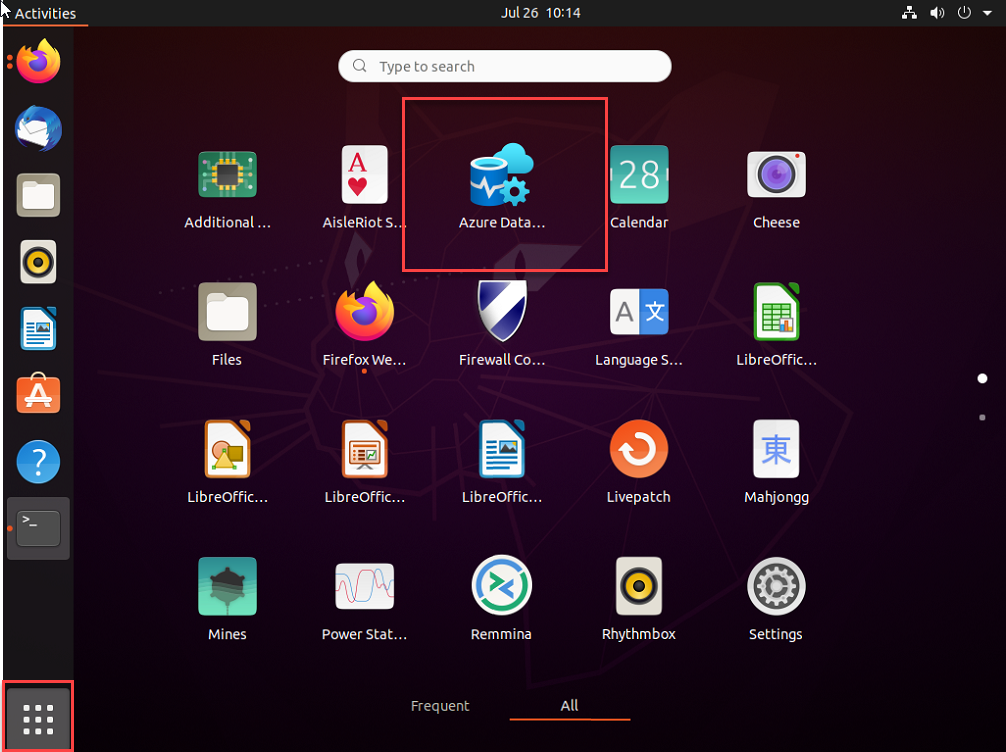
- Once the installation is completed, Azure Data Studio will appear on the installed apps screen. On Ubuntu, you can access it by clicking the box of squares that you can see in the lower left corner of the screen. Alternatively, you can also type “azuredatastudio” into a Bash terminal prompt to launch the app.
When Azure Data Studio first starts up, you’ll be prompted to create a new database connection using the New > New connection option from the initial Welcome screen. This will display the Connections dialog where you can input the following database connection values:
- Connection type: Microsoft SQL Server
- Input type: ‘Parameters’
- Server: ‘.’ (a dot or period) or ‘localhost’ for servers on the same system. For remote servers, you use the DNS name or IP address.
- Authentication type: SQL Login
- User name: sa (SQL Server systems administrator)
- Password: The value that you entered on the previous mssql-conf setup prompt for the sa password.
- Database: <Default> (Initially there are only system databases at this point – master, model, msdb, tempdb)
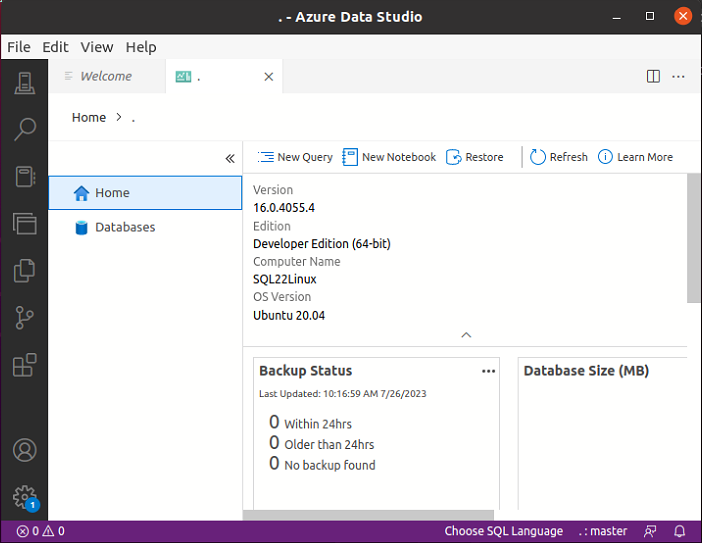
After completing the Connection dialog, you’ll see the following where Azure Data Studio is connected to your new SQL Server 2022 Linux installation. At this point you have SQL Server on Linux running and a graphical management and development environment on top of it allowing you to restore, migrate and create new SQL Server database projects.
Conclusion
The process for installing SQL Server 2022 is quite straightforward. I hope that this tutorial will help you perform the initial configuration of SQL Server 2022 on Ubuntu Linux, as well as install and connect Azure Data Studio to your new SQL Server on Linux installation. Thank you for reading, and feel free to check out other articles in my onging SQL Server Essentials series on Petri.
Related Articles:

Michael Otey is president of TECA, a technical content production, consulting and software development company in Portland, Ore. Michael is a former SQL Server MVP and was Senior Technical Director for Windows IT Pro and SQL Server Pro. He covers the...