How to Back Up Active Directory

In this guide, we’ll explain how to back up Active Directory (AD) by performing a full server backup, a system state backup, or by using Azure backup. Active Directory is a key component of your Microsoft Windows network, and you really need to protect it by performing regular backups. It’s really essential to have a backup of your Active Directory in case one of your domain controllers (DCs) fails, or any other issues prevent your users to log in to their computers.
🎬 Watch This Week in IT.
How to back up Active Directory
One of the easiest ways (and least expensive) to back up Active Directory is to use the Windows Server Backup feature that comes with Windows Server (since 2016). This allows you to do manual, scheduled (automatic), and custom backups of your Active Directory database and environment.
Here are the basic steps for performing a full server backup:
- Install Windows Server Backup program from the Server Manager dashboard.
- Open Windows Server Backup and Click the ‘Local Backup‘ link on the left tree view.
- In the Local Backup wizard, choose ‘Full server (recommended)‘ option.
- Specify the destination type (local drive or remote shared folder).
- Check all settings on the Confirmation Screen, then click on Backup. Voila!
Check all settings on the Confirmation Screen, then click on Backup. Voila!
Keep reading to get more details about how to back up Active Directory with Windows Server Backup!
Is it necessary to back up Active Directory?
Regardless of your environment, and how many Active Directory domain controllers (DCs) you have, you will certainly want to set up some sort of automated backup of your Active Directory. Although having two or more DCs provides redundancy and fail-over protection in the event one of them fails, you can’t really anticipate what can happen in the event of a natural disaster, a fire, or flooding of a data center… If you have all your eggs in one basket, you are definitely at risk.
Ransomware, viruses, zombies… All of these things can wreak havoc on your Active Directory. You certainly want your users to be able to log in to their computers and access your network resources, right? Right.
What about DC replication? Isn’t that enough of a backup? Again, it does provide fault tolerance in the event one of your DCs becomes inaccessible. But as I stated above, you need to include physical and geographical concerns when planning your backup strategy for Active Directory.
Best practices for backing up Active Directory
The absolute minimum you need to be aware of is to back up the system state of at least one domain controller in your environment. This will provide you the ability to restore it onto a bare metal server or a virtual machine in the event of a ‘disaster.’ Although there are myriads of third-party enterprise backup software solutions, this guide will use existing and built-in tools to back up Active Directory.
Another essential item to consider is the schedule you use for your automated backups. Honestly, I would back up the system state of one of your DCs nightly. There’s really no reason NOT to do that. Even though the default ‘tombstone lifetime’ interval is 60 days, you may as well keep nightly backups.
The AD tombstones are ‘deleted objects’. This AD Recycle Bin keeps deleted objects for 60 days, again, by default. If you need to perform a disaster recovery campaign, you’ll be delighted to know that only changes less than 24 hours from your previous backup will have been lost.
Can you automate Active Directory backups?
You can certainly automate Active Directory backups. Again, enterprise solutions will have this capability as part of their software. And, using Windows Server Backup, you can create any automated schedule you wish.
You can set up nightly, weekly, monthly, etc. backups of your critical Active Directory environment. You have many backup options in this regard. I’ll show you how to create a scheduled backup towards the end of this article.
What are the different ways to back up Active Directory?
From the API (Application Program Interface) perspective (I’ll explain in a moment), you can perform ‘full’ or ‘system state’ backups to backup Active Directory. This will protect the important aspects of Active Directory: DNS information, the NDIT database, the class registration database, the Windows registry, system files, the system volume (SYSVOL) directory, etc. to allow you to restore them onto another server during an emergency recovery situation.
Windows Server Backup, in addition to enterprise data protection products, issue ‘API calls’ to Windows Server to access the various low-level building blocks of Active Directory. This includes the raw database, DNS information, the SYSVOL volume/share, Group Policy, its environment, and many others. Conveniently, these are all included in the ‘system state’ backup API call.
For instance, if you use CommVault enterprise data protection software, you install a ‘native Active Directory agent’ on one of your Domain Controllers (DCs). This agent then makes those native API calls to back up all the various items I mentioned above to be able to successfully and reliably restore AD in a restore operation.
Full server backup
A full server backup backups all the volumes/partitions on a server, the system state – everything. That’s why it’s called a “full backup” 🙂 This includes applications, Windows, and nearly everything you need to recover the server.
If you wish to do a bare metal restore (restoring the contents onto a blank/empty server), you need to add that capability to your data protection software. You need to be able to boot from a USB stick or DVD with all appropriate storage drivers so you can successfully access the internal hard drives on the server.
Another helpful feature of a full backup is the ability to use that backup to restore Active Directory to another physical server, even with different hardware. You can also restore AD to a new virtual machine (VM). This provides a lot of flexibility in the event you need to recover Active Directory, even your entire forest!
System state backup
As stated previously, a ‘system state’ backup includes all the necessary components to protect Active Directory and restore it. This includes the raw database, DNS information, the SYSVOL volume/share, Group Policy, and its environment.
Within various backup and data protection software interfaces, you’re bound to discover how to perform system state backups in the software. Thankfully, it takes care of all these aspects via the API calls to Windows Server.
How to perform a full server backup
Let’s delve, once again, into my Hyper-V Windows Server 2022 Active Directory lab environment. I have three DCs and a dozen or so other member/application servers, client VMs, etc. I’ll demonstrate how to perform a full server backup using the Windows Server Backup program/GUI and the ‘wbadmin.exe’ command-line tool.
Using the Windows Server Backup GUI
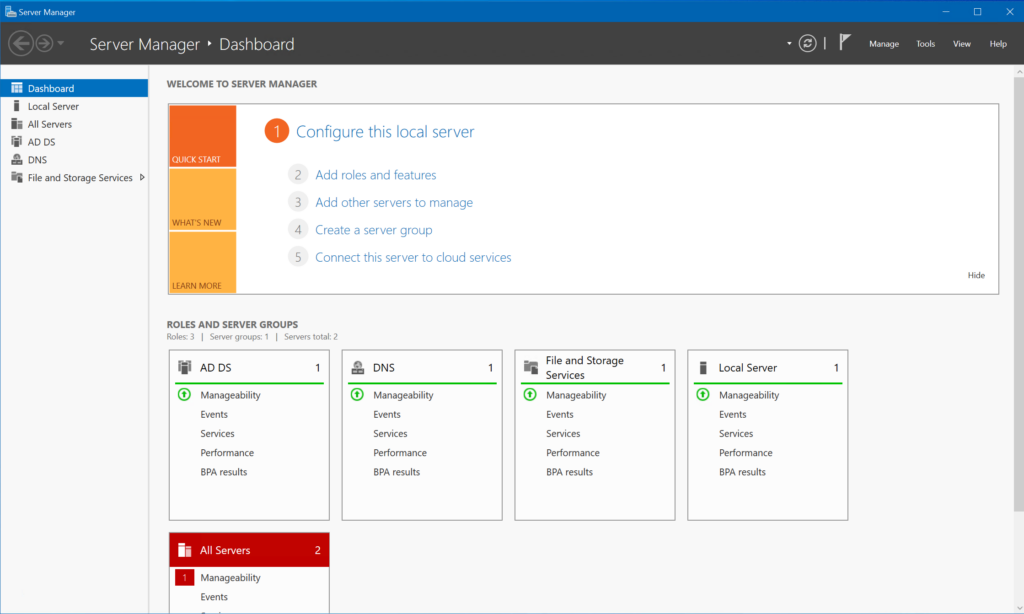
The first tool we’ll use is the Windows Server Backup program. First, we need to install the feature. To do that, we need to click Start -> Server Manager.
Next, click the ‘(2) Add roles and features‘ link. You can click Next a few times through the ‘Add Roles and Features Wizard‘ that opens. When you get to the ‘Features‘ category on the left, hold.
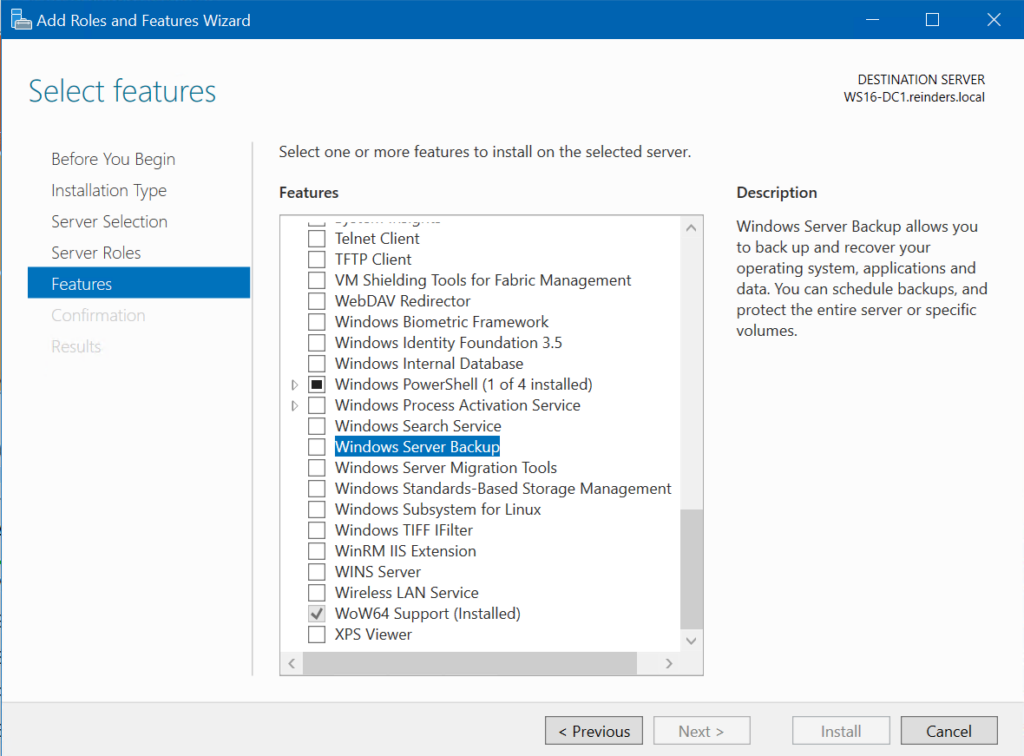
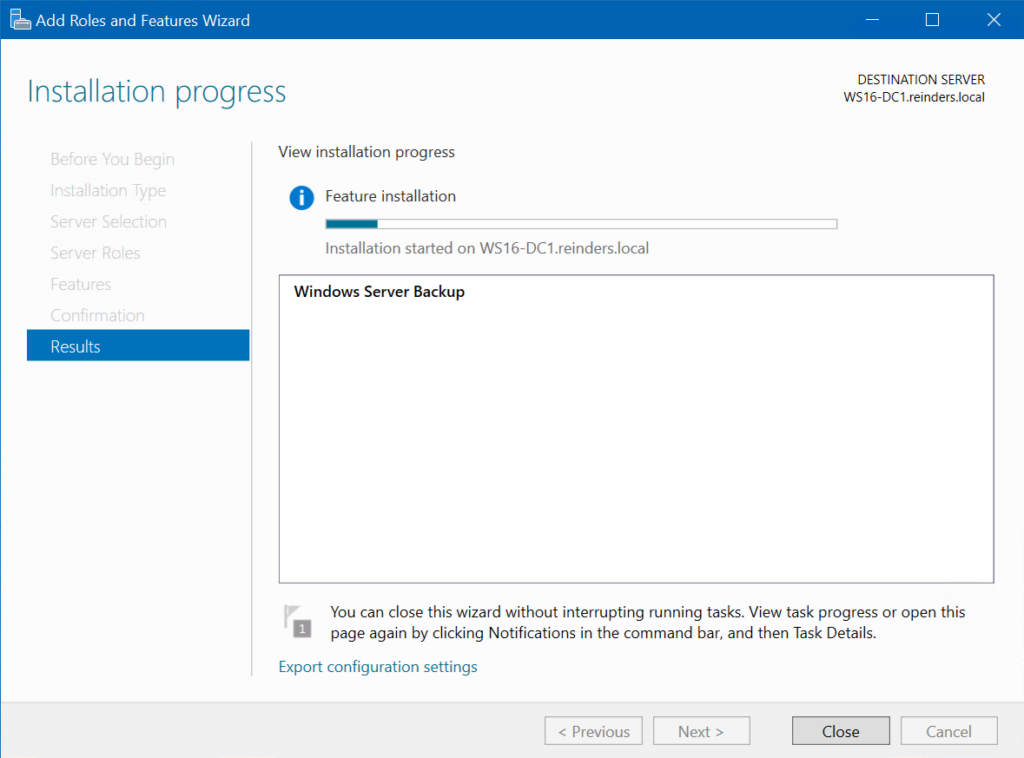
Locate ‘Windows Server Backup‘ and check it. Click Next, then click the Install button. It will start to install the feature.
Note – You can certainly use Server Manager to perform this feature installation on other remote servers if you desire.
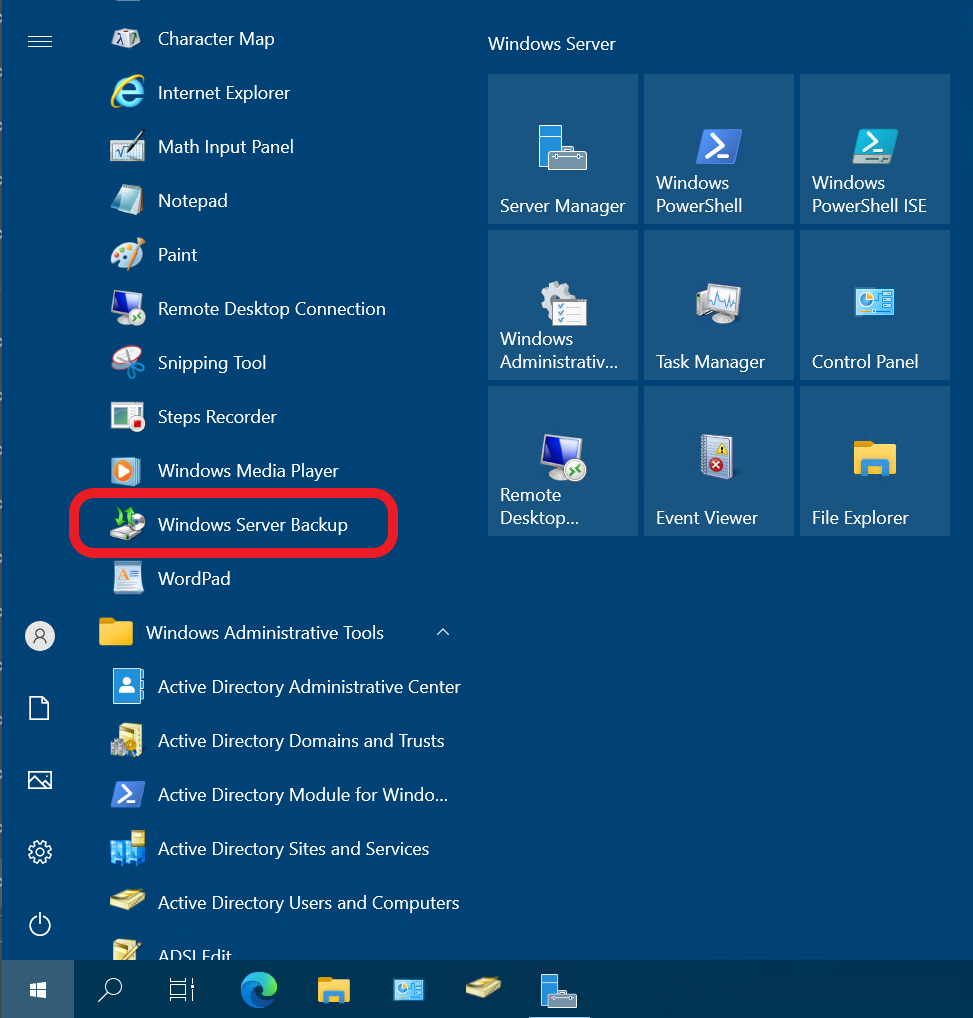
When the wizard completes, you can optionally reboot your DC. Then, log back in and click Start -> Windows Accessories -> Windows Server Backup.
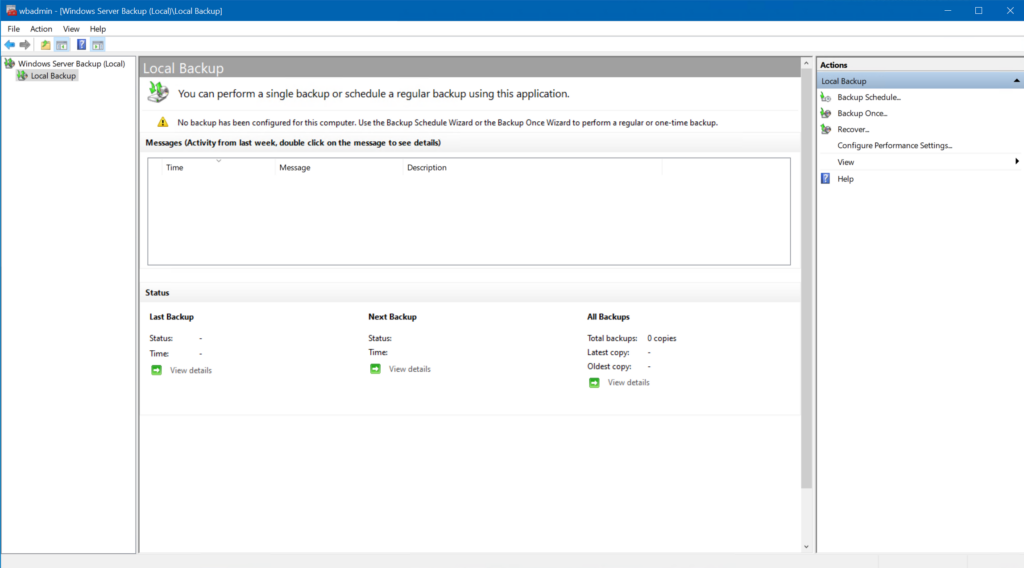
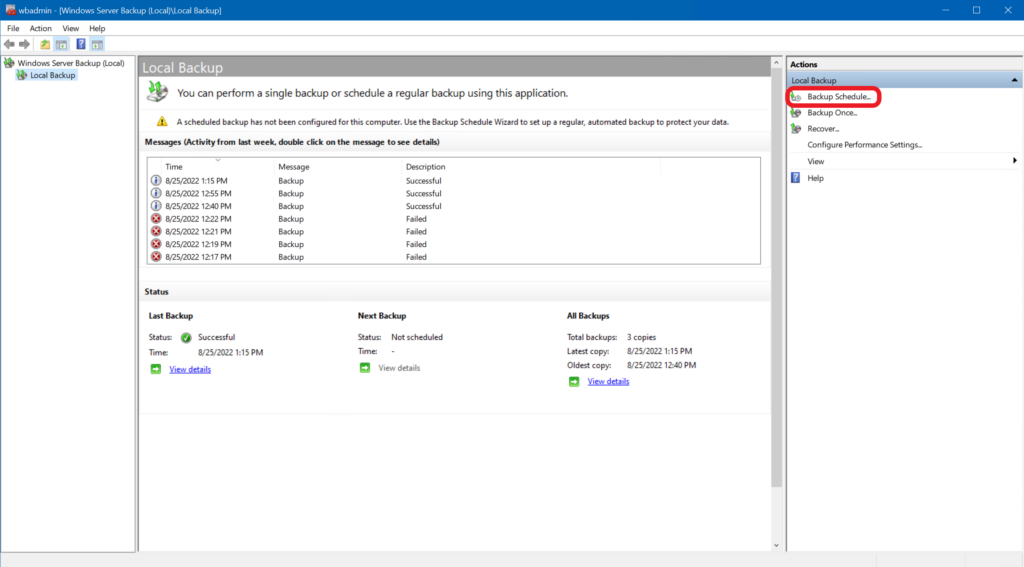
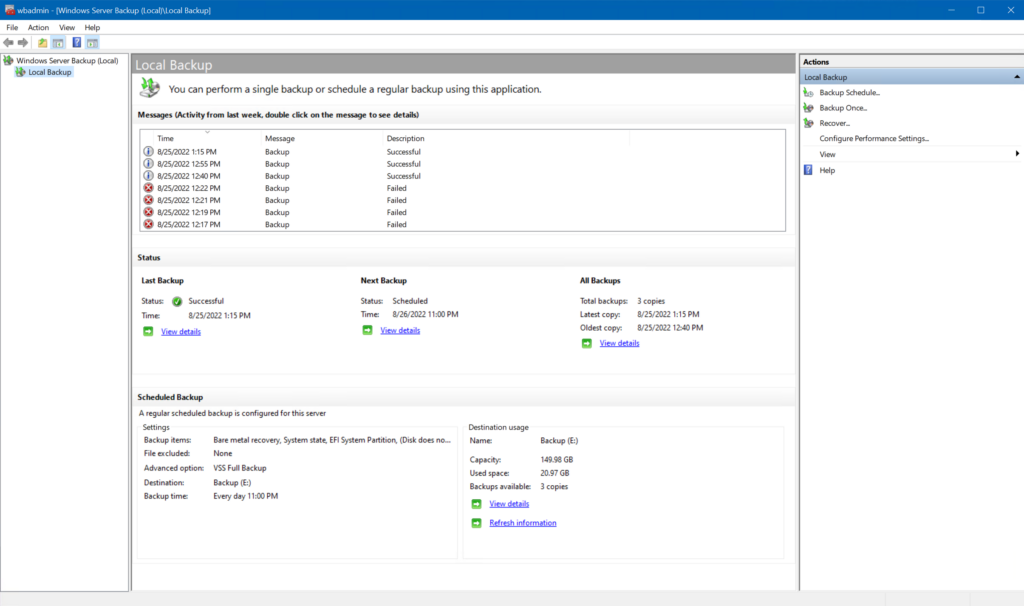
Here we are in Windows Server Backup!

As you can see, it’s pretty bare-bones at the moment. Not a lot of action. Don’t worry, we’ll change that nice and quick. Click the ‘Local Backup‘ link on the left tree view.
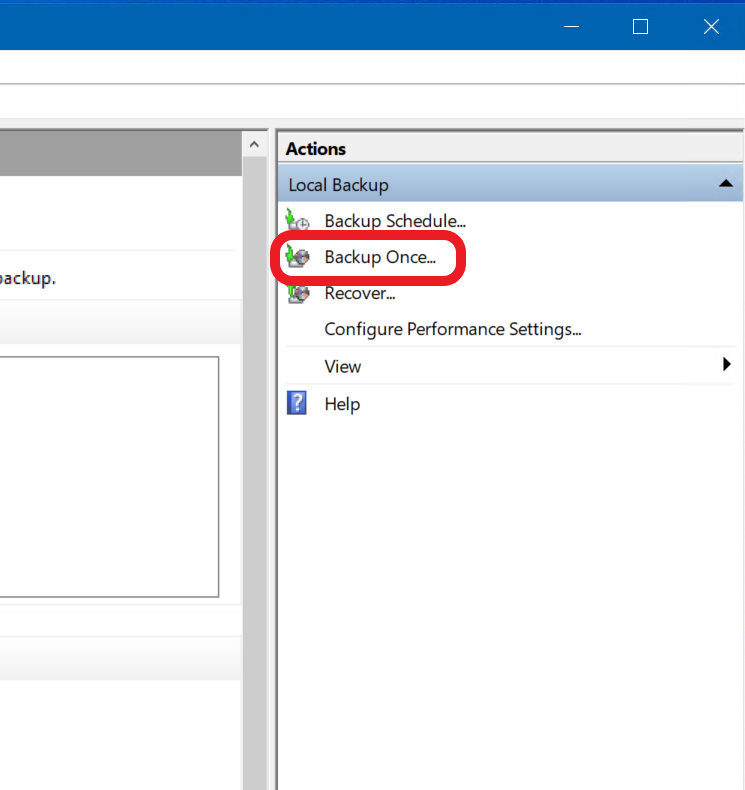
First, let’s do a single backup. Then, I’ll show you how to create an automated task/schedule. Click the ‘Backup Once…‘ link under the Actions menu on the right-hand side.
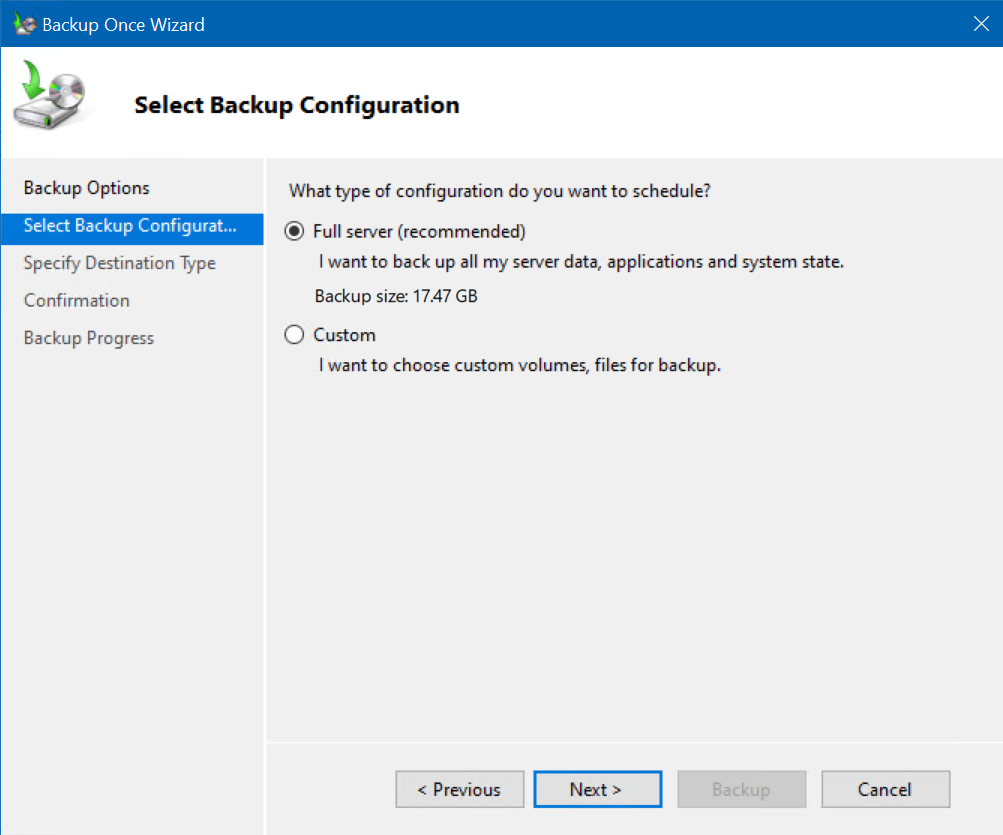
The ‘Backup Once Wizard‘ opens. As we haven’t created a scheduled backup yet, you can just click Next.

The ‘Full server (recommended)‘ option is selected by default – that’s what we want. Click Next.
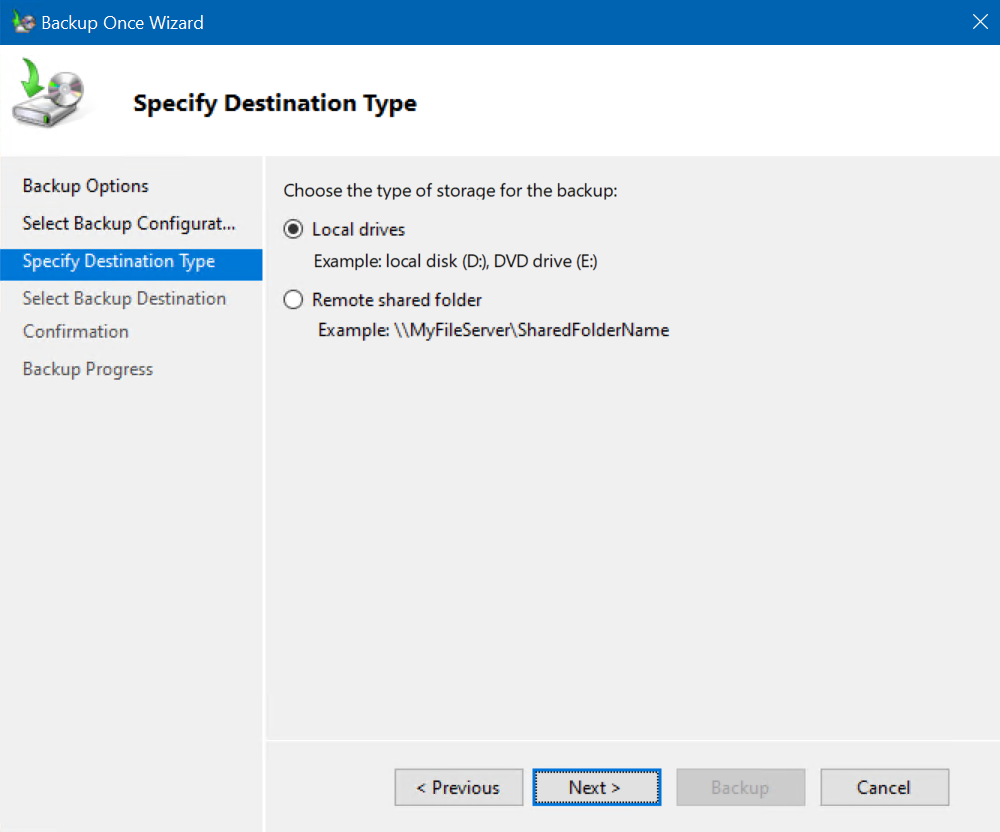
On the ‘Specify Destination Type‘ screen, typically, you would choose the ‘Remote shared folder‘ option to use another disk. If you were to lose access to your server, you wouldn’t be able to get at your backed-up data. However, for this guide’s purposes, we’ll just use a local directory on our server to go through the process. With ‘Local drives‘ selected, click Next.
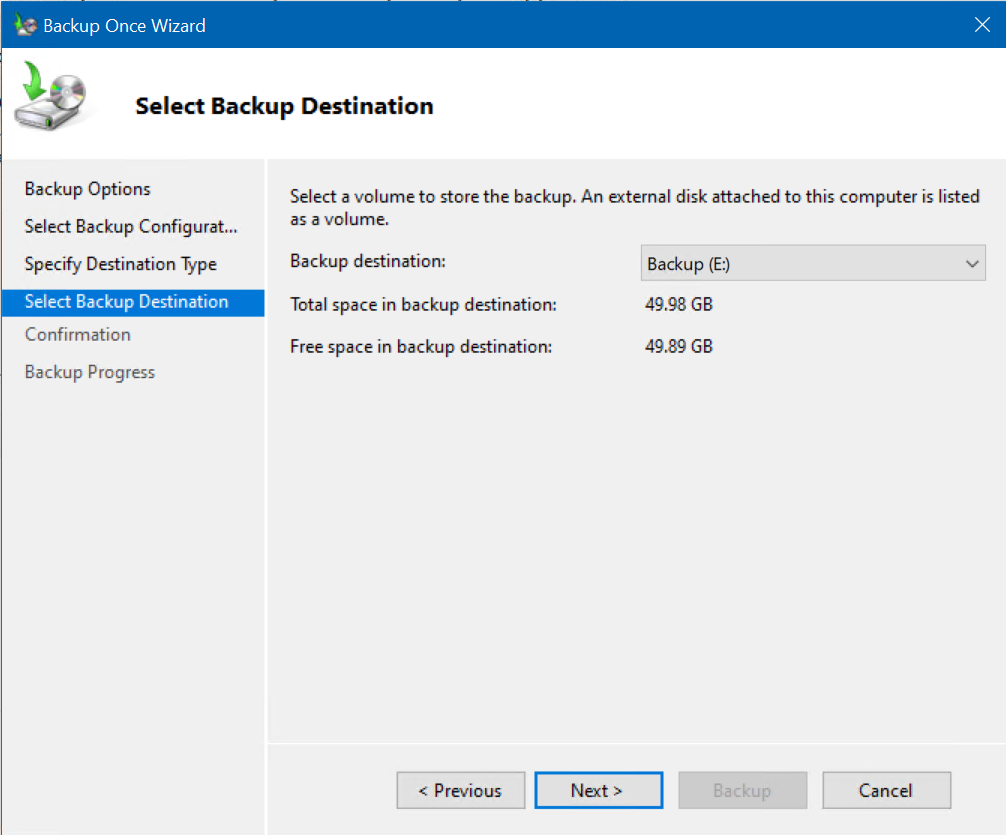
I created a 2nd volume/partition for these purposes, the E: drive. I will use this and click Next.
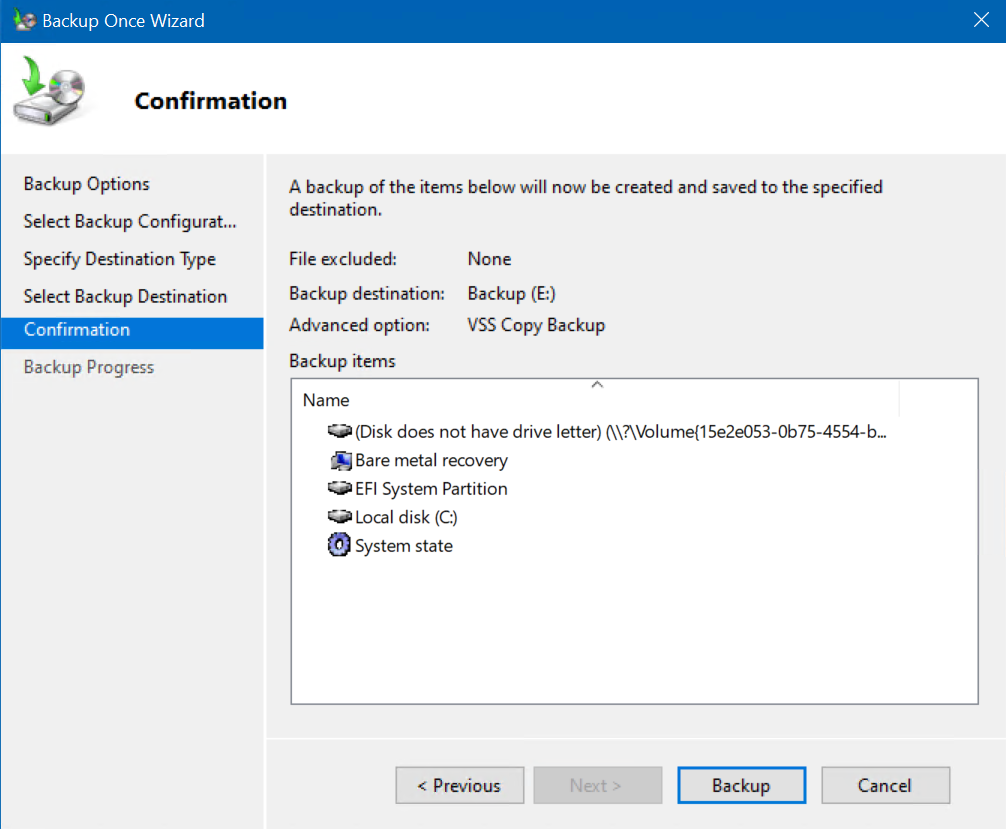
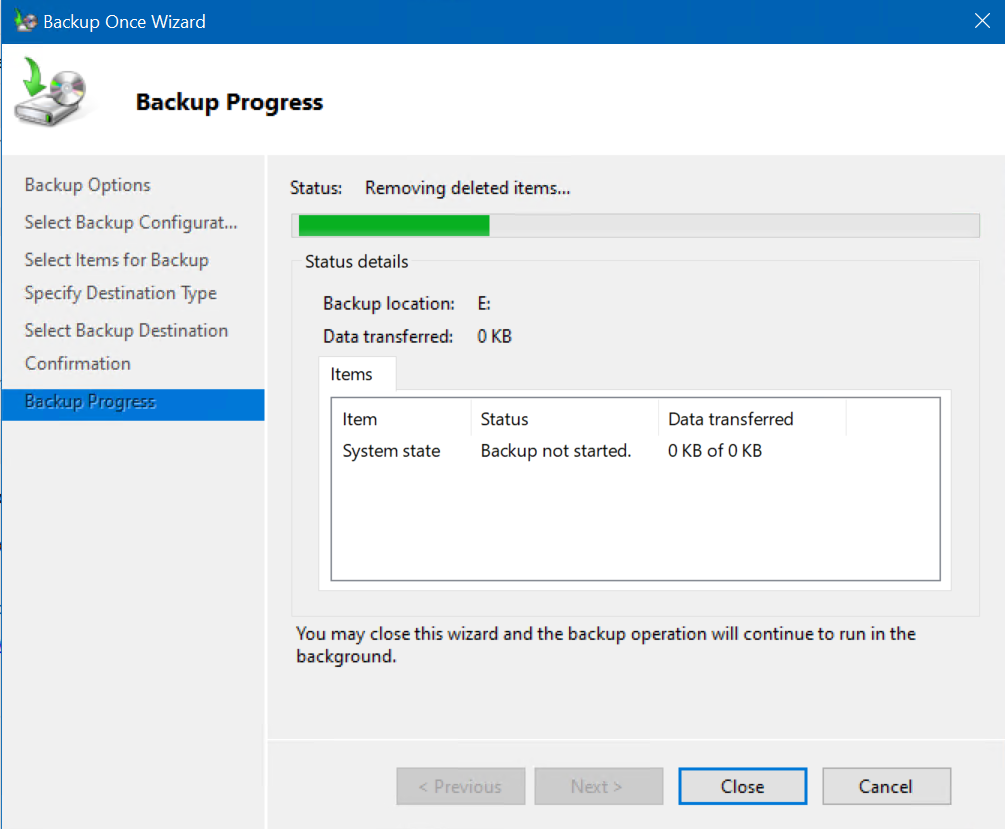
OK, we are at the Confirmation screen. Click Backup.
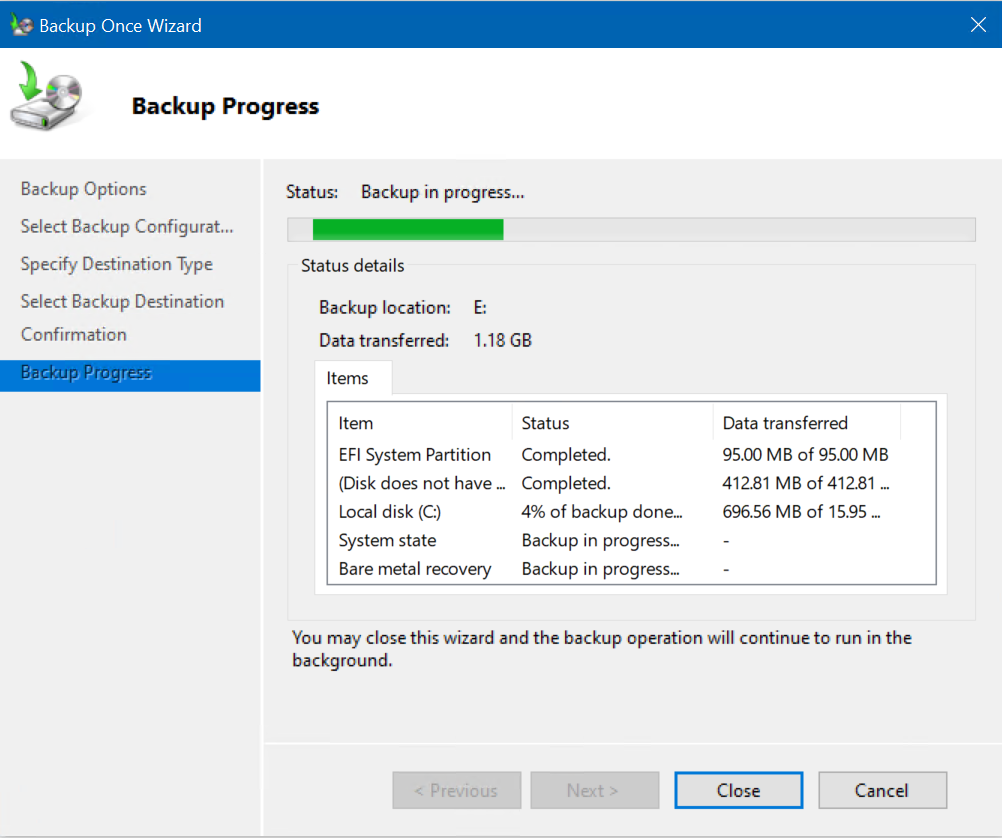
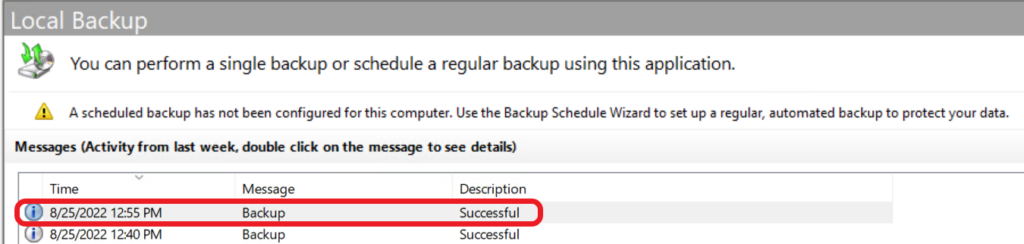
We can monitor the job’s progress in the dialog box or in the main interface window.
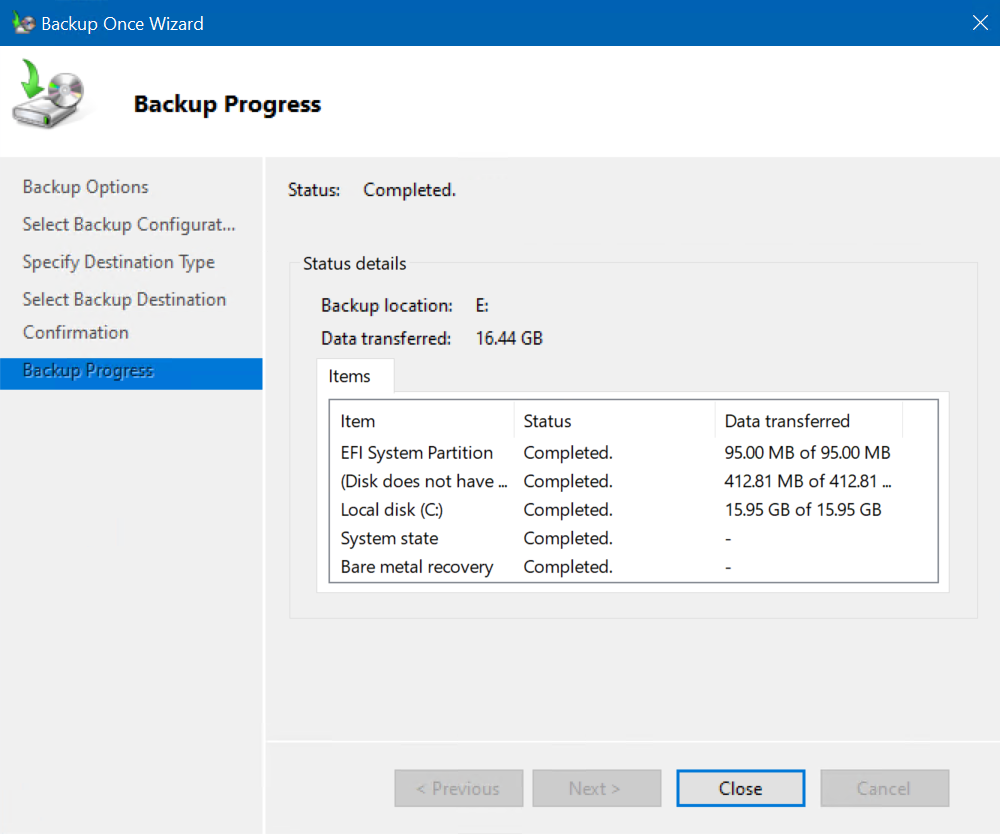
And, we are done! That was easy.
So, did you notice the title bar of the ‘Windows Server Backup’ program? Yep, ‘wbadmin’. This GUI is simply an extension in the MMC world using wbadmin.exe in the background, just like Exchange Server uses Powershell in the background. Read on!
Using the Windows Server Backup command-line tool Wbadmin.exe
So, now we can go through and examine the actual command-line instructions the GUI uses. We’ll use the wbadmin.exe command-line tool that gets installed when adding the Windows Server Backup feature in Server Manager.
So, to perform a full backup of our system to the E: drive, as we did previously, we’ll enter this command:
wbadmin start backup -backuptarget:E: -include:c:\*, -allcritical -systemstate
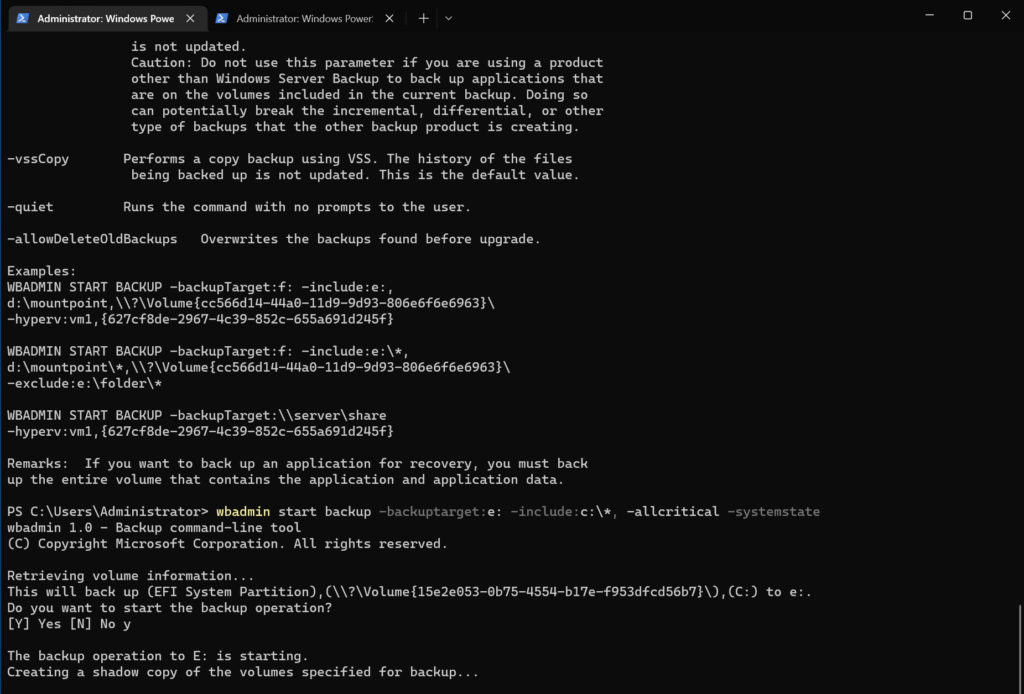
You’ll see it wanted a verification to include the System Partition. I chose ‘Y’es. After a few moments, the backup was completed successfully!
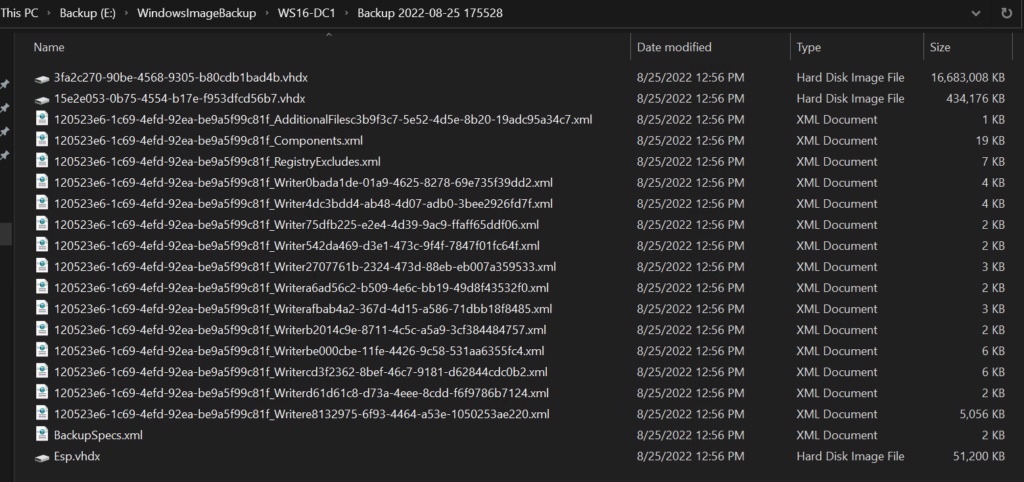
And if I browse out to the E: drive, I can drill down and find the backed-up files, in their full, technical glory. 😉
How to back up Active Directory using the system state
The other option we have when backing up Active Directory is the ‘system state’ option. Instead of doing a full backup just to get AD backed up, we can choose this single option during backups, with whatever product you’re using.
Let’s go through the Windows Server Backup application and the wbadmin.exe command-line tool.
Perform a system state backup using the Windows Server Backup GUI
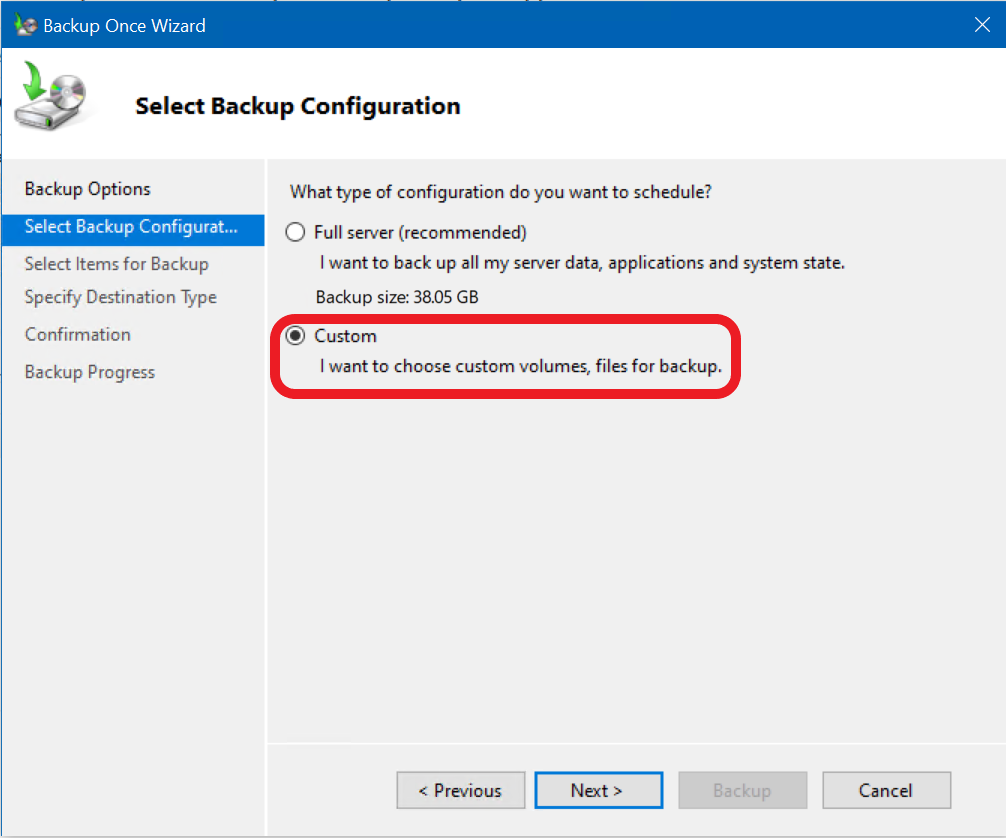
First, we will click the ‘Backup Once…‘ link again to start a manual backup. On the ‘Select Backup Configuration‘ category, we’ll choose ‘Custom‘ and click Next.
Put a checkmark in the ‘system state‘ option and click OK, then click Next. We’ll proceed through the rest of the wizard and click the Backup button.
The system state backup is in progress…
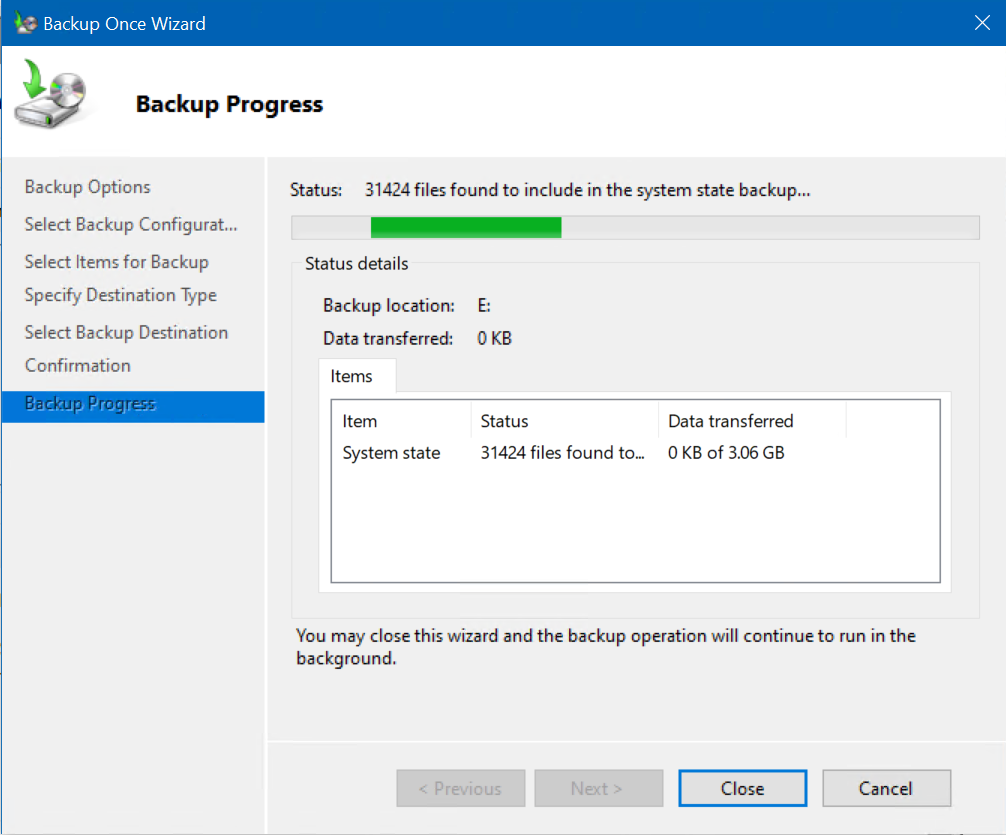
Since a system state backup uses less storage than a full server backup, this process should be noticeably faster. Anyway, wait until the system state backup is completed successfully.
Perform a system state backup using the Windows Server Backup command line (Wbadmin.exe)
Similarly, we can use wbadmin.exe to back up only the system state of our domain controller using the following command:
wbadmin start backup -backuptarget:e: -systemstate

That’s all there is to it!
How to create a scheduled backup
I highly doubt you want to remember to manually run backups of your domain controllers…there has to be a better way. 🙂 Well, there is. Let’s learn how to create a Backup Schedule.
Using the Windows Server Backup GUI to create an automated schedule
We will start in the Windows Server Backup application and click the ‘Backup Schedule…‘ link under the Actions menu pane on the right.
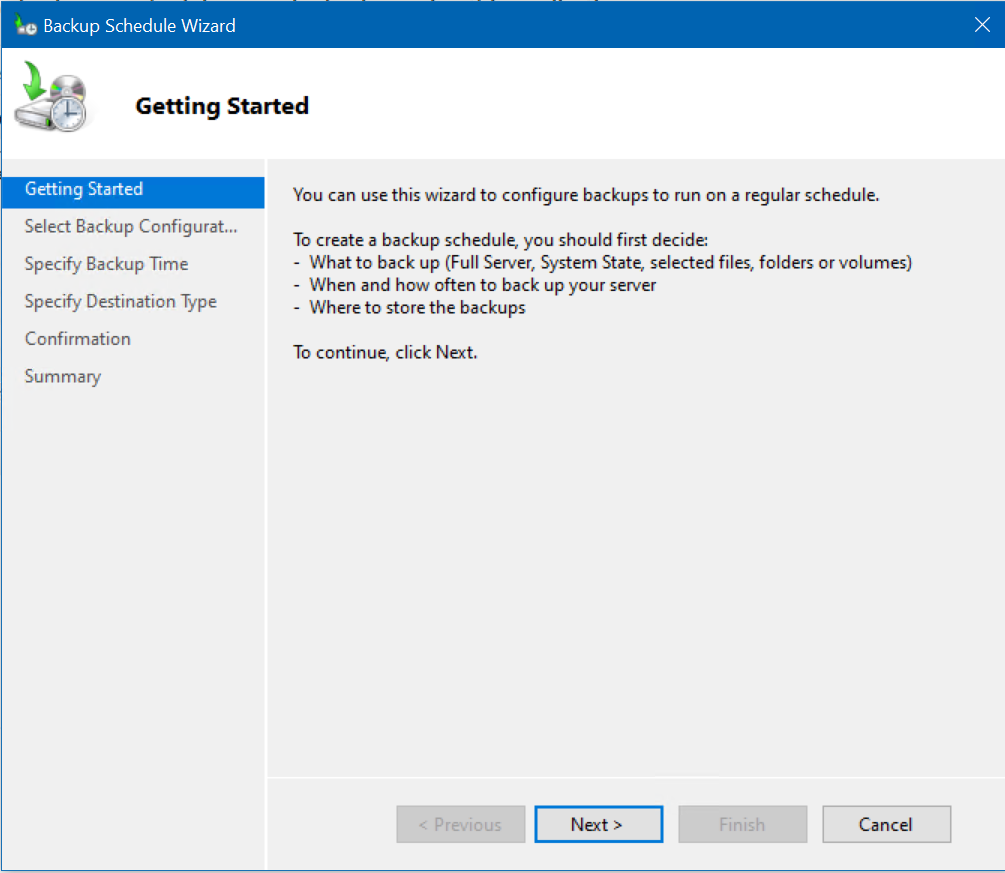
We are presented with the Backup Schedule Wizard. Click Next.
We’ll keep the default ‘Full’ backup option and click Next.
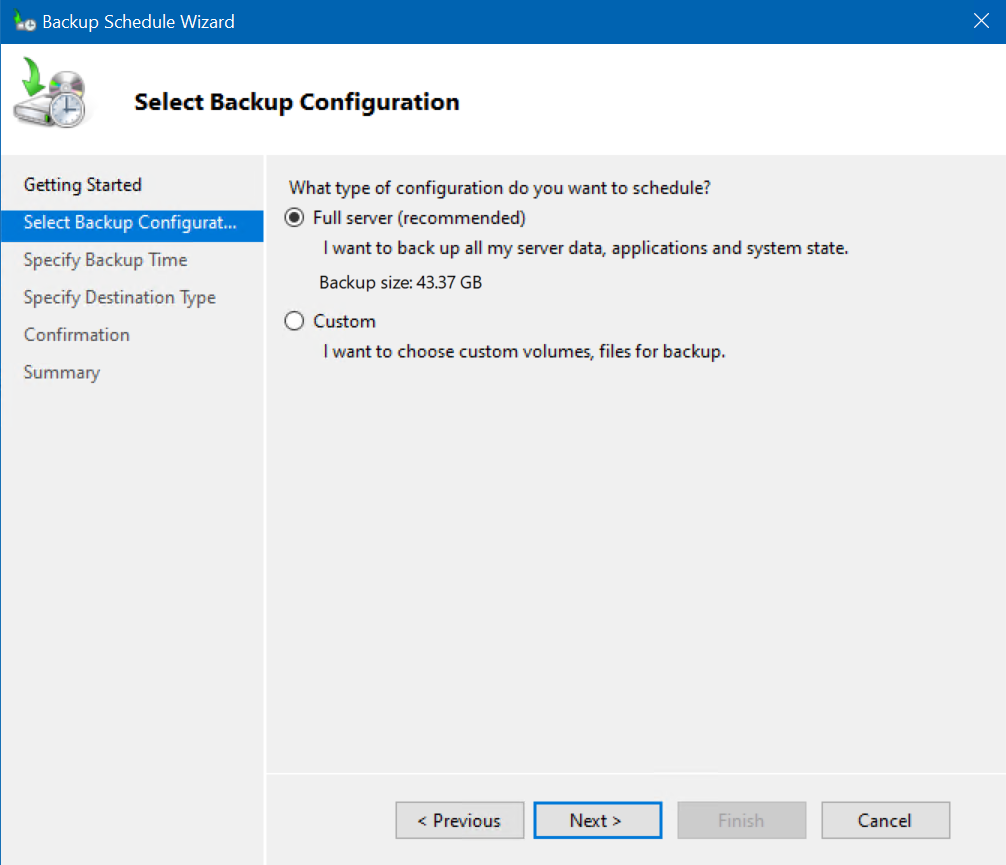
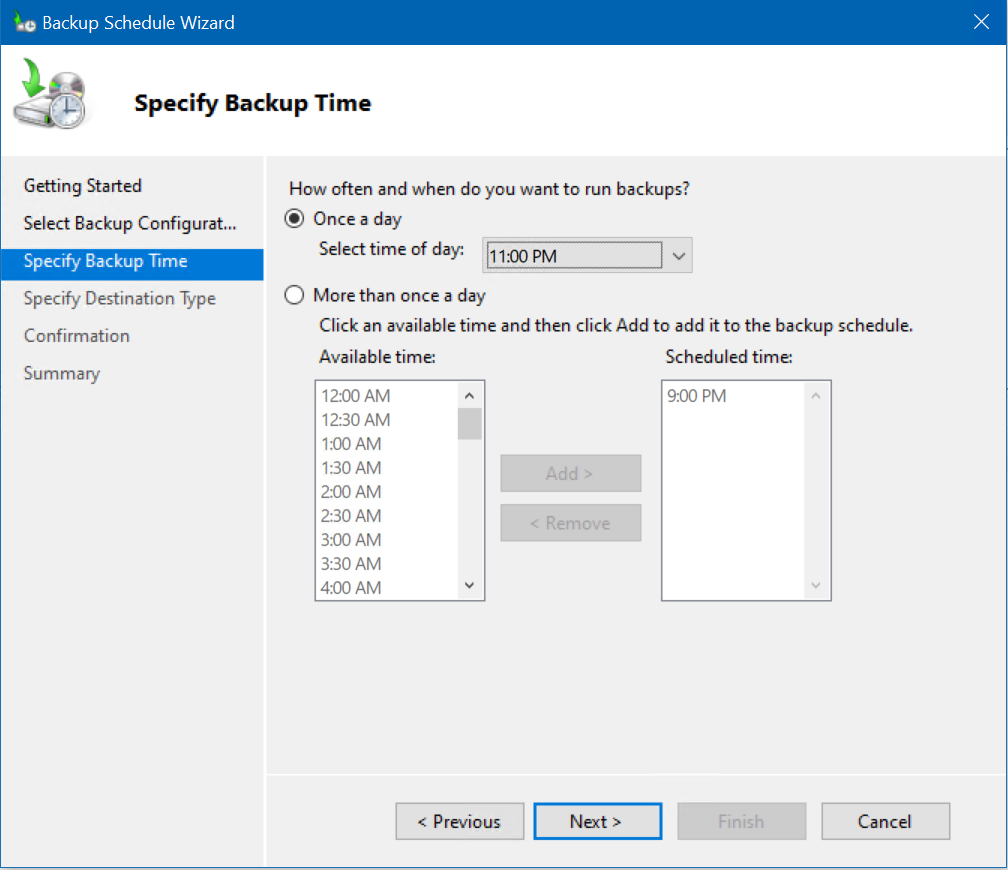
On the Specify Backup Time page, we’ll choose to have it start a Full backup nightly at 11:00 pm.
On the Specify Destination Type screen, we will choose the middle option, ‘Back up to a volume.’ The first option is definitely Best Practices, as it will use a dedicated, external backup device (hard drive) to exclusively store backups for your server. However, for demonstration purposes here, I’ll choose the 2nd option. Then, I’ll click the Add button.
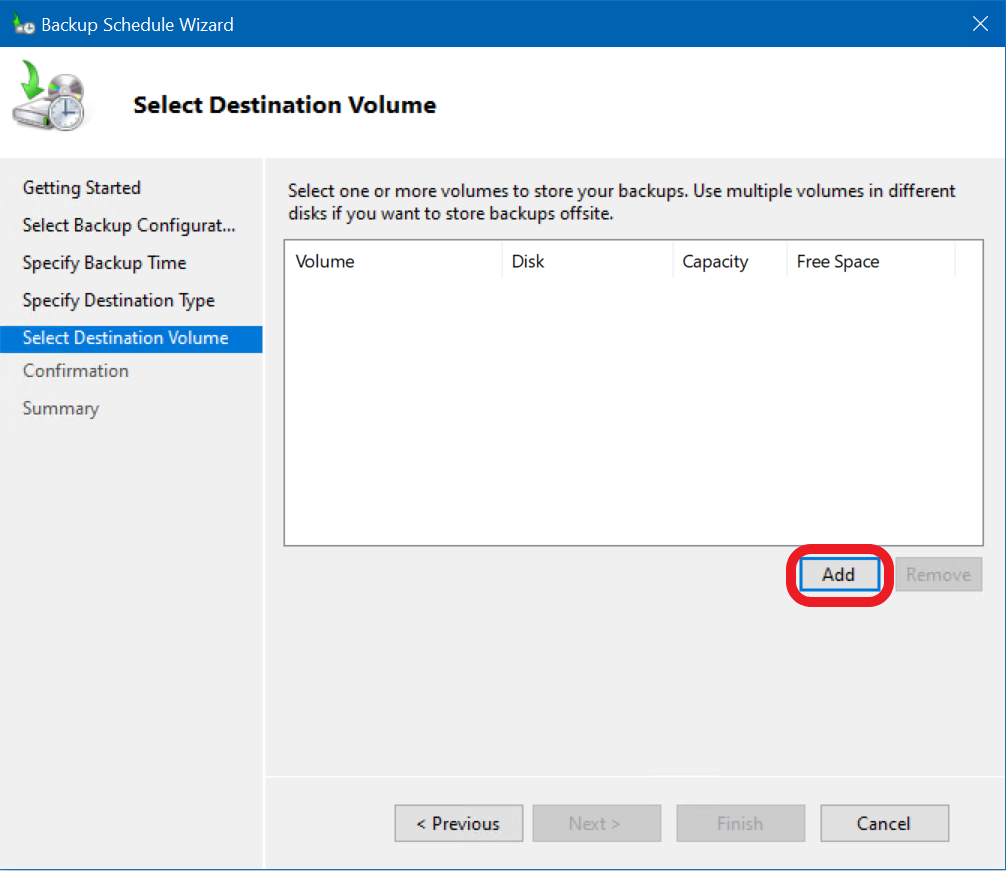
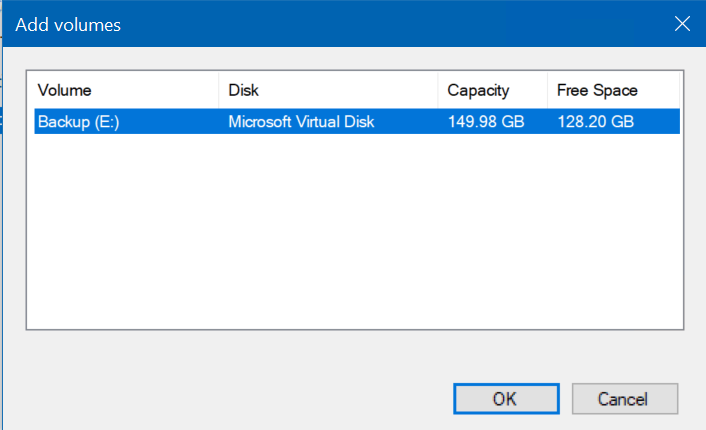
On the Select Destination Volume screen, I will click the Add button and then choose my E: drive.
Now, on the Confirmation screen, we can confirm all our details and click Finish.
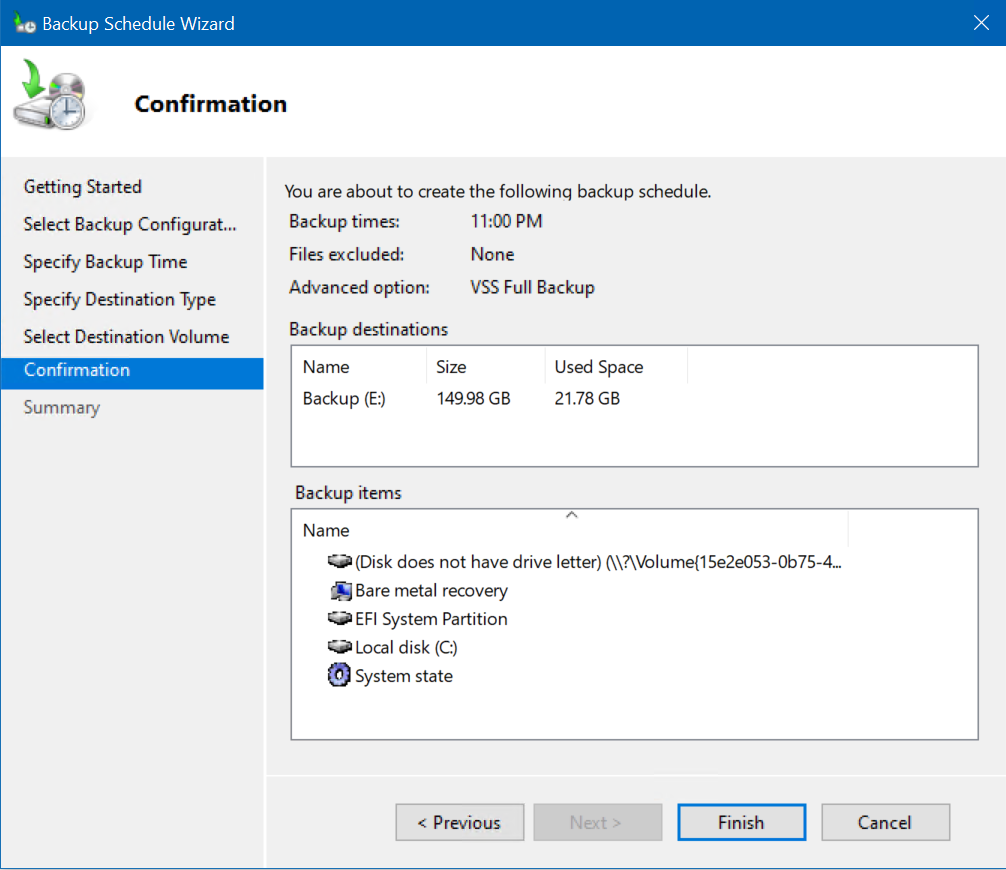
Voila! We are all set for the backups to start tonight at 11 pm!
Back up Active Directory using Azure Backup
If you’re running some of your Active Directory Domain Controllers (DCs) as VMs in Microsoft Azure, you’ll definitely want to set up Azure Backup to protect your DCs. Backing up Active Directory and ensuring successful restores in cases of data loss is a critical aspect of Active Directory maintenance.
Domain controllers running in Azure VMs
Again, if your DCs are running as Azure VMs, you can use Azure VM Backup. Please read our previous guide on how to back up Azure virtual machines the easy way.
On-premises domain controllers
To back up and protect an on-premises domain controller, you need to back up the server’s system state data. There are two main strategies you can use:
- If you are using Azure Recovery Services, follow this link for more information.
- If you are using Azure Backup Server, follow this link for more information.
Conclusion
Protecting your Active Directory environment is absolutely critical to include in your overall business continuation/disaster recovery plan. Thankfully, you have several options to consider when accomplishing this task.
Using the built-in and free Windows Server Backup program, you can back up and protect your domain controller’s information and store it offsite for robust recovery purposes. If you want to further, I invite you to check out our guide on how to restore Active Directory on Petri.
FAQ
How long does it typically take to back up Active Directory in a medium-sized organization?
The time needed to back up Active Directory typically ranges from 30 minutes to 2 hours, depending on the size of your directory and the backup method chosen. For organizations with up to 10,000 users, a full system state backup of Active Directory usually completes within an hour using modern backup solutions.
What happens if I don’t back up Active Directory regularly?
Failing to back up Active Directory regularly can lead to extended downtime, loss of user authentication capabilities, and potential data corruption. Without proper backups, organizations risk losing Group Policy settings, DNS records, and other critical AD configurations that could take weeks to manually recreate.
Can I back up Active Directory while users are actively using the system?
Yes, modern backup solutions allow you to back up Active Directory during production hours without disrupting user activities. However, it’s recommended to schedule comprehensive backups during off-peak hours to minimize any potential impact on system performance.
What’s the recommended retention period for Active Directory backups?
Best practices suggest keeping Active Directory backups for at least 180 days, with some organizations maintaining backups for up to one year. This extended retention period ensures you can recover from long-term corruption issues and meets most compliance requirements.
How much storage space is needed to back up Active Directory?
The storage space required to back up Active Directory typically ranges from 50GB to 200GB for medium-sized organizations. This includes system state data, SYSVOL contents, and associated AD components. It’s recommended to allocate additional space for multiple backup versions and growth.

Michael has been an IT Pro since 1998. He has worked predominantly in the Windows world including client and server operating systems, on-prem systems engineering (AD, DNS, etc.), and over the last ten years or so has embraced and immersed himself in...


