How To Find Windows 10 Stop Codes and Fix Errors Quickly

Windows 10 doesn’t reliably give you easy access to stop codes when it crashes. Plus, these codes may flash on your screen for just half a second! In this guide, we’ll show you how to find Windows stop code fix methods, understand the reasons behind Windows crashes and guide you to solidify your Windows reliability across your enterprise.
What is a Windows stop code?
Windows stop codes or crashes can be a major pain for PC users. As an IT Pro, we usually focus 2% of our resources on the error code and how to resolve it going forward and 98% on getting back to getting our job done! However, it would behoove us all to learn a bit more about what they are and develop an understanding of how to avoid them altogether in our Windows environments.
Windows stop codes, or bug checks, are arbitrary unique numbers that identify what’s called a ‘stop’ error. Yes, we’re talking about the “Blue Screen of Death” (or Green Screen of Death if you happen to be running a Windows Insider build in your testing), which is also sometimes referred to as a blue screen error.
Why are you getting a Windows stop code?
When Windows gets to a point where it either can’t continue or shouldn’t continue, it will halt the system (this terminology was used decades ago). When that occurs, Windows will cease all activity and write a small debug dump file to the Event Viewer documenting what went wrong. If you have kernel memory or complete memory dumps configured, it will write everything in RAM to a dump file, typically ‘C:\Windows\MEMORY.DMP.’
The stop codes can be used as a troubleshooting tool to identify what exactly went wrong – was it a specific driver, a hardware issue with one of the RAM sticks in the system, or a memory leak that went past the point of no return?
What are the most common Windows 10 stop codes?
Let me provide a listing of the most common stop codes in Windows in table form.
| Windows Stop Code | Stop Error Detail | Explanation |
| 0x0000000EF | CRITICAL_PROCESS_DIED | Corrupt system updates files and driver problems. |
| 0x00000133 | DPC_WATCHDOG_VIOLATION | Incorrect installation or uninstall of an application. |
| 0xc000021a | STATYS_SYSTEM_PROCESS_TERMINATED | Generic issues with software or hardware. |
| 0x0000009F | PDP_DETECTED_FATAL_ERROR | Issues with input or output device initialization. |
| 0x00000139 | KERNEL_SECURITY_CHECK_FAILURE | Driver compatibility issues. |
If Windows is not able to offer the best explanation during a BSOD, there will be a link on the screen, usually pointing you to ‘windows.com/stopcode’. This takes you to a Microsoft Support website to assist your troubleshooting efforts.
Next, I’ll explain how you can find these codes retroactively.
How to find Windows 10 stop codes on your PC
So, you have experienced an annoying Blue Screen of Death (BSOD), and your system has come back online. With your proactive hat on, you’d like to get some more detail about what caused Windows to stay ‘stop’. Let me show you a few tools and programs so you can do some historical ocular reconnaissance to identify the root cause.
Search through your Windows logs with the Event Viewer
The best place to start, especially if your computer or server is locked down security-wise, is the Windows Event Viewer. Let’s go through some step-by-step instructions.
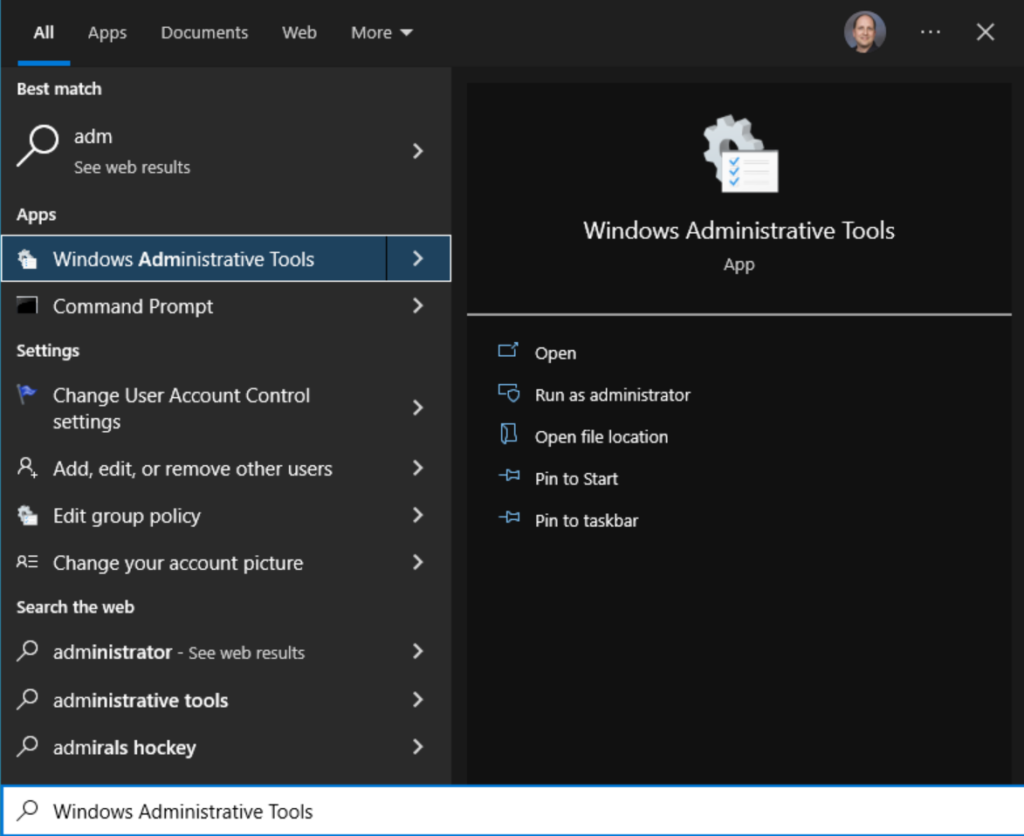
- Go ahead and open the Administrative Tools menu from the Start Menu and open Event Viewer.
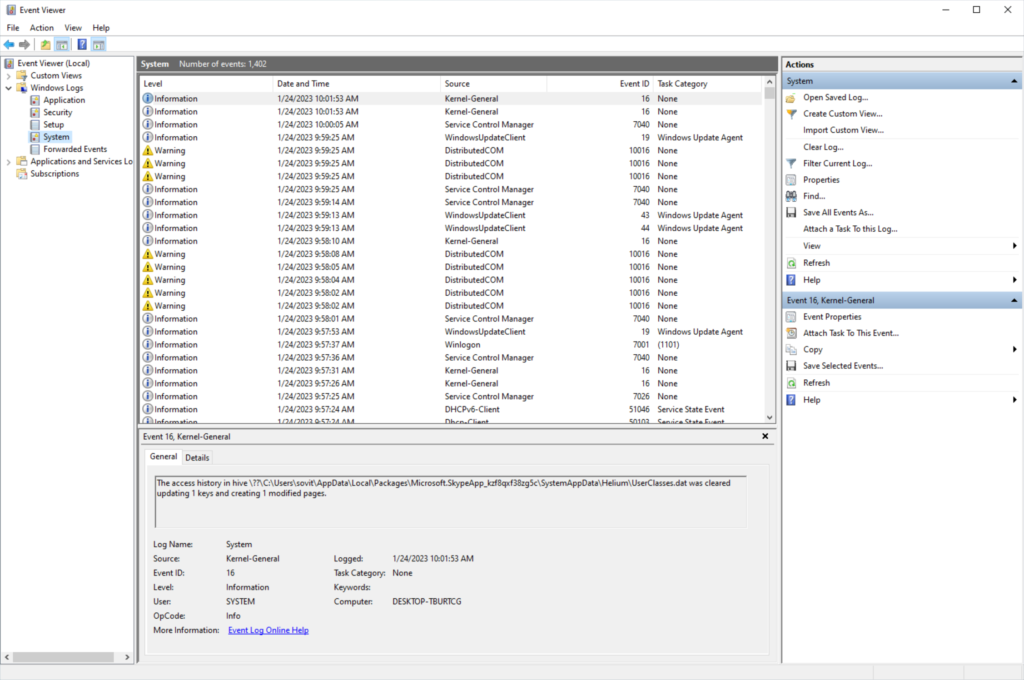
- Here, you can click and expand Windows Logs then click on the ‘System‘ entry. This will show you all Windows system-related events.
Typically there are a lot of events, so we want to narrow the field:
- Click the ‘Filter Current Log…‘ entry on the right.
- Put a checkmark in the ‘Critical‘ and ‘Error‘ checkboxes and click OK.
- This will then only show errors and critical events.
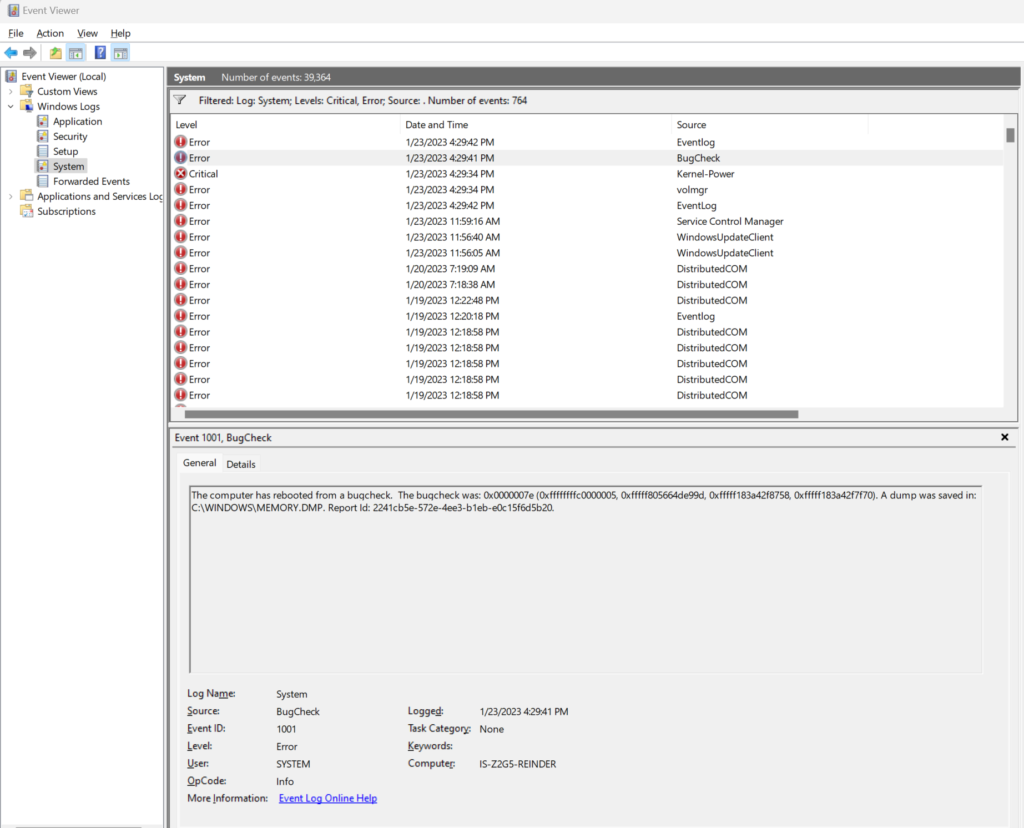
Do you see what I see? Yes, there are a few items that happen to have occurred on my workstation yesterday afternoon (as I write this). Interesting synchronicity here, but I had Windows completely freeze up around 4:30 pm yesterday. This essentially never happens. So, maybe the universe was providing excellent evidence and information to help write this post!
Anyway, if I click on the ‘BugCheck’ event, I can see the details. The core stop code was ‘0x0000007e’. If I do a quick search online, it’s a pretty generic stop code – ‘SYSTEM_THREAD_EXCEPTION_NOT_HANDLED.’
How to troubleshoot these codes is beyond the scope of this post. We are simply looking to identify what happened so we can then open an investigation to resolve the reliability issue.
Use the SetupDiag diagnostic tool
Microsoft developed and released a diagnostic tool called SetupDiag to help users and IT Pros troubleshoot failed Windows 10 upgrades. However, you can also install it to help identify recent crashes in Windows. You can download SetupDiag on this page.
I ran the utility on my computer, but the resulting output LOG file was empty. This could very well be due to the fact that I am running Windows 11. I also ran it on my Windows 10 22H2 Hyper-V virtual machine and got the same results. Basically, the utility is scanning for specific rules (events) or memory dump files and does a cursory examination to find the root cause.
Find stop codes using Nirsoft’s BlueScreenView tool
Here’s one more free utility you can download and use to get a little more detail. Bonus – it actually helped me right away with identifying the most likely root cause of my crash yesterday. You can navigate to Nirsoft’s website site to learn more about BlueScreenView.
You can scroll to the bottom of the page to download the x86 or x64 versions of BlueScreenView. After you download it, open your Downloads folder. Right-click on the file and click Run As Administrator.
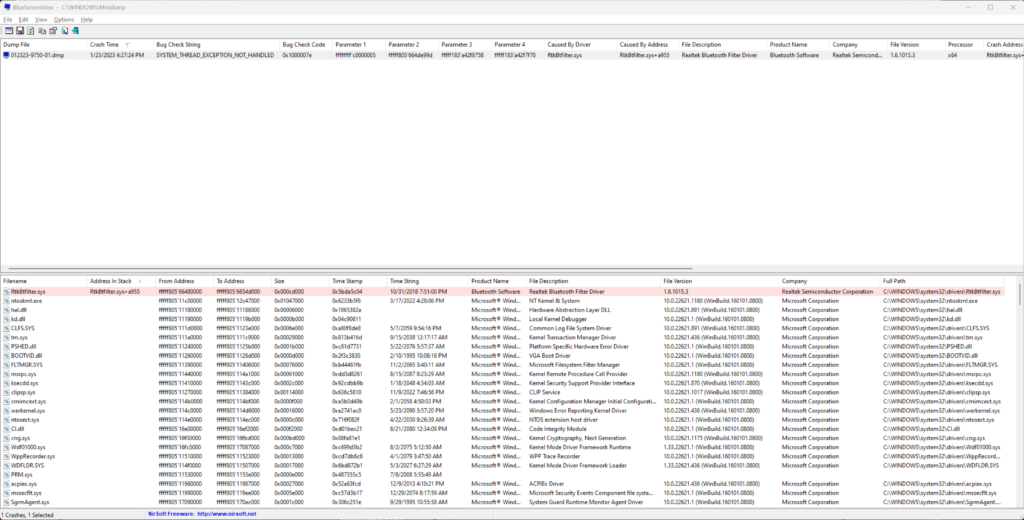
Look at that! It would appear my Realtek Bluetooth driver was the culprit! The utility found the MEMORY.DMP file in my C:\WINDOWS folder and did a little digging.
How to fix Windows stop codes: Basic steps
Now that we know a decent amount of information about what Windows stop codes are and how to find them, we turn our focus on how to fix them – immediately, and then proactively. Keeping our systems healthy and up-to-date is a crucial aspect of this preventative work.
Restart your PC
First, if Windows didn’t reboot your computer on its own after the BSOD errors, go ahead and restart your PC. You may need to forcefully power down your computer and turn it back on. Let it boot up and log in again to continue troubleshooting.
Use the System File Checker (SFC) and CHKDSK system utilities
After your system comes back up and you log in, there are some command-line utilities you can use to check for critical Windows files that may be missing or corrupt. First, let’s try the System File Checker (SFC) program.
Open an Administrative Command Prompt (or Windows Terminal) from the Start Menu.
Before we run ‘SFC’ let’s first access the image of Windows and compare it to an online database to make sure it’s accurate. We’ll use the Deployment Image Servicing and Management (DISM.exe) command line tool to do that:
dism.exe /online /Cleanup-image /Restorehealth
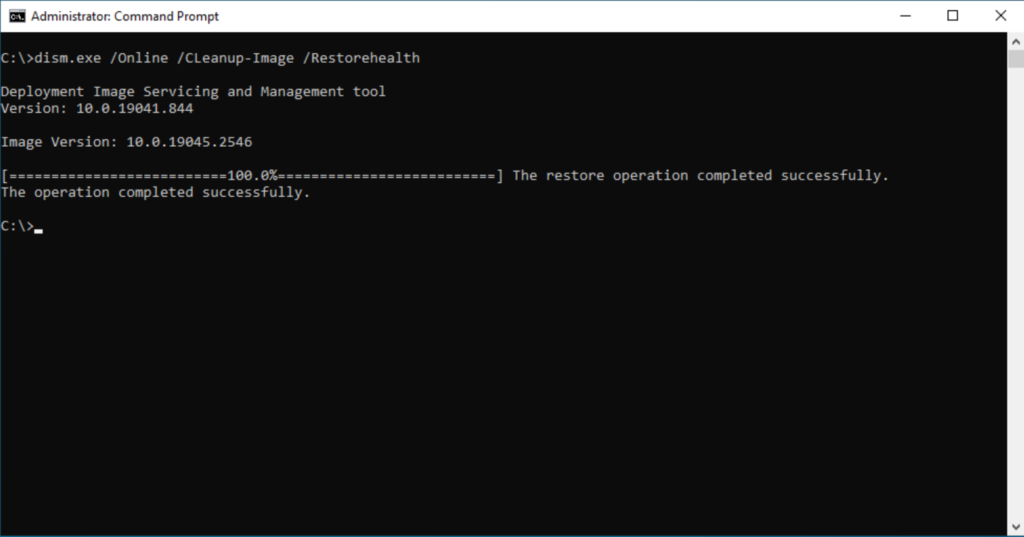
With successful results, we know that if any critical Windows system files were not intact and verified to be accurate, they were pulled down from Microsoft’s servers. This can often solve many reliability issues in Windows.
Next, we can run the SFC command:
sfc /scannow
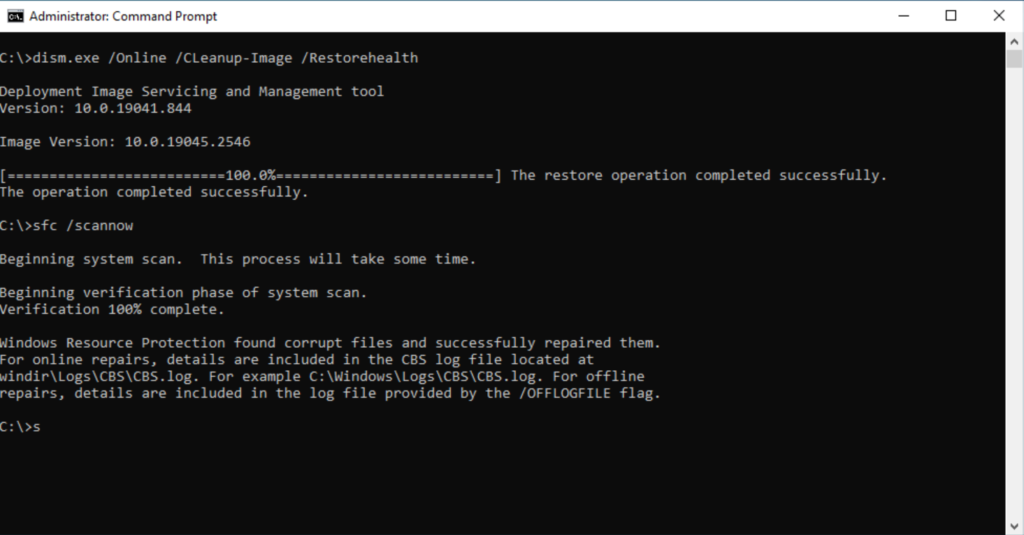
Well, thank you ‘SFC.’ From the results, we can see that there were corrupt system files; Windows was able to restore them from a hidden, protected area on the SYSTEM volume or from an online repository. Very nice. You can examine the log files mentioned for further detail if you desire.
Next, we will use the infamous, but more traditional CHKDSK tool. For our first run, we can run the following command:
Chkdsk c:
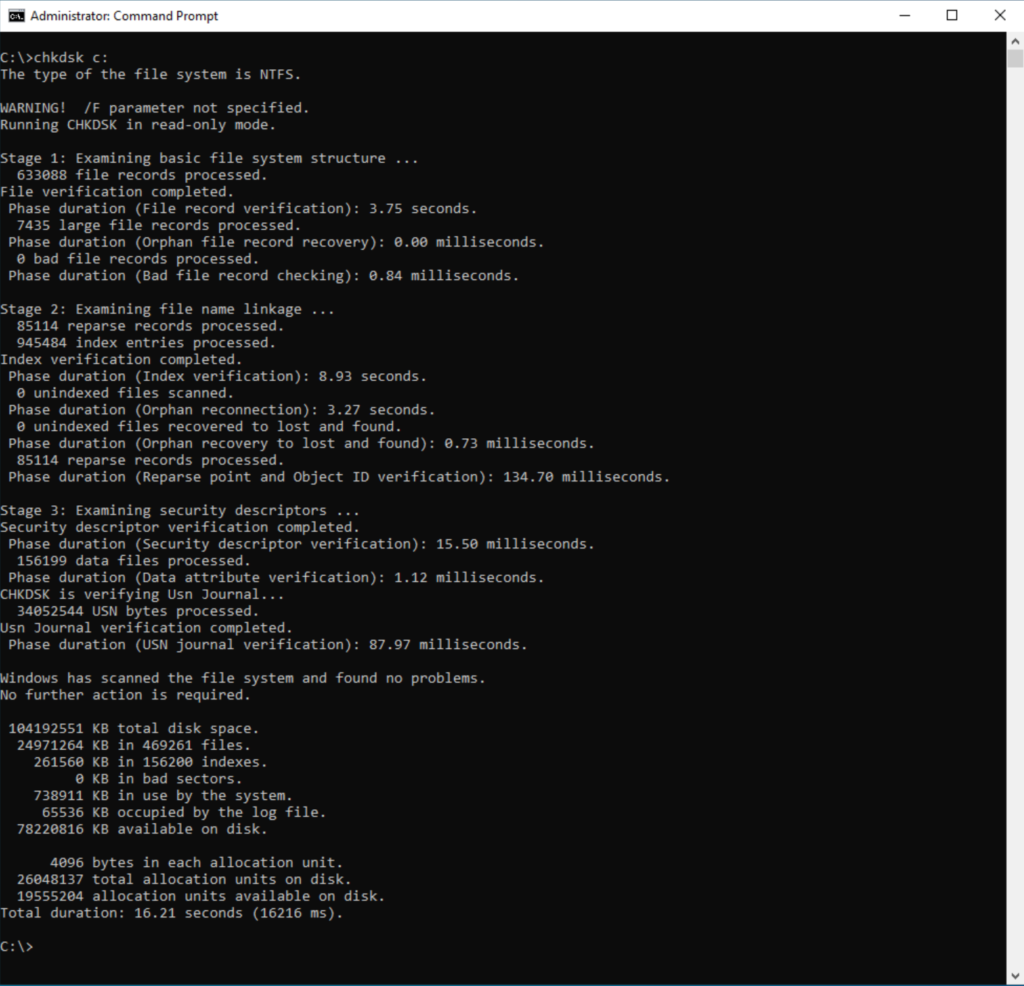
Thankfully, Windows found no problems with the file system on the C: drive. That’s a relief. And, to make a note, the kind of corruption this tool looks for was much more prevalent two decades ago when mechanical hard drives weren’t nearly as reliable as they are today: SSD and NVMe memory-based drives are much better in that regard, obviously.
Install the latest Windows 10 Updates on your PC
Probably the most helpful proactive step you can take to avoid BSODs in the future is to run Windows Update and make sure everything is patched and up-to-date. To access this, click the Start button, and click on Settings.
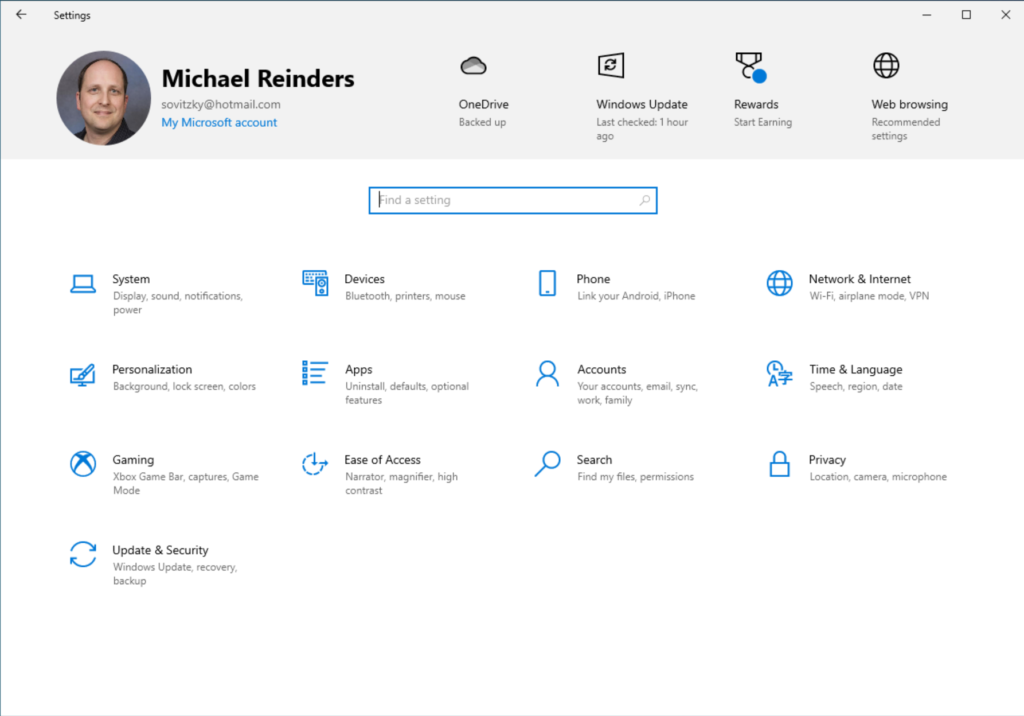
Click the ‘Update & Security‘ icon. Before you check for updates, click the Advanced options menu button.
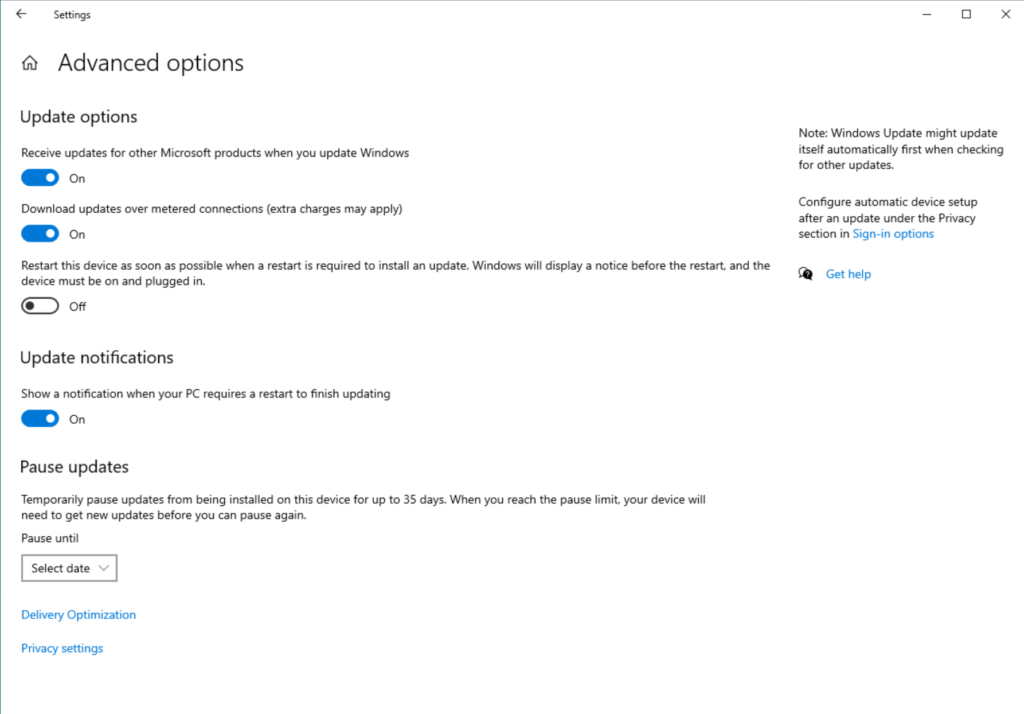
Make sure ‘Receive updates for other Microsoft products when you update Windows‘ is set to On.
Then, go back and click the Check for updates or the link – ‘Check online for updates‘. This will make sure you are running the latest supported build/version of Windows 10, the latest security and cumulative updates, and any verified Windows drivers for your devices.
This will help immensely in keeping your system in tip-top shape!
Uninstall incompatible Windows 10 updates, apps, or drivers
But wait…there’s more! Another step you can take to prevent your current BSOD woes is to remove a recently-installed Windows cumulative update or a Windows device driver. And, even a recent app install or upgrade may contain buggy code that leads to a BSOD.
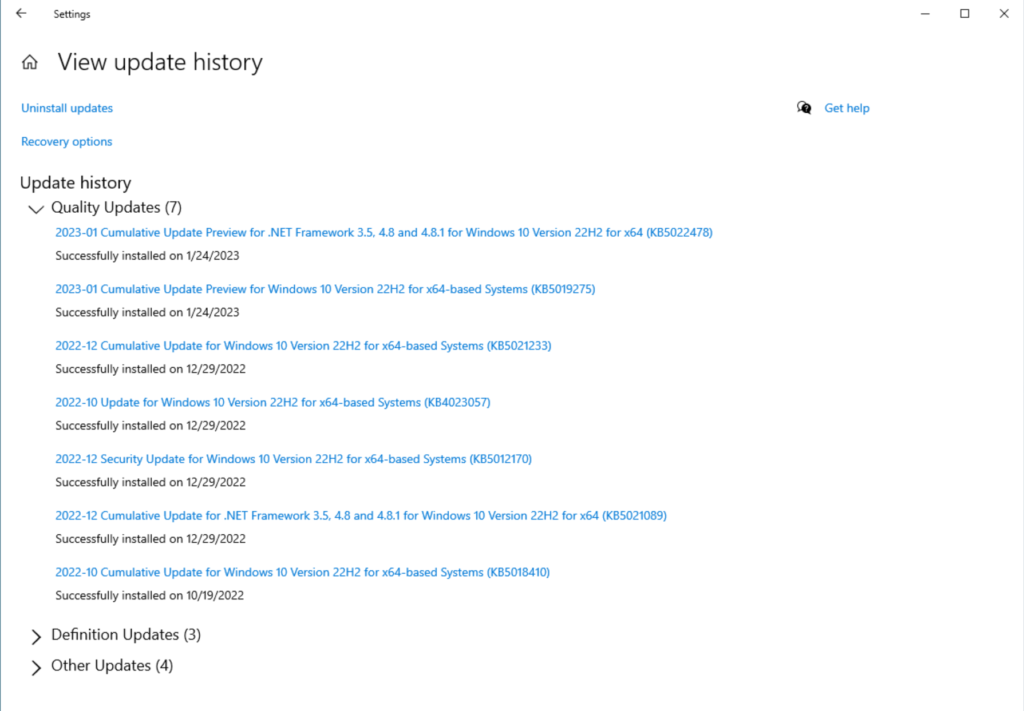
First, you can go to Windows Update and click the ‘View update history‘ link.
If you find an update that has been identified to be a problem, you can access the old-school Control Panel to uninstall the update. Click the Start button and type in ‘appwiz.cpl‘.
Here you can click the ‘View installed updates‘ link on the left.

You can select an update, and click the ‘Uninstall‘ link on the toolbar above. After you reboot (when you are prompted), hopefully, you’ve restored some stability to your Windows 10 PC.
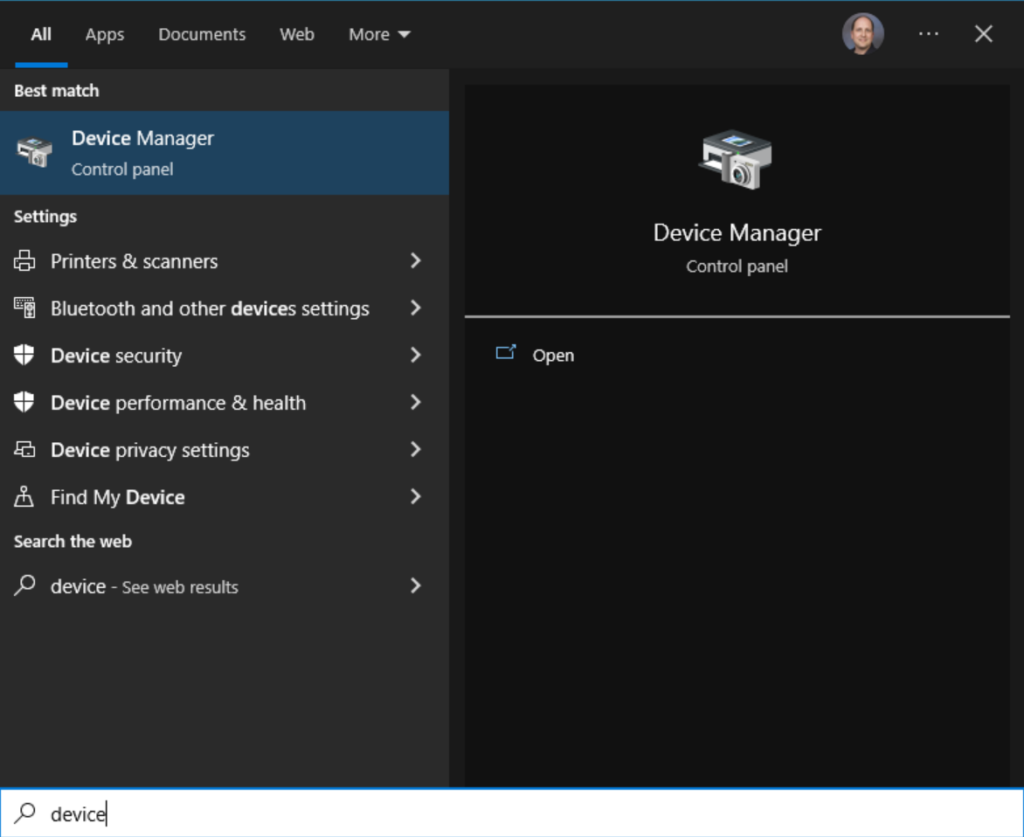
Let me also show you how and where you can uninstall an ill-upgraded driver. First, open Device Manager by clicking the Start button and start typing in ‘device‘ and click on Device Manager.
Right-click on the component in question, and click Properties. Click the ‘Driver‘ tab and click the ‘Roll Back Driver‘ button.
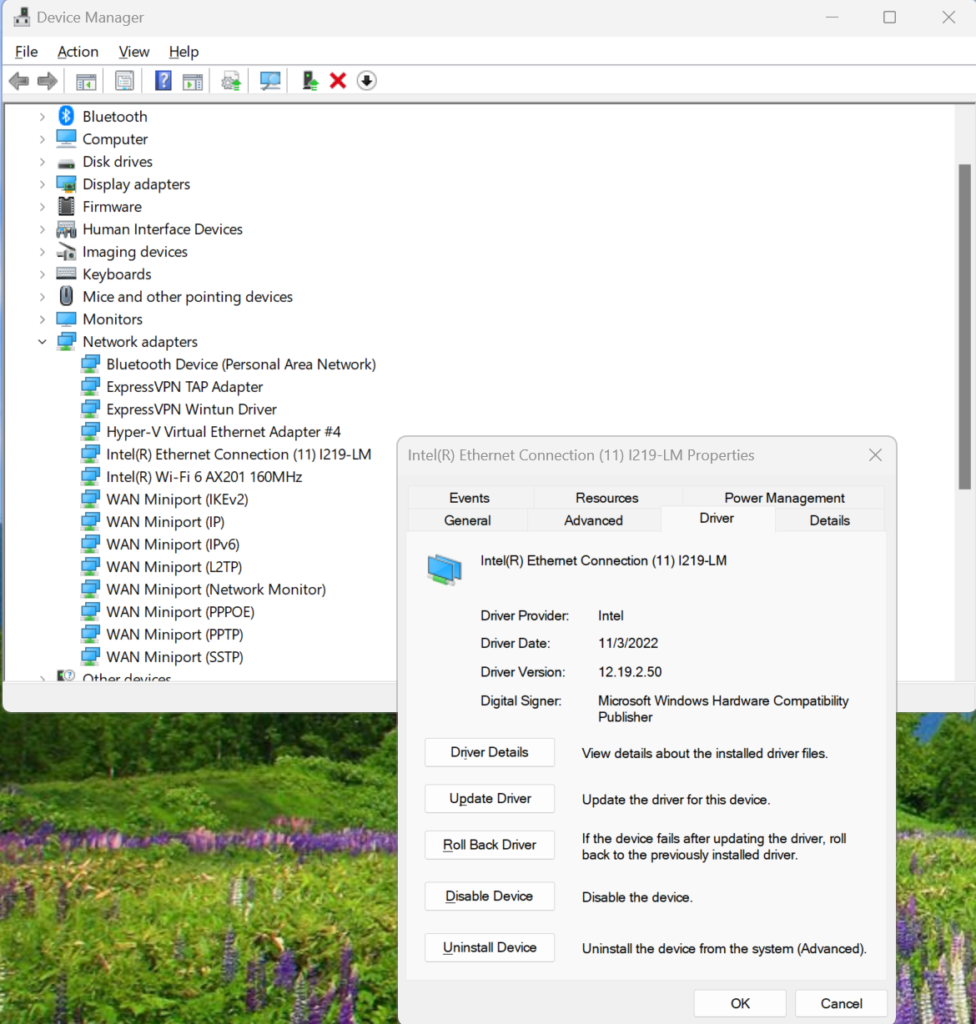
That will revert the driver used by Windows to the previously used one. This should help in clearing up any potential instability in a newly-released driver!
Perform a System Restore
There is one more method you can use to bring back that Windows stability I just mentioned – perform a System Restore. This will take Windows and bring its system files status back to a known-good restore point.
If you have recently installed an update, a newer app upgrade, or even a Windows stop code fix attempt, using System Restore will essentially revert those changes for you with a reboot. I previously wrote a detailed article on how to recover your PC using System Restore on Windows 10.
Conclusion
The dreaded Windows Blue Screen of Death has been a royal pain for many IT Pros over the decades. Hopefully, this abundant treasure trove of information will help you better understand them, what they mean, and how to thoroughly prevent them from happening in the future. Besides, you want your systems and your end user’s systems to stay online as much as possible!
Thank you for reading my post. If you have any questions, please reach out via the Comments section below!
FAQs
What are the quick emergency steps to fix a Windows stop code without rebooting?
For an immediate Windows stop code fix, press Windows + Ctrl + Shift + B to reset the graphics driver, check for overheating issues, and disconnect all non-essential peripherals. These steps might help resolve the error without a full system restart.
Can you automate a windows stop code fix with third-party software?
Yes, automatic Windows stop code fix tools like WhoCrashed, BlueScreenFixer, and Windows Boot Genius can monitor your system, automatically diagnose stop codes, and implement fixes without manual intervention.
How do hardware upgrades help prevent Windows stop codes?
Adding more RAM, upgrading to an SSD, or installing a better power supply, can significantly reduce system crashes and blue screen errors.
What role does Windows Registry play in stop code prevention?
Regular registry maintenance is a crucial windows stop code prevention strategy. Cleaning invalid entries, removing corrupt keys, and optimizing the registry can prevent many common stop codes from occurring.
How effective is driver rollback as a Windows stop code fix?
Driver rollback resolves approximately 65% of stop code issues, making it one of the most reliable Windows stop code fix methods. It’s particularly effective for errors occurring after driver updates.

Michael has been an IT Pro since 1998. He has worked predominantly in the Windows world including client and server operating systems, on-prem systems engineering (AD, DNS, etc.), and over the last ten years or so has embraced and immersed himself in...
