Windows PowerShell ISE Fundamentals
- Blog
- PowerShell
- Post
One of the primary reasons we have the Windows PowerShell Integrated Scripting Environment (ISE) is so that you have something other than Notepad for creating PowerShell scripts. On client operating systems, the PowerShell ISE should be installed by default. On servers it is an optional feature.
- Related: 5 Tips for the PowerShell 3.0 ISE
Launching the PowerShell ISE from the command prompt
Because you are probably not developing scripts on your servers, you should be able to live without it. On the client desktop, you should be able to find a shortcut to the Windows PowerShell ISE. However, if you already have the PowerShell console open, then you can launch the ISE directly at the prompt:
PS C:> ise
If you are running your console elevated, then the ISE will also run in an elevated session. When I need the ISE, I never bother looking for the shortcut because I simply can start it from PowerShell. It’s even better that you can open files in the ISE directly from PowerShell.
PS C:> ise C:scriptsGet-HyperVEvents.ps1
Next, if you later run the following ISE command, then the file will be opened in a new tab in the currently-open ISE.
PS C:> ise C:scriptsSet-ComputerConfiguration.ps1
Note that this trick only works for a single PowerShell console. If you open a new PowerShell console and run an ISE command, then you will get a second instance of the ISE.
Opening multiple files in the ISE isn’t as intuitive.
PS C:> ise "C:scriptsSet-ComputerConfiguration.ps1,C:scriptsGet-HyperVEvents.ps1"
Pay close attention to this code sample. I don’t have a comma separated list of files, e.g. “file1.ps1,” “file2.ps1,” but rather one string with a comma separated list of files. If you wanted to open a number of files from PowerShell using the pipeline, then you would need something like this one line command:
PS C:> dir c:scriptsdev-win* | foreach -Begin { $list = @() } -Process {
 $list+=$($_.fullname)} -end {ise "$($list -join ",")"}
That is a bit cumbersome, so I put together a short function that will achieve the same result.
#requires -version 3.0
Function Open-ISEFile {
<# .Synopsis Open a list of files in the PowerShell ISE. .Description This command is intended to take a directory listing of select files and open them all in the PowerShell ISE. .Example PS C:\> dir c:\scripts\dev-win* | open-isefile
#>
[cmdletbinding()]
Param(
[Parameter(Position=0,Mandatory,HelpMessage="Enter the path to a file",
ValueFromPipelinebyPropertyName)]
[ValidateScript({Test-Path $_})]
[string[]]$Fullname
)
Begin {
Write-Verbose "Initializing the list of files"
$list = @()
}
Process {
foreach ($item in $fullname) {
Write-Verbose "Opening $item"
$list+=$($item)
}
}
End {
Write-Verbose "Opening files in the ISE"
ise "$($list -join ",")"
}
} #end function
As you can see in the help example, all you need to do is pipe your directory listing of files to Open-ISEFile.
The Windows PowerShell ISE Layout
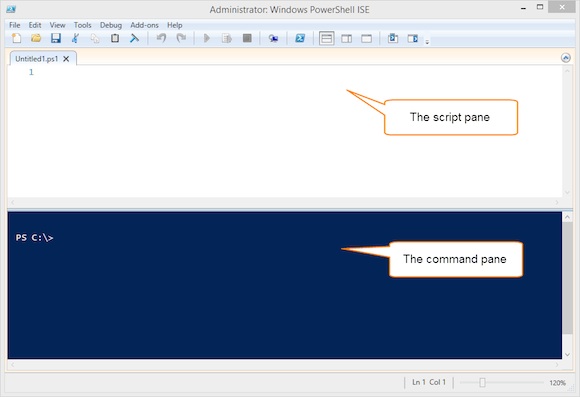
One you have the ISE open, it is a pretty simple affair, where you type your code in the script pane and it executes in the command pane. More on that later. You can download the Open-ISEFile function here.
The PowerShell ISE, with the script pane at the top and the command pane at the bottom. (Image: Jeff Hicks)
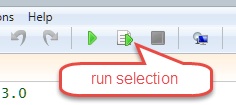
A great feature of the PowerShell ISE is that you can select one or more sections of code, press F8 and the highlighted section will run. You can also run a single line of code this way. You don’t even need to select it all. If you press F8, then the ISE will run the line of code that contains your cursor. Or you can use the run selection menu icon as shown below.
The Windows PowerShell ISE ‘Run Selection’ menu icon. (Image: Jeff Hicks)
The icon to the left, or F5 will run the entire script. If it hasn’t been saved, you will be prompted to do so.
Change the PowerShell ISE window layout
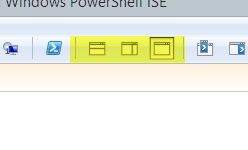
Personally, I like having the panes maximized. You select one of the menu shortcuts in following figure.
The Windows PowerShell ISE windows layout menu icons. (Image: Jeff Hicks)
If the script pane is maximized, then the command pane is as well. I use the keyboard shortcut Ctrl+R to toggle between the two. This has become second nature that I try to use this shortcut in other applications as well! Another option is to use Ctrl+D to jump to the console pane and Ctrl+I to jump to the editor. Between all of these shortcuts I don’t spend a lot of time mousing around.
The PowerShell ISE has a great deal to offer the PowerShell scripter. I encourage you to learn the keyboard shortcuts you see on the menu items, for tasks that you use often. These tips should get you started down the path of working smarter and there is much, much more. I’ll be demonstrating more tips and tricks in future articles.


