A Workaround for Using PowerShell’s Get-Service with the ComputerName Parameter
- Blog
- PowerShell
- Post
Without a doubt, one of the features in PowerShell that makes it so compelling is the pipeline. You run a cmdlet or script, and PowerShell spits out objects that are formatted on the screen for your viewing pleasure. With that said, sometimes the output is less than friendly. One quirk that always frustrates me is the Get-Service command. The command will display service information for remote computers, but the associated property name is MachineName rather than the traditional Computername parameter. In this article, I’ll show you a workaround for working with PowerShell’s Get-Service cmdlet.
Get-Service bits -computername chi-core01,chi-fp02,chi-hvr2,chi-dc04 | Select Status,Name,Machinename
I suppose that’s not completely unbearable, but I like using Computername, which is frequently used in PowerShell. This typically means resorting to a hashtable with Select-Object to rename the property.
Get-Service bits -computername chi-core01,chi-fp02,chi-hvr2,chi-dc04 | Select Status,Name,@{Name="Computername";Expression={$_.Machinename}}
That’s a lot to remember to type, so why not have PowerShell do the work for me?
PowerShell has always had an extensible type system. This means that you can extend what an object looks like. In earlier PowerShell versions, this mean relying on a complicated XML file. But now we can make changes practically on the fly. In this particular scenario, I want to create a property called Computername that will have the value from MachineName. In other words, I want to create an alias property.
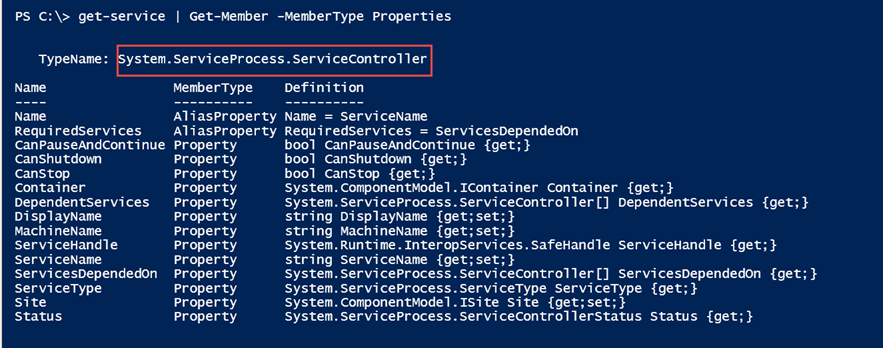
First, I’m going to need to know the type name for the objects that Get-Service uses. I can discover this with Get-Member.
I’ve highlighted the type name. You’ll notice that there are already a few alias properties. PowerShell adds these automatically from included type extension XML files. But we’re not going to mess with them. Instead we’ll use a simple cmdlet called Update-TypeData.
I’ll need to specify the object type name, the type of member I intend to add, what I want to call it, and the value I want to assign.
Update-TypeData -TypeName System.ServiceProcess.ServiceController -MemberType AliasProperty -MemberName Computername -Value Machinename –Force
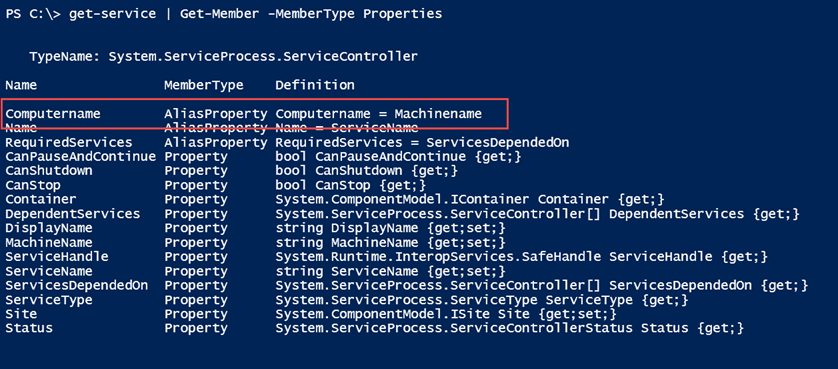
I typically also use the –Force parameter to overwrite any existing values. In this situation, I’m not changing anything that Microsoft defines, so I should be good. Let’s look at Get-Member again.
It is now defined. Like any other property in PowerShell, if it is defined, then I can use it.
Get-Service bits -computername chi-core01,chi-fp02,chi-hvr2,chi-dc04 |
Format-Table Status,Name,Computername -AutoSize
This property will only last for as long as my PowerShell session is running. To make it more permanent, I can put the Update-TypeData expression in my PowerShell profile script.
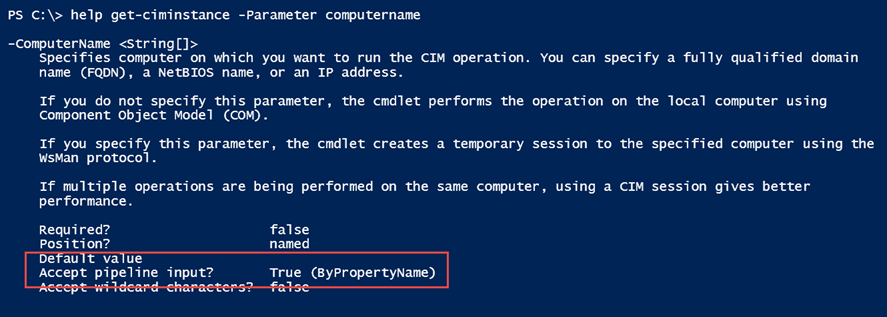
If you’re still not convinced, then here’s one more scenario. Many of you like to query Active Directory for computer accounts. Ideally, it would be nice to then pipe those results to other commands like Get-CimInstance, which will connect incoming objects with a Computername property to the command’s Computername parameter.
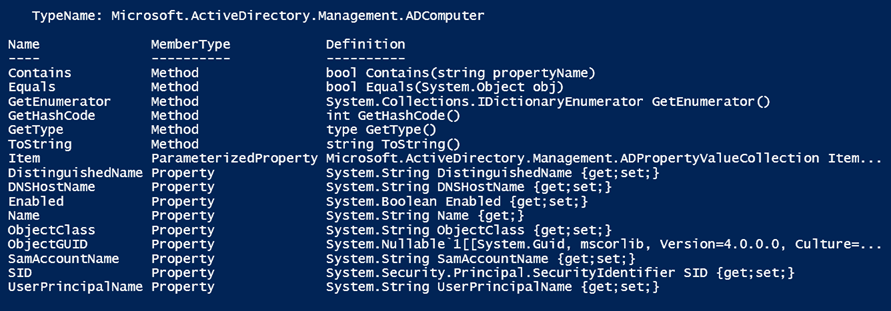
But when you run Get-ADComputer, there is no Computername parameter.
So why not add an alias property here as well?
Update-TypeData -TypeName Microsoft.ActiveDirectory.Management.ADComputer -MemberType AliasProperty -MemberName Computername -Value Name -Force
Now I can get a bunch of computers.
$c = Get-ADComputer -Filter * -SearchBase "OU=Servers,DC=Globomantics,DC=Local"
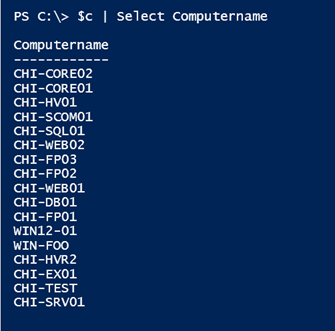
And they now have a Computername property.
Going back to my Get-CimInstance thought, normally I would use a command like this:
$c | Get-CimInstance Win32_logicaldisk -filter "DeviceID='c:'" -ErrorAction SilentlyContinue
But because of some weird quirk of the AD Computer object with Get-Cimstance, this will fail. So in this particular case, I need to tweak the command a bit:
$c | Select * | Get-CimInstance Win32_logicaldisk -filter "DeviceID='c:'" -ErrorAction SilentlyContinue
Although since I’m select properties, I could just select Computername only.
$c | Select computername | Get-CimInstance Win32_logicaldisk -filter "DeviceID='c:'" -ErrorAction SilentlyContinue
Either way, I get results.
By the way, this is merely for demonstration purposes. I’ve set the error action to SilentlyContinue to ignore errors for offline computers. Normally you would want to handle errors with Try/Catch.
Finally, to circle around back to the beginning I can use the collection of AD computers with the Computername property to get service statuses and display the results with a Computername property:
$c | Get-Service bits -ErrorAction SilentlyContinue | Select Computername,Name,Status
Think about how you use PowerShell or how you would like to. How could you create easier PowerShell expressions? Perhaps you just need a new name and as you’ve seen it is very easy to do.


