Upload Files or Entire File Shares with METADATA to SharePoint Online
What? Does that title say that it is possible to push all of my on-premises files to SharePoint Online and retain the Created by, Created Date, and Modified Date? Why yes, yes it does. In this article, I am going to walk you through how to use the Patterns and Practices (PNP) PowerShell to accomplish just that. As a bonus at the end, I will tell you about a PowerShell Function that I wrote that takes all the work out of writing 400 lines of PowerShell. It does the work for you. Who is excited?
What Exactly Are We going to Do?
So, the idea is that we are going to learn how to use PowerShell to take a group of files from the file share and push them to SharePoint Online. We will do this while automatically retaining all of the file’s metadata. When we are done, we will take this:
With a few lines of PowerShell Magic, we will get:
Pretty cool? I thought so. Also, if you want to watch me walk through these concepts, the companion video is available.
Making Sure You Are Ready
Before you can do all of this fun stuff, you will need to have a recent version of the PNP SharePoint Online PowerShell available. I am using version 2.16.1706.1. If you are not sure you have that version or the PNP PowerShell at all, then run this:
Get-Module | select Name, Version
If you need to get the PNP PowerShell installed, you can use this great article written by a very kind person (me!). I will show you how to get all of this installed and configured.
Something else that is not required but that makes running lots of SharePoint Online PowerShell much easier, is this quick little article on Managing PowerShell Passwords. If you do not want to read the whole thing (shame on you), scroll down to the Windows Credential Manager section. It shows you how to use the feature to make PNP PowerShell much easier.
Working with Your Files with PowerShell
Before we worry about moving files to SharePoint, we need to look at how we get the file metadata with PowerShell. I will cover the pieces you need to know for this project but if you want to understand more about working with files with PowerShell, check out my video Copy, Move, and Delete Files with PowerShell. Sorry, I have not written an article on those concepts.
The first concept is that you can use the simple cmdlet Get-ChildItem to query files on the local computer, a file share, or other places, such as the registry. We will skip all the scenarios and cut to the chase. Run the following line to query your File Share:
Get-ChildItem \\servername\share
This will return all of the files at that location. You can also use the cmdlet to return a single file as so:
Get-ChildItem \\servername\share\file.txt
Lastly, we can store this file object in a variable like so:
$YourVariable = Get-ChildItem \\servename\share\file.txt
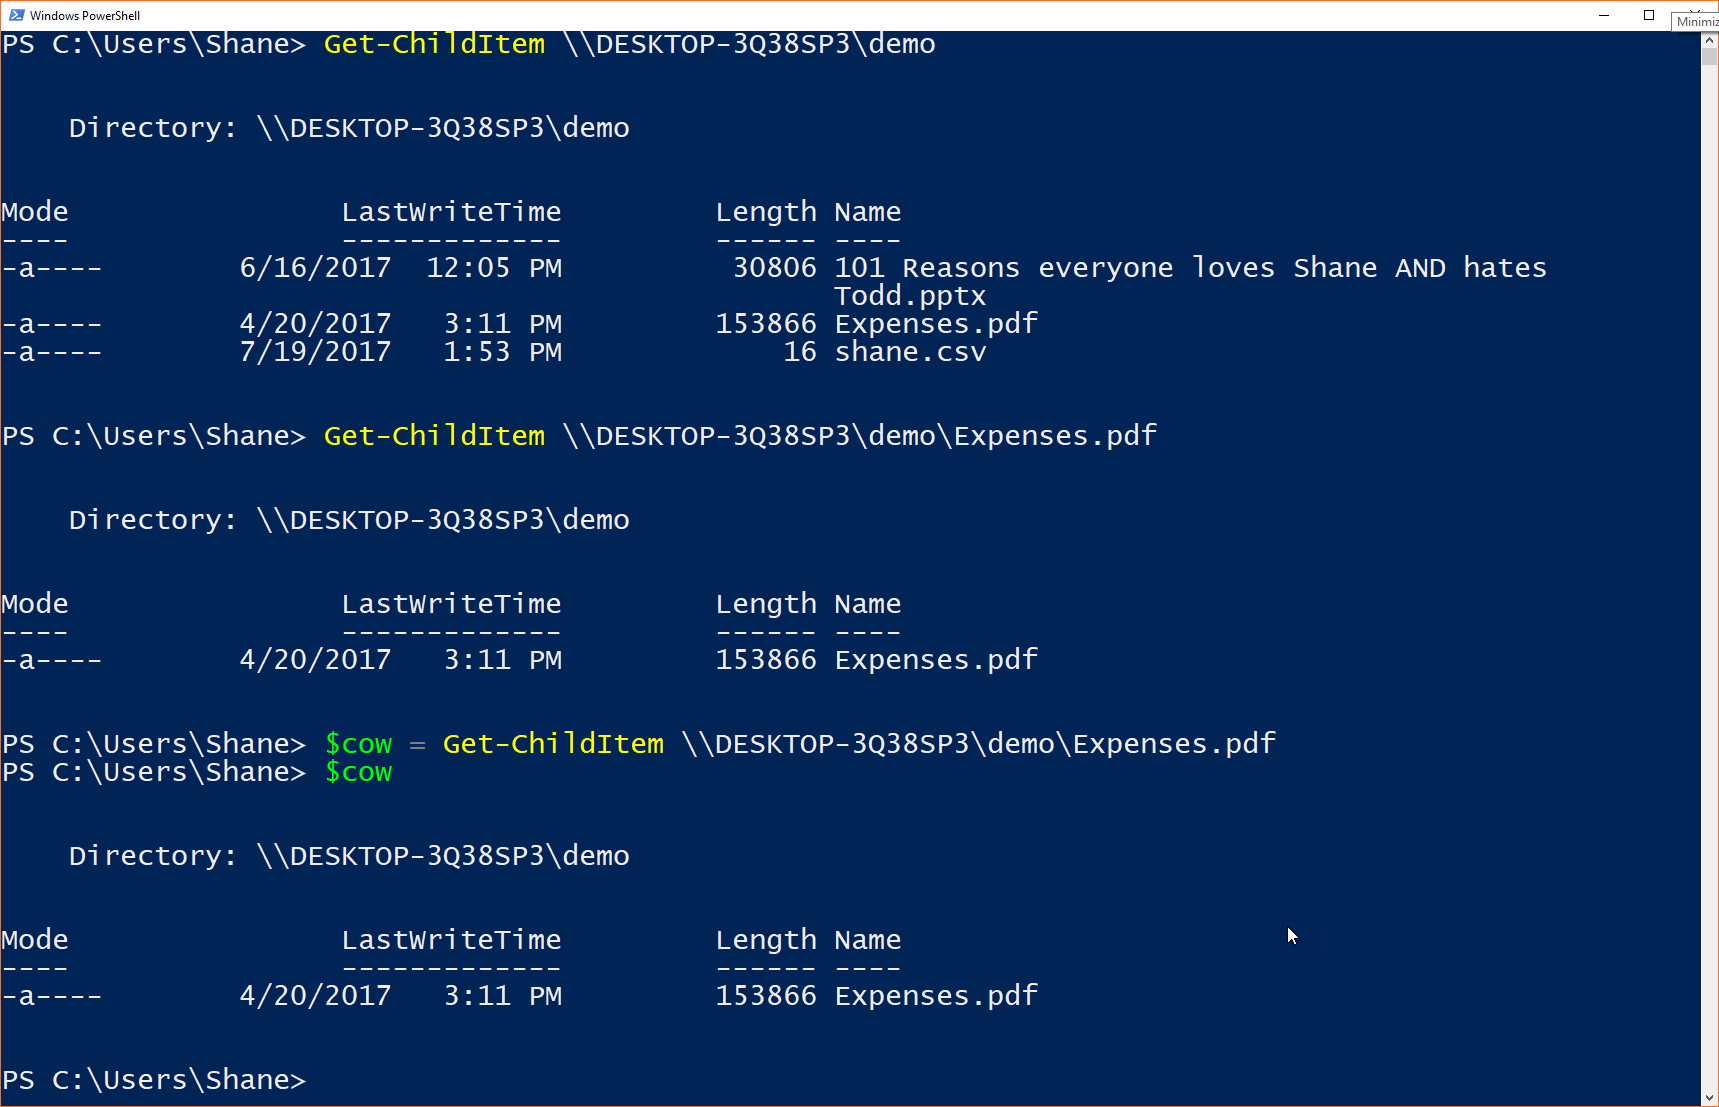
Check out the screenshot to see a working example:
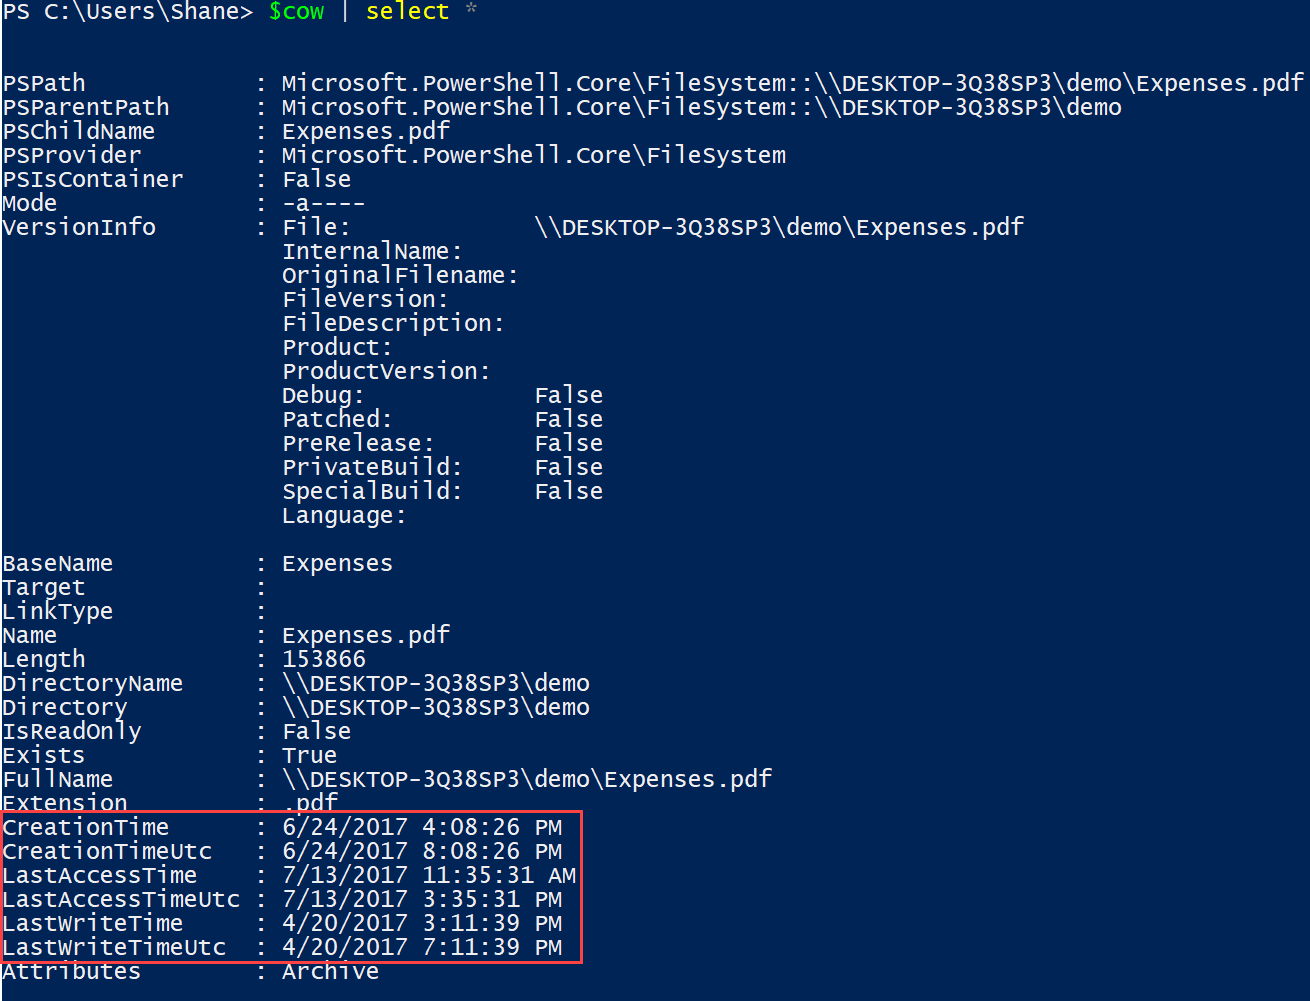
Now that we have a file object stored in a variable, we can find where it is hiding the info we are after. Let’s start with Created Date and Modified Date. To find properties of an object when I am digging, I usually start with Select *:
$YourVariable | Select *
This will show you all of the properties of the object that has values.
If you scroll through all of those properties, you will see exactly what we are looking for, CreationTime and LastWriteTime. Even cooler? They both have a UTC version, which is great news. When you upload the files to SharePoint Online, it wants you to specify the time in UTC. Now, this is one less problem to solve.
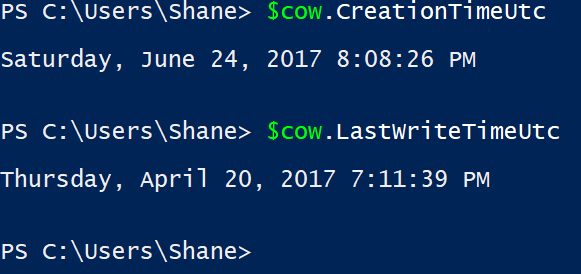
You can use the following line to access the Creation Time in UTC format in a single statement:
$YourVariable.CreationTimeUtc
For the Modified information in UTC, you would use:
$YourVariable.LastWriteTimeUtc
This is two things down and one to go. For Created By, which is not a file property but a security property, getting it is slightly different. You need to run a line like:
$YourVariable.GetAccessControl().owner
That does it. We now know how to get the information we need in an automated fashion using PowerShell. Time to switch to SharePoint.
Connect to SharePoint Online
Now that you have all of the pieces in place, you need to connect to SharePoint Online with the PNP PowerShell. You will want to connect directly to the site collection that contains the document library that you want to upload files to. In my example, I am going to connect to a document library that exists in the root site collection. I will run the following PowerShell to connect: (Remember to use your URL, not mine.)
Connect-PNPOnline -URL https://SPE730038.sharepoint.com
After running the line, you are prompted to enter your username and password. The exception to this is if you used the credential manager like I mentioned earlier. After a few seconds, it will connect. If you are the untrusting type, you can type Get-SPSite to make sure it returns your site collection to confirm you are connected.
Uploading a File to SharePoint Online
Our friends on the PNP PowerShell team give us a great cmdlet called Add-PNPFile. This is now going to do the heavy lifting for us. Let’s look at the cmdlet from simple to complex.
To simply upload one file to SharePoint Online, use the following line:
Add-PNPFile -Path \\ServerName\Share\File.txt -folder YourDocumentLibrary
That does it. That will push the file to SharePoint Online. This is the same as if you went in the browser and manually uploaded it. All of the metadata will be right and you will be the owner. Nice, but not the solution we are looking for yet. Keep going.
Add-PNPFile also includes a way to set metadata. So, you could use the following line to set the created date to yesterday.
Add-PNPFile -Path \\ServerName\Share\File.txt -folder YourDocumentLibrary -Values @{Created=(Get-Date).AddDays(-1)}
Pretty cool. In case you do not understand Get-Date, I have a video that covers it. Be sure to give it a thumbs-up if you enjoy it.
If you want to set both Created Date and Modified Date, you just need a semi colon:
Add-PNPFile -Path \\ServerName\Share\File.txt -folder YourDocumentLibrary -Values @{Created=(Get-Date).AddDays(-10); Modified=(Get-Date).AddDays(-1)}
That sets Created to 10 days ago and Modified to yesterday, just for fun. One thing to keep in mind is that the properties are case sensitive. Everything else is not.
One thing a keen eye will notice is that the modified time/date in the cmdlet output is not the fake date you specified. This is expected. If you look in SPO, you will see the time stamps you specified were used in your cmdlet. Just a quirk of the cmdlet.
Now that we have solved working with the dates, what about setting the owner? It is slightly different, so we need to learn some more new stuff first.
Getting a User’s ID
While it seems like setting Author or Editor should be as easy as [email protected], unfortunately, it is not. This was the part I struggled the most with. Turns out, you need to set Author to the ID of the user. So, in the case of my tenant, I am user ID 52. Let’s talk about how to figure that out.
The PNP PowerShell cmdlet Get-PNPUser will return all of your site collection users and a bunch of properties about them, including this ID. So, for a one-time use, it is pretty easy. What if you want to create a more automated solution? Well, thanks to the mastermind behind the PNP PowerShell, Erwin van Hunen, we have an answer. You run the following:
Get-PNPUser | Where-Object{$_.LoginName -match "shane"} | Select id
So simple and elegant, yet something I could not come up with without some help. Thanks, Erwin.
So, what this means is that as long as your usernames match from on-premises to SharePoint Online, you can programmatically get everything you need.
To use this now, you would run the following line:
Add-PNPFile -Path \\ServerName\Share\File.txt -folder YourDocumentLibrary -Values @{Created=(Get-Date).AddDays(-10); Modified=(Get-Date).AddDays(-1);Author=52;Editor=52}
Hopefully, you noticed that I did both Author and Editor. That is because, you cannot set the Author without setting the Editor. Do not worry about the why but make note, it will fail if you try. You could set Editor without setting Author if you wanted to. Also, in case you didn’t figure it out, Author is the Created By and Editor is the Modified By fields in a SharePoint document library.
You can also set other SharePoint columns, including custom columns you created by using the same logic as above.
Cool. I think it is time for the big reveal.
The Script You Have Been Waiting On
I really want to ramble on and make you keep waiting. However, I will not. Instead, here it is.
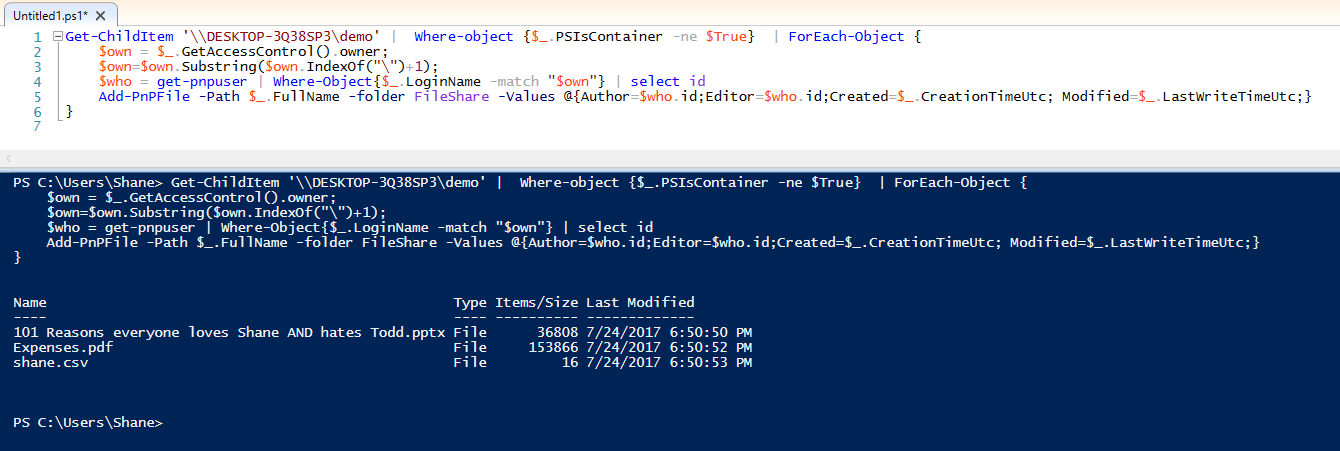
Get-ChildItem '\\DESKTOP-3Q38SP3\demo' |  Where-object {$_.PSIsContainer -ne $True}  | ForEach-Object {
$own = $_.GetAccessControl().owner;
$own=$own.Substring($own.IndexOf("\")+1);
$who = get-pnpuser | Where-Object{$_.LoginName -match "$own"} | select id
Add-PnPFile -Path $_.FullName -folder FileShare -Values @{Author=$who.id;Editor=$who.id;Created=$_.CreationTimeUtc; Modified=$_.LastWriteTimeUtc;}

}
In action, it looks like this: (Note, I switched to the ISE to make it easier to read this part.)
Amazing? Amazing! Let’s break it down, so you can finish this learning stuff and get to amazing your coworkers with your new skills.
Get-ChildItem ‘\\DESKTOP-3Q38SP3\demo’ This gives you all of the files from that folder in your document library.
We then pipe ( | ) that over to Where-object {$_.PSIsContainer -ne $True}. This is done so that if you have any subfolders, you will not get errors when add-pnpfile cannot upload a folder by its name.
We then pipe that over to ForEach-Object. That means run all the cmdlets in between the { } brackets one time for each file in the folder. If you are new to ForEach-Object might, I recommend this video.
$own = $_.GetAccessControl().owner; This line sets the current owner of the file to the variable $own.
$own=$own.Substring($own.IndexOf(“\”)+1); This line trims the variable down from Domain\User to User, so we can use it in a moment. If modifying strings with PowerShell is not your thing, then watch the video.
$who = get-pnpuser | Where-Object{$_.LoginName -match “$own”} | select id; This line sets the value of $who to the ID that matches the owner of the file by searching for a match for User. If there is no match, such as the user left the company since creating the file, then they are not in your SharePoint Site Collection. That is okay. $who will be set to null If you pass Add-PNPFile null for Author and Editor. Then, it will use the user that you connected to the site collection, such as when you ran Connect-PNPOnline earlier.
Add-PnPFile -Path $_.FullName -folder FileShare -Values @{Author=$who.id;Editor=$who.id;Created=$_.CreationTimeUtc; Modified=$_.LastWriteTimeUtc;} We have already covered how that is the line for getting the file uploaded to SharePoint online with its metadata. The only difference this time is we use the variables we just created, instead of direct values. This is a necessary skill when automating things.
Awesome? Awesome. That gives you all of the pieces of the puzzle to start creating your own solutions for uploading files and file shares to SharePoint Online and keep the metadata.
A Tool to Do All of That
With those pieces solved, I set out to create an automated solution to upload an entire file share with metadata to SharePoint Online. Turns out, to make a full PowerShell function to do that, you end up needing a lot more pieces. The challenges I had to overcome:
- Files that were too large to upload
- Files with the symbol for the word “and” in the name, which SharePoint Online allows but Add-PNPFile does not
- Folders and sub-folders
- Logging and progress indicator
- Setting a default user when the actual user is not found
- Making it all a reusable function with parameters and help
- And more error checking and suggested corrections than I care to talk about
That “quick” little project turned into three weeks of work. Yikes. However, the output is pretty cool. If you want to see it in action, then check out this video. Unfortunately, the boss said I could not give the function away. Something about the kids needing to eat but if you are interested, there is more information on how you can get a copy.
Putting a Bow on Things
Thanks to the magic of the PNP PowerShell, you can write your own PowerShell to push files to SharePoint Online. Onesies and Twosies are pretty easy. If you want to get fancy, then prepare to write a lot of PowerShell. I hope it helps you on your journey to the cloud. As always, if you have any questions or need help, feel free to hit me up in the comments below or tweet me at @ShanesCows.


