The Return of Serverless Powershell
Powershell was conspicuously absent from the language options in Azure Functions 2.0 until recently. A few weeks ago, Microsoft announced preview level support for running a Powershell script inside a function. Support for Powershell is an important feature for Function apps, because Powershell is a popular language for enterprise level automation, and Functions offer a straightforward platform for automating Azure resources.
Let’s look at an automation scenario to get a feel for Powershell on a serverless platform. What we’ll do is create a function that will execute at 22:00 UTC every weekday and shutdown virtual machines inside a resource group.
The Setup
In this article, we will be using Visual Studio Code with the Azure Functions extension. You’ll also need the Azure Functions Core Tools if you want to develop and test locally with the Function runtime version 2.0. You will also need Powershell. Serverless Powershell requires Powershell Core, which is the open source and cross-platform version of Powershell that builds on top of .NET Core. You can find the source code as well as links to installer binaries in the Powershell GitHub repository.
Creating a Project
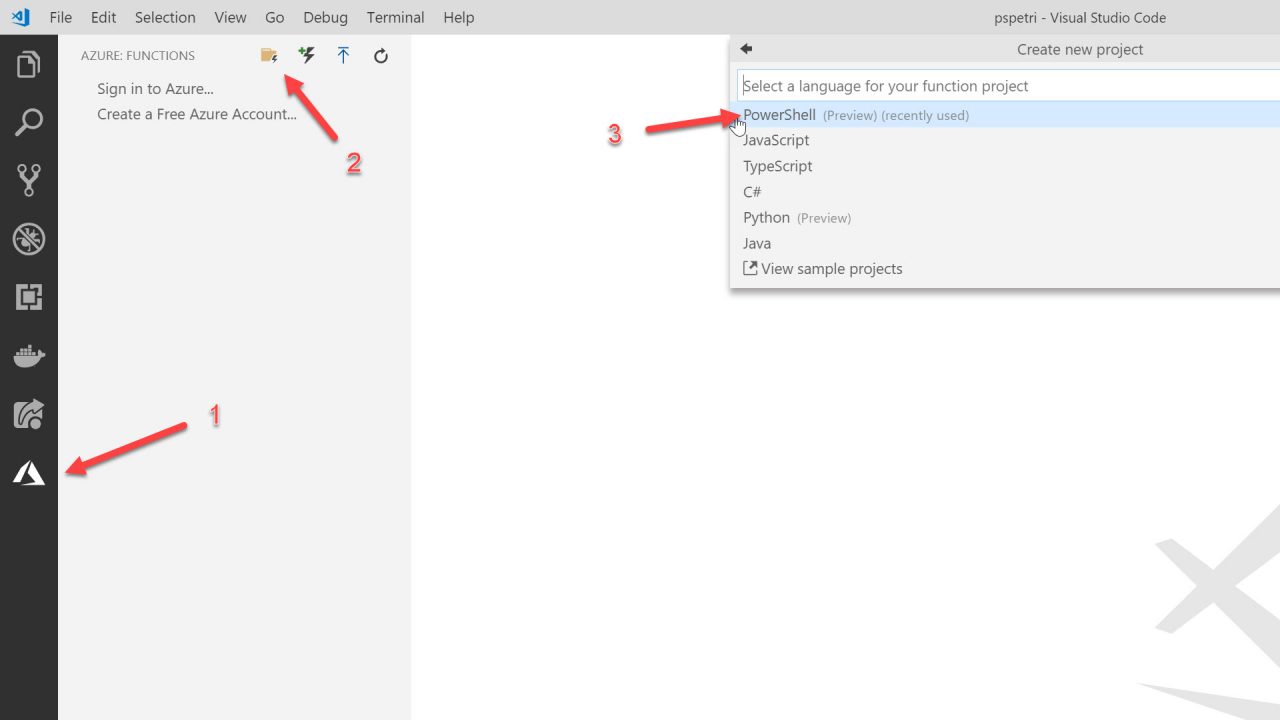
There are at least three different approaches you can take to create a new Function app. One approach is to use the Azure portal. A second approach is to use the command line tools. Our approach is to use the VS Code extension to create a new project. With the Azure tab selected (#1 below), click on the Create New Project icon as shown with #2 below. You’ll then select where to place the project on your local drive, and then make sure to select the Powershell language option (#3 below).
A Function app can contain multiple functions. Once the functions extension has enough information to create a new project, the extension will continue asking questions to create the first function in the project.
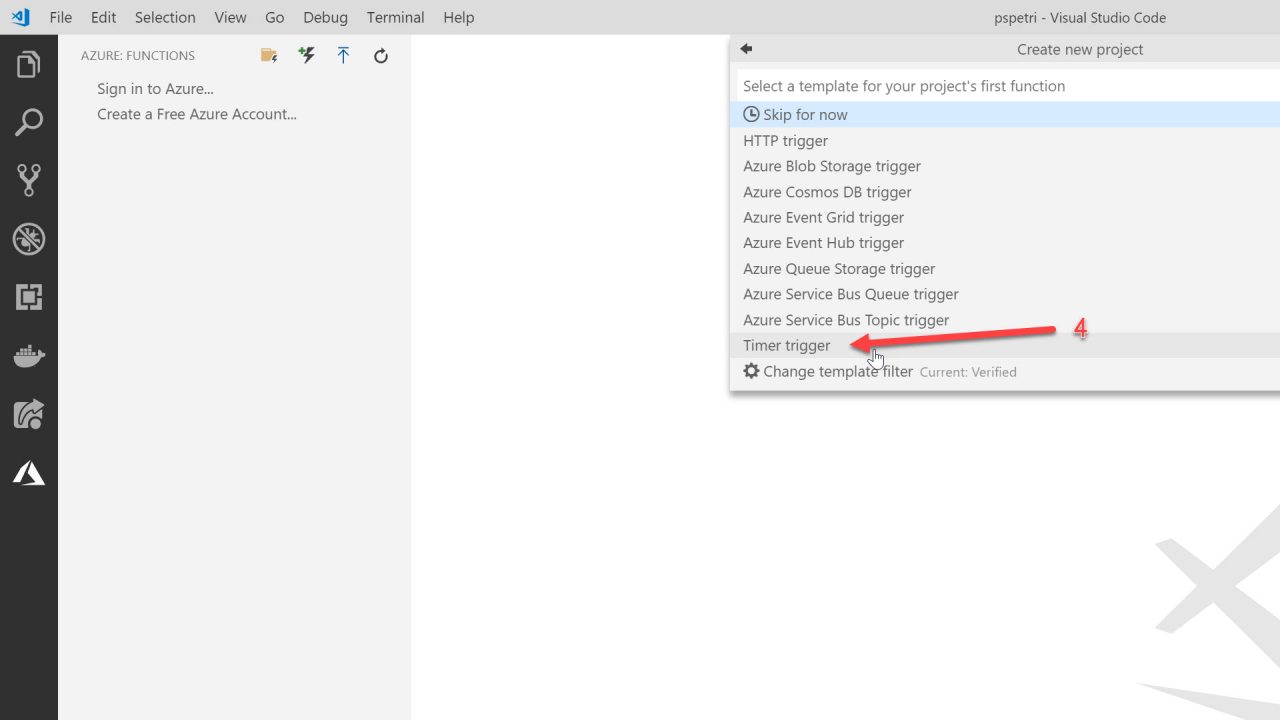
The first step is to select a starting template (#4 below). The starting templates are all setup to trigger the function when an event happens. An event could be an HTTP message arriving, or a new blob appearing in a storage account, and other events. The best template for our VM shutdown scenario is the timer trigger template, after which we need to give our new function a name. I’ll be using the name ScheduledVmShutdown.
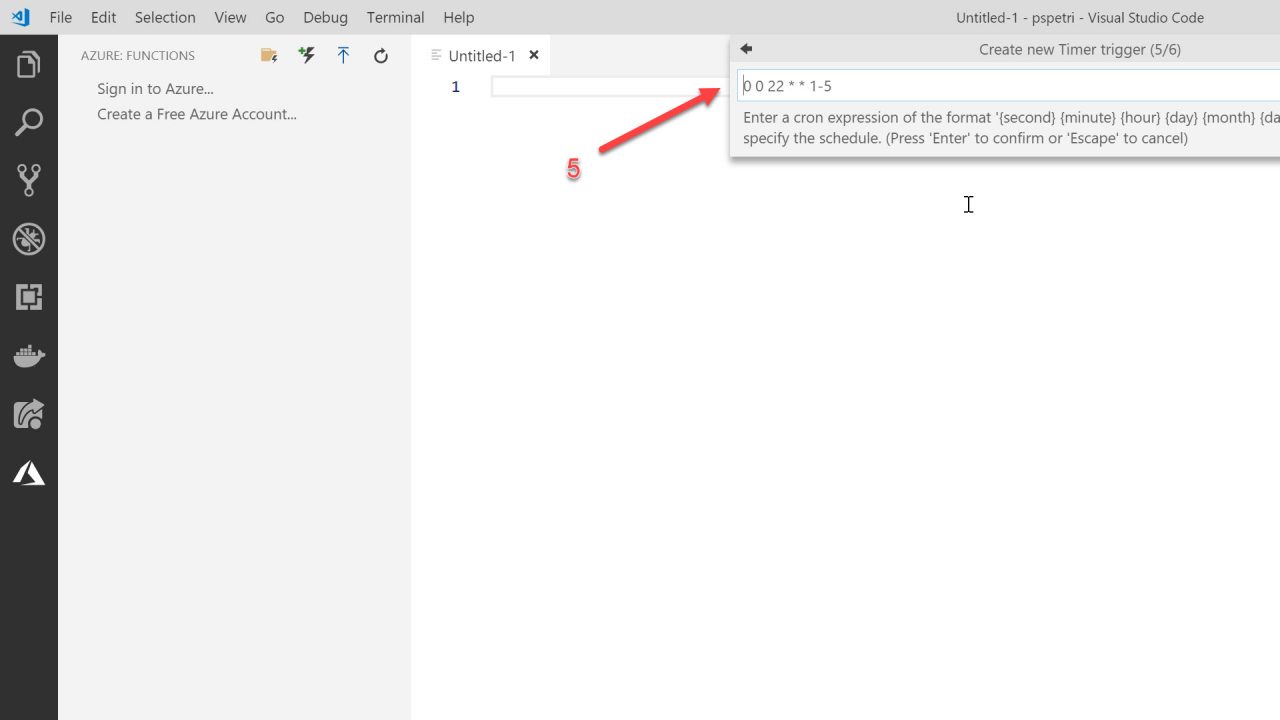
The last step in setting up a time triggered function is to define the cron expression for the function. You might already be familiar with cron expressions if you’ve ever worked with the Unix job scheduler named cron. A cron expression consists of 6 fields to define the date and time for a recurring task. The default expression for a function is 0 */5 * * * *, which tells Azure to execute the function every 5 minutes for every day of the month and week. See the CRON expressions section in the docs for https://docs.microsoft.com/en-us/azure/azure-functions/functions-bindings-timer more details and examples of different schedules.
To execute our function at 22:00 UTC on every weekday, we’ll use the cron expression 0 22 * * 1-5 (see #5 below).
The Code
The functions extension should now complete the creation of your project and add your first function.
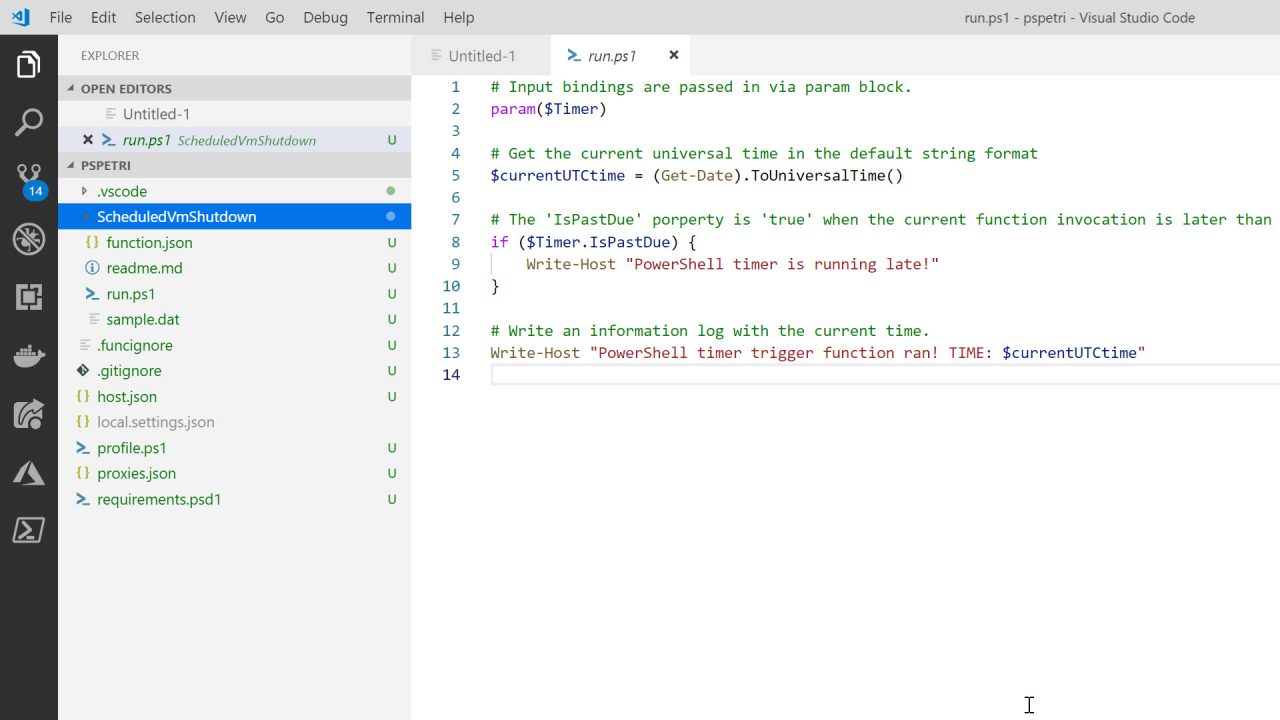
Assuming you are using the same name as I did, which was ScheduledVMShutdown, you’ll find a run.ps1 file inside a folder with the same name. We’ll replace the code inside with the following code from the Azure Serverless Community Library https://serverlesslibrary.net/?technology=Functions%202.x.
# Input bindings are passed in via param block.
param($Timer)

Write-Host 'TRigger'

# Specify the VMs that you want to stop. Modify or comment out below based on which VMs to check.
$VMResourceGroupName = "Contoso"
#$VMName = "ContosoVM1"
#$TagName = "AutomaticallyStop"

# Stop on error
$ErrorActionPreference = 'stop'

# Check if managed identity has been enabled and granted access to a subscription, resource group, or resource
$AzContext = Get-AzContext -ErrorAction SilentlyContinue
if (-not $AzContext.Subscription.Id)
{
     Throw ("Managed identity is not enabled for this app or it has not been granted access to any Azure resources. Please see https://docs.microsoft.com/en-us/azure/app-service/overview-managed-identity for additional details.")
}

try
{
    # Get a single vm, vms in a resource group, or all vms in the subscription
    if  ($null -ne $VMResourceGroupName -and $null -ne $VMName)
    {
        Write-Information ("Getting VM in resource group " + $VMResourceGroupName + " and VMName " + $VMName)
        $VMs = Get-AzVM -ResourceGroupName $VMResourceGroupName -Name $VMName
    }
    elseif ($null -ne $VMResourceGroupName)
    {
        Write-Information("Getting all VMs in resource group " + $VMResourceGroupName)
        $VMs = Get-AzVM -ResourceGroupName $VMResourceGroupName
    }
    else
    {
        Write-Information ("Getting all VMs in the subscription")
        $VMs = Get-AzVM
    }

    # Check if VM has the specified tag on it and filter to those.
    If ($null -ne $TagName)
    {
        $VMs = $VMs | Where-Object {$_.Tags.Keys -eq $TagName}
    }

    # Stop the VM if it is running
    $ProcessedVMs = @()

    foreach ($VirtualMachine in $VMs)
    {
        $VM = Get-AzVM -ResourceGroupName $VirtualMachine.ResourceGroupName -Name $VirtualMachine.Name -Status
        if ($VM.Statuses.Code[1] -eq 'PowerState/running')
        {
            Write-Information ("Stopping VM " + $VirtualMachine.Id)
            $ProcessedVMs += $VirtualMachine.Id
            Stop-AzVM -Id $VirtualMachine.Id -Force -AsJob | Write-Information
        }
    }
    # Sleep here a few seconds to make sure that the command gets processed before the script ends
    if ($ProcessedVMs.Count -gt 0)
    {
        Start-Sleep 10
    }
}
catch
{
    throw $_.Exception.Message
}
Test It
To run your functional locally, press F5 in VS Code to start the debugger. With a timer triggered function you have to wait for a timer to expire, but fortunately, with Powershell, you can also execute your script directly from the command prompt. You’ll need to install the Azure Powershell module first.
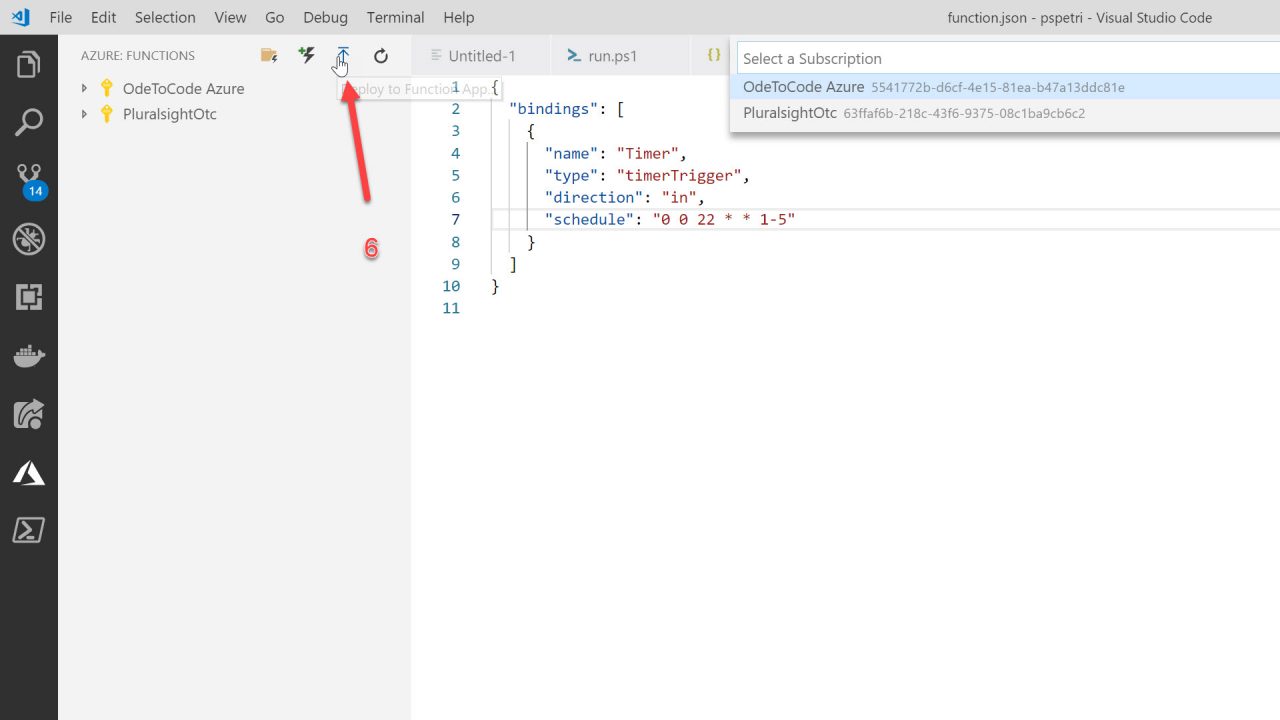
When you are ready to deploy, click the deploy button in Visual Studio Code (see #7 below). For this particular function to work, you’ll need to give your application a managed service identity, and grant access to the virtual machines you need to manipulate. You can read more about managed service identities (MSI) at Benjamin Perkins blog.
Summary
Functions are easy to author, test, and debug. They are also easy to host in Azure and cost no money unless the app scales beyond Azure’s free limits. Combine cheap and easy with your Powershell expertise and you’ll find a powerful and cost effective platform for automating Azure resources.


