Managing Windows Server with Puppet Part 3: Edit the Site Manifest
In today’s Ask the Admin, I’ll show you how to install modules on your Puppet master and how to open and edit the main site manifest using Secure Shell.
In part 2 of this series, I showed you how to log into Puppet master using Secure Shell, accept the certificate from the Windows Server node, and how to test connectivity between agent and master. In part 3, I want to show you how to locate the site manifest file on Puppet master and edit it using the vi text editor. We’ll also install the Puppet on Windows module pack on the master. If you want to start at the beginning, check out part 1 of this series.
Let’s get started. The first task is to log into Puppet master using Secure Shell. I’m going to use the beta OpenSSH client built into the Windows 10 Fall Creators Update but you can use any SSH client. If you need a reminder about how to log in to Puppet master using SSH, check out ‘Log in to Puppet Master using Secure Shell’ in part 2 of this series.
Install the Puppet on Windows Module Pack
All Puppet commands must be executed with root access. This can be achieved by adding sudo to the beginning of every command. But I prefer to change to sudo interactive mode like this:
sudo -i
You’ll need to confirm your password to continue. Before we can administer Windows Server using Puppet, we’ll need to install some Windows modules on Puppet master. The easiest way to do that is to install the Puppet on Windows module pack, which includes 11 modules that are supported by Puppet Labs:
- ACL
- Chocolatey
- DSC
- PowerShell
- Reboot
- Registry
- WSUS client
- Windows environment
- Download_file
- IIS
- Windowsfeature
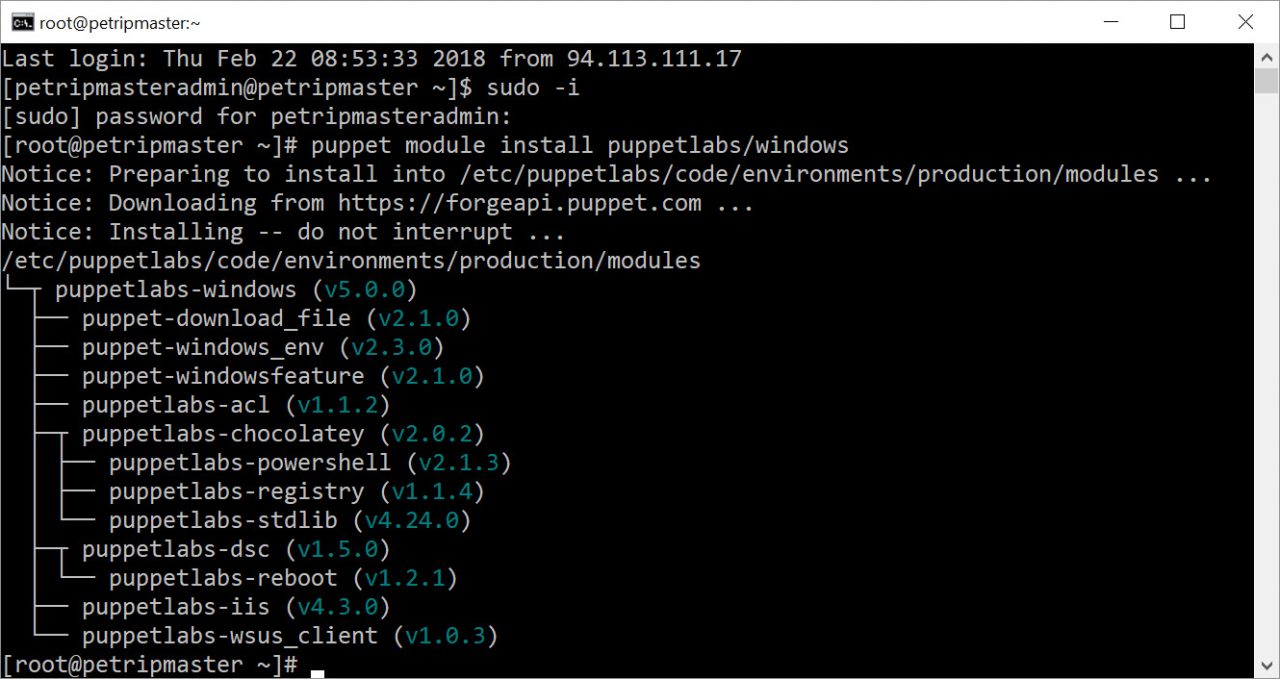
To install the module pack on Puppet master, use the command as shown below. It might take a few minutes for the pack to download.
puppet module install puppetlabs/windows

Edit the Site Manifest
Puppet uses a manifest to apply catalogs to nodes. A manifest is a program that contains Puppet DSL (domain-specific language) code. The site manifest is the starting point that Puppet master uses to apply catalogs. You can have more than one manifest, but for the purposes of this article, we will put all our code into the site manifest.
Before editing the site manifest, we need to change the working directory to the manifest folder using the change directory command.
cd /etc/puppetlabs/code/environments/production/manifests
The main site manifest (site.pp) is located in the manifest directory. We can open it using vi as shown here:
vi site.pp
When you open a file using vi, by default, you are working in command mode. In this mode, you can move around using the cursor but not make changes to the file. To edit the file, change to insert mode by pressing the INSERT key on your keyboard. Scroll down to the bottom of the file using the arrow keys and then press INSERT.
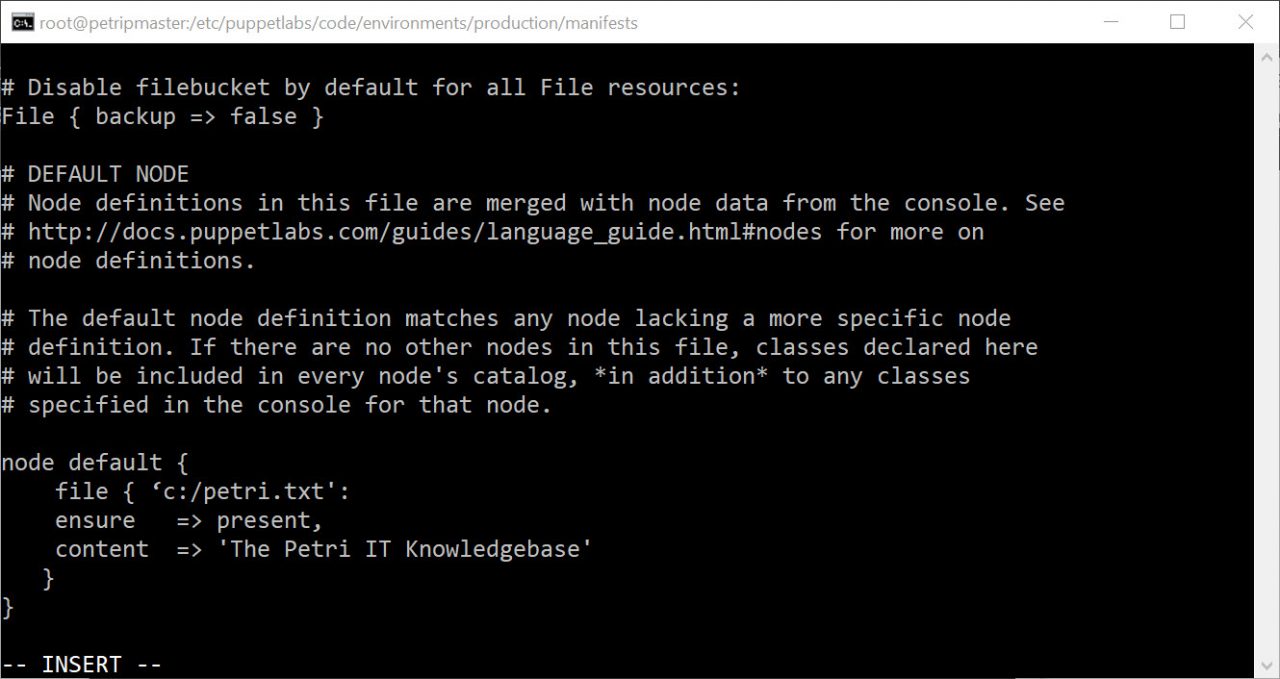
At the bottom of the file, you’ll see a section called node default {}. Any resources contained in this section will be applied to all nodes connected to the Puppet master. Let’s edit this section to add a simple file resource. Add the following code between the braces of the node default section. You can delete the commented-out example code that is in the file by default.
file { 'c:/petri.txt':
  ensure   => present,
  content  => 'The Petri IT Knowledgebase'
 }
So the final code will look like this:
node default {
  file { 'c:/petri.txt':
    ensure   => present,
    content  => 'The Petri IT Knowledgebase'
   }
}

Once you have the code in place, press ESC to exit insert mode. To save to file, press SHIFT+Q. Then after the semicolon, type wq, and press ENTER. The ‘wq’ represents write and quit respectively.
That’s it! The next time the Puppet agent runs on Windows server, you should find a new file in the root of the system drive. If you want to trigger the agent manually, log into Windows Server and run puppet agent -t on the command line.
In this Ask the Admin, I showed you how to install modules on Puppet server and edit the main site manifest. In the next part of this series, I’ll look at adding resources to the site manifest in more detail.


