
If you want to use Hyper-V on Windows Server Core, you’ll have to do that without a Graphical User Interface (GUI), which requires some knowledge about the different Hyper-V installation options? We’re going to explore them all in that guide, and we’ll also explain why you may find Windows Server Core to be a great option for using Hyper-V.
Why Windows Server Core is the best platform for Hyper-V
There are advantages and disadvantages to using Windows Server Core as the platform for the Hyper-V role. Let’s get a few disadvantages out of the way first. You don’t have a local GUI environment (Desktop experience) to administer the server with. Really, that’s the ‘core’ one, no pun intended…or is it intended?
Advantages compared to Windows Server with the Desktop experience
The main advantage is the fact that the desktop environment is not installed. As a result, a huge security attack vector is missing. Plus, the complexity of Windows is greatly diminished. This is precisely why the Server Core option is so good for Hyper-V.
Ideally, Hyper-V is installed as a low-footprint hypervisor on a bare metal server. And Microsoft did release this specific SKU in the past, going back to Windows Server 2008. However, ‘Hyper-V Server 2019’ is the last version Microsoft has released and will release. There will be no ‘Hyper-V Server 2022’ released.
So, the next best thing (besides heading into the Azure lands in the clouds) is to install Windows Server (2022) Core and install the Hyper-V role. This comprises most of what this article will detail and explain.
Why choose Windows Server 2022 to run Hyper-V?
I pretty much started to answer this question above. Let’s be a bit more nuanced though, shall we?
Running the latest and greatest version of Windows Server has advantages, most notably performance and security related. Plus, using Hyper-V Server 2019 will only get you to the end of support quicker. Windows Server 2022 will go out of extended support on October 14, 2031! That’s over nine years to go!
Staying up to date has its advantages, obviously. Also, Microsoft will undoubtedly spend the most R&D resources on their ‘latest’ platforms.
Hyper-V installation options
There are technically three major installation options for installing and using the Hyper-V role on Windows Server.
- Installing Hyper-V Server 2019 on a bare metal server.
- Installing the Hyper-V role on Windows Server with the Desktop Experience.
- Installing the Hyper-V role on Windows Server Core.
I am going to focus on the third option above for the remainder of this article. I will show you how to install the Hyper-V role on an installation of Windows Server 2022 Core.
Hyper-V in Windows Server Core Mode
Installing the Hyper-V role on Windows Server Core is the next best thing to installing Hyper-V Server 2019 on bare metal. Let’s get started!
How to install Hyper-V on Windows Server Core
Now I’ll get down to brass tax and explain the procedures and steps to installing and using the Hyper-V role on Windows Server Core. First, let’s go over the requirements.
Hyper-V Server Core requirements
Regardless of the Hyper-V features you want to use, you’ll need:
- A 64-bit processor with second-level address translation (SLAT): To install the Hyper-V virtualization components such as Windows hypervisor, the processor must have SLAT, also known as nested paging. However, it’s not required to install Hyper-V management tools like Virtual Machine Connection (VMConnect), Hyper-V Manager, and the Hyper-V cmdlets for Windows PowerShell.
- CPU support for VM Monitor Mode Extension (VT-x on Intel CPUs)
- Enough memory – plan for at least 4 GB of RAM. More memory is better. You’ll need enough memory for the host and all virtual machines that you want to run at the same time.
- Virtualization support turned on in the BIOS or UEFI:
- Hardware-assisted virtualization: This is available in processors that include a virtualization option – specifically processors with Intel Virtualization Technology (Intel VT) or AMD Virtualization (AMD-V) technology.
- Hardware-enforced Data Execution Prevention (DEP) must be available and enabled. For Intel systems, this is the XD bit (execute disable bit). For AMD systems, this is the NX bit (no execute bit).
You can also open an administrative command prompt or Terminal and run:
Systeminfo.exe
Then, you can scroll down to the Hyper-V Requirements section for details.
Install and Configure Windows Server Core
I previously wrote an article on how to install Windows Server 2022 Core using the Core option. I also included a few crucial ‘post-setup’ tasks.
Install The Hyper V platform/server role
The next step is to install the Hyper-V platform on our new server. To accomplish this, we will add the ‘Hyper-V’ role using several methods.
For the purposes of this article, I have an existing virtual machine (VM) we’ll be using for demonstration purposes.
Install Hyper-V using PowerShell
Before we go any further, I get to broach the lovely topic of nested virtualization.
Typically, you install a hypervisor (Hyper-V, VMWare ESXi, etc.) on a bare metal server. You’re adding a hypervisor layer (virtualization) onto bare metal. No big deal…this has been done for decades.
However, I don’t have a bare metal (physical) server handy, so I need to use my Hyper-V lab environment for the purposes of showing you the steps involved. Installing the Hyper-V role on an existing (virtualization) layer involves some cool computer science.
By default, Hyper-V VMs do not support enabling a nested hypervisor layer inside its operating system (Windows Server). There are special processor requirements needed for this. So, we need to run a PowerShell command to ‘expose virtualization extensions’ from the Hyper-V hypervisor layer to the VM itself. Let me show you.
First, you can exit out of the sconfig utility by typing ’15’ to exit to PowerShell. Then, run the Get-VM PowerShell command to identify the name of the VM we’re going to work with.
Get-VM
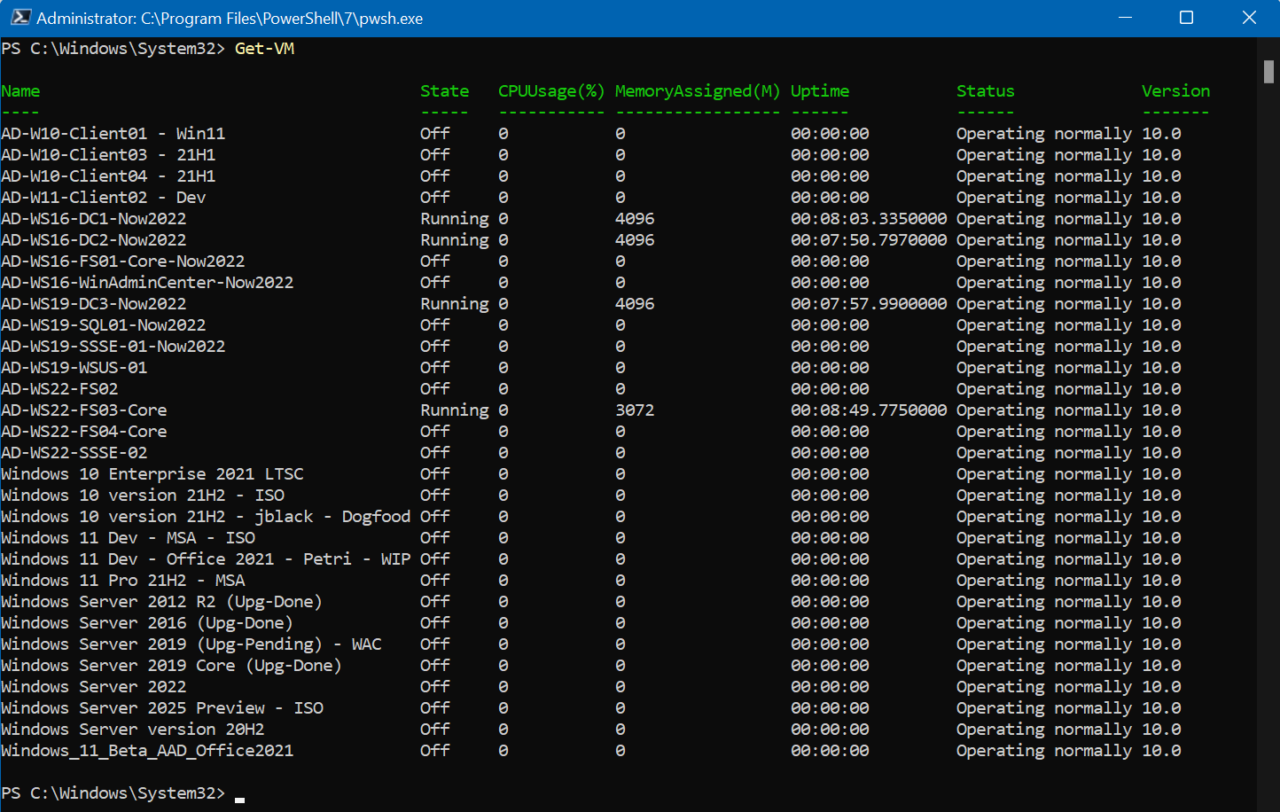
The one I’m using is called ‘AD-WS22-FS03-Core’. So, I’ll need to use it with the PowerShell Set-VMProcessor command:
Set-VMProcessor -VMName "AD-WS22-FS03-Core" -ExposeVirtualizationExtensions $true
There’s no real output or reply. Just assume no news is good news. OK, now we are ready to install the role. PowerShell makes it awesome easy. Open a PowerShell prompt with administrator privileges and run the Install-WindowsFeature cmdlet:
Install-WindowsFeature -Name Hyper-V -IncludeManagementTools -Restart
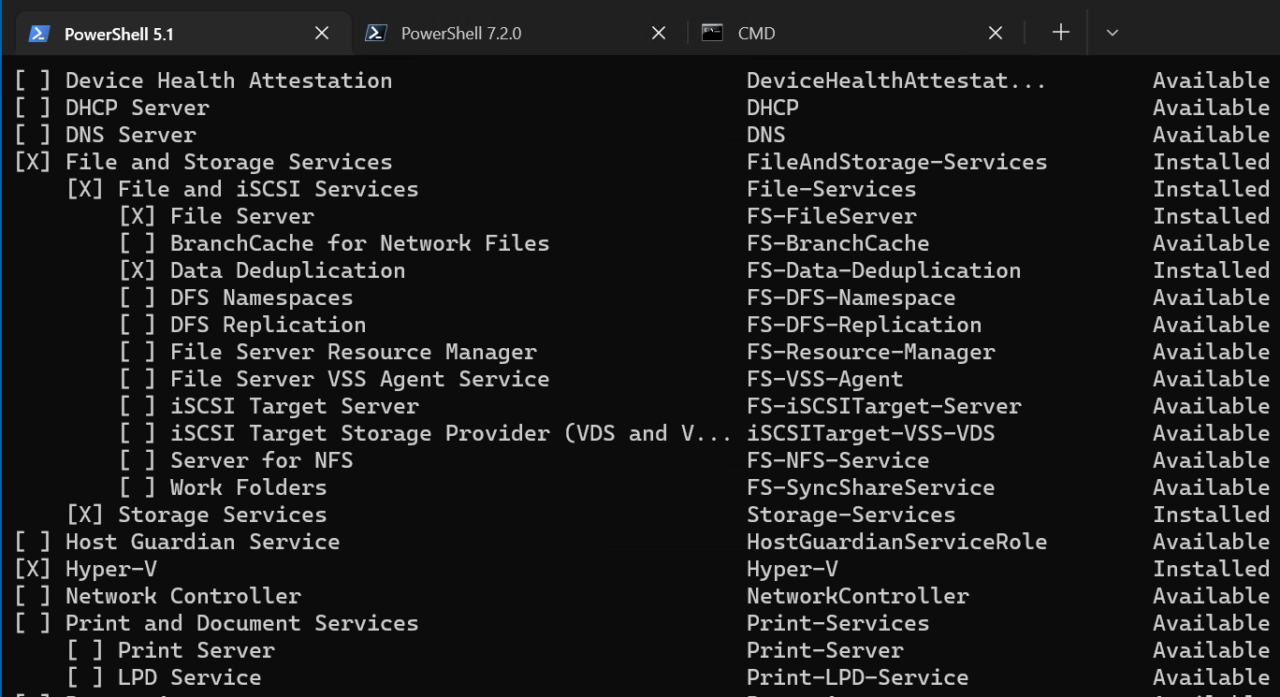
It should automatically reboot the server when the installation is successful. To quickly verify the role is installed, just use the Get-WindowsFeature cmdlet from any computer on the domain.
Get-WindowsFeature -ComputerName WS22-FS03-Core
You should see Installed next to ‘Hyper-V’ (or an ‘x’):
Install Hyper-V using the Windows Admin Center
For the current, recommended, graphical method, we’ll turn to our trusty Windows Admin Center. I’m on a Windows 11 client workstation on our domain and have Windows Admin Center running.
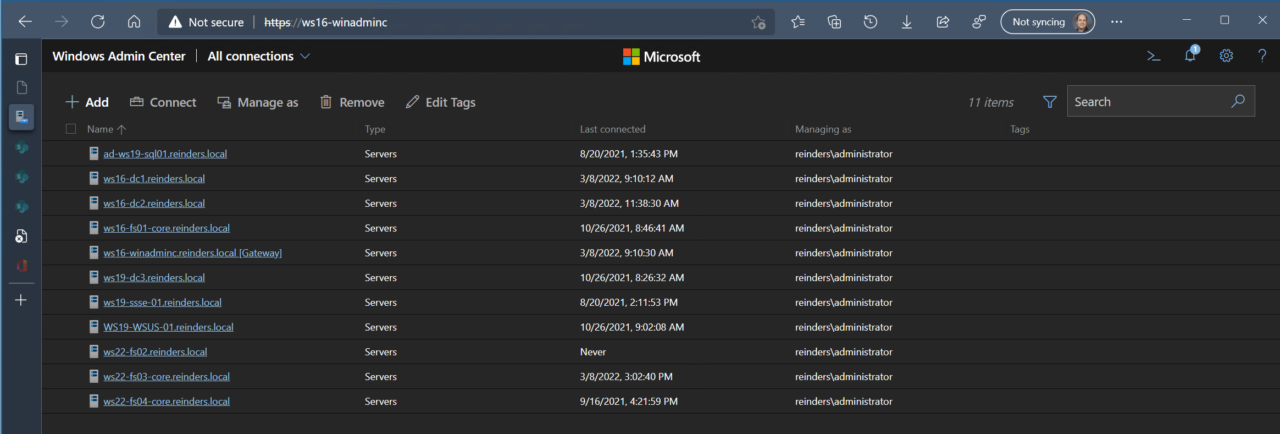
I need to manipulate the installed ‘Roles and Features’ on our server so I will click on ‘ws22-fs03-core.reinders.local’ (and login)
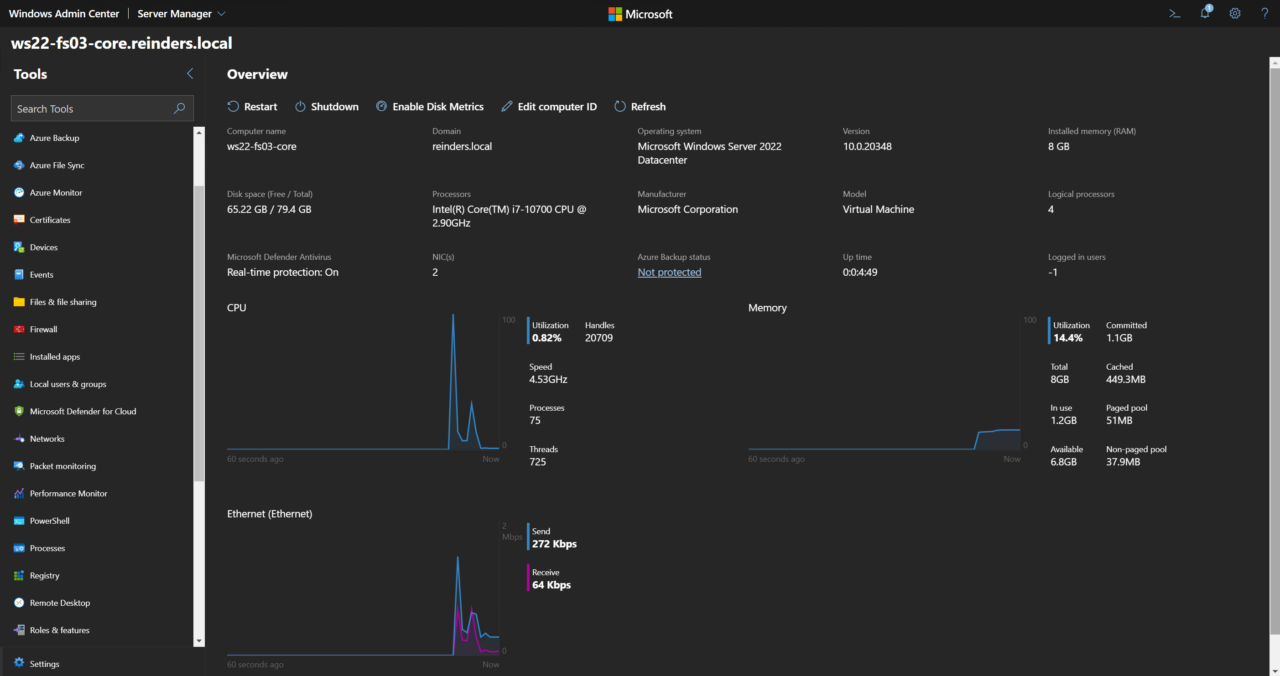
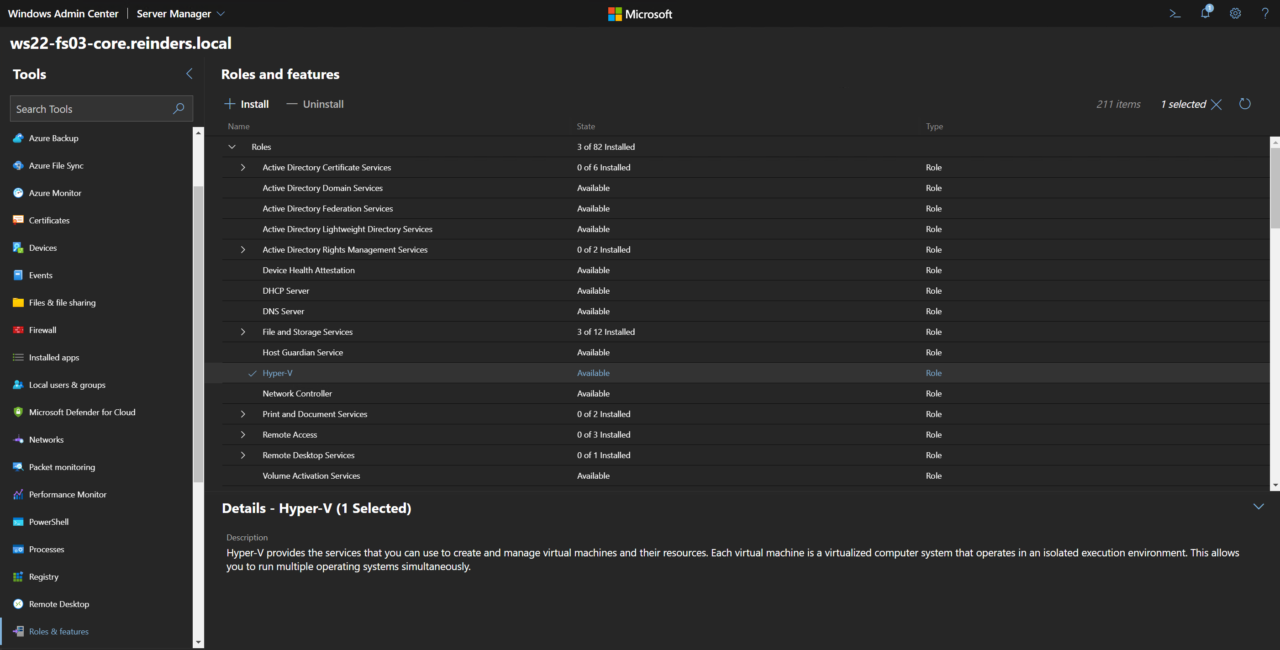
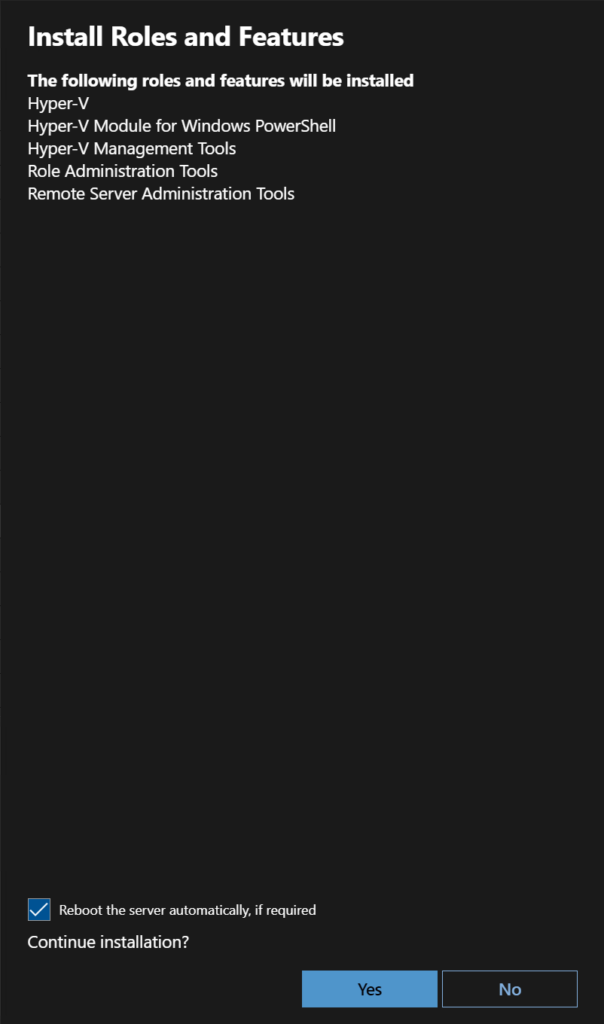
On the top, click ‘+ Install‘. Check the box to ‘Reboot the server automatically, if required‘ and click Yes.
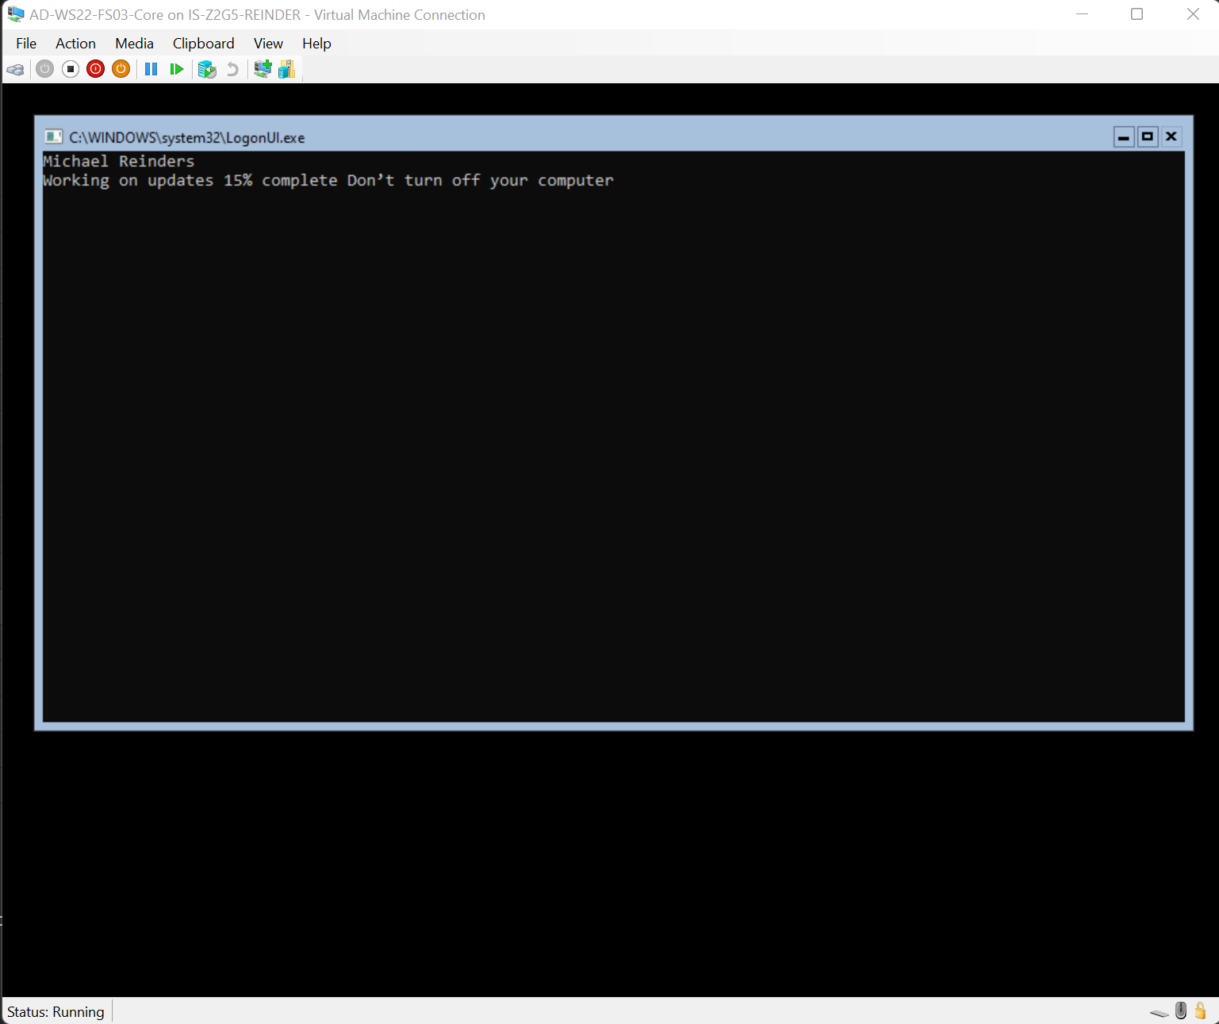
Then, you’ll be able to check progress on the installation of the Hyper V platform and server role.
How to create and manage Hyper-V virtual machines
I’m not sure what you all think, but I feel it’s pretty cool that we have the Hyper-V role installed on top of a Hyper-V VM! And trust me, that’s a nifty accomplishment in its own right.
But what good is the Hyper-V role if we don’t use it? Let’s install and manage a few VMs using the three main tools listed here.
Using Windows Admin Center
First, we’ll use the modern Windows Admin Center to create a new Windows 10 VM. But before we create a new VM, we first need to create a virtual switch. Open Windows Admin Center and click on the server you’re using (in my case, WS22-FS03-Core). Next, scroll down to the bottom of the Tools list and choose Virtual switches.
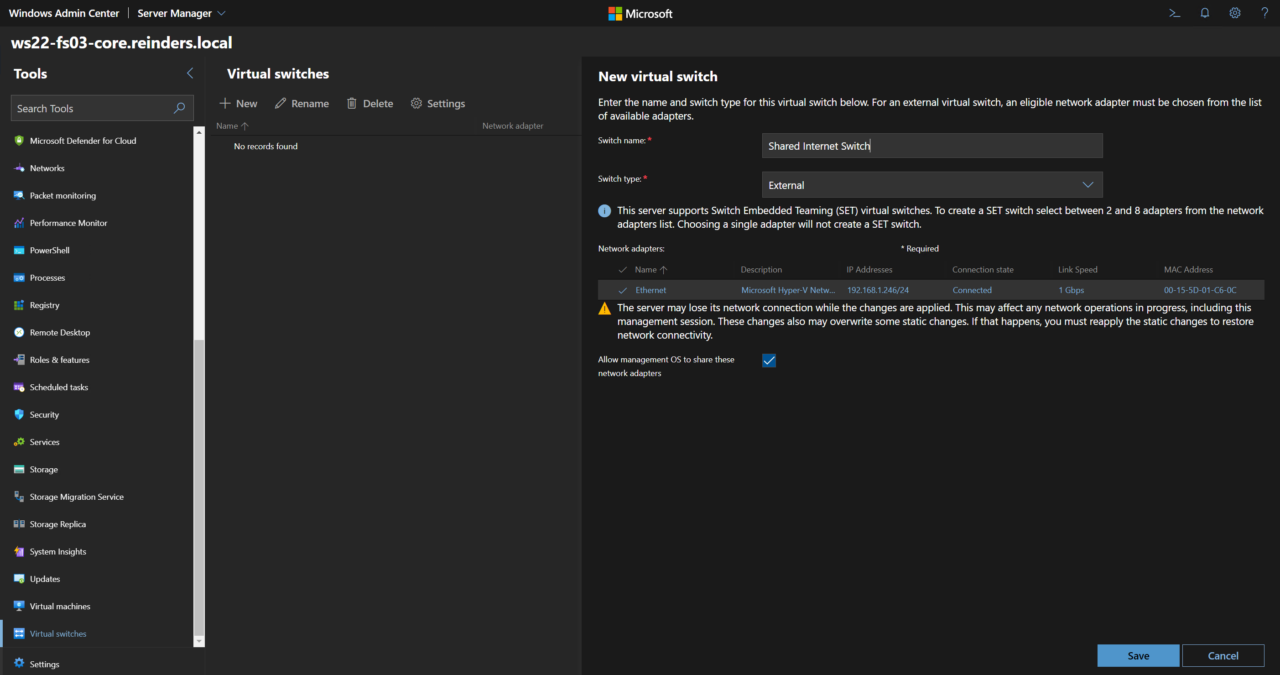
We need to create a virtual switch that will allow our Hyper-V host to manage network traffic between itself and the VM. Here’s how to do it:
- Click ‘+ New‘.
- Enter a switch name that suits your needs
- Choose the Switch type of ‘External‘ from the dropdown menu
- Place a checkmark next to the ‘physical’ network adapter on your Hyper-V server (Ethernet)
- Make sure the ‘Allow management OS to share these network adapters‘ is checked
- Click Save.

Now, we can create our Virtual Machine. Under Tools, right above Virtual switches, click on Virtual machines.
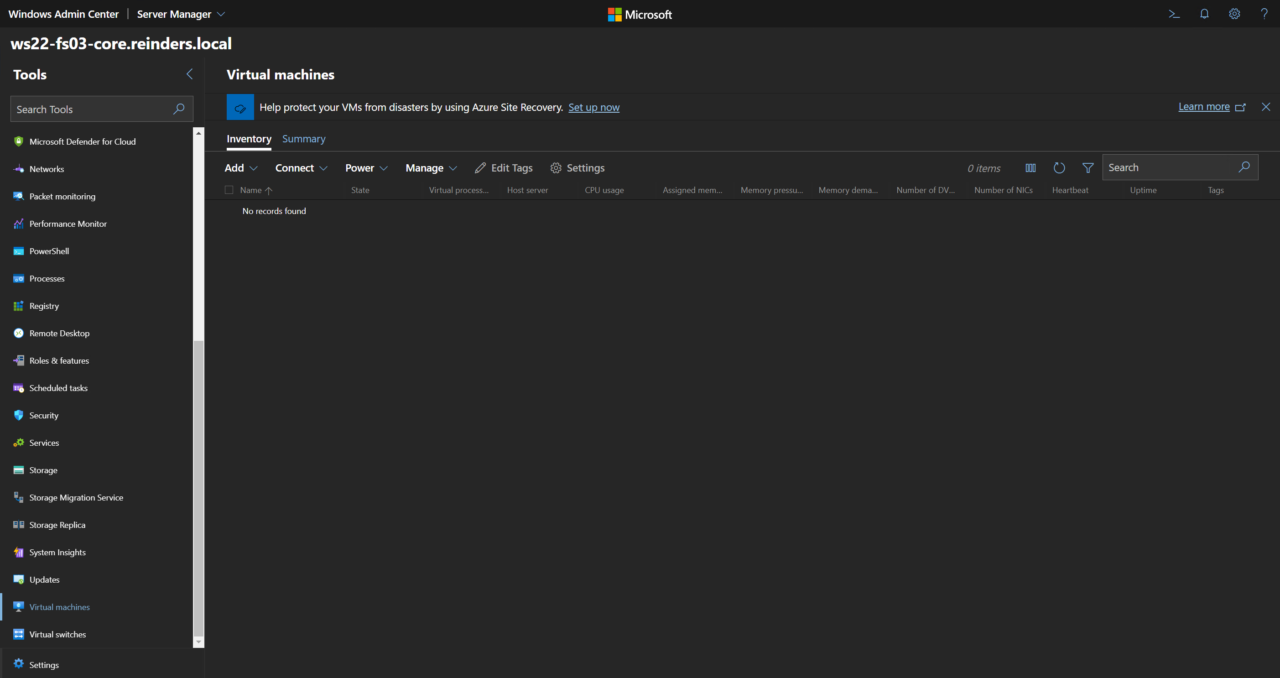
Click the ‘Add’ dropdown and click ‘+ New‘. Enter a Name for the new VM, choose if you want Generation 1 or 2, then adjust the location of the VM configuration and virtual hard disks, if you don’t prefer the defaults.
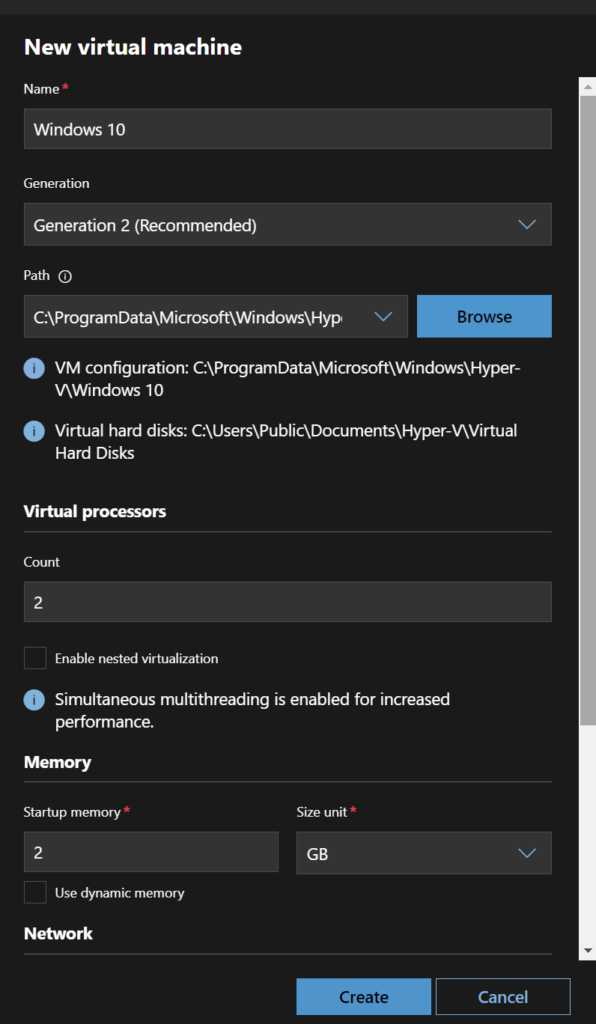
Choose the number of Virtual processors you want to grant the VM, and the amount of memory (RAM). Be sure to choose the new Virtual switch we just created, then under Storage, click the ‘+’ sign. Decide how large you initially want the ‘C: drive’ to be in the VM and confirm that ‘Install an operating system later’ is selected. Then, finally, click Create!

Using Hyper-V Manager
Let’s transition over to using Hyper-V Manager to make some additional changes and to start our new VM. I’m back on my Windows 11 client machine and have launched ‘Hyper-V Manager’ from the Administrative Tools menu.
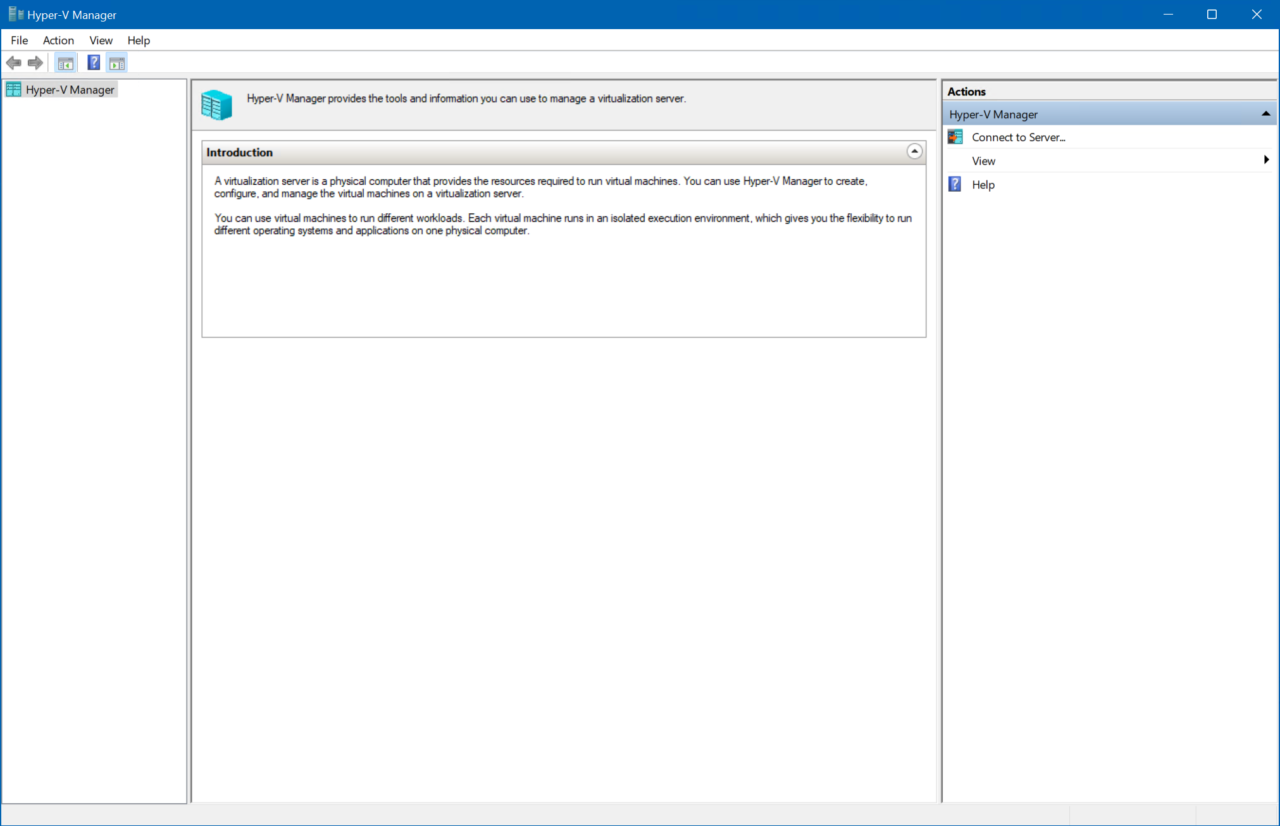
Right-click on ‘Hyper-V Manager’ in the upper left corner, and choose ‘Connect to server…’ I’ll type in ‘ws22-fs03-core’ in the ‘Another computer’ field and click OK.
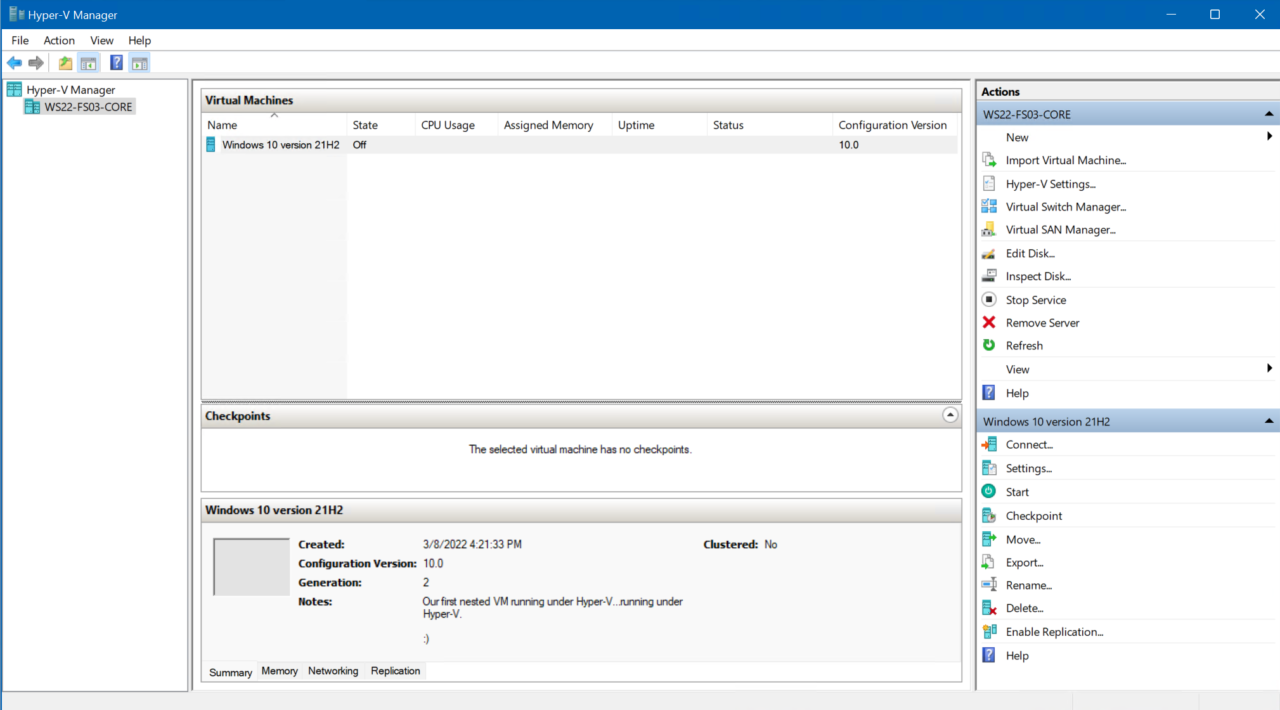
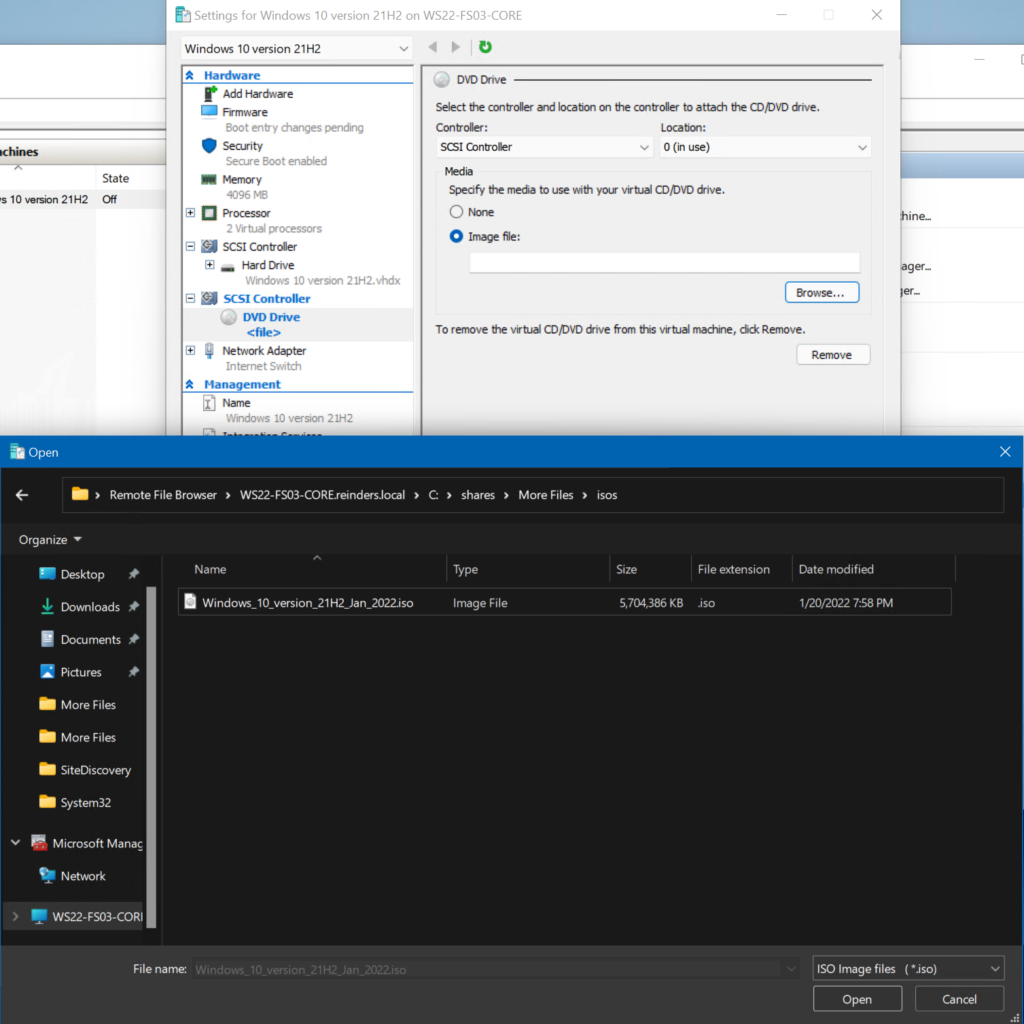
There’s our VM! I’m going to go through a few other settings before we fire it up. Right-click on the VM and click Settings:
- On the ‘Add Hardware’ menu, confirm ‘SCSI Controller’ is highlighted and click the ‘Add’ button.
- Choose ‘DVD Drive’ and click ‘Add.’
- Click the ‘Image file:’ radio button and click the ‘Browse…’ button.
- Locate your Windows 10 installation ISO and click OK.
- Now, go up to the ‘Firmware’ category on the left, click the new ‘DVD Drive’ and click ‘Move Up’ until it’s at the top. This should do it.
Using PowerShell
You can always count on PowerShell to give you a shot of efficiency in your day-to-day tasks, and managing your Hyper-V environment is no exception. Incidentally, the larger and more complex your Hyper-V environment is, the faster you’ll get things done with PowerShell at your side. Let me go through a few of the basic cmdlets.
A great place to start is to get a list of all the cmdlets available related to the Hyper-V module.
Get-Command -Module hyper-v
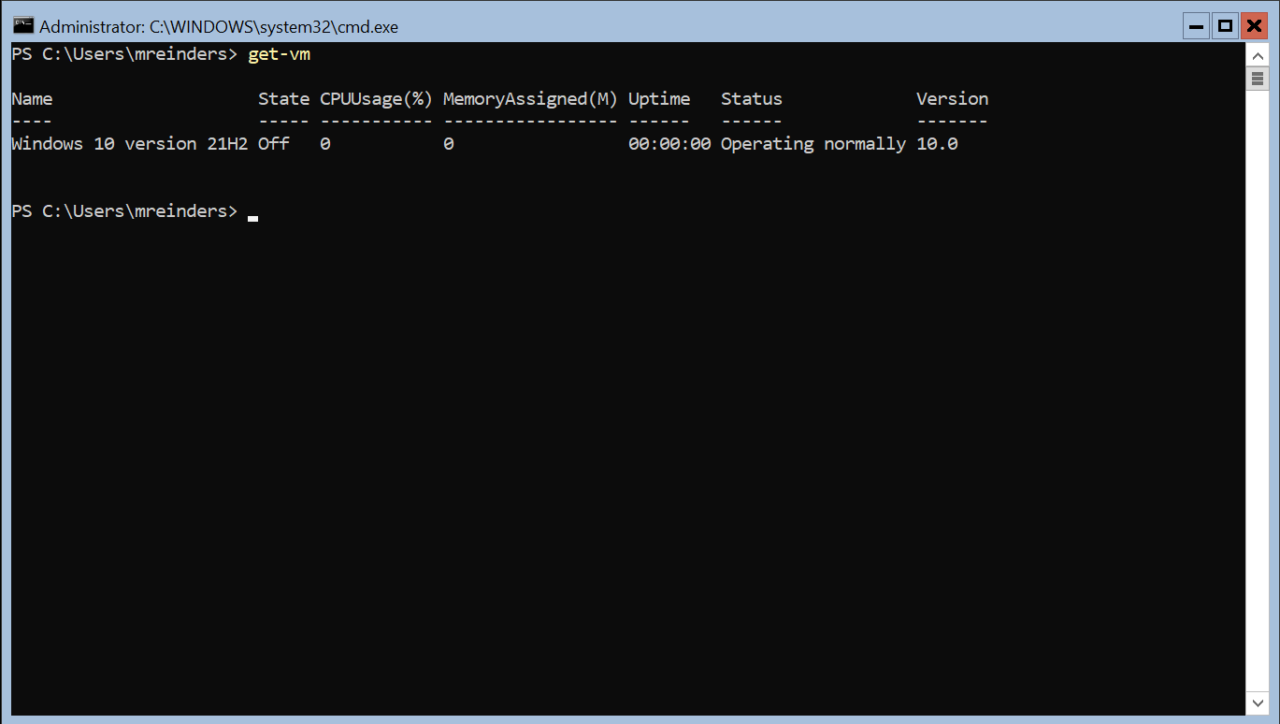
Yes, there are an awful lot. Let’s start simple. Use the Get-VM cmdlet to get a list of VMs.
Get-VM
If you wanted to list only VMs in the ‘Running’ state, you can use a filter:
Get-VM | where {$_.State -eq 'Running'}
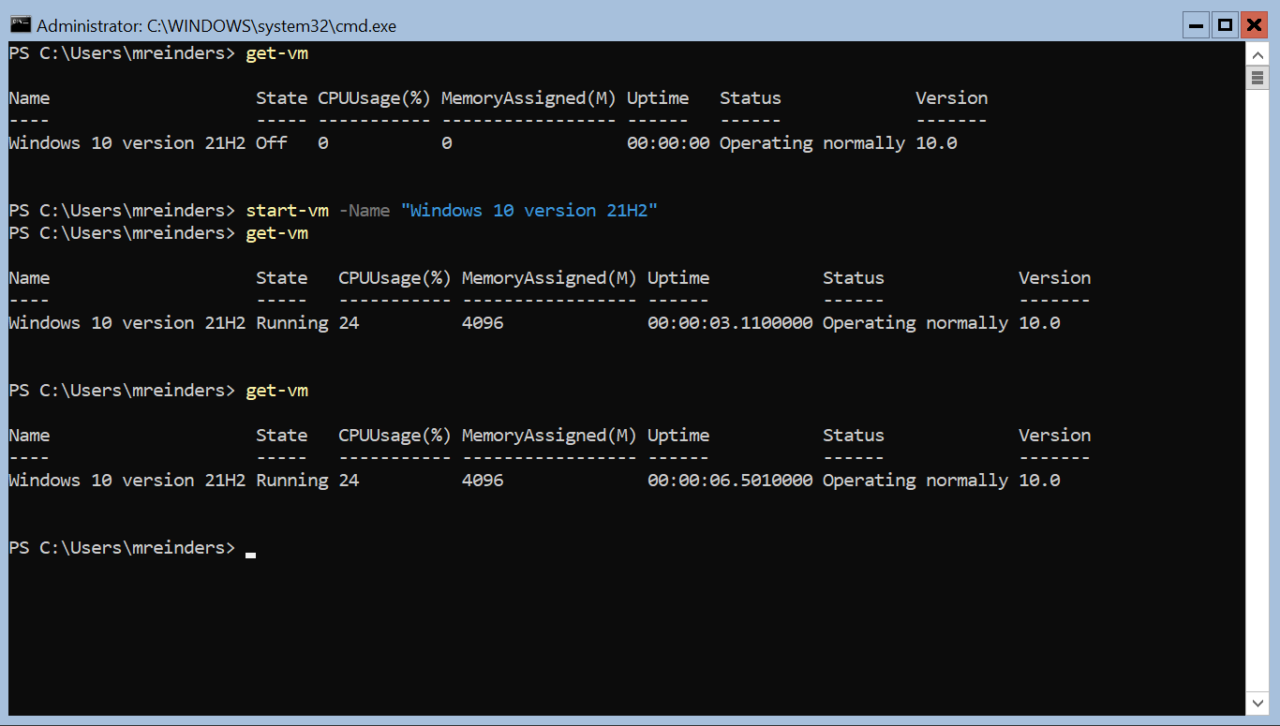
Anyway, to start a VM, use the ‘Start-VM’ cmdlet.
Start-VM -Name "Windows 10 version 21H2"
Let’s finish off this lovely post with an example of how to create a new VM. You could use the ‘PowerShell ISE’ to create this script and run it against your Hyper-V Server.
$VMName = "Windows 11 version 21H2"

$VM = @{
Name = $VMName
MemoryStartupBytes = 2147483648
Generation = 2
NewVHDPath = "C:\Virtual Machines\$VMName\$VMName.vhdx"
NewVHDSizeBytes = 53687091200
BootDevice = "VHD"
Path = "C:\Virtual Machines\$VMName"
SwitchName = (Get-VMSwitch).Name
}

New-VM @VM
This will create a new VM using the Name of “Windows 11 version 21H2”. It will start with 2GB of RAM, create a Generation 2 VM, set the file path for the VHD file in the path above, set the initial C: drive partition size to about 50GB, and boot from the .VHDX file. This is pretty simple, but there are many more options and parameters you can use to create some pretty sophisticated VMs using PowerShell.
That’s it for our guide about how to install Hyper-V on Windows Server Core, be aware that we have a separate guide on how to install Hyper-V on a Windows 10 PC.


