Guide: How to Install Windows 11 in a Virtual Machine
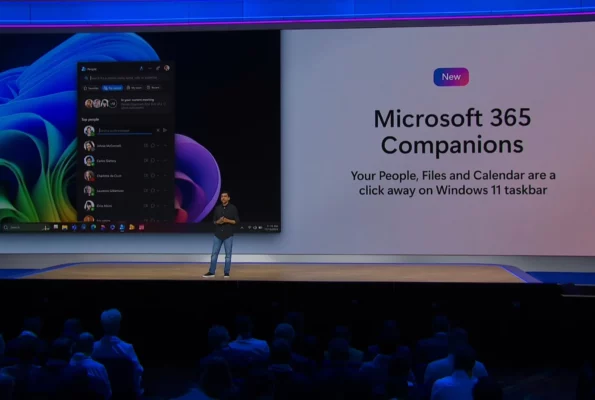
I’m sure many of you are excited that Microsoft’s Windows Insider Program team recently launched the testing phase of Windows 11. What better way to get your feet wet than to test it in a brand-new virtual Hyper-V machine! Some of your users will probably be clamoring to upgrade when it’s official and recommended, so, you have your work cut out for you. Should you foist the general newness of Windows 11 on at least a testbed of users? Well, that’s outside the scope of this post, but, guaranteed, it will be discussed ad nauseum over the next six months.
The best way to get started with installing Windows 11 is to grab an official ISO from the company. If you do not have one available, you can use a Windows 10 ISO and upgrade to Windows 11 via Windows Update but that process will take longer than a direct Windows 11 ISO install. If you are looking to install Windows 11 in VMware Workstation Pro, then check out Petri’s article dedicated to that virtualisation platform.
Equipment & Prerequisites
I’m running Hyper-V on my Windows 10 HP Z2 Mini G5 Desktop workstation. You need to make sure your computer supports the Hyper-V Feature/Role, and that you have it enabled. You can use this guide to verify. The next steps are to create your new virtual machine (VM).
Creating the VM
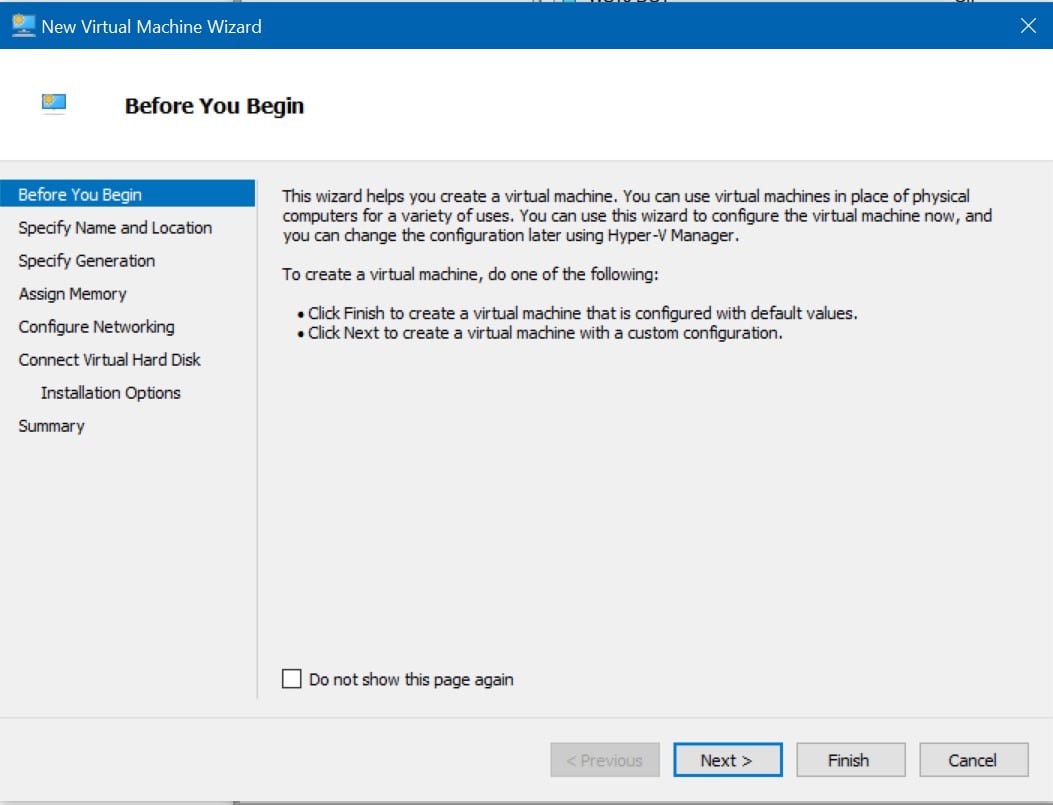
First, on the right Actions pane, click New -> Virtual Machine…

Now, on the first screen, you can click Next.
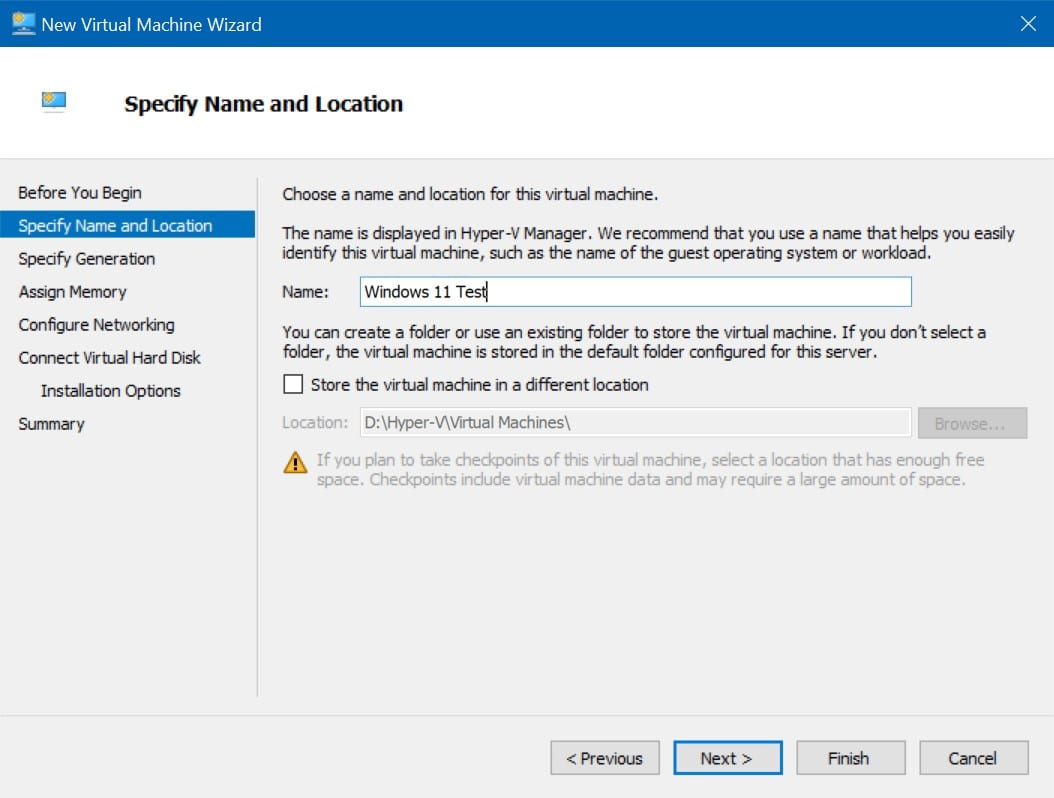
Next, type in the name of your VM. Make it descriptive.
Then, you choose the Generation of the VM. You definitely want to use Generation 2, cuz, well, you can. 2 is better than 1. Right? Amirite? Sure, let’s do Gen2. But seriously, you would only need to use Generation 1 when installing Windows 7 or Windows Server 2008 R2 or earlier. And, those aren’t supported anymore, but, you never know. (I know there are other use cases where Generation 1 would be needed, but for these purposes, Gen 2 FTW!)

Here is where you specify how much memory (RAM) you want to allocate to the virtual machine. 4 GB is Microsoft’s (current) minimum for Windows 11. For testing purposes of the base OS, 4 GB is fine. If you plan on testing more than just web browsing, Microsoft 365 Apps, or other light tasks, I would consider 8 GB or 12 GB (or more). This is something you can change post-creation. You can easily shut down Windows, change it from 4096 to 8192, and fire it up.

Alright, now, you will choose what network connection you want. If you’ve already created a few VMs, you’ll probably have a virtual network like ‘Internet’ or ‘External’ to choose here. This allows the VM to share the wired (or wireless) network connection of your host computer. Think of Hyper-V, logically, like a switch. Any ports plugged into it (VMs) will act as if they are the host computer. If your host computer is set to DHCP, then your VM will DHCP on the same network from the same DHCP server. The guide I mentioned previously goes into these details.

Here, you can have Hyper-V create a new virtual hard disk for your VM. The default is probably around 127GB. I usually set 50 or 60 GB for Windows, in general. But, you can allocate more as you wish.

Finally, you have the Summary page. Click Finish and your VM is seconds away from completion!

Here you can see our new VM nestled safely in between the other ogres and valkyries vying for some Hyper-V Host time.

Before installing Windows 11, we need to do some final configuration steps on the VM. First, right-click on the VM and click Settings.

With SCSI Controller selected, click Add, then choose ‘DVD Drive’ and click Add. Choose ‘Image file:’ and browse to your Windows 11 Installation ISO.

Click the Apply button at the bottom, then click the ‘Firmware’ category on the left. Click to select the DVD Drive, and move it to the top of the Boot order.

There are two remaining steps I perform, but they are not required. Click on the Processor section. Here you can increase the number of virtual (cores) the VM can utilize. The default is one. I typically choose four (4) here. My host system has an Intel Core i7-10700 with 8 cores and 16 threads. So, I could even go up from 4 if I wish. But, as you saw my list of VMs, it is relatively extensive. And with my upcoming project to upgrade my lab Active Directory environment from Windows Server 2016/2019 to Windows Server 2022, I’ll have 3, 4, even 5 or more VMs running at the same time so the upgrades work correctly. That will be a true test of this workstation!

Finally, Checkpoints. By default Hyper-V will enable automatic checkpoints. Whenever you power up or power down a VM, it will take a checkpoint (snapshot) of the state of the VM, in case you want/need to revert to it. Personally, I leave that off. I am still free to create a checkpoint manually whenever I want, which I will undoubtedly use with my upcoming project. (What if the upgrade from 2016 to 2022 fails? I need a failsafe) Anyway, you can choose what you wish here.

We’re done! We’re ready to install Windows 11!
Installing the Operating System
First, right-click on the VM and click Connect…this will open a console window for the VM. Go ahead and click the Start button to get her started.

Just make sure you press a key when you see the ‘Press a key to boot from the DVD…’, you’ll then see the Setup screen. Click Next and then Install.

Here, you can click the ‘I don’t have a product key’ and click Next. (You can activate it after setup, if necessary.)

You will probably see other SKUs of Windows 11 here, depending upon what specific installation media (ISO) you have. Choose the appropriate version of Windows 11 and click Next.

Click the checkbox for ‘I accept the Microsoft Software…’ clause to the almighty software giant in the sky and click Next.

Now, this is clearly not an upgrade as you have a bare, fresh virtual machine to play with. So, choose Custom and click Next.

The only option you should have as an installation location for Windows 11 is the bare virtual hard drive, ‘Drive 0’. Click Next and off she goes!

After a few reboots, you’ll come to the OOBE (Out Of Box Experience). Based on what country/region you choose will determine the screens that follow. For these purposes, you’ll see the United States options. Your screens may vary.

Then, the keyboard layout is requested and an optional 2nd keyboard layout. Typically, you can skip that last one.

Setup will then Check for Updates, going to Windows Update to download any monthly cumulative updates since ‘RTM’ or any critical security patches available. Next, you’ll see something not available in Windows Setup for quite some time. Naming your PC!

Here’s where you will choose if you want to log in with a personal Microsoft account, or a Microsoft 365 work or school account. I chose the latter as I have access to a tenant.

After you login and authenticate (and two-factor…Be sure to practice safe authentication) you’ll come to the privacy settings screen. Choose appropriate toggles and click Next.

We.Are.Done!

Conclusion
Well, there we go. You will have some post-setup tasks to perform per your environment, compliance, testing, all that tedious but terribly important part of your testing phase. Please reach out if you have any questions about the process or any other options for setting up Hyper-V or configuring the VM settings for Windows 11. It’s helpful for us all to maintain an open dialogue about updates to this process.

Michael has been an IT Pro since 1998. He has worked predominantly in the Windows world including client and server operating systems, on-prem systems engineering (AD, DNS, etc.), and over the last ten years or so has embraced and immersed himself in...