Install Windows 11/Server 2022 in VMware Workstation 17 Pro

In this article, I’ll show you how to successfully install Windows 11 or Windows Server 2022 in VMware Workstation 17 Pro.
It’s taken more than a year for VMware to release a new version of VMware Workstation Pro that officially supports Windows 11. But there are still some issues that haven’t been resolved since the previous release, version 16. For example, Workstation Pro detects you are installing Windows from an ISO file but Windows Server 2022 setup fails because the default hardware configuration assigned to the virtual machine (VM) doesn’t work with Windows Server.
But the solution is simple and I’m going to share it with you below.
Before you can follow the instructions below, you’ll need an Internet connection to download the relevant image files for the version of Windows that you want to install. And you’ll need either a trial version or licensed version of VMware Workstation Pro installed on your local PC.
How to install Windows 11 on VMware Workstation 17 Pro
Before you can install Windows in a virtual machine powered by VMware Workstation Pro, you are going to need to download the latest image file (ISO) for Windows.
Download an evaluation version of Windows or Windows Server
All currently supported versions of Windows and Windows Server are available to download from the Microsoft Evaluation Center.

- Select the version of Windows you want to download from Microsoft’s website.
- In this example, I’m going to download and install Windows 11 Enterprise.
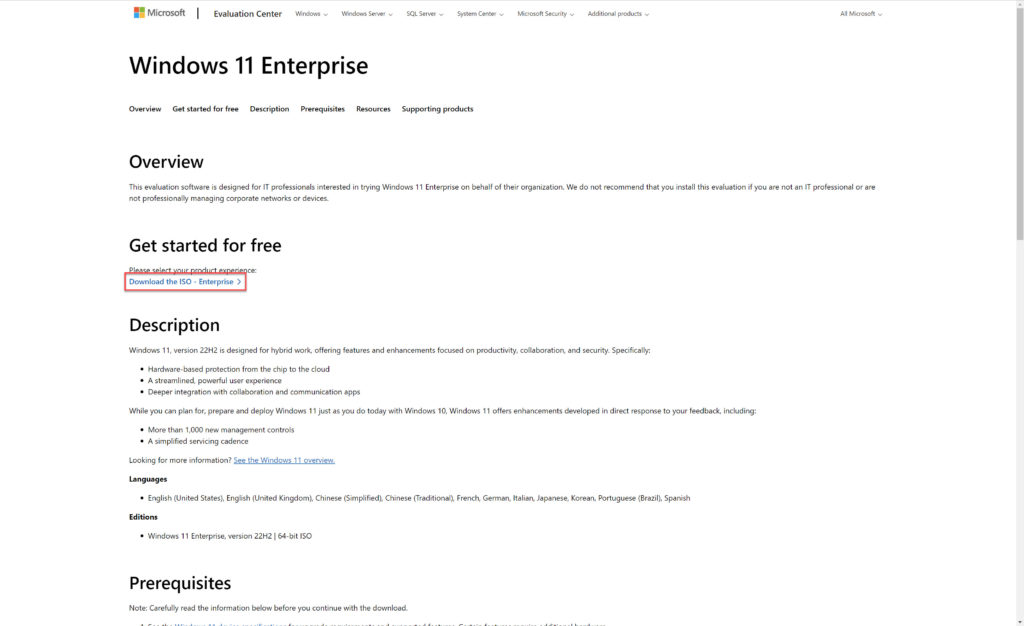
- Fill out all the required fields on the registration form and click Download now at the bottom of the page.
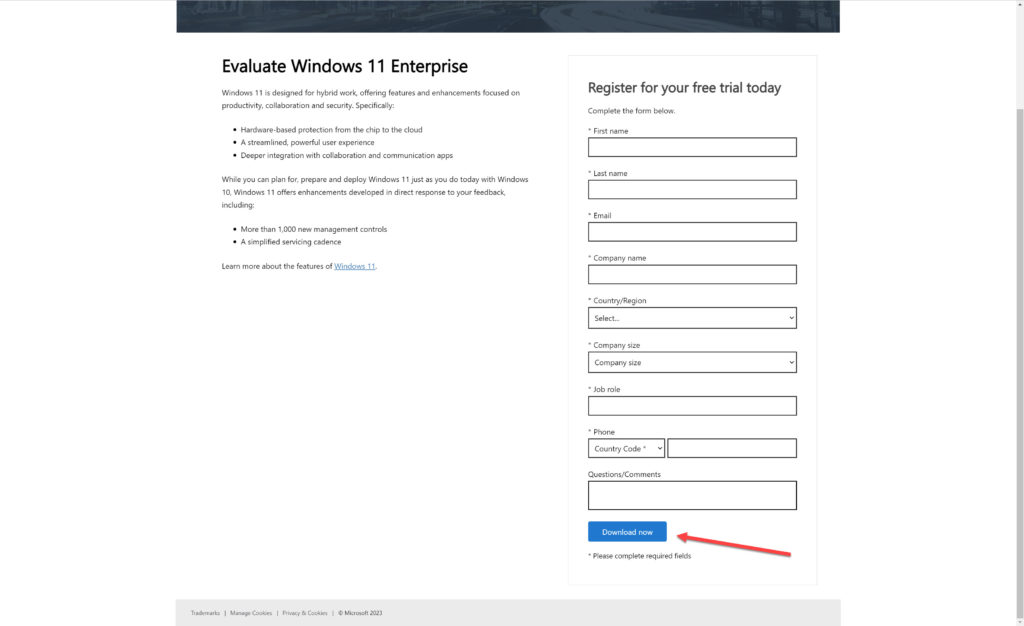
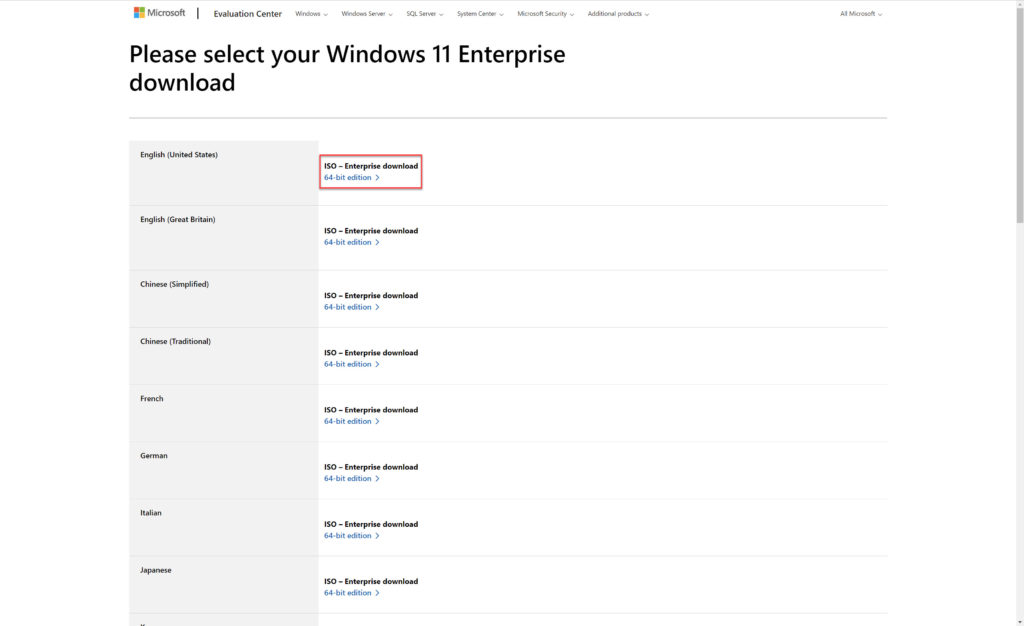
- Select the 64-bit edition of Windows and save the file using your browser to your PC.
Install Windows in a VMware virtual machine
Now that you have the ISO file for Windows on your device, you can install Windows in a VM.
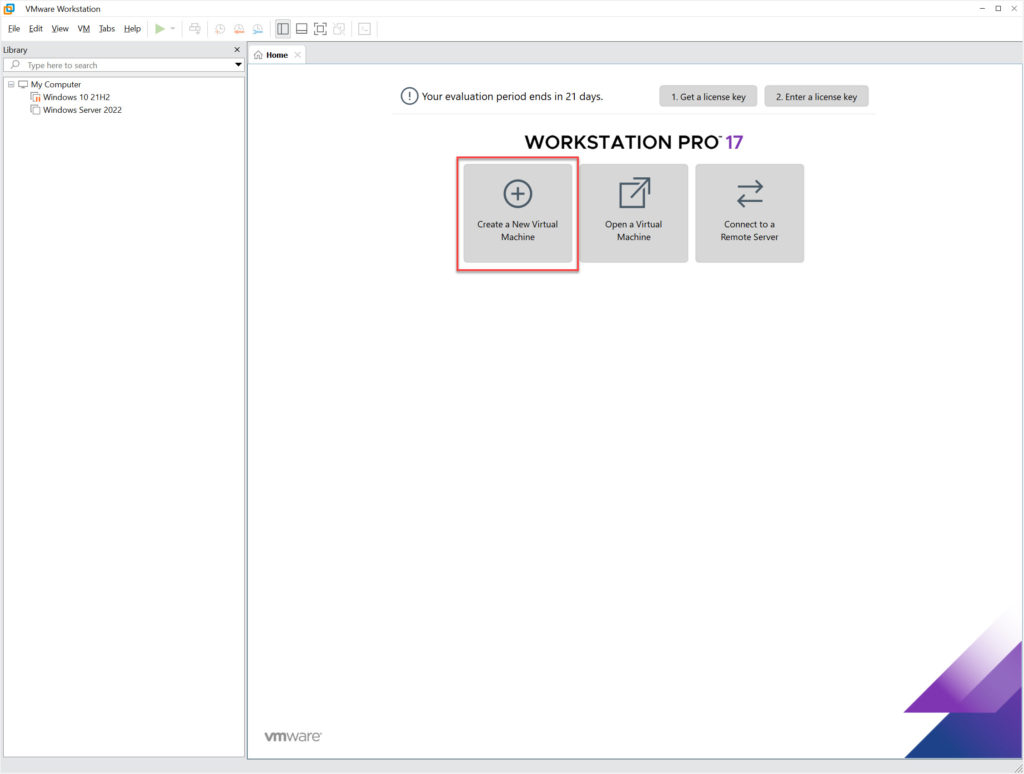
- Launch VMware Workstation Pro.
- Click Create a New Virtual Machine on the Home tab.
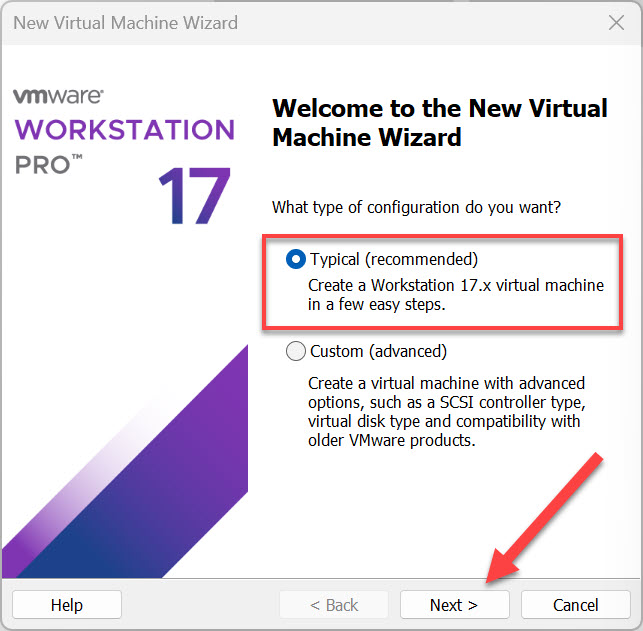
- In the New Virtual Machine Wizard, check Typical (recommended) and click Next >.
- In the Guest Operating System Installation dialog, check Install disc image file (iso) and click Browse. Select the ISO file you downloaded from the Microsoft Evaluation Center in the previous steps. Click Next to continue.

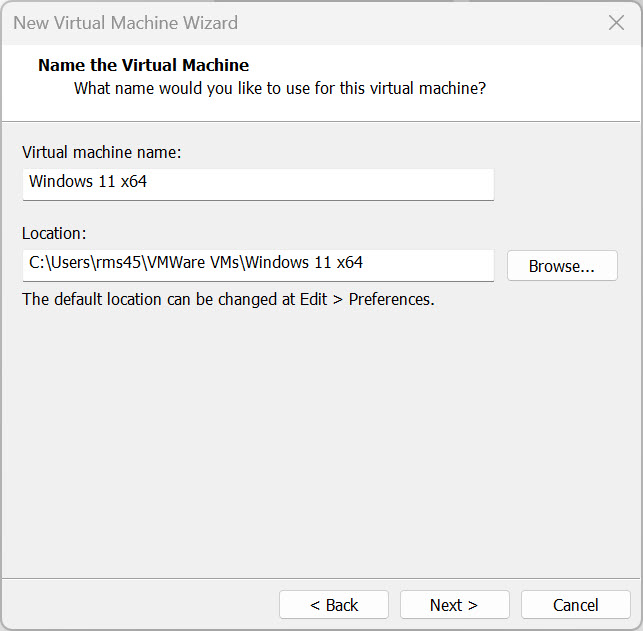
- Accept or change the given name for the new VM in the Name the Virtual Machine dialog window and click Next to continue.
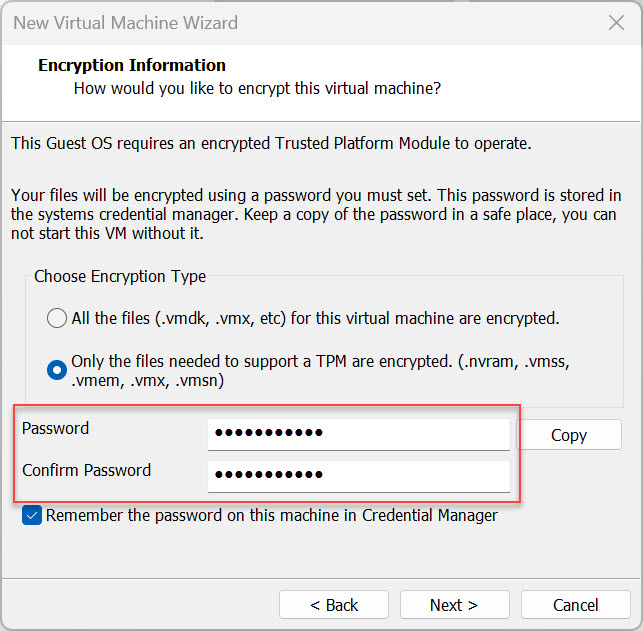
- If you are installing Windows 11, you’ll need to enter a password that VMware can use as an encryption key for the Trusted Platform Module (TPM). Enter a password and make sure you record it somewhere secure and safe. You’ll need it to start the VM.
- Click Next.
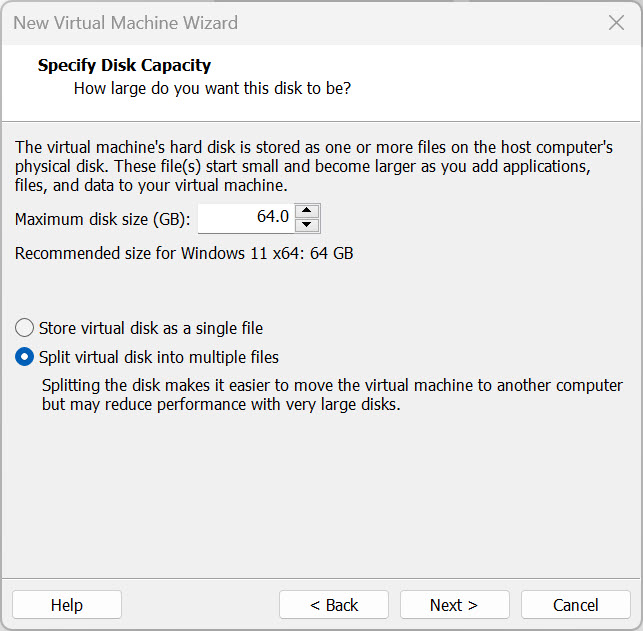
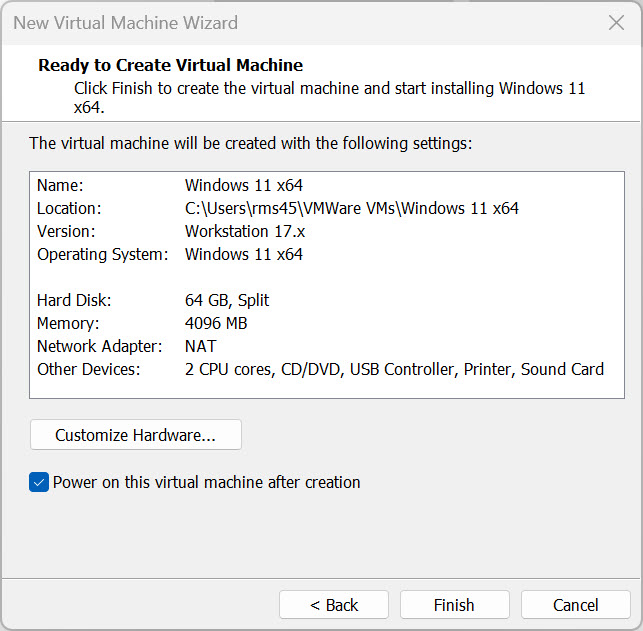
- Accept the default disk configuration on the Specify Disk Capacity dialog by clicking Next.
- Click Finish in the Ready to Create Virtual Machine dialog to start the new VM and begin the Windows installation process.
- VMware Workstation Pro will create the disk for the VM and then start the virtual machine. You’ll need to quickly click on the VM screen and press the spacebar on your keyboard to boot the VM from the virtual DVD ROM drive where your downloaded ISO file is attached. If you don’t manage in time, shut down the VM and start it again.

Once you boot into Windows setup inside the VM, you install Windows 11 in the same way as installing the OS on a physical device.
Related article: How to Install Windows 11 – The Ultimate Guide
Getting past the ‘Windows Cannot Find Microsoft Software License Terms’ error
If you are installing Windows Server 2022, you might get an error when stepping through the install process: ‘Windows cannot find the Microsoft Software License Terms’.
To complete the install process successfully, follow the steps below:
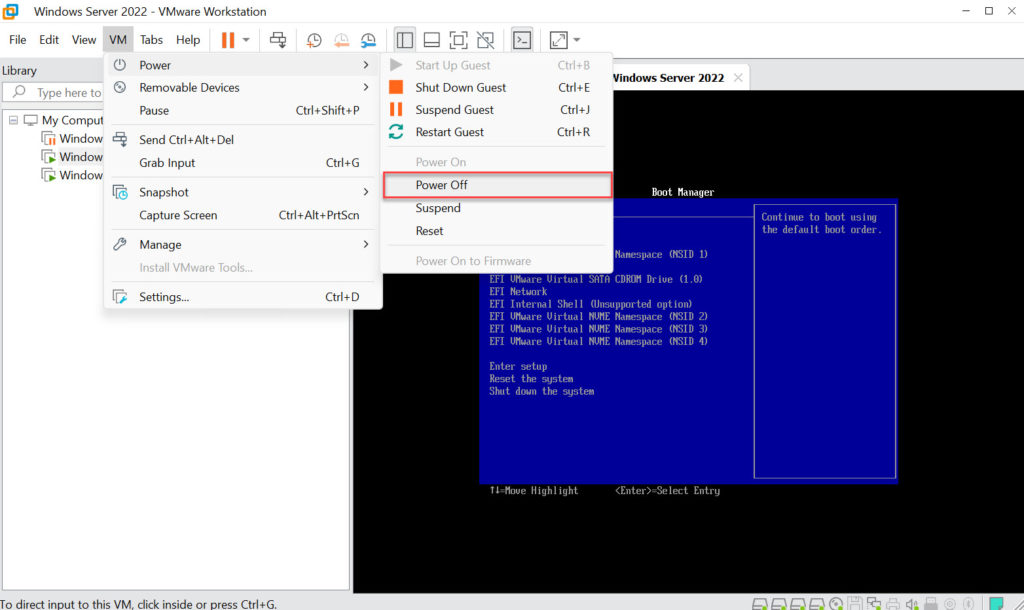
- If your Windows Server VM is running, stop it by selecting VM from the menu then Power > Power Off. Confirm the operation by clicking Power Off in the pop-up dialog.
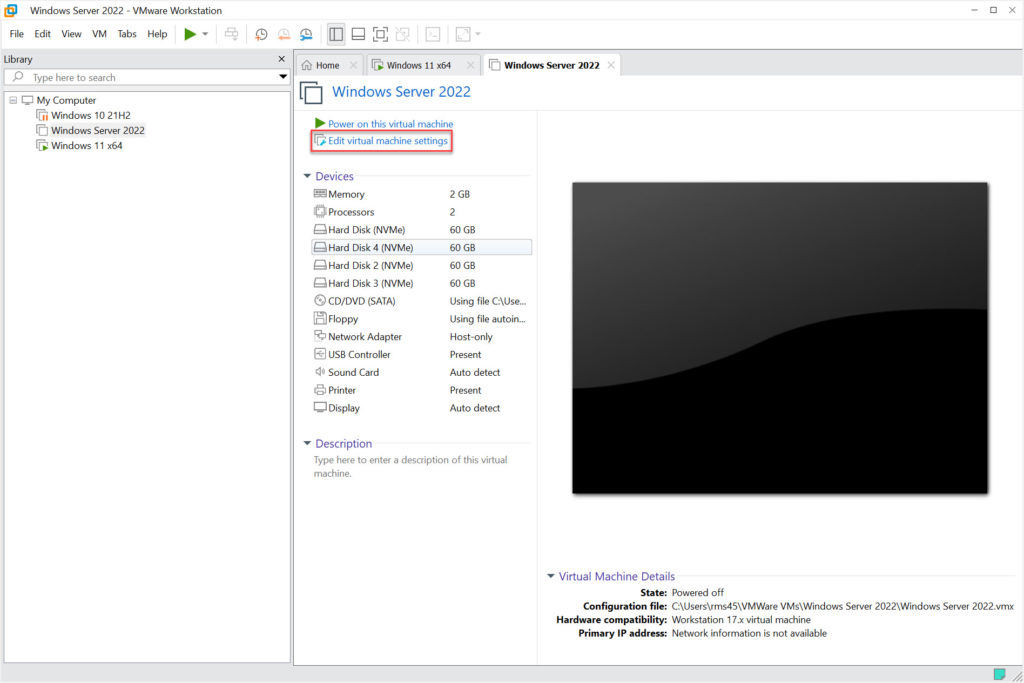
- On the tab for the VM, click Edit virtual machine settings.
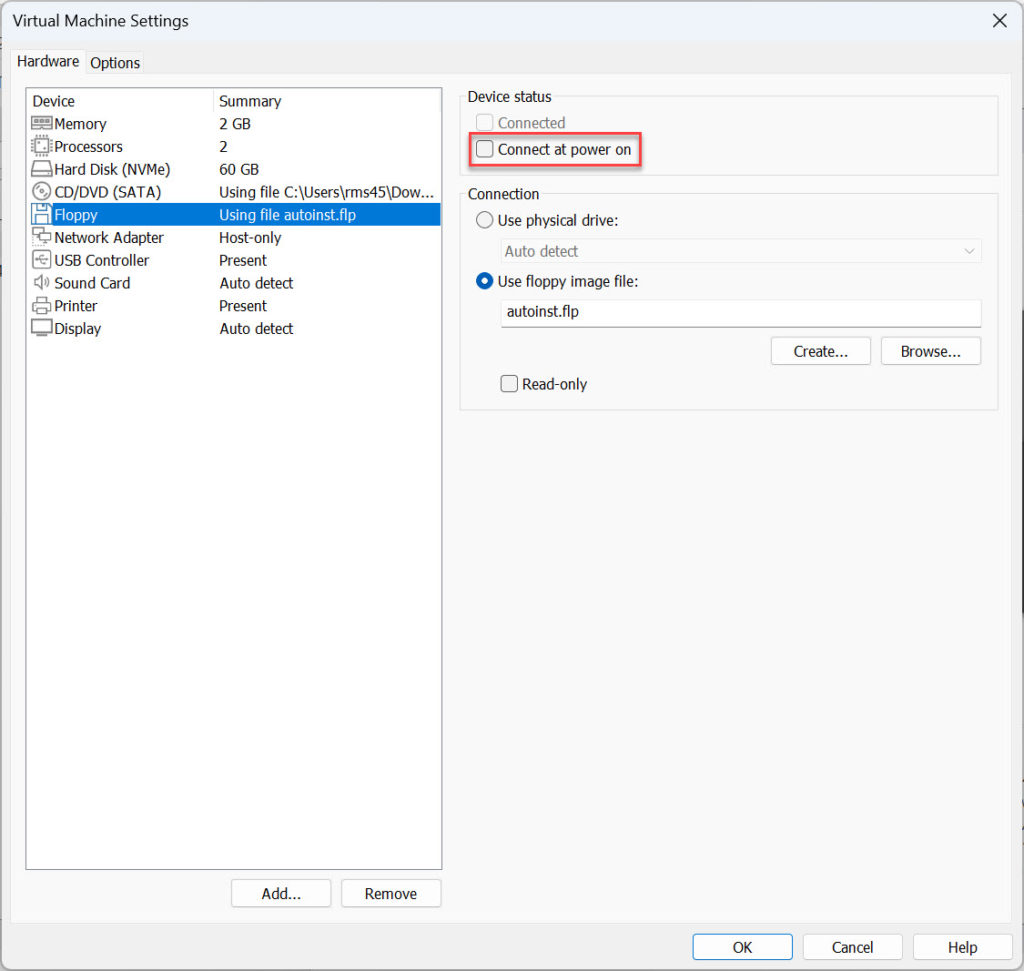
- In the Virtual Machine Settings dialog, click Floppy in the list of hardware devices on the left. On the right, uncheck Connect at power on and click OK.
- Back on the tab for the VM, click Power on this virtual machine and the installation of Windows Server should complete as normal without an error.
And that is it! If you’d like more information on installing Windows 11 in a Hyper-V virtual machine, check out the link below.
Related articles
Russell Smith, the Editorial Director at Petri IT Knowledgebase, has over two decades of hands-on experience in IT, in both small business settings and government IT infrastructure projects. Russell started writing for Windows IT Pro Magazine in t...