Attach a Data Disk to a VM in the Azure Portal
In this Ask the Admin, I’ll show you how to attach a data disk to a virtual machine (VM) in the new Azure Management Portal.
Adding an additional disk to an Azure VM was easy and intuitive in the classic Azure management portal, but while the new portal has some benefits, sometimes the endless array of options and sliding panels makes it harder to find basic configuration options.
There are lots of reasons why you might want to attach additional disks to VMs in Azure, but one common situation is the requirement to host Active Directory database files on a volume that doesn’t use write caching. By default, Azure deploys OS volumes with write caching enabled, and this can cause issues, such as data loss, with some applications.
If you’ve never deployed a VM in Azure before, see Deploy VMs Using Azure Resource Manager on the Petri IT Knowledgebase. Azure Resource Manager (ARM) is the default deployment model for provisioning VMs, and other resources, in Azure using the new management portal. For more information on Azure resource groups, see What are Microsoft Azure Resource Groups? on Petri.
Create and attach a data disk to a VM
Before starting, you need to already have a virtual machine deployed in Azure. It doesn’t necessarily need to be running.
- Log in to the Azure management portal here.
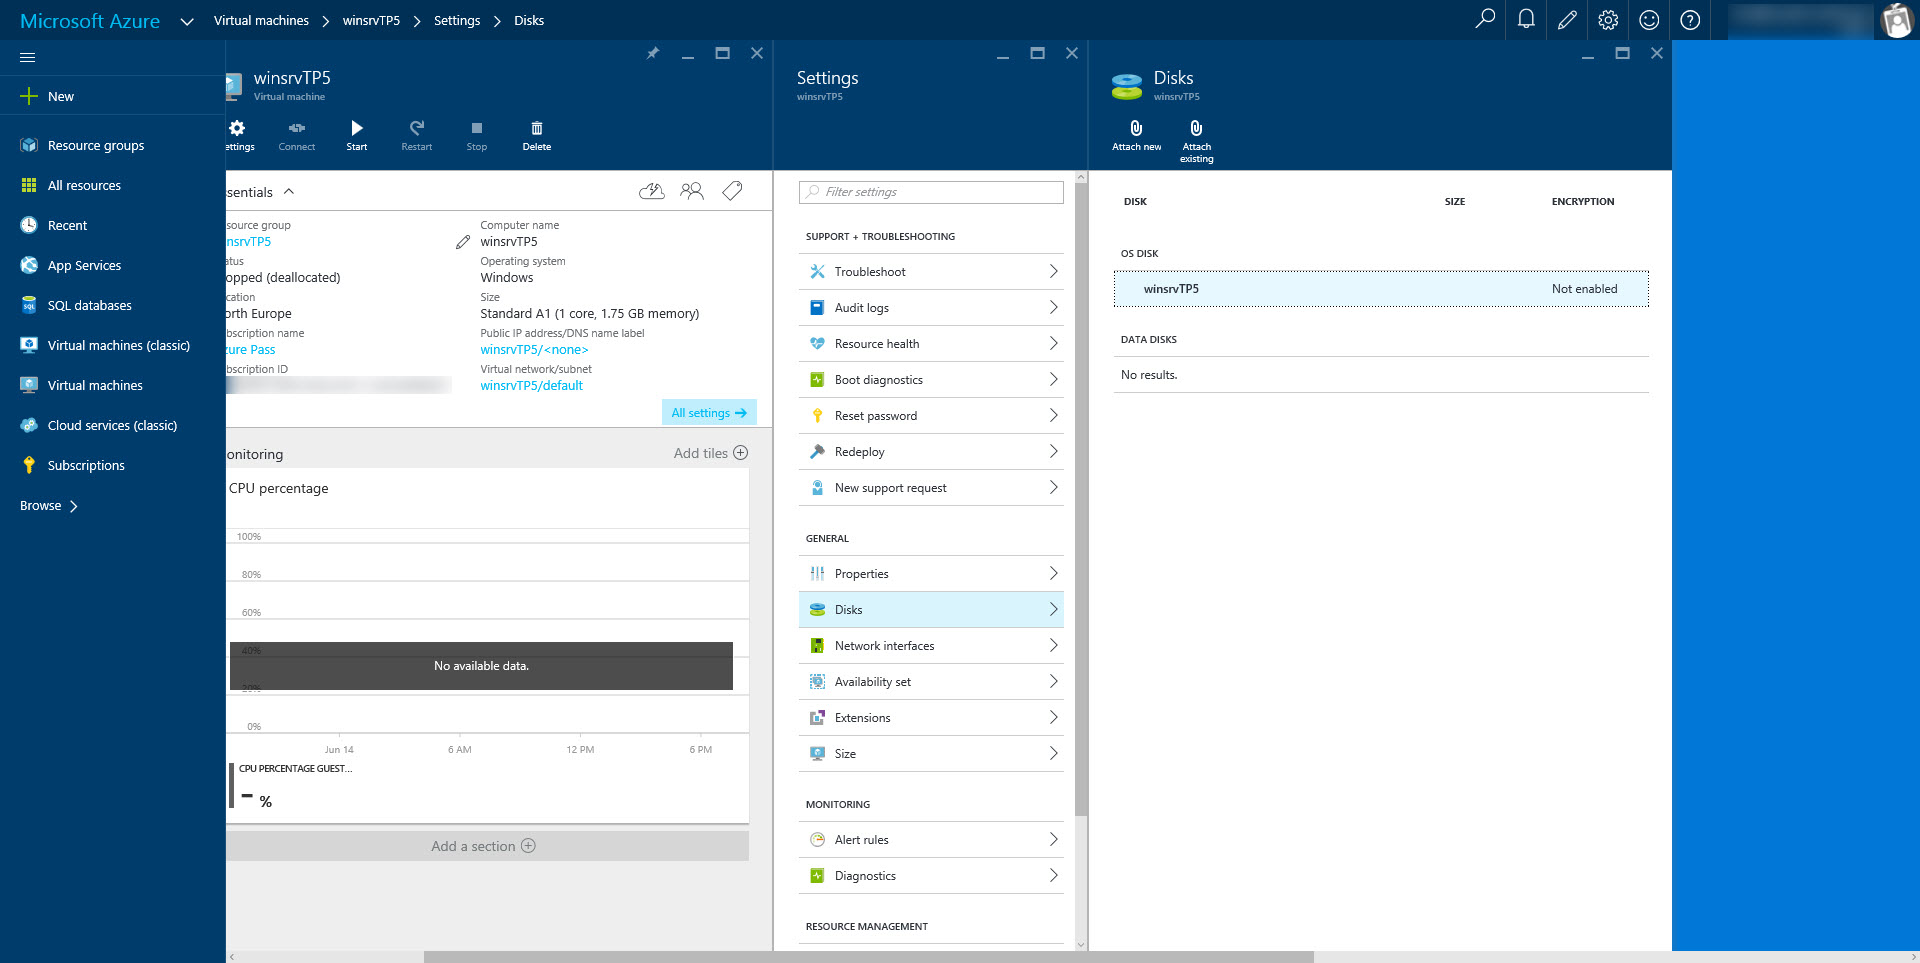
- In the Azure management portal, click Virtual machines in the list of options on the left.
- In the Virtual machines pane, click the VM you want to attach a disk to.
- A dashboard for the VM will appear, and the VM’s Settings panel to the right. In the Settings panel, click Disks under GENERAL.

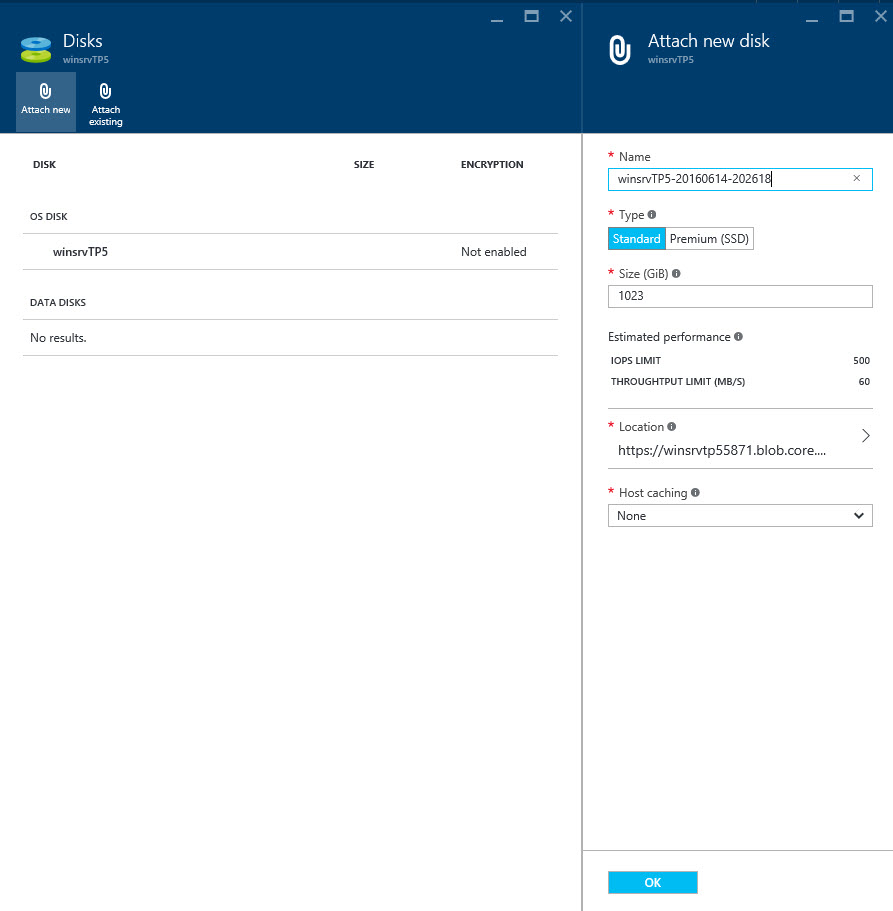
- In the Disks pane, click the Attach new icon. Optionally, you can choose to add an existing disk.
- In the Attach new disk pane, change the disk parameters to meet your needs. You can choose between standard and premium SSD disk, if your VM size supports it; change the disk size, location, and caching options: None, Read only, and Read/Write.
- Once you’re done adjusting the settings, click OK at the bottom of the Attach new disk pane.

Creating and attaching the disk might take a few minutes, and once the task is complete, you should see a notification appear in the top right of the management portal. The new disk will also appear in the Disks pane if you haven’t already closed it.

In this article, I showed you how to create and attach a new disk to an existing virtual machine in Azure.


