Synching Office 365 with Active Directory: Using Directory Synchronization
In the first part of this series on setting up AD directory synchronization with Office 365, I looked at some of the concepts involved and basic preparation of your onsite AD. In this article, I’ll describe how to activate synchronization for your Office 365 subscription, and how to install and configure the onsite Directory Synchronization tool.
Activating AD Synchronization in Office 365
Before activating Active Directory synchronization, Microsoft recommends that you add your own custom domain to Office 365 to provide users with a better experience. Chances are that if you are using Office 365 for email or SharePoint, you will already be using your own domain name. If that is not the case, it’s recommended (though not a requirement) to add a custom domain name to Office 365 before activating AD synchronization.
Before you install your Directory Synchronization server, you should activate AD synchronization in Office 365 in the administration center:
- Login to the Office 365 Admin Center with an administrative account.
- Click users and groups in the list on the left.
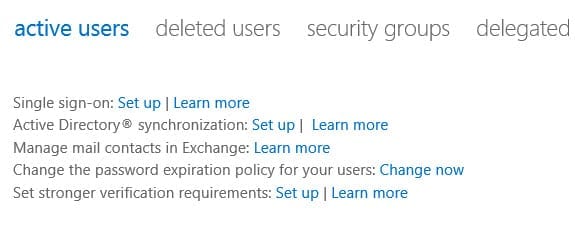
- Click Set up to the left of Active Directory synchronization on the active users tab.
- Click Activate under Activate Active Directory synchronization.
- Click Activate again in the pop-up dialog to confirm the action.
- You’ll see a message appear at the top of the window confirming activation and a note explaining that it could take up to 24 hours before the activation process is complete.
- Finally, click download below Install and configure the Directory Sync tool ready for the next step and save dirsync.exe to the local server.
Install the Directory Synchronization Tool
Don’t try to install the Directory Synchronization tool until AD synchronization has been successfully activated in Office 365. Additionally, make sure that you’ve read part one of this series and have understood the requirements for installing the Directory Synchronization tool.
- Log on to the server where you intend to install the Directory Synchronization tool as a domain administrator.
- Run dirsync.exe, which you downloaded after activating AD synchronization.
- Click Next on the Welcome screen.
- Accept the license terms and agreement and click Next.
- Click Next to install dirsync in the default directory.
- The installation process can take up to 10 minutes. Once complete, click Next.
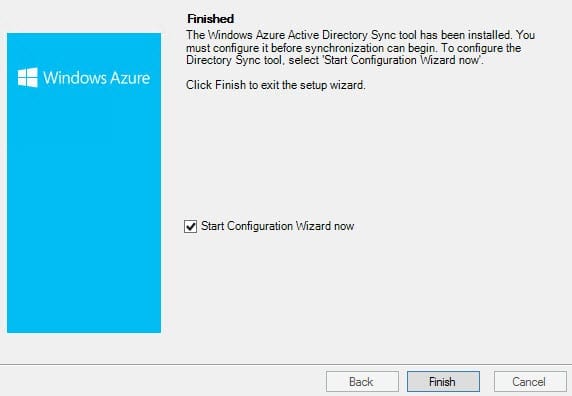
- On the Finish screen, make sure that Start Configuration Wizard now is checked and click Finish.
Configure Directory Synchronization
The configuration wizard allows you to set the basic parameters for synchronization and user credentials for connecting to your local AD and Office 365. The wizard can be run again at any time using the shortcut installed on the desktop.
- Click Next in the configuration wizard Welcome screen.
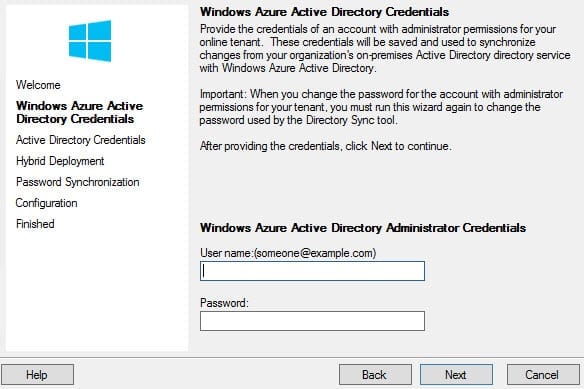
- On the Windows Azure Active Directory Credentials screen, enter a username and password that has global administrative permissions to Office 365 and click Next.
- On the Active Directory Credentials screen, type a username and password that has Enterprise Admin access to your local AD and click Next.
On the following screen, you get the option to enable hybrid deployment, allowing some Active Directory object attributes that are modified in Office 365 to be written back to your local AD. This is a requirement for some Office 365 functionality, such as email. If you don’t want or need to enable a hybrid deployment right now, you can run the configuration wizard again to enable it. Note that if you don’t have Exchange in your local environment, this option will be greyed out.
- On the Hybrid Deployment screen, check Enable Hybrid Deployment if required and click Next.
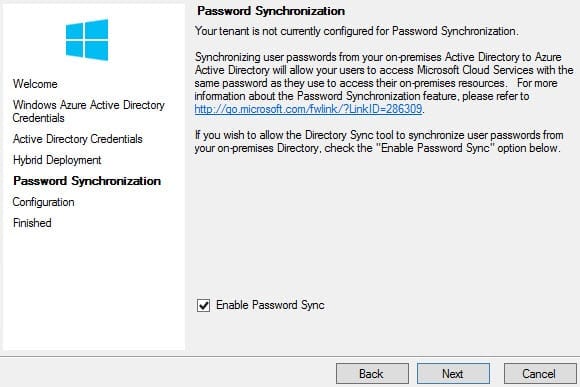
- Check Enable Password Synchronization on the Password Synchronization screen and click Next.
- Once configuration is complete, click Next.
- On the Finished screen, make sure that Synchronize your directories now is checked and click Finish.
Verify and Force Directory Synchronization
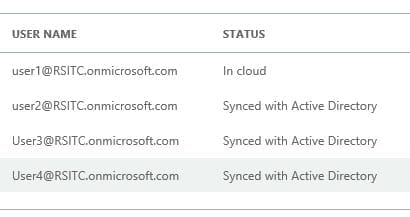
If there are any errors during synchronization, an email notification will be sent to the address registered as the cloud service technical contact when you signed up for Office 365. If an account is successfully synchronizing to Office 365, you will not be able to edit the account’s properties in the online administration portal. The status of the account in the online portal will also show Synched with Active Directory.
Additionally, you could either create a new local AD account and check that it gets synchronized to Office 365, or modify an attribute of an existing local AD account, such as Job Title.
Force Synchronization
Remember that synchronization occurs once every three hours, so if you don’t want to wait that long to verify synchronization is working, you can force synchronization on the Directory Synchronization server:
- Open DirSyncConfigShell.psc1 in c:\program files\windows azure active directory sync to load PowerShell with the directory synchronization cmdlets preloaded. I created a shortcut on the desktop to make access easier.
- In the new PowerShell window, type Start-OnlineCoexistenceSync and press Enter.
Sync Office 365 with AD: Licensing
Once your AD accounts are being successfully synchronized to Office 365, you should bear in mind that you will still need to manually assign licenses to new accounts.
Same Sign-on
Now that the Directory Synchronization tool synchronizes passwords to Office 365, it gives organizations that don’t want to manage Active Directory Federation Services a more convenience option and the ability to manage passwords between the corporate intranet and public cloud more effectively. Importantly, users won’t need to worry about either remembering two separate passwords for the same username on different systems, which can be confusing, or having to reset their Office 365 password when their local AD password expires.


