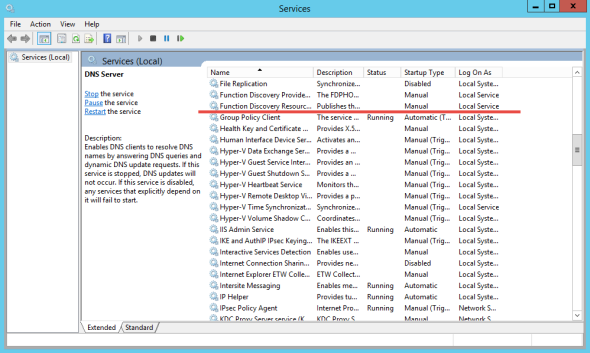
How to rename and hide Windows services
In some scenarios administrators may want to rename and hide Windows services to prevent local administrators from knowing that a specific product that’s installed on a specific computer. This may be true, for example, when using security products that are designed to follow the actions of end users. When those end users are also local administrators, then they have the required privileges needed to view running services and can even disable them from running next time the computer boots.
Sometimes you might need to keep certain Windows services hidden for security reasons. (Image: Dreamstime)
Such services may be related to antivirus programs, anti malware programs, tools designed to prevent USB and external storage device usage, software that records the actions of users, keyloggers that are installed on specific high-security workstations and others.
The procedure of making users into local administrators used to be well-known back in the time of Windows XP. Unless the users were also made local admins, then they had many issues when attempting to perform various system configurations. This problem was solved in Windows 7 and Windows 8 by using the User Account Control (UAC) feature, which basically lets users run in the context of a low-privileged user account by elevating permissions to administrative level only when needed.
Going back to the concept of this article, let’s assume that the security manager of a company is attempting to meet a new regulatory compliance and has decided to install a security product on all the computers used by privileged users in the company. In this example, Help Desk users are outsourced from a third-party contractor. This product installs a service on the users’ computers, and the security manager fears that some of the Help Desk users, being smart enough to know something was changed, will notice that this new service was installed on their computer. Assuming that these users may not like this idea, they may tamper with the service’s status to the point where they may stop or even disable it.
Rename and Hide Windows Services
One of the things that can be done — besides making sure all those cheeky users read, sign and reconfirm their commitment to the company’s corporate policies, if any exist — is to either rename the suspicious service to some unsuspicious name or completely hide the service altogether.
Note: Potentially, a user that has domain admin permissions may be able to work around these procedures. You may want to use extra security measures and auditing to protect yourself from these scenarios when you rename and hide Windows services.
The original service’s name is not important for the purpose of this article, which is why I masked the name in my screenshots.
Note: Please make sure you understand the implications of making such changes to SYSTEM SERVICES. Use with care and at your own risk. Also, please note that while this guide will probably work for all services, you’d better be safe than sorry, and when in doubt please contact the vendor of the third-party product and check whether this change will not affect or void their support agreement.
Warning!
This post contains instructions on how to edit the Windows registry file. Edit the registry at your own risk, and always back up the registry before making changes. If you edit the Windows registry incorrectly — or introduce typos or errors — you can potentially cause Windows to fail or be unable to boot, which might require a Windows reinstall. If you do not feel comfortable editing the Windows registry seek the help of a skilled IT professional to help you perform this task properly.
I will assume that the service should be renamed to “Generic Service.” You may choose any name.
Note: This procedure can be done locally or remotely. The steps outlined in this article describe local procedures. To make a change remotely, you may either use the same step to rename the service, but instead of opening the local registry, you connect to the remote computer’s registry. You can also use scripted approaches by using commands such as REG.
How to Rename a Windows Service
1. Log in to the computer using administrative credentials.
2. Open “Administrative Tools” and select “Services.”
3. Look for the <original service name> service.
4. Open REGEDIT, browse to:
HKEY_LOCAL_MACHINESYSTEMCurrentControlSetServices<original service name>
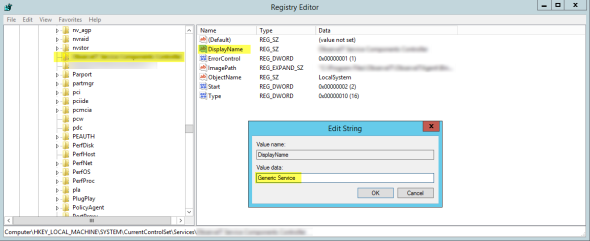
5. In the right pane, right-click on the “Display Name” value and select “Modify.” Change value to “Generic Service.”
Editing the Windows registry to rename a service. (Image: Daniel Petri)
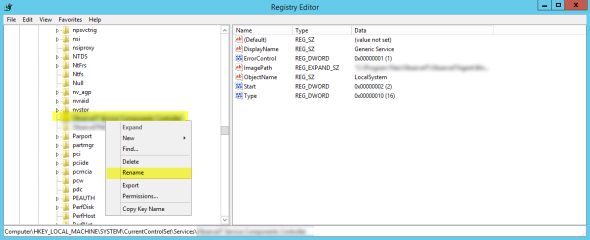
6. In the left pane, right-click on the <original service name> key and select “Rename.” Change value to “Generic Service.”
Renaming a service in Windows. (Image: Daniel Petri)
7. Reboot computer.
8. Log in to the computer using administrative credentials.
9. Open “Administrative Tools” and select “Services.”
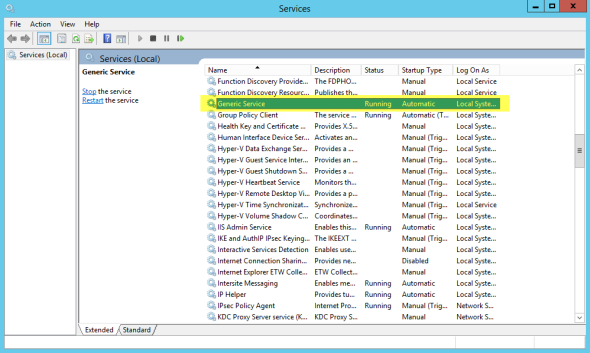
10. Look for the “Generic Service” service.
Searching for Generic Service on Windows. (Image: Daniel Petri)
How to Hide a Windows Service
1. Log in to a Domain Controller computer using domain admins credentials.
2. Open “Administrative Tools” and select “Group Policy Management.”
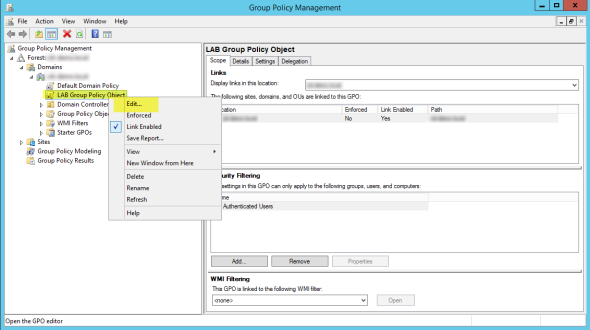
3. Expand the domain tree. Either create a new GPO, or edit an existing one. Note that the GPO must be linked to the OU level that contains the computer accounts where the specific suspicious service is installed. If you want to change this for the entire domain, use the Default Domain GPO or create a new one.
Creating or editing a Group Policy Object in Windows. (Image: Daniel Petri)
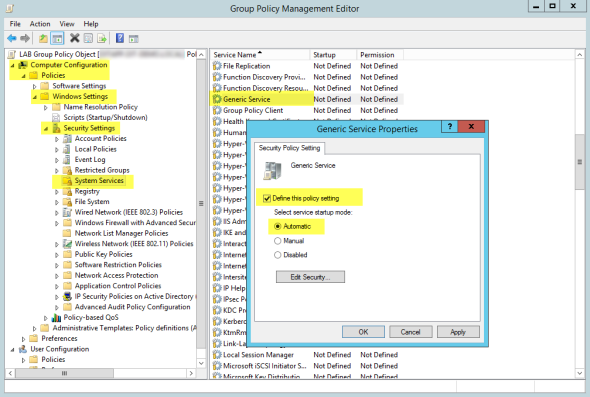
4. In the relevant GPO, expand Computer Configuration > Policies > Windows Settings > Security Settings > System Services.
5. In the right pane, double-click the “Generic Service.”
If the service does not appear in the list, you will need to do one of the following:
a. Install the specific service temporarily on the DC used to edit the GPO.
Or
b. Use “Group Policy Management” on a computer that already has the relevant service installed. You may need to also install the Microsoft Remote Server Administrative Tools (RSAT) on that computer, if not already installed. See site for instructions on how to do that.
6. In the “Generic Service Properties” window click to select “Define this policy setting.” Select “Automatic.”
Defining the group policy security setting in Windows. (Image: Daniel Petri)
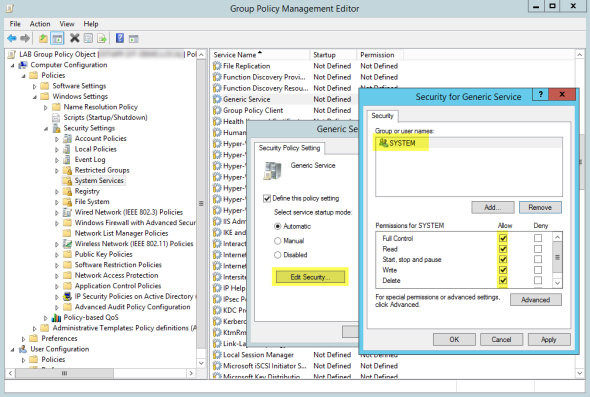
7. Click “Edit Security.”
8. In the security window, under “Group or user names,” click on the line for “Administrators” and press “Remove.” Also remove the “Interactive” line. Leave only “System” with the default full-control permissions.
The Group Policy Management Editor in Windows. (Image: Daniel Petri)
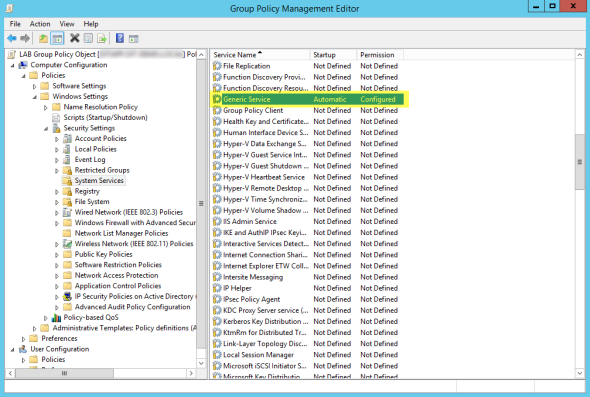
9. Click “OK,” then “Yes,” then “OK” again.
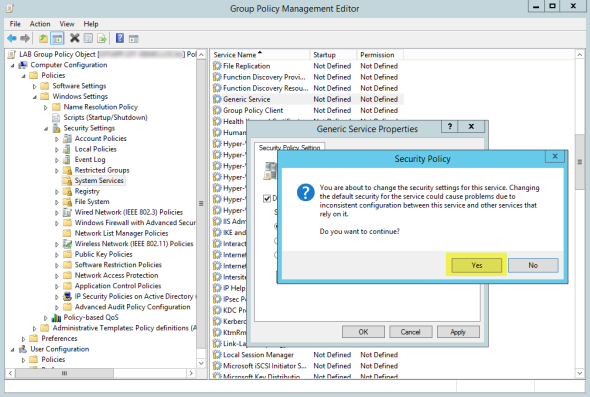
Group Policy Setting Confirmed in Windows. (Image: Daniel Petri)
10. Close the GPO editor, then close “Group Policy Management.”
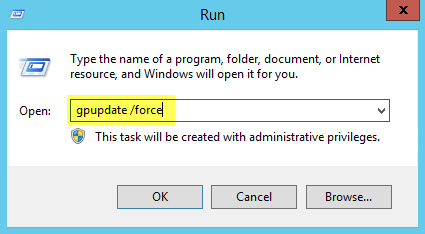
11. In the “Run” command, type the following command to refresh the policy:
Gpupdate /force
Running gpupdate /force in Windows. (Image: Daniel Petri)
12. Open “Administrative Tools” and select “Services.”
13. Look for the “Generic Service” service. You will not be able to find it anymore.
The Generic Service is successfully hidden. (Image: Daniel Petri)
Have you ever had to hide or rename Windows OS services for any other reasons? Share your experiences by adding a comment to this blog post.


