IT Governance with Azure Policy
Learn how to control the properties users can select when provisioning resources in the Azure cloud.
If you are like me and you regularly deploy servers and other resources in the Azure cloud, you’ll know how quickly things can get out of control if you share a subscription with a team. Azure Policy allows you to create rules that ensure resources conform to standards to remain compliant.
Azure Policy is a service that runs hourly and evaluates your resources to make sure they are compliant with your policies. For example, you could create a policy that limits users to creating virtual machines of a certain SKU size, which could help manage costs. Unlike Role-Based Access Control (RBAC), which controls the actions users can undertake in Azure, policies let you determine the properties that users can set when provisioning or updating resources.
Microsoft has created some built-in policies to help you get started but you can also create your own. As I outlined above, one of the built-in policies, Allowed Virtual Machine SKUs, lets you determine which VM sizes (SKUs) users can deploy. Another, Allowed Resource Type, lets you set what resource types can be provisioned. For example, you might allow users to deploy virtual machines but not backup vaults. Policies can be assigned to resource groups, management groups, and subscriptions.
Create a Policy Assignment
Let’s start with the basics and assign one of the built-in policies to an Azure subscription. If you don’t already have an Azure subscription, you can sign up for a free trial here.
- Log in to the Azure portal here with a Global Administrator account.
- Click All services in the top left corner of the portal window.
- In the Filter box, type policy and click Policy in the list of results.
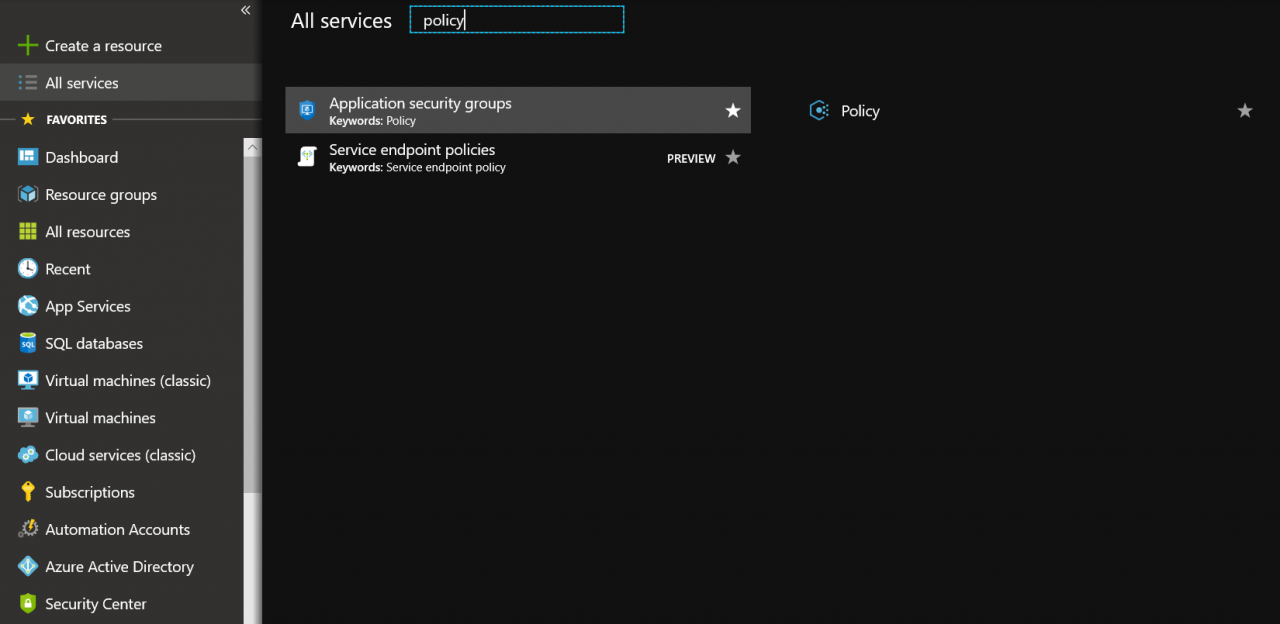
- On the Policy screen, click Assignments under Authoring.
- Click Assign policy.
- The first task is to assign the scope. I’m going to apply a policy to the entire subscription, which in my case is the Microsoft Partner Network. Optionally, you can exclude resource groups or individual resources. To change the default selections, click the blue icons to the right of the Scope and Exclusion boxes.
- Now let’s choose one of the built-in policies to apply to the selected scope. Click the blue icon to the right of the Policy definition field under BASICS. On the Available Definitions screen, type sku in the Search box. Click Allowed virtual machine SKUs from the list of results and then click Select.
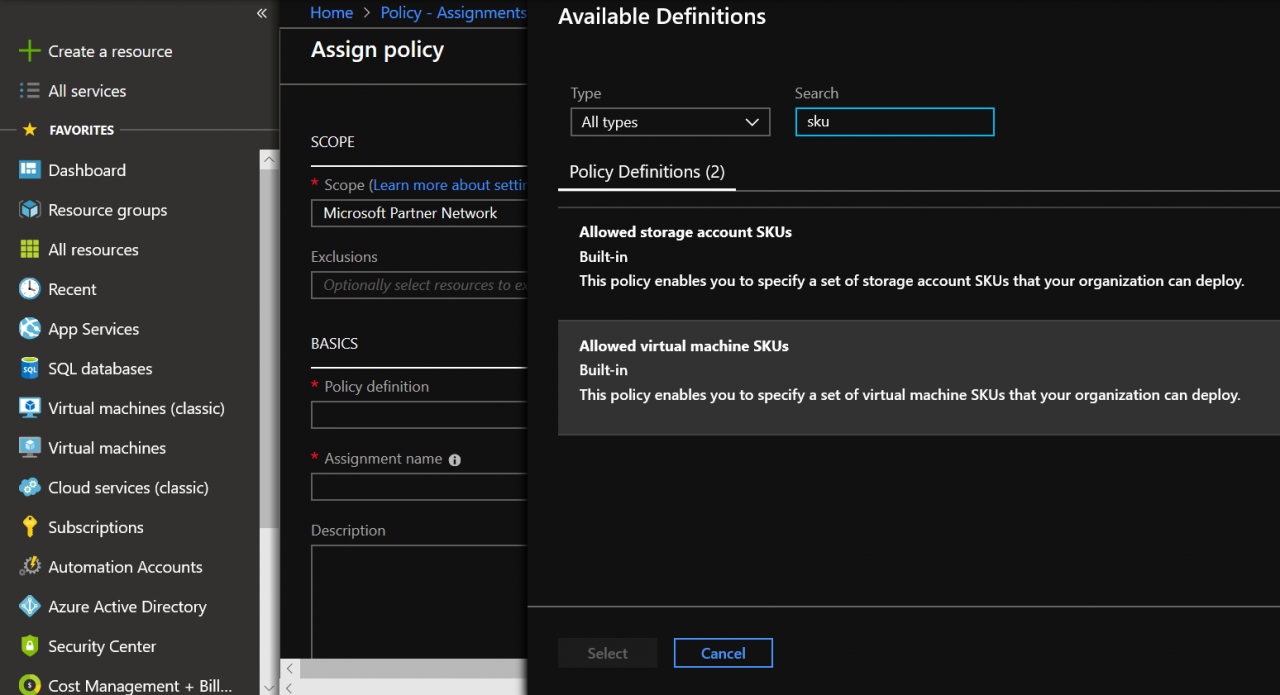
- Notice that the Assignment name field is automatically populated with the name of the chosen policy. You can change the assignment name if you like.
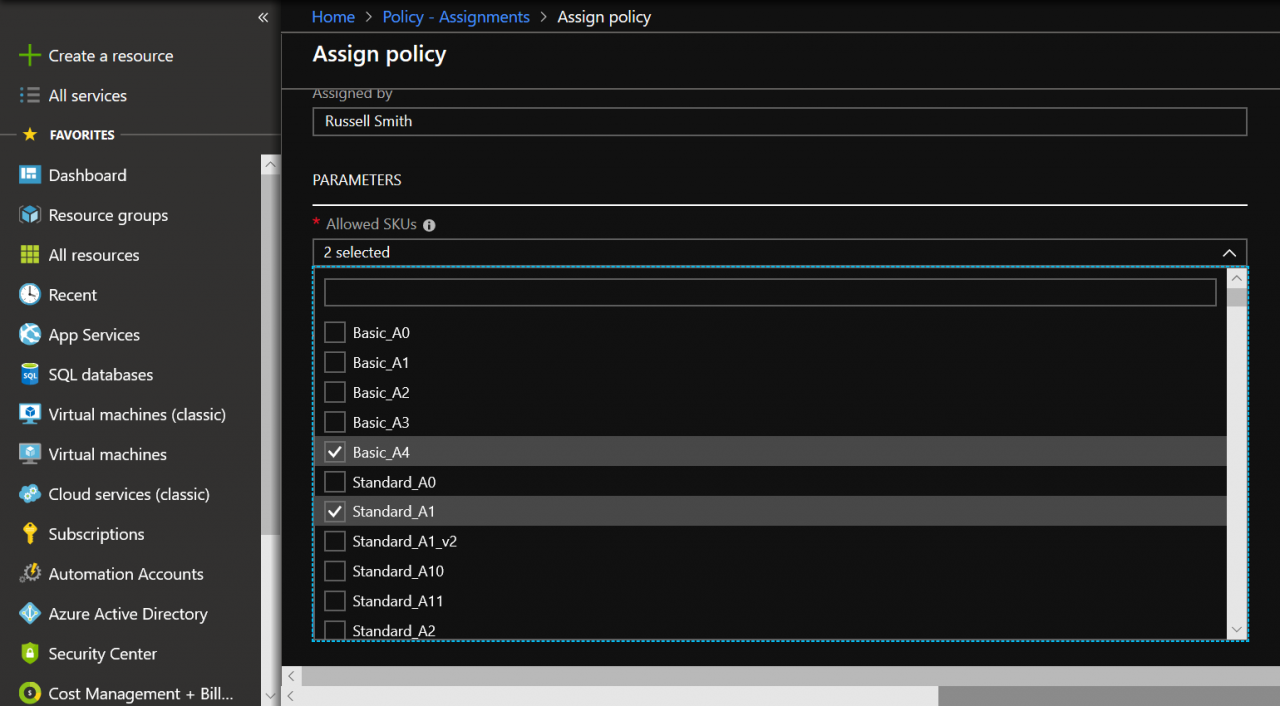
- Now the important part. Scroll down to the PARAMETERS section. Here you need to set the allowed SKUs by clicking the dropdown menu. Select the SKUs that you want to allow.
- Now click Assign to apply the policy assignment.
Within a few seconds, your new policy assignment should appear on the Policy – Assignments screen. Don’t forget that the policy assignment can take up to an hour to be applied. In the example above, users can provision VMs with only the Basic_A4 and Standard_A1 SKUs. If you click the menu to the right of the assignment and click View compliance, you can check if there are any resources that don’t comply with the policy assignment.
Create a New Policy
Now let’s create a custom policy. To create your own policy, you will need to be familiar with JSON. You can however download Azure Policy templates from GitHub. I’m going to show you two methods for creating policies. Using the first, you must write the JSON yourself. In the second, you go to GitHub, choose a sample policy template and import it into the Azure management portal.
Method 1 – Write Your Own JSON
Beginners should skip to method 2, it’s much easier if you don’t know your way around writing JSON templates for Azure.
- On the Policy screen in the Azure management portal, click Definitions under Authoring.
- Click + Policy definition.
- On the Policy definition screen, click the blue icon to the right of the Definition location box under BASICS. Select a subscription for the new policy and then click Select.
- Give the policy a name in the Name field.
- Click Use existing under Category and select a category using the dropdown menu. In this example, I’m going to select Compute.
- Azure policies are defined in JSON like Azure Resource Management (ARM) templates. Add your JSON code to the box in the POLICY RULE section and then click Save to commit the new policy.
The new policy will be ready in a few seconds to use in a policy assignment.
Method 2 – Import a Sample Policy Template from GitHub
In this example, I’ll import a sample policy template from GitHub that allows me to restrict the VM images that users can specify when provisioning VMs.
- Follow this link to sample Azure Policy templates on GitHub.
- Scroll down to the list of folders and click samples.
- Now click the Compute
- Now click the allowed-custom-images
- Scroll down to the README.md section of the page and click Deploy to Azure under Try with Azure Portal. You will be automatically redirected to the Azure management portal.
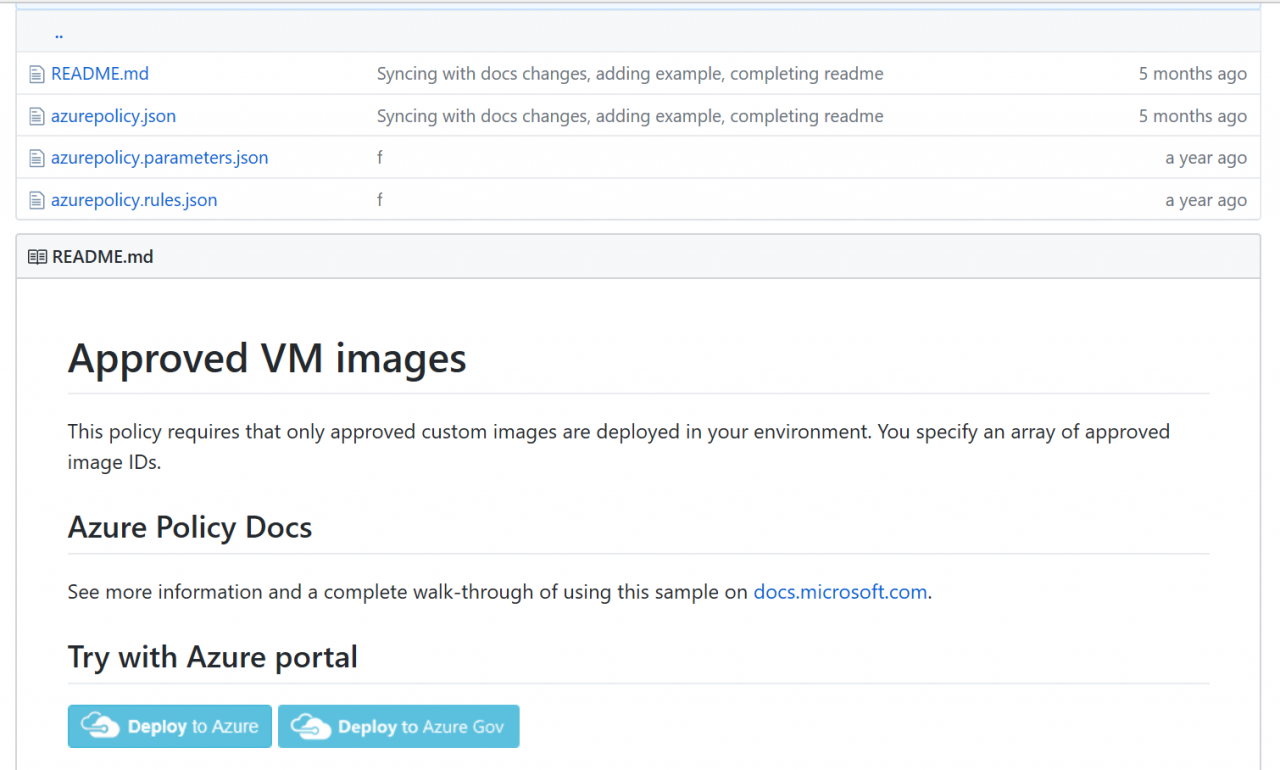
- On the Approved VM Images policy definition screen in the portal, click the blue icon to the right of the Definition location box under BASICS. Select a subscription for the new policy and then click Select.
- Click Use existing under Category and select Compute from the dropdown menu.
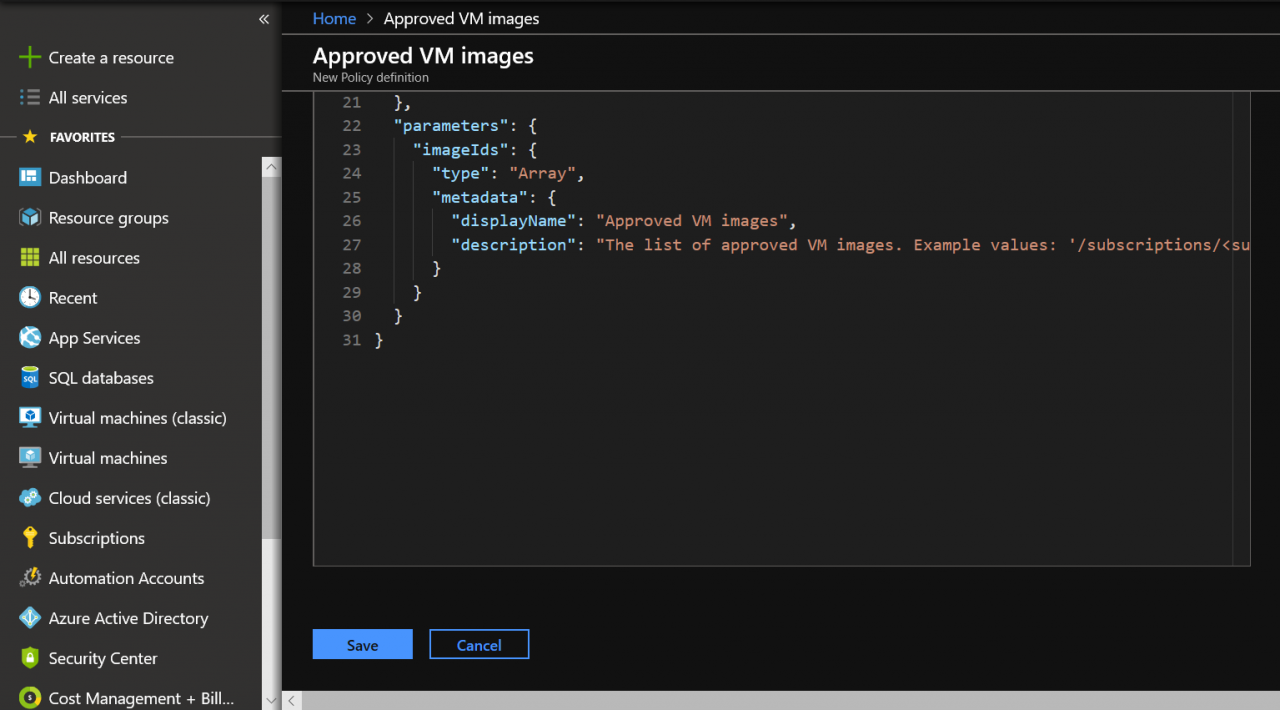
- Under POLICY RULE, you’ll see the JSON code has already been imported into the box from the GitHub template. Now all that is left to do is click Save at the bottom of the screen.
The new policy will be ready in a few seconds to use in a policy assignment.


