How to Import PST Files to Office 365

As an IT pro, the process of exporting users’ mailboxes to PST is rather straightforward. However, importing PST email and calendar items into new mailboxes can be tricky. In this article, I will detail how to import PST files to Office 365 using either Outlook or the Microsoft Purview Compliance portal and Azure AzCopy.
How to import PST files to Office 365: Before you start
PST files are personal storage files that are used to store Outlook data, such as emails, contacts, and calendars. If you have PST files that you want to import into Office 365, perhaps from a company merger or acquisition, there are a few different ways to do it.
In any case, you’ll want to move the information in these PST files into Exchange Online as soon as possible. PST files can become corrupt somewhat quickly – for this reason, it’s not safe to use PST files for long-term email storage. Also, PST files are generally local on a user’s computer. If that device is broken or stolen, your emails are gone!
One way to import PST files to Office 365 is to use the Import/Export Wizard in Outlook. I’ll explain how to do this in the next section. However, a more robust method to import PST files to Office 365 is to use the Microsoft Purview Compliance portal and a nifty little tool called Azure AzCopy. This method is preferred, especially for more significant imports with many employees or PST files. I’ll demonstrate how this works in the 2nd section below.
Import PST files to Office 365 with Outlook
A quick and easy method to import a PST file from a user’s mailbox to Office 365 is to use the Outlook desktop application. This isn’t preferred as you need to have direct (or remote) access to Outlook on the computer in order to accomplish this.
From an IT pro’s perspective, the ideal scenario is performing these steps “administratively.” However, why not show you the ropes because we’ve been doing these steps for decades?
- To start, make sure you’re in Outlook and you have access to said PST file.
- Then, click File -> Open & Export -> Import/Export.
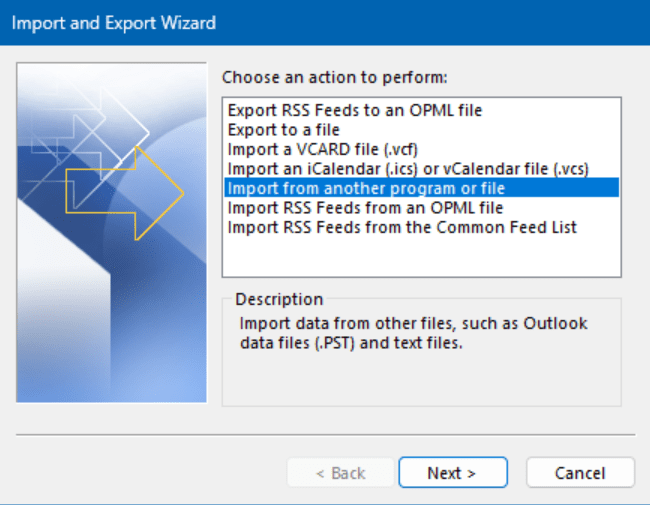
- From the initial screen select Import from another program or file and click Next.
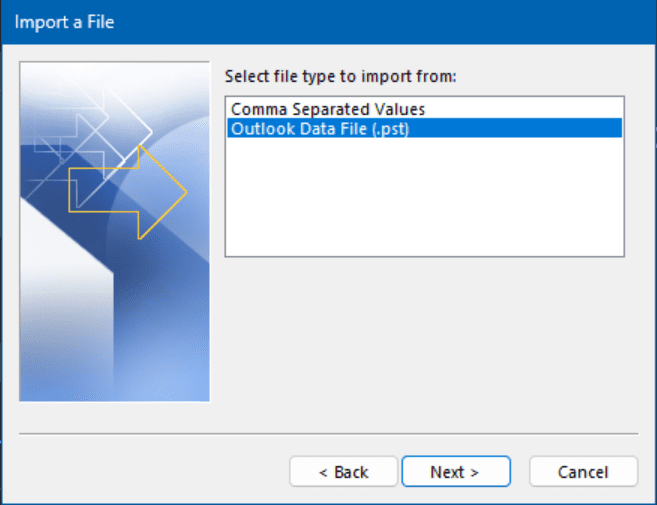
- Select Outlook Data File (.pst) and click Next.
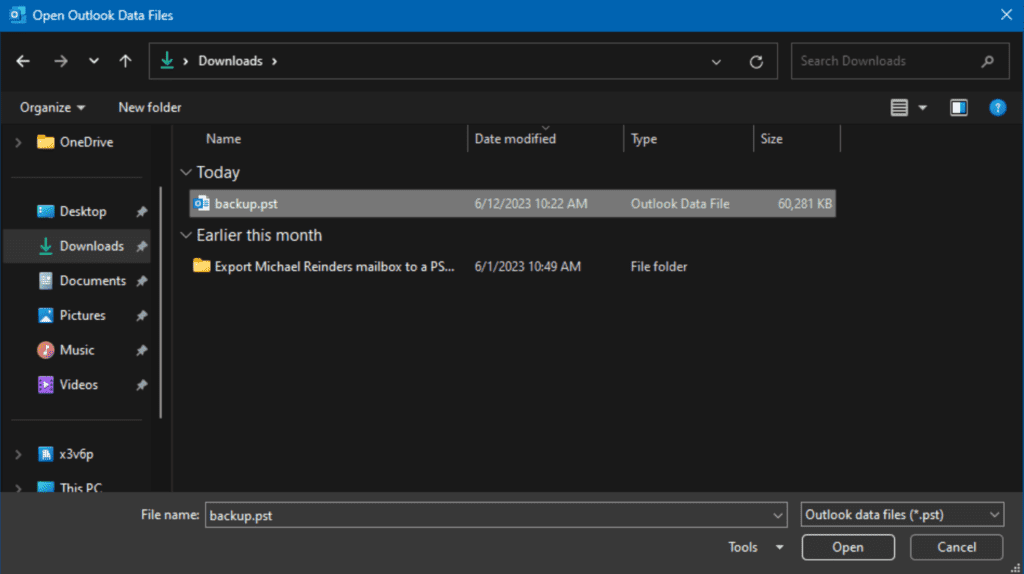
- Now, on the ‘Import Outlook Data File‘ screen, click the Browse button and find your PST file.
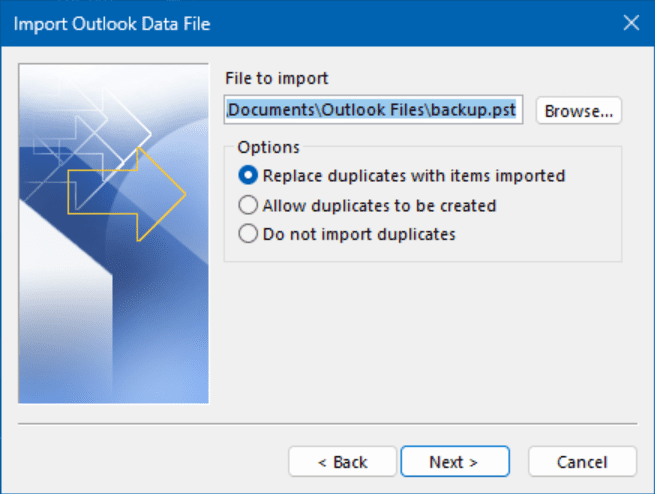
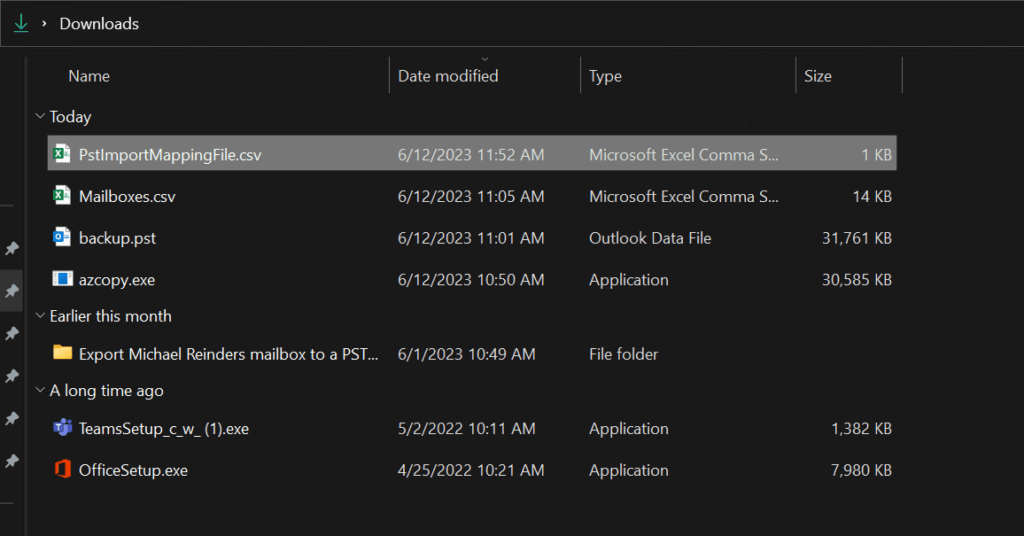
- Here, I’m selecting the backup.pst file I want to import.
- Next, at the ‘Select the folder to import from:‘ you’ll most likely want to choose the ‘root’ of the tree, right at the top. Most often, you will want to keep ‘Include subfolders‘ checked. Then, verify you want to import the items directly into the user’s primary mailbox – ‘Import items into the same folder in:‘.
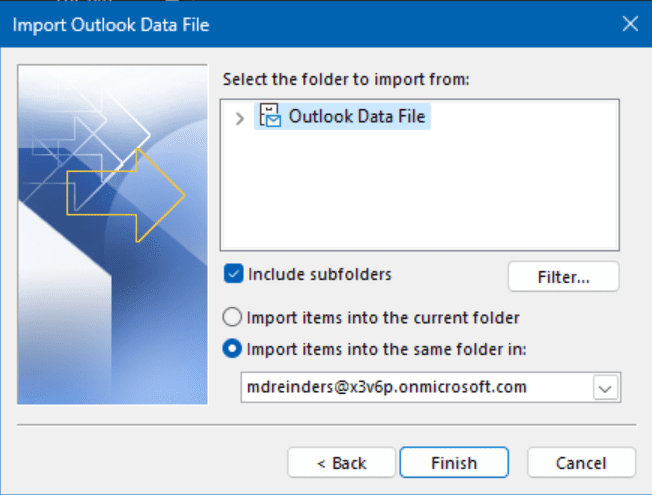
Note: You can also import these items into the archive mailbox by choosing it from the dropdown meny. However, you should note that you can expand the file and only choose Calendar items, Emails, or even Contacts if you have more granular needs.
- Click Finish and everything will be imported in.
Be advised, if you have a multi-gigabyte file, it could take a while. If it will take more than a few moments, you’ll get a somewhat-helpful progress window.
Import PST files to Office 365 in bulk with Microsoft Purview and Azure AzCopy
The much preferred and robust method is using the Microsoft Purview Compliance portal and Azure AzCopy. Azure AzCopy is a command-line tool that can copy data to and from Azure storage. It can also be used to import PST files into Office 365… Isn’t that a coincidence?
Let’s go through the steps to creating an import job, uploading the PST files, and then mapping them to individual mailboxes.
Preparation
Before we proceed, we need to add some permissions and admin roles to my account. By default, no users or admins are assigned the Mailbox Import Export role, even Global Administrators. Let’s get this out of the way first.
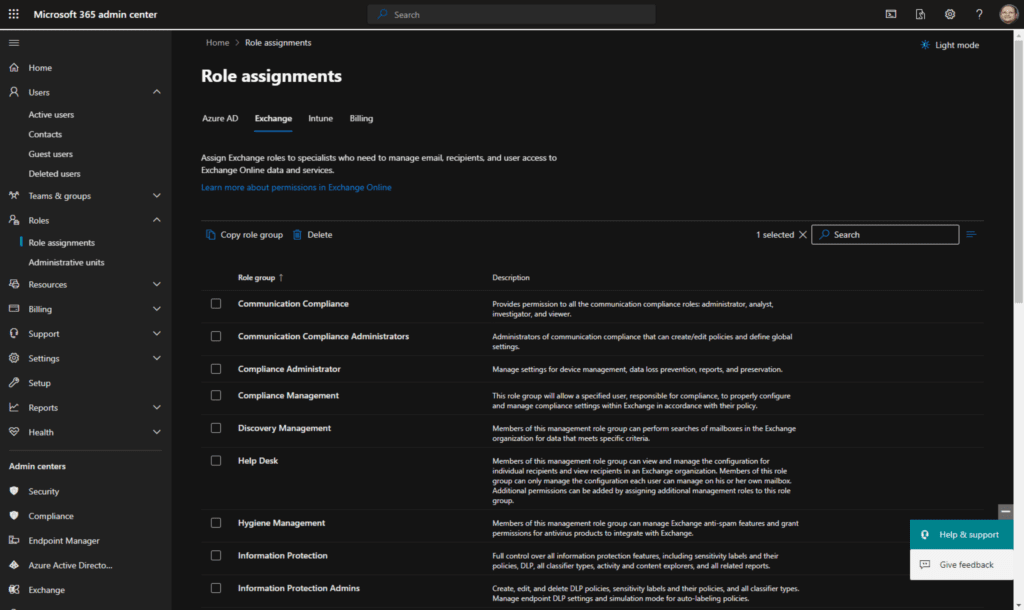
- First, we’ll log in to the Exchange Admin Center. Under the Roles category on the left, expand it, then select Role assignments. Next, select the Exchange tab on the top.
- Now, scroll down and find Organization Management and click on it.
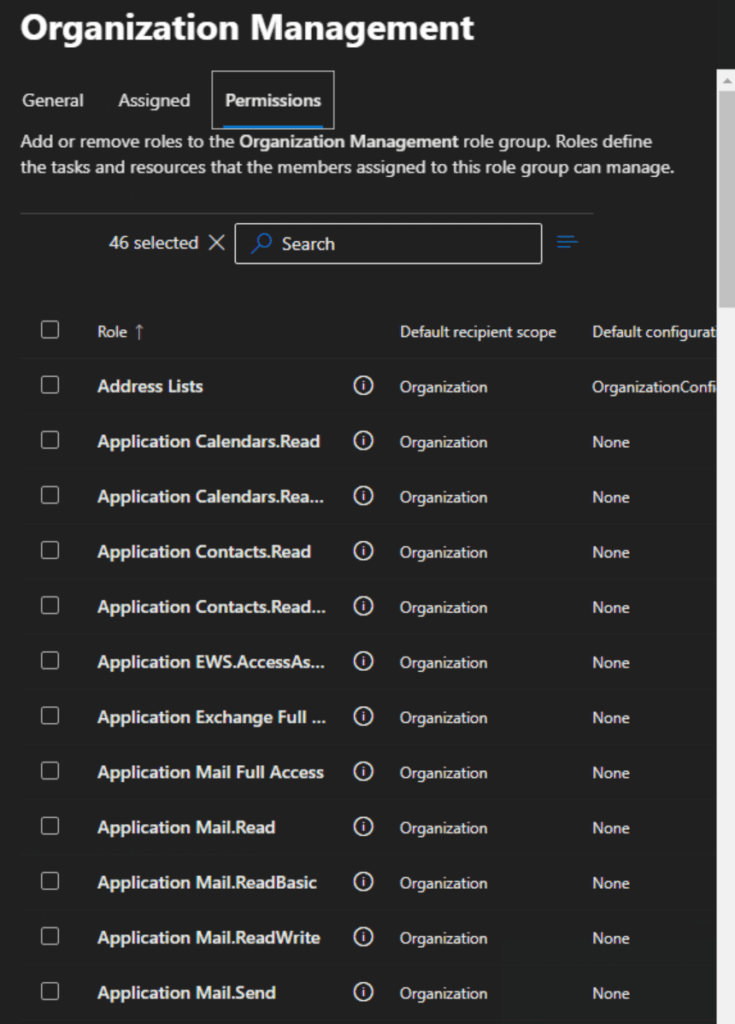
- Click the Permissions tab on the top, scroll down in the Role list and find Mailbox Import Export. Select it and click Save.
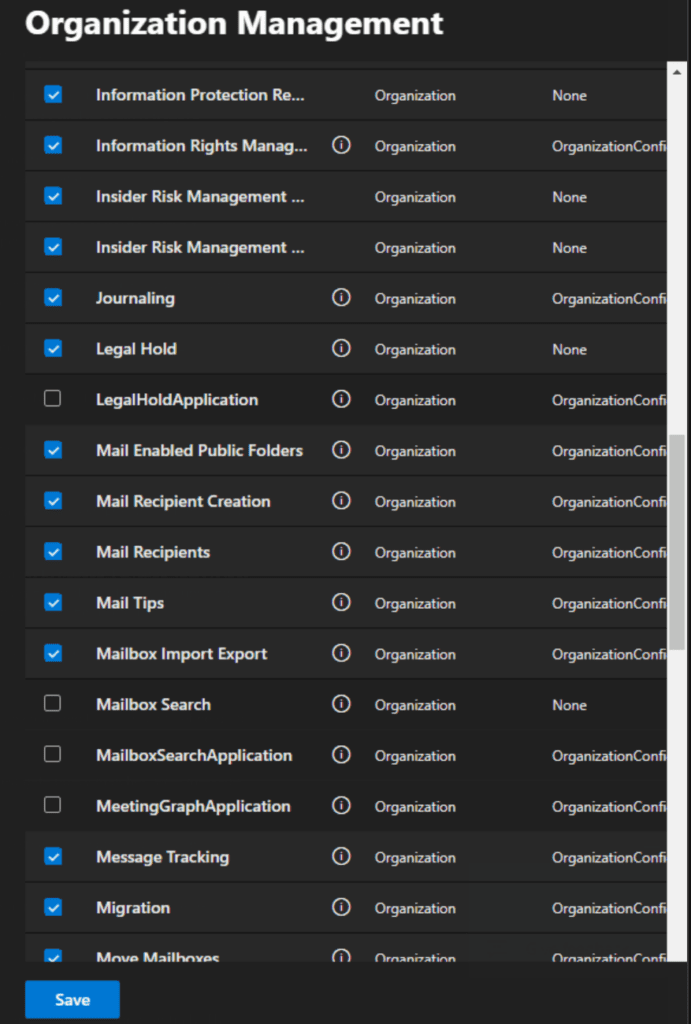
Now, members of the Organization Management role group will have the necessary permissions for creating an import job!
Obtaining the SAS URL and downloading AzCopy
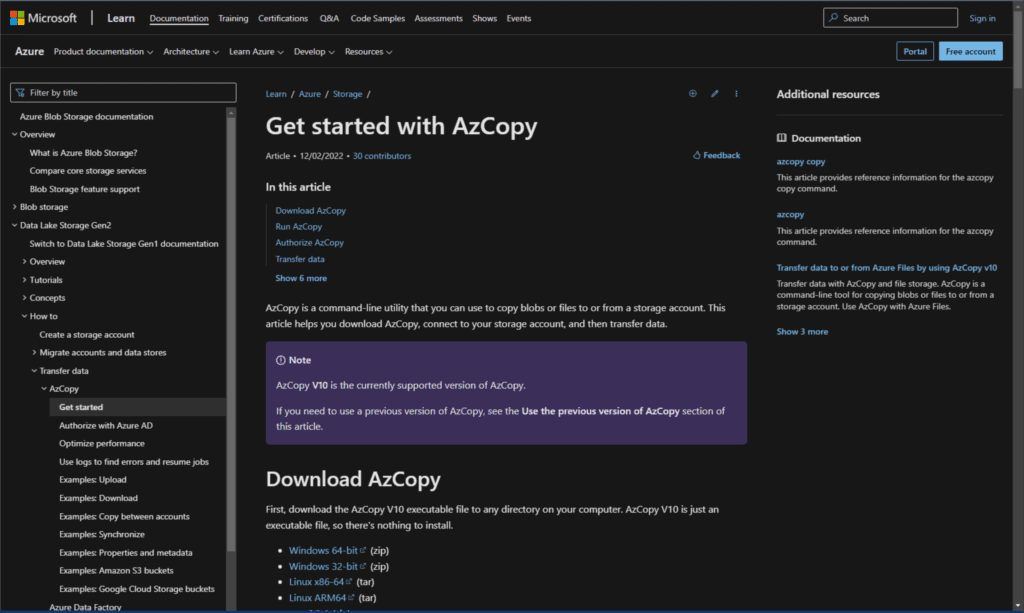
The next step now is to download the AzCopy tool. This will be used to upload our set of PST files to Office 365. You also need to copy the Blob container SAS URL for your organization. This will be used later on, so make sure it’s on your clipboard history or written down elsewhere.
- First, let’s download AzCopy. You can get it from the Microsoft Learn website. After downloading it, unzip it in Windows and proceed.
- Next, we will go to the Microsoft PurView Compliance Center homepage.
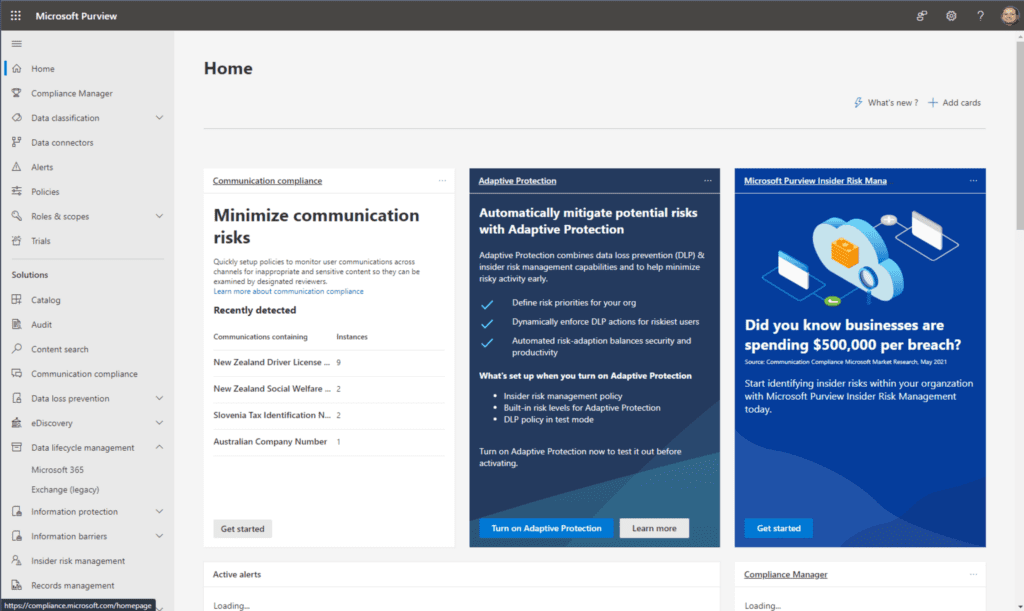
- On the left, expand ‘Data lifecycle management‘ under Solutions. Then, click Microsoft 365.
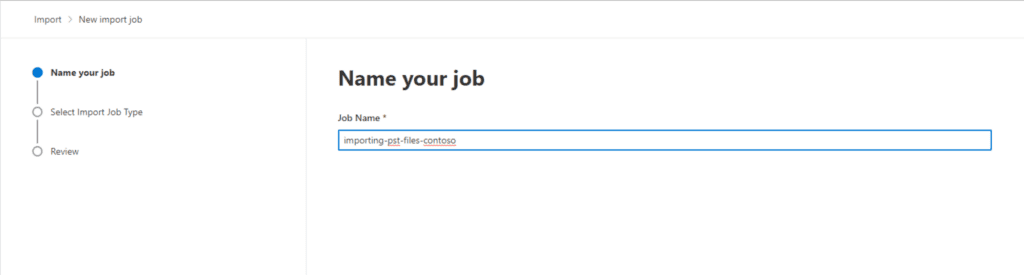
- Click the Import tab on the top and click the ‘+ New import job‘ button.
- First, we’ll name our job and click Next. Be sure to adhere to the requirements in red.
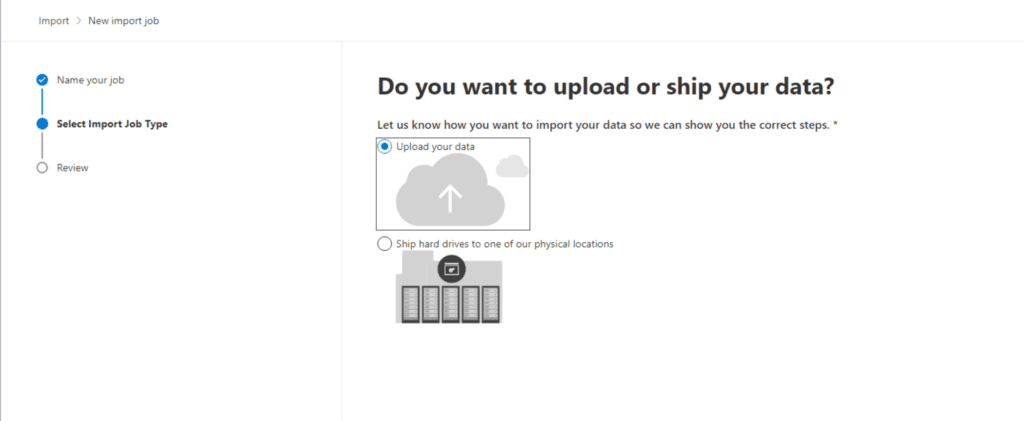
- On the ‘Select Import Job Type‘ screen, keep Upload your data selected and click Next.
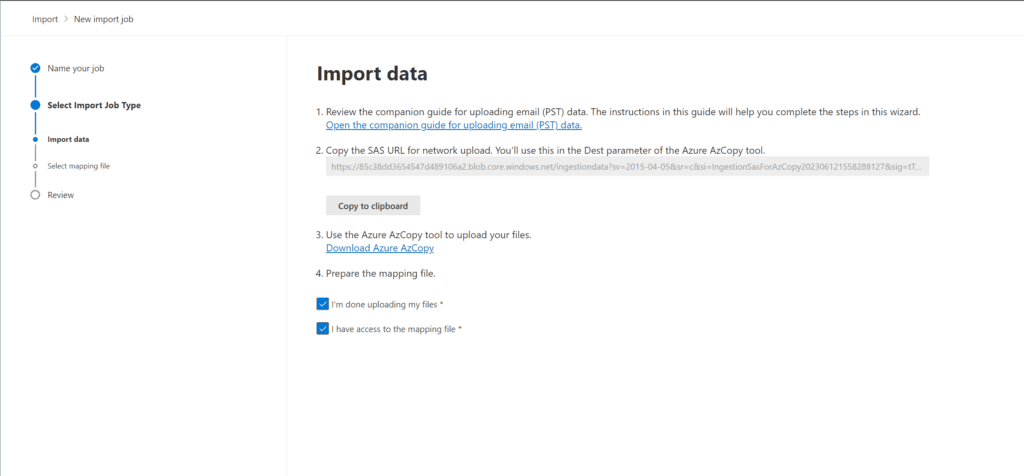
- On the Import data screen, we will first click the ‘Show network upload SAS URL‘ and save it to our Clipboard.
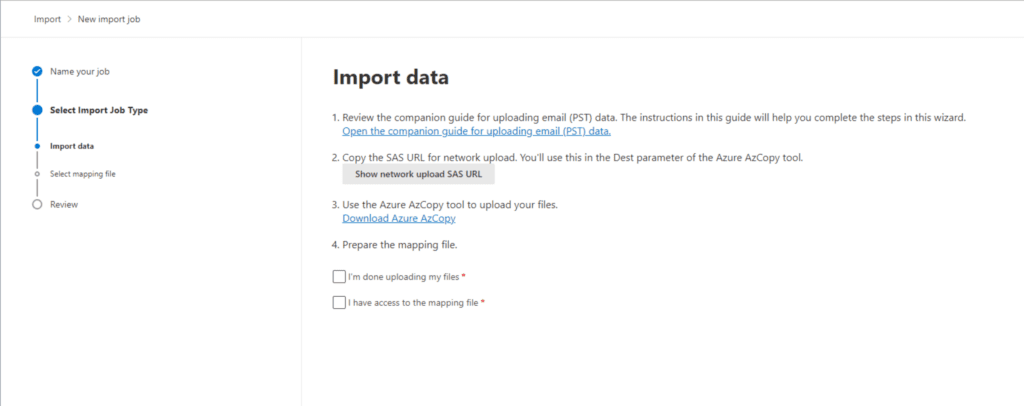
We’ve already downloaded AzCopy, so we can now move forward.
Uploading PST files using the Azure AzCopy tool
We are now ready to use AzCopy to upload our PST files to Office 365. The command-line tool will upload the PST files to an Azure Storage location in the Microsoft cloud. This specific location is located in the same regional Microsoft data center where the rest of your organization’s data is stored.
- Open your favorite shell and start a command prompt.
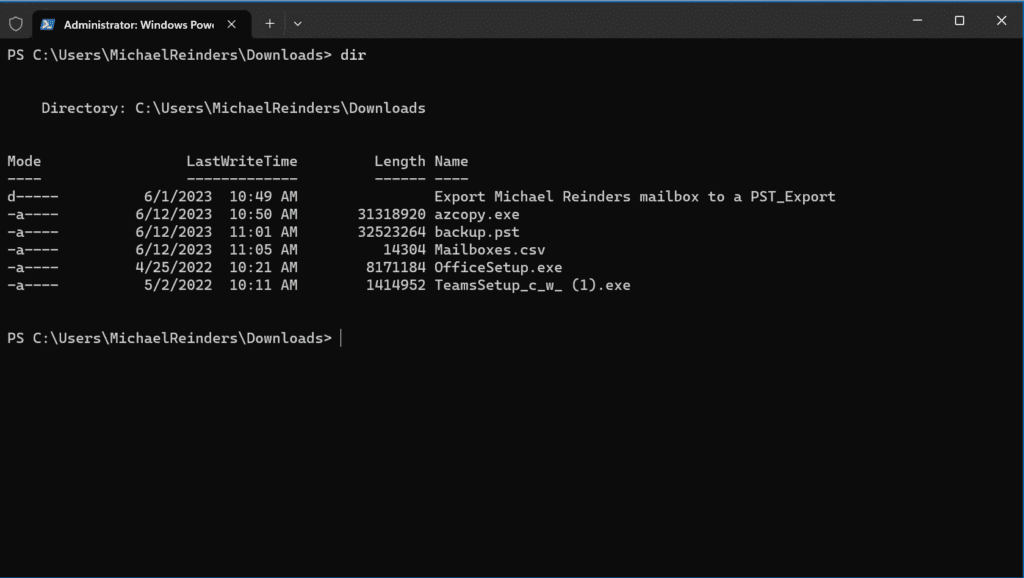
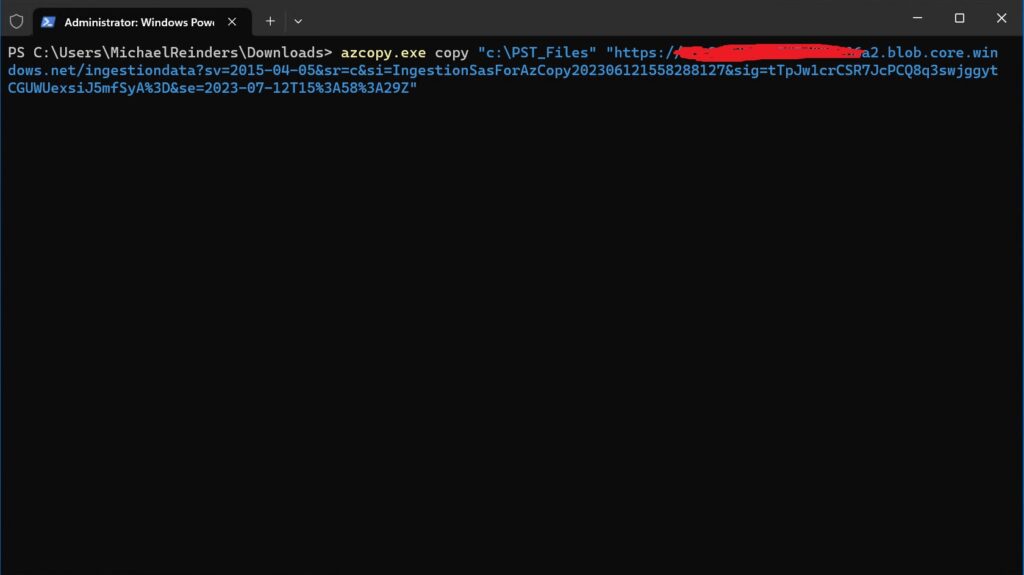
- Change to the folder where you have azcopy.exe. We will then run a variation of this command:
azcopy.exe copy "<Source location of PST files>" "<SAS URL>"
Here, I will enter it as follows:
azcopy.exe copy "c:\PST\*" "https://randomnumbersremoved.blob.core.windows.net/ingestiondata?sv=2015-04-05&sr=c&si=IngestionSasForAzCopy202306121558288127&sig=tTpJw1crCSR7JcPCQ8q3swjggytCGUWUexsiJ5mfSyA%3D&se=2023-07-12T15%3A58%3A29Z"
- After running this command, 2 files were uploaded.
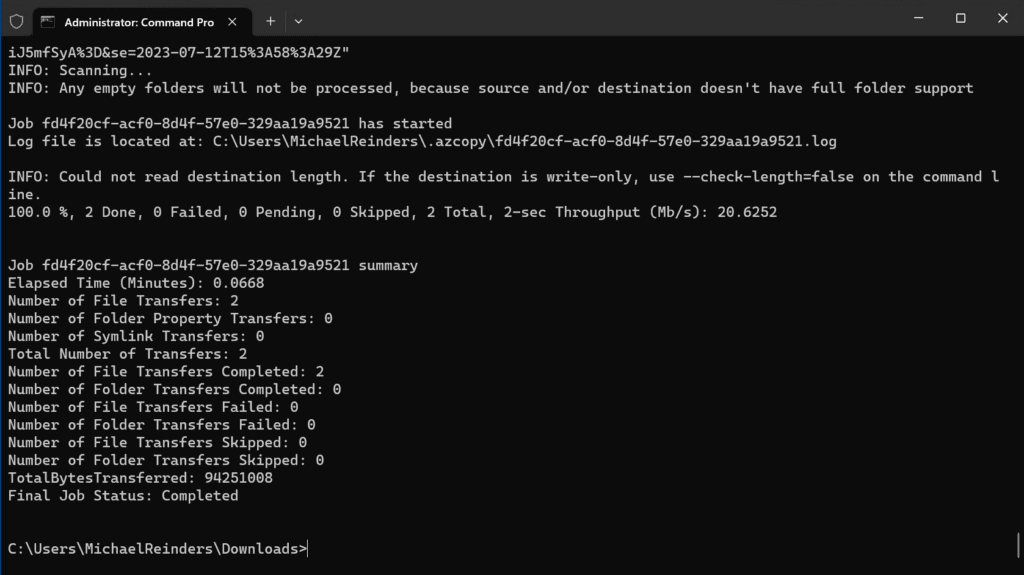
Next, we will coordinate and specify the two users to receive these PST files.
Mapping the PST Files
Now, we will work on mapping the uploaded PST files to the users’ mailboxes. This is accomplished by downloading a PST import mapping file, filling it out, then we’ll upload it during the next step, which is the creation of the Import job.
- First, download the mapping template CSV file from this link.
Filling this out for a handful of mailboxes is pretty easy. And, for larger environments, I’m sure you could use the power of Excel to make this work for a thousand mailboxes or more. Anyway, I have set the file thusly:
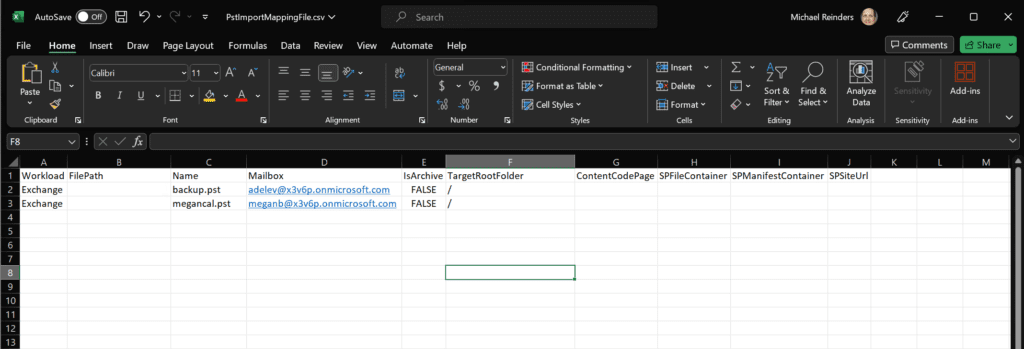
- Here, the Workload column is Exchange. This tells the job to use Exchange Online.
- The FilePath column is blank as the PST files were uploaded to the root of the Azure Storage location. If you happen to use Azure Storage Explorer to move them elsewhere, this is where you would specify it.
- The Name column contains the case-sensitive name of the PST file. You really need to double-check this – this is a common cause of errors during the import job.
- The Mailbox column contains the email address of the user you want the PST file to be imported to.
- Finally, the TargetRootFolder column specifies what mailbox folder you want the items to go to. If you leave it blank, all the items will be brought into a new folder at the root level of the mailbox called ‘Imported.’ Here, I am specifying ‘/’, which means items will simply drop into their respective folders.
- Calendar entries will go directly into the Calendar section of the mailbox.
- If you had emails in Sent Items, they would simply populate right into the Sent Items folder.
- Emails in the Inbox will move right to the new mailbox’s Inbox.
You definitely want to TEST this on a mailbox or two to make sure items go where you want them to go!
Complete the Import job
We can now resume the Import Job we started earlier.
- At the Import data screen, we can now check both checkboxes: ‘I’m done uploading my files‘ and ‘I have access to the mapping file‘.
- On the Select mapping file screen, click the ‘+ Upload file‘ button, browse to the modified ‘PstImportMappingFile.csv’ file, and then click the Validate button.
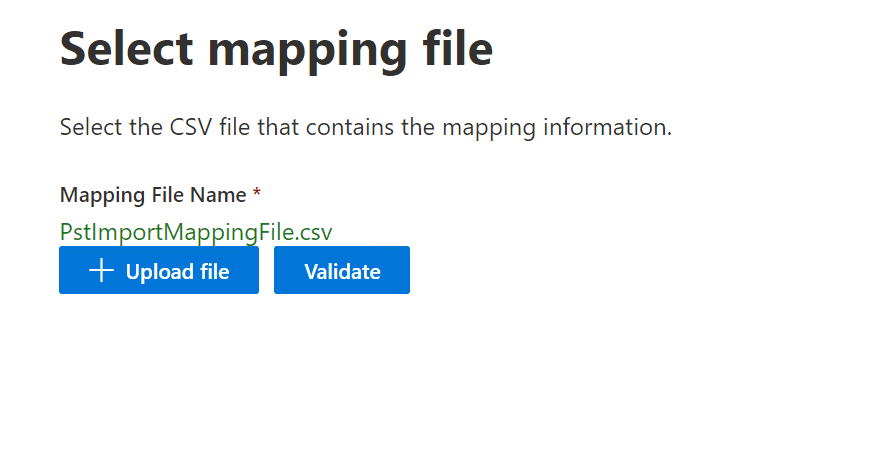
- If the text is ‘Green’, the trap is clean! (Ghostbusters). Anyway, click Next.
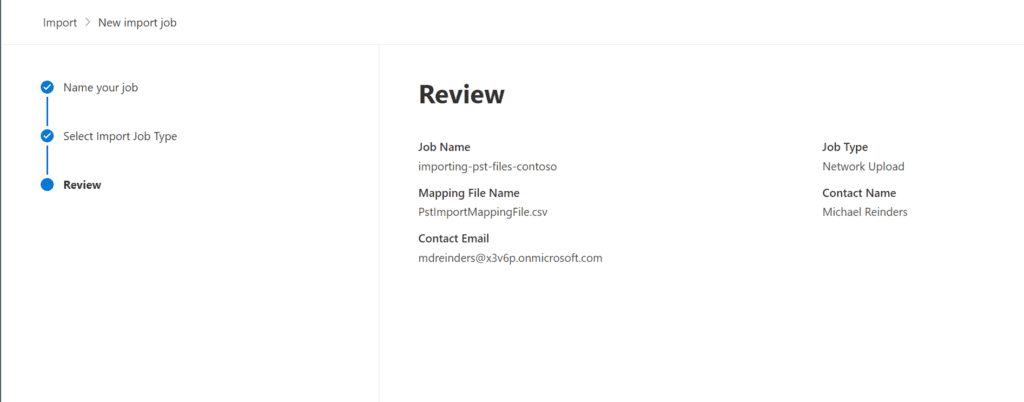
- On the Review screen, click Submit.
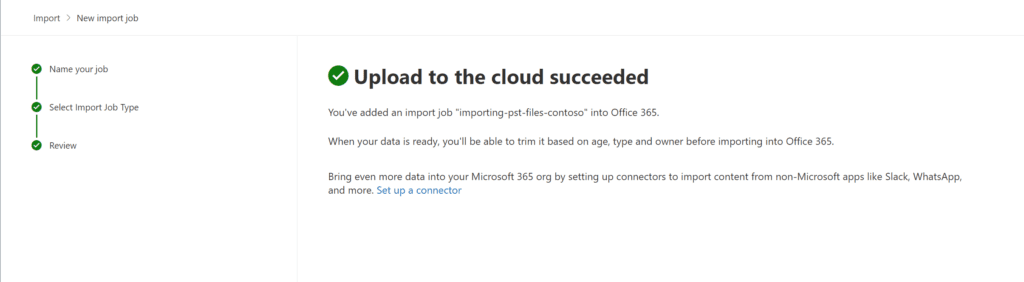
- The upload has succeeded. Now, let’s have a look at the progress…
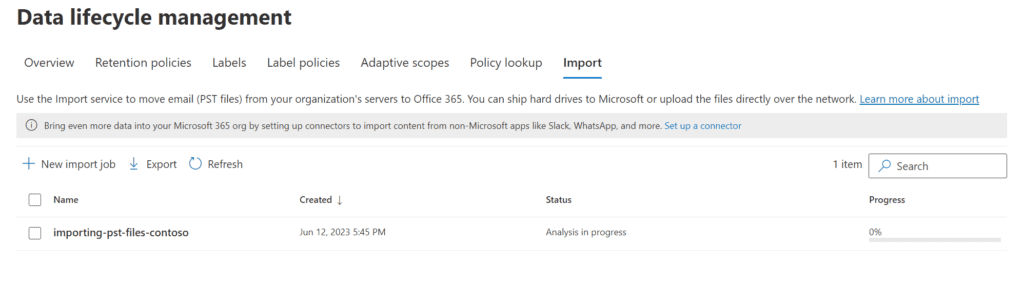
- After the imported data is analyzed, it will show as completed. Next, select the import job, then click the toolbar button ‘Import to Office 365‘.

- The data is safely and securely analyzed to verify its age. You can now choose to filter any of the data or allow it to import everything. I will choose ‘No, I want to import everything‘ and click Next.
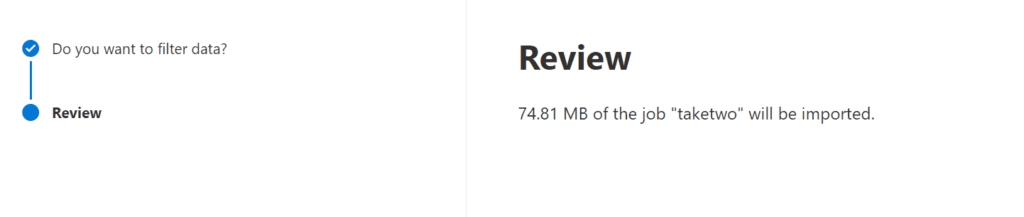
- On the Review screen, please click Submit. The actual import of items from the PST files into the user mailboxes will now proceed. This can take a long time to complete, so please be patient. I did a few spot-checks and logged into Megan’s mailbox to see her Calendar items right where they should be!
Common issues when importing PST files to Office 365
There are a few issues you may run into when going through this process. Let me list out a few here.
- Errors during import. As I mentioned briefly earlier, the CSV mapping file needs to be set up exactly as specified. The most common error encountered is the case sensitivity of the PST filenames. If you aren’t careful here, the final step (importing into Office 365) will fail.
- Maximum message size. The default maximum message size in Office 365 is 35MB. Although you can change this setting on a user or tenant-wide level, during the import you may run into issues. Be sure to check each user’s mailbox settings BEFORE you run your import(s).
- Import job becomes stuck or runs very slowly. The ingestion rate of the Microsoft 365 Import service to import a PST file into a mailbox is approximately 24 GB per day. This rate is typical, but it cannot be guaranteed because the Import service runs in an environment that is shared by multiple tenants. If your import job is processing slowly or appears to be stuck, the PST file might be larger than the maximum recommended size of 20 GB.
- Import job fails with “MapiExceptionShutoffQuotaExceeded” error: This error occurs when the total size of the PST files that are being imported exceeds the available quota for the target mailbox. To resolve this issue, delete unnecessary data from the PST files before importing them.
Alternative methods to import PST files to Office 365
For the record, there are 3rd-party options available for importing PST files into Office 365. Here are two somewhat popular migration tools you can look into and decide if they may be right for your organization’s needs.
Whichever method you choose, importing PST files into Office 365 is a great way to keep your data safe and accessible. Whether you run a small shop or a large, multi-national enterprise, the methods here will assist you in transferring a new batch of acquired employees into your organization, seamlessly and safely.
Additional recommendations for importing PST files to Office 365
Here are some additional tips for importing PST files to Office 365
- Make sure that your PST files are compatible with Office 365. Some older PST files may not be compatible, and you may need to convert them before you can import them.
- If you have a large number of PST files, utilizing Microsoft PurView is highly recommended. Migration tools can import PST files more quickly than the Import/Export Wizard.
- Be sure to back up your data before you import it. This will help to protect your data in case something goes wrong during the import process.
That’s it! Thank you for reading, please leave a comment or question below if you need more information.
Related Article:

Michael has been an IT Pro since 1998. He has worked predominantly in the Windows world including client and server operating systems, on-prem systems engineering (AD, DNS, etc.), and over the last ten years or so has embraced and immersed himself in...


