How to Disable Hyper-V Completely in Windows 10

In this article, I will show you how to completely disable Hyper-V in Windows 10.
Disable Hyper-V in Windows 10 (Windows feature)
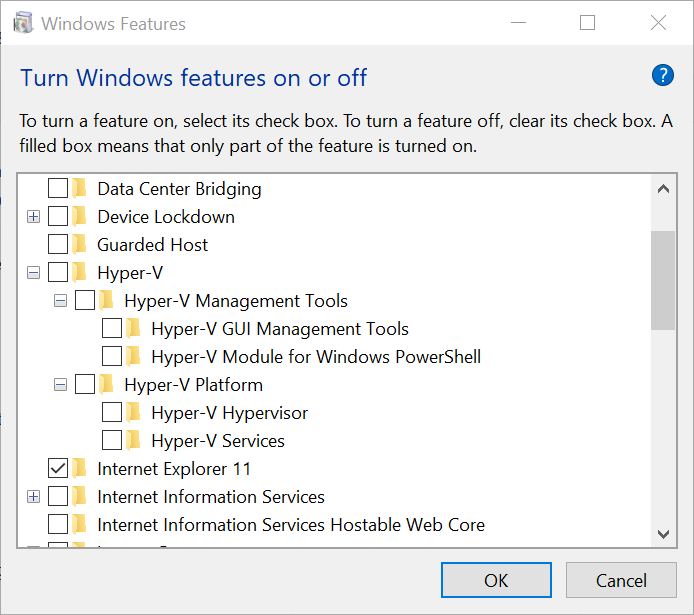
Hyper-V is an optional feature in Windows 10 that can be used to run virtual machines (VMs) and perform other virtualization duties, such as supporting Credential Guard and Windows Sandbox. Like all Windows 10 features, you can add or remove Hyper-V using Turn Windows features on or off in the Programs and Features applet of the legacy Control Panel, PowerShell or DISM.
Enable-WindowsOptionalFeature -Online -FeatureName Microsoft-Hyper-V -All

DISM /Online /Enable-Feature /All /FeatureName:Microsoft-Hyper-V
Or remove it.
Disable-WindowsOptionalFeature -Online -FeatureName Microsoft-Hyper-V-Hypervisor -All

DISM /Online /Disable-Feature:Microsoft-Hyper-V

But sometimes running these commands, or removing Hyper-V via the Control Panel, isn’t enough to disable the hypervisor. In most cases, leaving Hyper-V in place isn’t going to affect your system. But one scenario where Hyper-V must be removed is when running a type-2 hypervisor, like Oracle VirtualBox.
As a type-1 hypervisor, Hyper-V blocks access to virtualization hardware for all other hypervisors. So, software like VirtualBox can’t run 64-bit guest VMs on your PC while Hyper-V is installed. Although you could run 32-bit VMs because VirtualBox uses software virtualization for 32-bit guests as opposed to the hardware virtualization technology it uses for 64-bit VMs.
Check Hyper-V status using systeminfo.exe
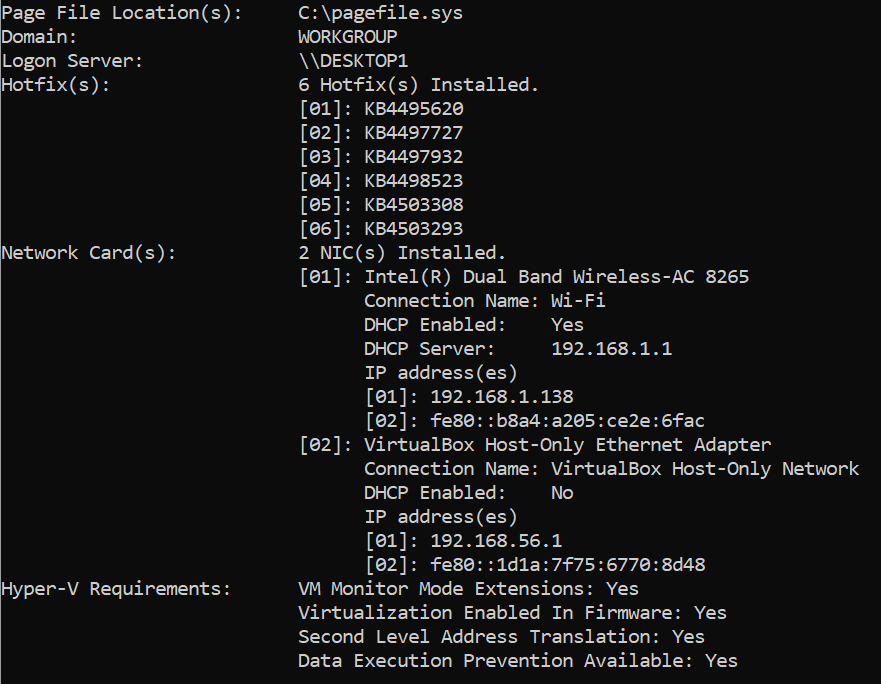
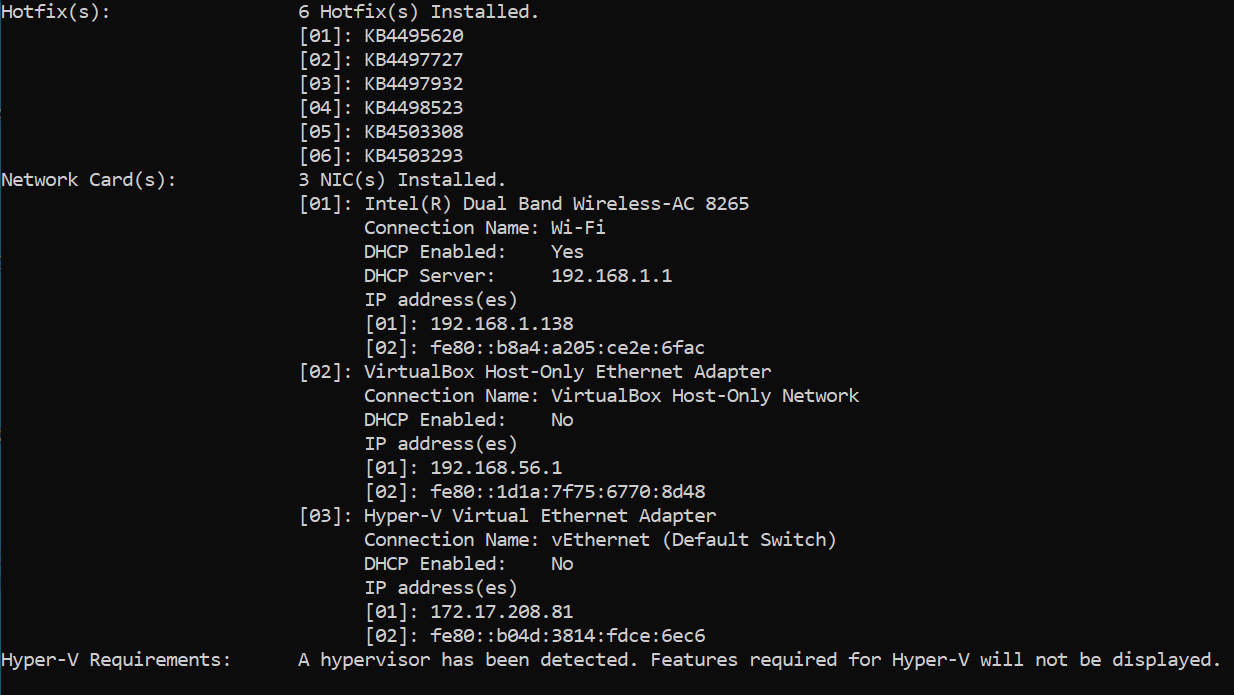
First, disable Hyper-V in the Control Panel; or using PowerShell or DISM. You might want to also disable other features that rely on Hyper-V, like Windows Sandbox. Next, check whether Hyper-V is still installed on the system using the systeminfo utility in a command prompt. Even if PowerShell, DISM, or the Control Panel show that Hyper-V has been removed, it’s not a fact that it has actually been disabled.
systeminfo.exe
If Hyper-V is disabled, you’ll just see a list of technologies that are required for Hyper-V to run and whether they are present on the system. In this case, Hyper-V is disabled, and you don’t need to do anything further.

If instead you see ‘A hypervisor has been detected. Features required for Hyper-V will not be displayed’, that means Hyper-V is enabled on the system. Removing the Hyper-V feature should be enough but if Secure Boot is enabled, you’ll be prevented from removing Hyper-V because some Windows security features depend on virtualization.

How to Temporarily Disable Secure Boot
To work around this issue, temporarily disable Secure Boot. How you access UEFI settings is system dependent but it usually involves rebooting and pressing a designated key when the system starts, like F12 or ESC. In the UEFI settings, if the system supports Secure Boot, you should find an option to turn it off.
Once you’ve disabled Secure Boot, restart the system. And then restart it again. Now check the status of Hyper-V using systeminfo.exe. You should see that Hyper-V has been disabled. Reboot once more and reenable Secure Boot.
Changing Hyper-V Launch Type using BCDEDIT
If removing Hyper-V, Windows features that depend on Hyper-V, and temporarily disabling Secure Boot don’t do the trick, you can also check Boot Manager to see if Hyper-V is launching at startup. To access Boot Manager, open a command prompt with administrator privileges, type bcdedit in the command prompt, and press ENTER. If you see an entry for hypervisorlaunchtype set to Auto, Hyper-V is still enabled. You can try setting the launch type to Off by running the command below.
bcdedit /set hypervisorlaunchtype off
Reboot the system and check the status of Hyper-V again using systeminfo. It’s worth remembering that if you disable Hyper-V in Boot Manager, currently installed Windows features that rely on virtualization might fail.
Related Article:


