How to Combine Branches with Git Merge

If you’re using Git for source code management, you may need to merge different development branches for a project into a single branch. This article will guide you on how to combine two development branches with the Git merge command.
We’ll be showing you how to create a Git project, create different branches, and merge one branch into another. Additionally, you’ll learn what is a fast-word merge and a 3-way merge, and how to merge a branch into a remote repository.
What is Git merge?
Git is a popular DevOps tool that developers can use for tracking and managing changes to code written by different teams. With the Git merge command, you can take your current development branch (which you’ve forked from the main branch) and merge its code changes back into the main branch.
Git merge is a command you’ll use most often when you are working in a team. There might be times when you and another developer might collaborate on one feature on two separate branches. However, when the time will come, you’ll need to combine your work into one branch, test those changes, and then merge your collaborative development into the main development branch.
As the main development branch is being updated, the separate feature branch you and other developers are working on will not update with your teams’ changes. Therefore, as a best practice, when the time comes to raise a pull request, you should always start by updating your local version of the main branch with the latest changes. Then, you can merge the updated main branch into your development branch before committing and raising a pull request to merge it into the main development branch.
How to combine two Git branches with Git merge
As a developer, being proficient at Git can really help to make you more productive. For starters, it’s fundamental to understand how to execute Git commands from the command line. Before we get started, let’s see what you’ll have to set up first before you can begin merging different Git branches.
Prerequisites
To get started, you’ll need the following items:
- A Windows, Mac, or Linux machine to run Git.
- The Git app, which is available to download here.
- A GitHub or Gitlab account.
- Code editing software such as Visual Studio Code.
Let’s quickly run over the different steps required to install Git on a Windows PC (we also have a separate guide on how to install Git on Ubuntu):
- Follow the link to download Git for your machine and install the files.
- Once installed, open your terminal and type git –version:
git –version
If you get a version number returned, great! However, If you get a “command not found” message, then you may need to add Git to your $PATH variable. This is usually a Windows issue.
Let’s quickly remedy that so you don’t have to wander off on a search.
- Go to the Start bar and right-click on This PC.
- Select Properties.
- Click Advanced System Settings.
- Under System Properties, click Environment Variables. Here, you can add values to the $PATH variable.
- Select $PATH and click Edit.
- Click New and add a path to the git/cmd.
- Click New and add the path to the git.exe file.
Save the changes, go back to the terminal, and run the git -version command again.
git -version
You should now get the version number returned. After doing the pre-work and setting up your GitHub or Gitlab account, you should now be up and running.
Creating a Git project
In this section, I’ll walk you through the different steps required for creating a new repository.
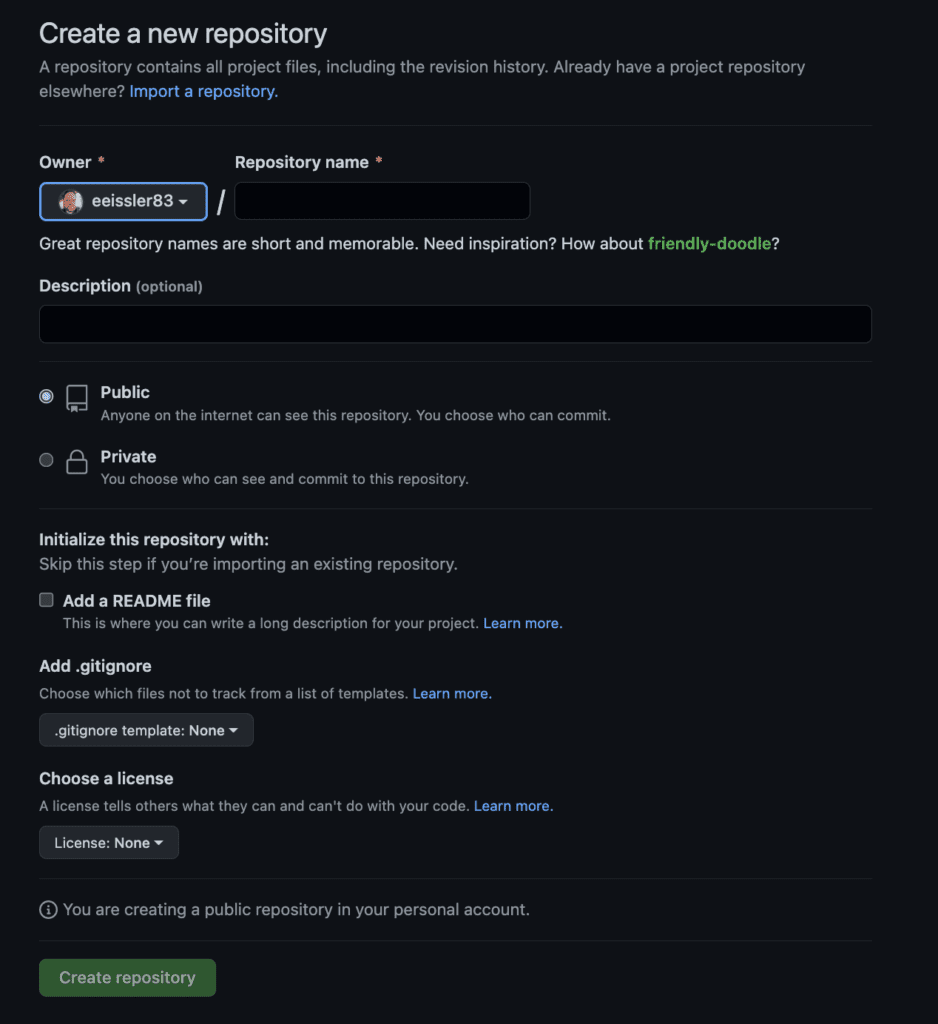
On your newly created Github account, click on New on the left side of the screen.

Next, you’ll need to give your repository a name and fill in a few other details. Give it a short description if you want, make it public, and a best practice is to always add a ReadMe file. Once you’re done, click on Create repository.
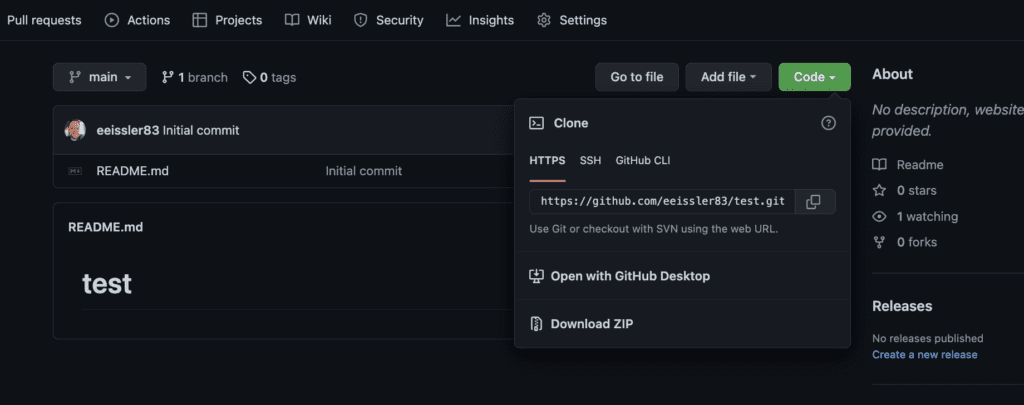
Now, to get working in your code editor, you’ll want to clone your new repository by clicking the Clone button. Select HTTPS, copy the address, and open your terminal.
In your terminal, use the cd command to choose where you want to create a new directory for your project
cd user/desktop/repo/
When you’re in the correct branch, use the mkdir command to create a new directory:
mkdir <name of your directory>
Now, let’s use the cd command again to switch to that newly created directory:
cd <name of your newly created directory>
Once in your new directory, use the git init command to create a new repository:
git init
Next, use the git clone command with the correct HTTPS address, and hit Enter. By default, this will create a main branch on your local repository.
git clone <paste https address here>
Now, open your newly cloned repository with Visual Studio Code. You can now start writing code.
After creating your repository, you will already be on the main branch. As a best practice, you should never, ever, push code directly to the main branch, which needs to be protected.
For the sake of this tutorial, we’ll not go over protected Git branches. But out in the field, you’ll never be able to push code to the main branch without a pull request.
Creating another Git branch
We are currently on the main branch, you’ve coded something to create some content, and now you want to create a new branch.
In your terminal, use the git checkout command to create a new branch and automatically switch to it:
git checkout -b <name of new branch>
The command should automatically cut that new branch from your main branch, so the code of the latter should not change.
Now, here comes the fun part where we’ll be able to use the git merge command. On your newly created branch, you’ll first need to add more code so that your current branch is ahead of the main branch with some new changes.
Now that you’d like to merge this new branch into the main one, you may encounter a merge conflict, which is a code insertion that conflicts with code that already exists. It’s really not fun dealing with these.
So what do you do? Let’s see how to merge one branch into the other.
Merging your two Git branches in your local repository
While you’re on your new branch, go to your terminal and use the git branch command to verify the name of the branch you are on:
git branch
You are now on your new branch, use the git checkout command again to switch to your main branch:
git checkout Main
Next, use the git pull command to import any changes that your team may have made and get your local main branch up to date:
git pull
Now, use git checkout again to switch to the new branch you want to merge with the main branch:
git checkout <your specified branch>
It’s now time to use the git merge command. This will take the current version of your main branch and then merge it into your development branch:
git merge Main
The merge result will have the latest version of the code plus the feature you developed.
Other ways to merge Git branches
After showing you how to merge a new branch with our main branch, let’s check out other ways to merge Git branches that you may need to use.
What is a fast-forward merge?
A fast-forward merge is another way to merge multiple commits on one branch with one command rather than merging them all manually. Another advantage of using a fast-forward merge is that it will combine the histories of multiple commits while squashing the commit history.
Let’s suppose we have one feature branch ahead of the main branch by several commits. We want to merge all of these commits without having to manually merge them one by one. In this case, we’ll use a fast-forward merge.
In our example, we’ll start by writing some code and adding a new commit to our branch with the git add and git commit commands:
git add <filename>
git commit –m “added a thing”
Now, we’ll be adding another commit to our new branch by using the same commands once again:
git add <filename>
git commit –m “added another thing”
Next, we want to push these two commits to our remote repository without having to do two pushes. To do so, we need to use the –ff on the git merge command
git merge --ff
This will merge both commits at the same time into one and make your code catch up to the main branch.
What is a 3-way merge?
Imagine a case where your development team has created some new features on two separate branches. You’re now ready to update the branches and merge them into the main branch so that the latter will be ready to push code to a remote repository.
To ensure that new features are working together correctly, it’s a good idea to merge the feature branches into each other and then do some testing. A 3-way merge will allow us to combine two separate branches with their common ancestor.
Let’s walk through the steps needed to do a 3-way merge to the target branch. In the example below, we’ll start by creating a new branch, adding two commits to it, and we’ll combine it with our main branch using a 3-way merge.
First, let’s start by creating a ‘new-feature’ branch and automatically switch to it with the git checkout command. Specifying -b with this command causes a new branch to be created:
git checkout -b new-feature main
Next, we add some files and a new commit to our branch with the following commands:
git add <file>
git commit -m "Start a feature"
We then add another commit to our new branch with the following commands:
git add <file>
git commit -m "Finish a feature"
After we’ve added new code to our new branch, you have to imagine a situation where our main branch also continues to progress. We’ll first switch back to it with the git checkout command:
git checkout main
Next, we’ll add a new commit to our main branch:
git add <file>
git commit -m "make some changes to Main"
Now, we want to merge the ‘new-feature’ branch we created earlier with our updated main branch. As work will continue on our main branch, we’ll finish by deleting the ‘new-feature’ branch with the git branch command.
git merge new-feature
git branch -d new-feature
Now, we merged our two branches with a common ancestor into our main branch. The latter is now ready to be merged into your remote repository and further increment our software project, and we’ll see how to do that next.
How to merge a Git branch to a remote repository
You may sometimes need to merge a branch into a remote repository. Let’s walk through the steps on how to accomplish that.
Let’s imagine a situation where you have written new code for a new feature that your product owner wanted to create. After testing your code and then reviewing it with your product owner, you are now ready to merge your hard work into your team’s remote repository.
As mentioned before, you should never be able to push your code to the main branch directly. You must always respect the Git workflow we’ve detailed at the beginning of this guide.
After reviewing the Git process, let’s get your code merged in. Picking up where we left off, we now have an up-to-date branch: The latest updates to the main branch have been pulled down into your local repository.
You are now standing at the gates of the remote repository. How do you get there? Simple, we are going to use some more git commands.
As a best practice, you should always check your branch status with the git status command. This command will show what files have been added, removed, tracked, or untracked.
git status
You should also see if you have added files that are untracked. In that case, you need to add them so they will be tracked and added to the commit.
You can use the git add command to add all the files you created in your development. Now, you may need to write some file names out if you only want to add specific files. If you want to add all files use “.” to add all files.
Next, we’ll use the git commit command to commit all the files we added in the previous step. You’ll need to use -m flag to write a message, otherwise, you’ll get pushed into the text editor mode to write a message, which isn’t a streamlined process.
For your message, you can write a quick note about what you did. For example, “created a new cool feature and added a new icon to the menu and added bug fixes.”
git commit -m “<your commit message goes here>”
Finally, you can use the git push command to push your branch up to the remote repository.
git push --set-upstream origin <<your branch name>>
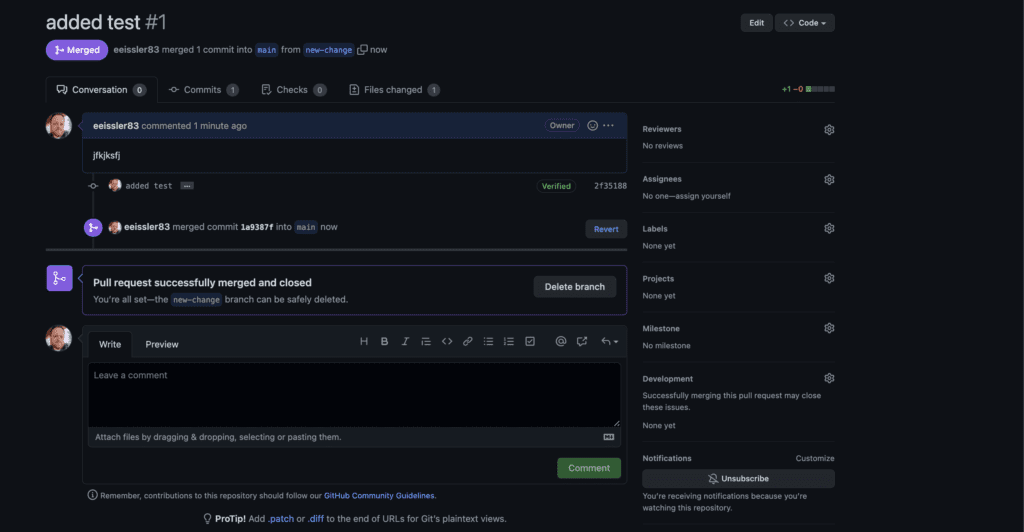
Now, after pushing your branch, you will need to go to GitHub or where your remote repositories are hosted, find your recent push, and click on Create pull request.
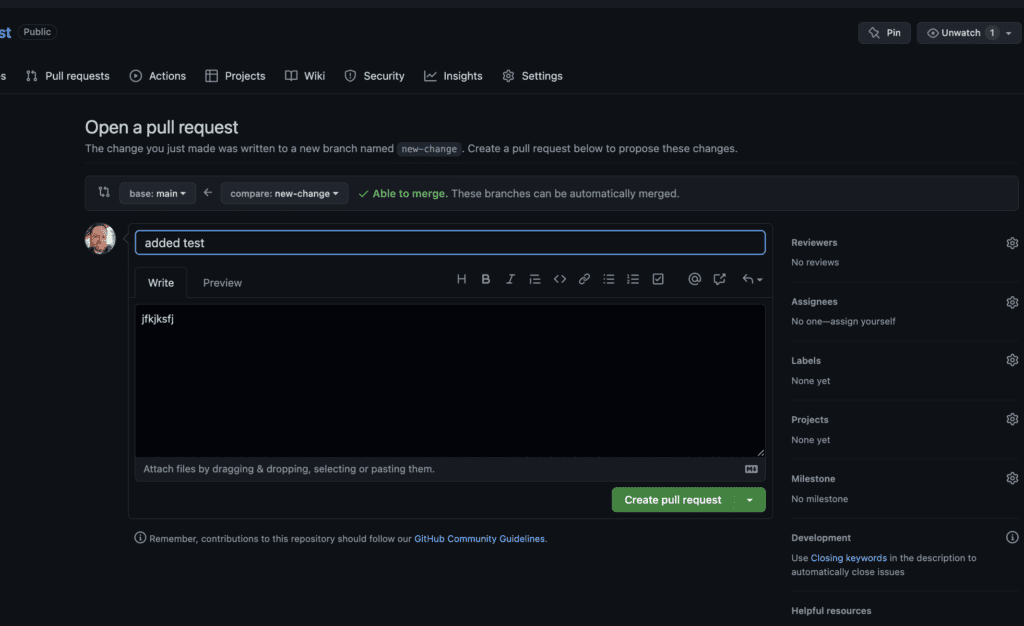
Once you click on this button, you will be taken to a page to add reviewers and members of your team who will approve or deny your merge request. In the second case, they’ll be able to add comments about what needs to be fixed before allowing you to merge your branch into the remote main branch.
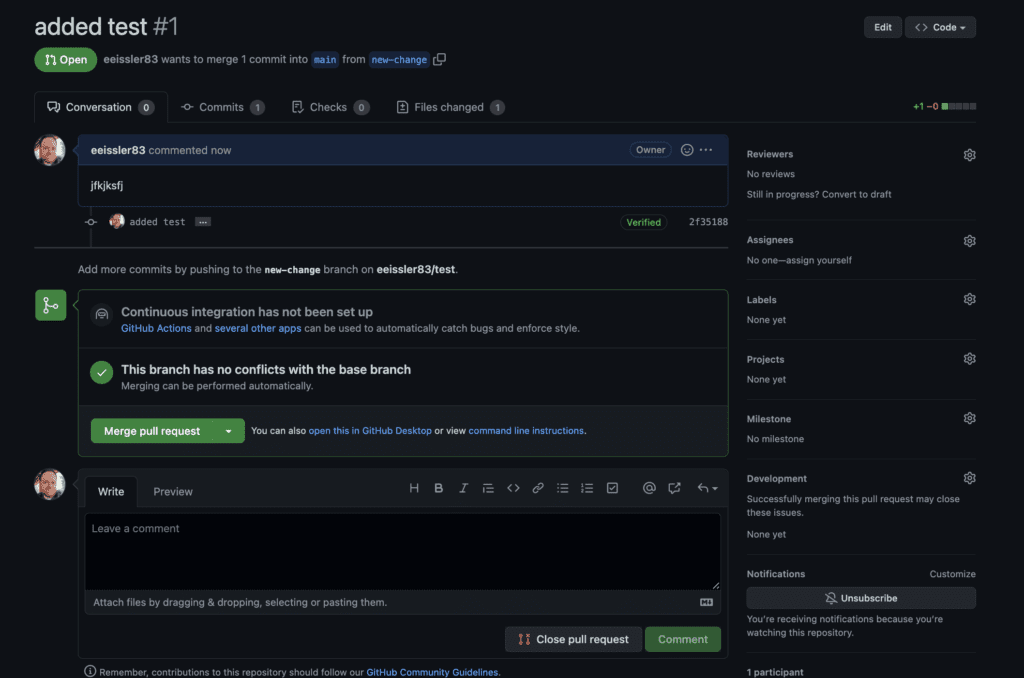
Once the review is complete and your merge request has been approved, the Merge button will be available. Click this button to start the merge. If the merge is successful, you will get a message confirming that your new code has been added.
Congratulations! You’ve got the basics down for using the git merge command!
Conclusion
Git merge is a powerful command that will allow you and your team to use different branches to work on new features, and then bring them together to your main repository.
You have learned the proper steps required to create branches, merge them, add files and commits to them, and most importantly, push those branches to a remote repository. In addition, you now understand how to do a fast-forward merge to combine several related branches using one command, which can really help to make any development work more efficient.
Git is a powerful tool that can do a lot. The more you learn about the different commands you can use, the better you are going to become as a developer. Now that you have learned everything you need to know about merging branches, it is time to go off and learn other commands. Good luck on your quest to master Git!

Robert is a DevOps Engineer working in Software Development and Cloud Services. He has been working in DevOps for more than 7 years. He has worked in Higher Education, Marketing, and Healthcare. When he is not hard at work, Robert enjoys a round of g...