Getting Started with Azure Arc-Servers
One of the biggest announcements (in my opinion) at Microsoft Ignite was the release of Azure Arc. This new Azure service stands to be a game-changer as it relates to managing any and all of your hybrid environments. In this article, we’ll set up Azure Arc to manage our on-prem workloads. Now, to be clear, Azure Arc was just released to public preview. With that being said, understand it has limited capabilities in it’s infancy. Be sure to keep an eye on added features as it matures. While at Ignite, I was speaking with one of the product team members and he said features will be coming fast and often.
What is Azure Arc?
If you don’t know what Azure Arc is, here’s a quick summary. Azure Arc provides the ability to manage your workloads, regardless of where they live within this single dashboard. You can add servers from your own data center or any other cloud platform. Along with servers, Azure Arc can also be used for data services using Kubernetes. This article will focus on server management. Azure Arc brings Azure cloud services to these workloads. Services such as Role-Based Access Control, Azure Policy and Azure Resource Manager, with more on the way.
Adding On-Premises Servers to Azure Arc
Getting your on-prem servers to appear in the Azure Arc portal is pretty straight forward. First, we need to make sure we have a few things checked off before we dive in.
Required Resource Providers
We need to register two resource providers to use Azure Arc for Servers.
Microsoft.HybridComputer
Microsoft.GuestConfiguration
This can be done in the portal, through PowerShell or Azure CLI. We’ll be using PowerShell in this example.
Login-AzAccount
Register-AzResourceProvider -ProviderNamespace Microsoft.HybridCompute
Register-AzResourceProvider -ProviderNamespace Microsoft.GuestConfiguration
Once that’s taken care of, we can verify our settings using PowerShell as well.
get-azresourceprovider | where {$_.providernamespace -like '*hybridcompute*'}
get-azresourceprovider | where {$_.providernamespace -like '*guestconfiguration*'}
And we can see whether or not the resource providers are registered.
We can also verify in the portal as well.
- Click on Subscriptions.
- Choose your subscription.
- Under settings, select Resource providers.
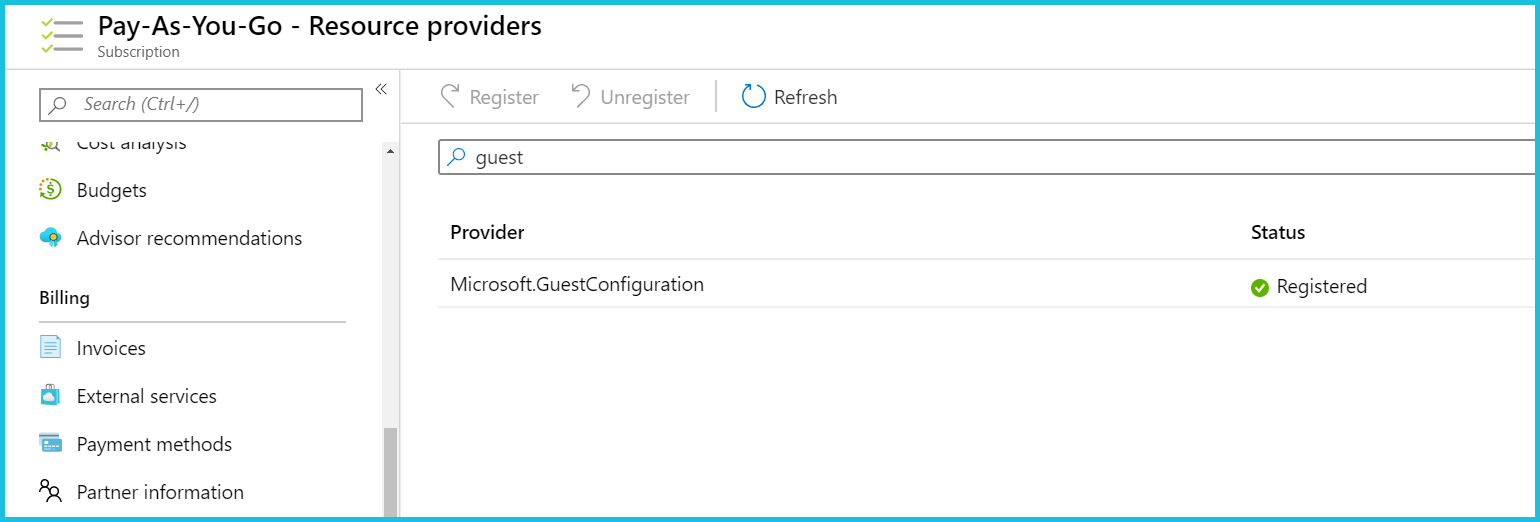
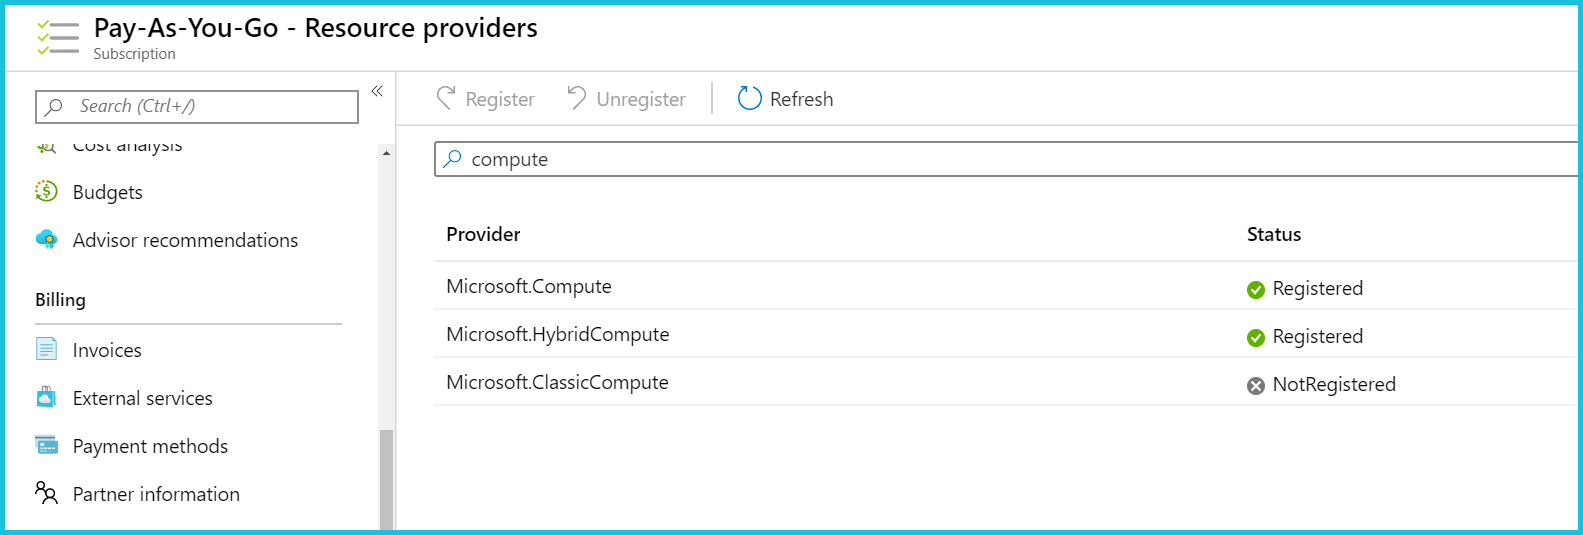
- Using the filter by name option and locate GuestConfiguration and HybridComputer
GuestConfiguration resource provider seen below.
HybridCompute resource provider seen below.
Adding Servers
Once we have that complete, we can add our servers by completing the following within the Azure portal.
- Type Azure Arc in the Search resources box at the top of the port and press Enter (see below).
- Select Manage Servers while in the Azure Arc portal.
- In the Machines screen. Click + Add to add a server.
- Choose Generate Script in the Add machines using interactive script.
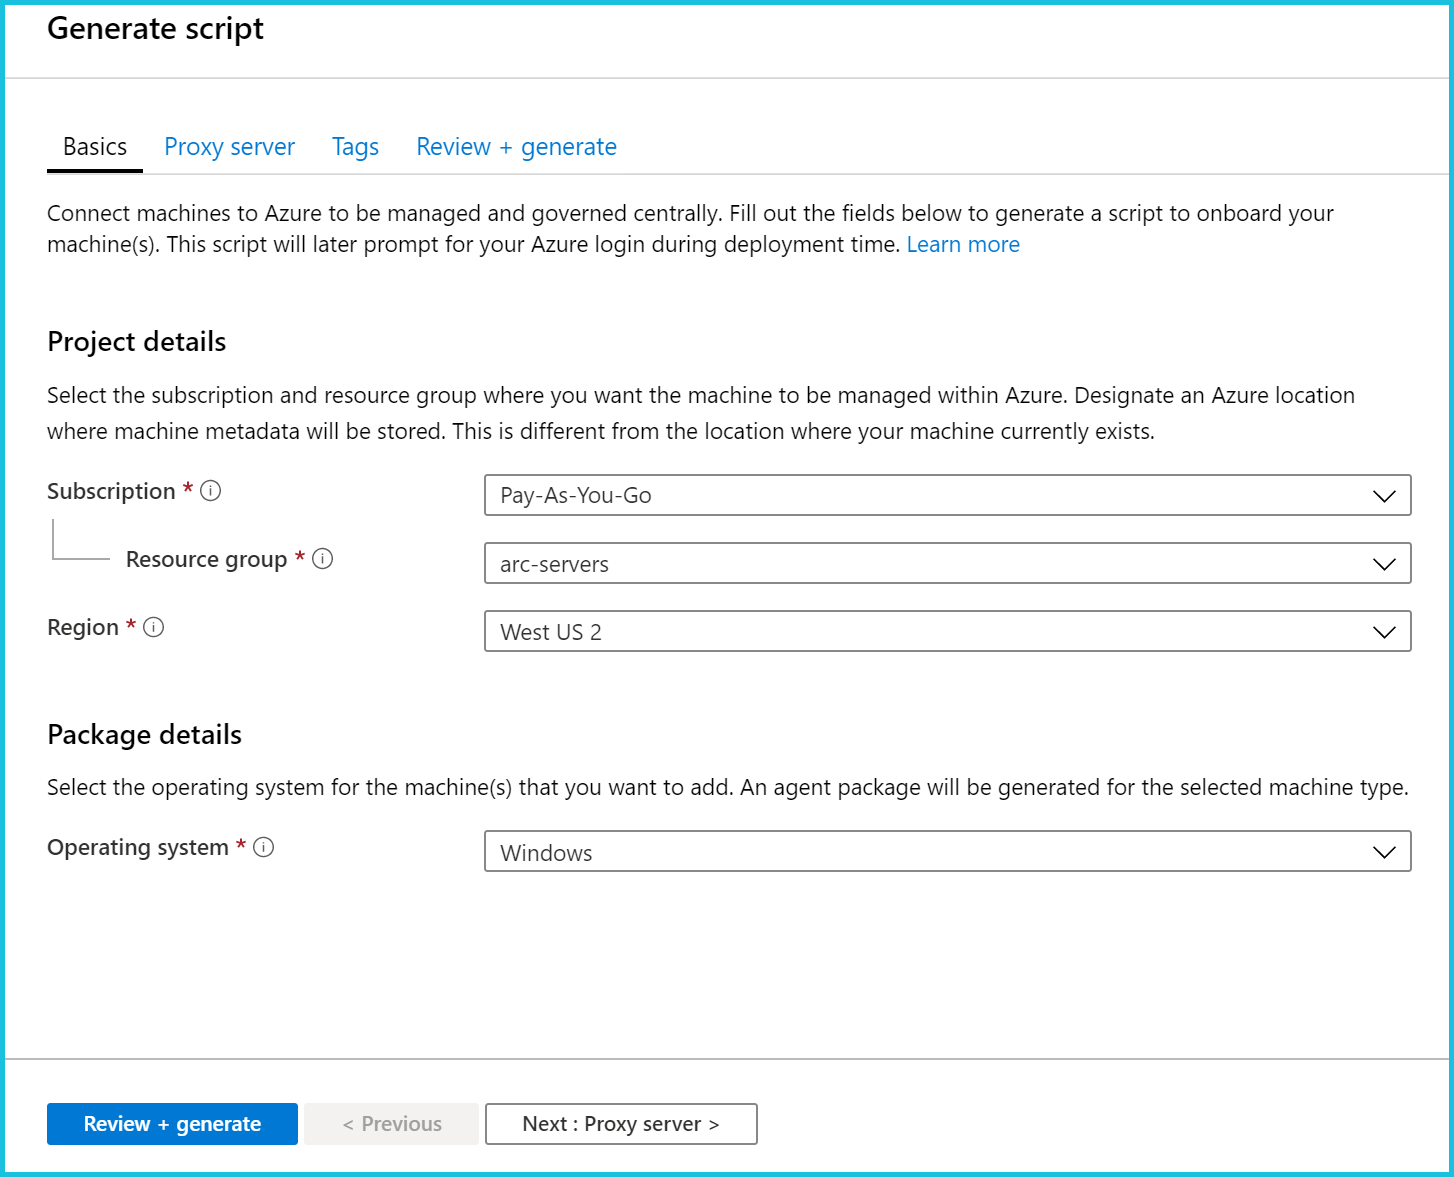
- Select your subscription, resource group (or create new) and region.
- Choose the operating system your on-premises workload is running, either Windows or Linux. We’ll choose Windows.
- Click Review and generate script.
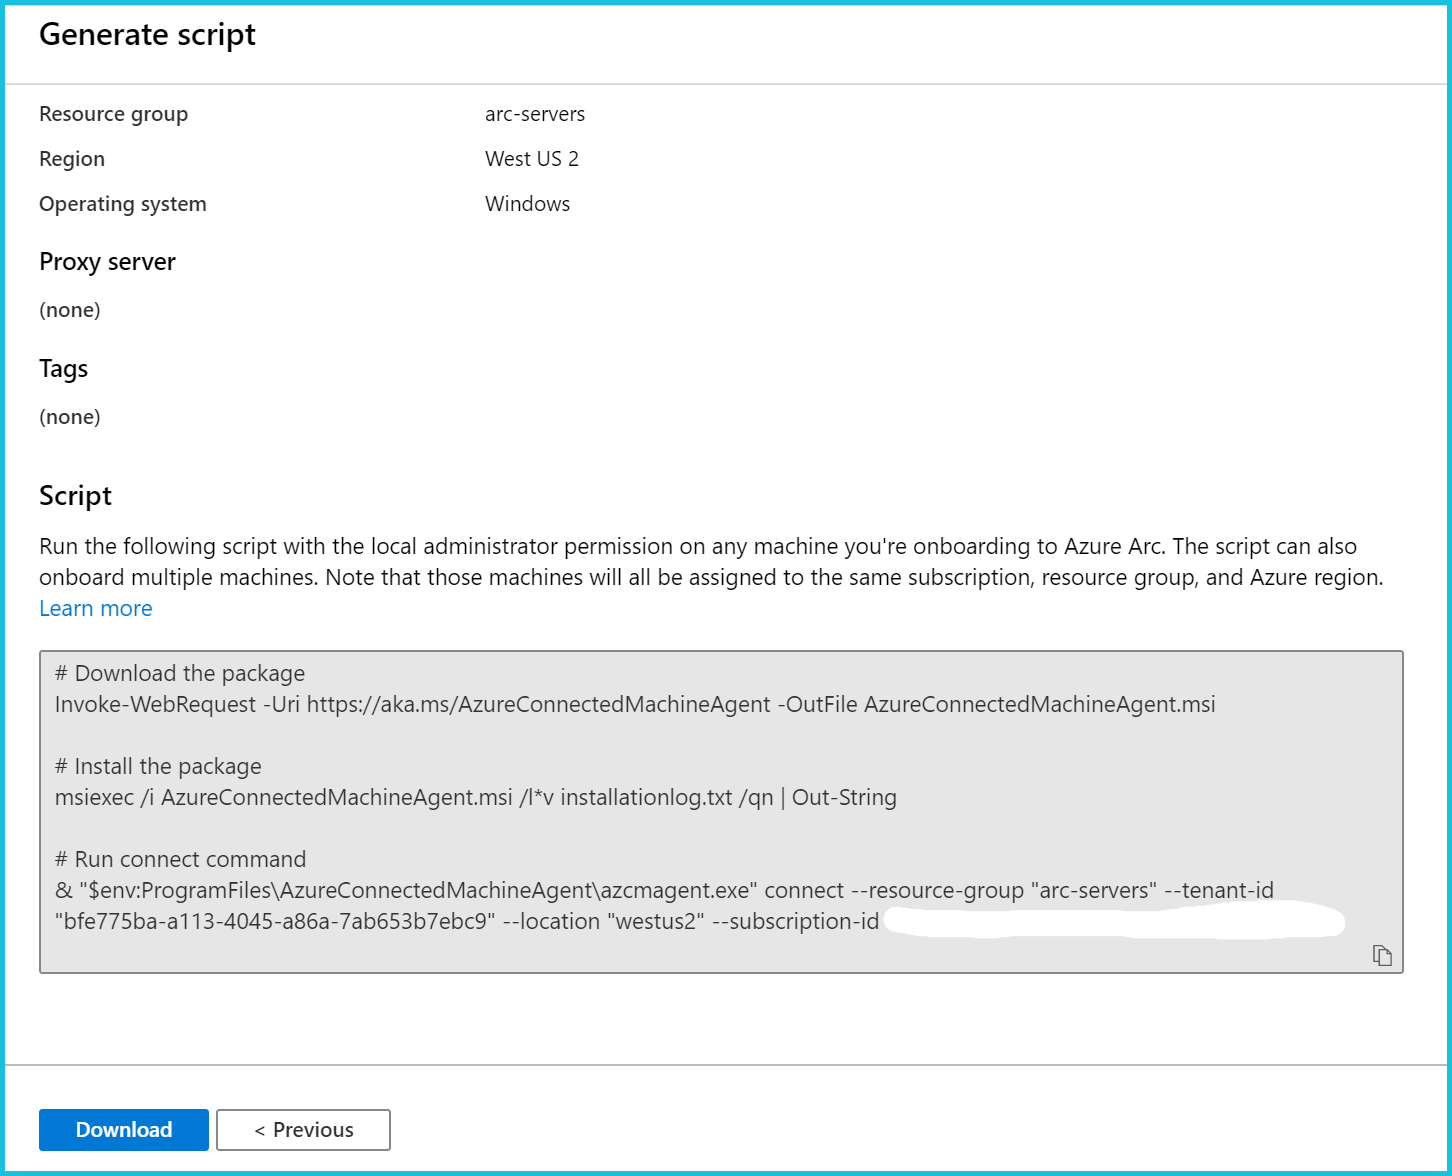
- At this point, you can either download or copy the script.
After you have either downloaded or copied the script. You’ll need to run these commands on the server you want managed with Azure Arc. The script downloads a lightweight agent and installs it on the server which in turn associates with your subscription. Your server should appear in the Azure Arc portal after several minutes.
If you’re on-boarding a Linux server, you’ll have to copy the commands from the portal and execute on the server. They do not provide a script to download. The Linux commands perform the same process as the Windows commands by downloading and installing a lightweight agent on the server.
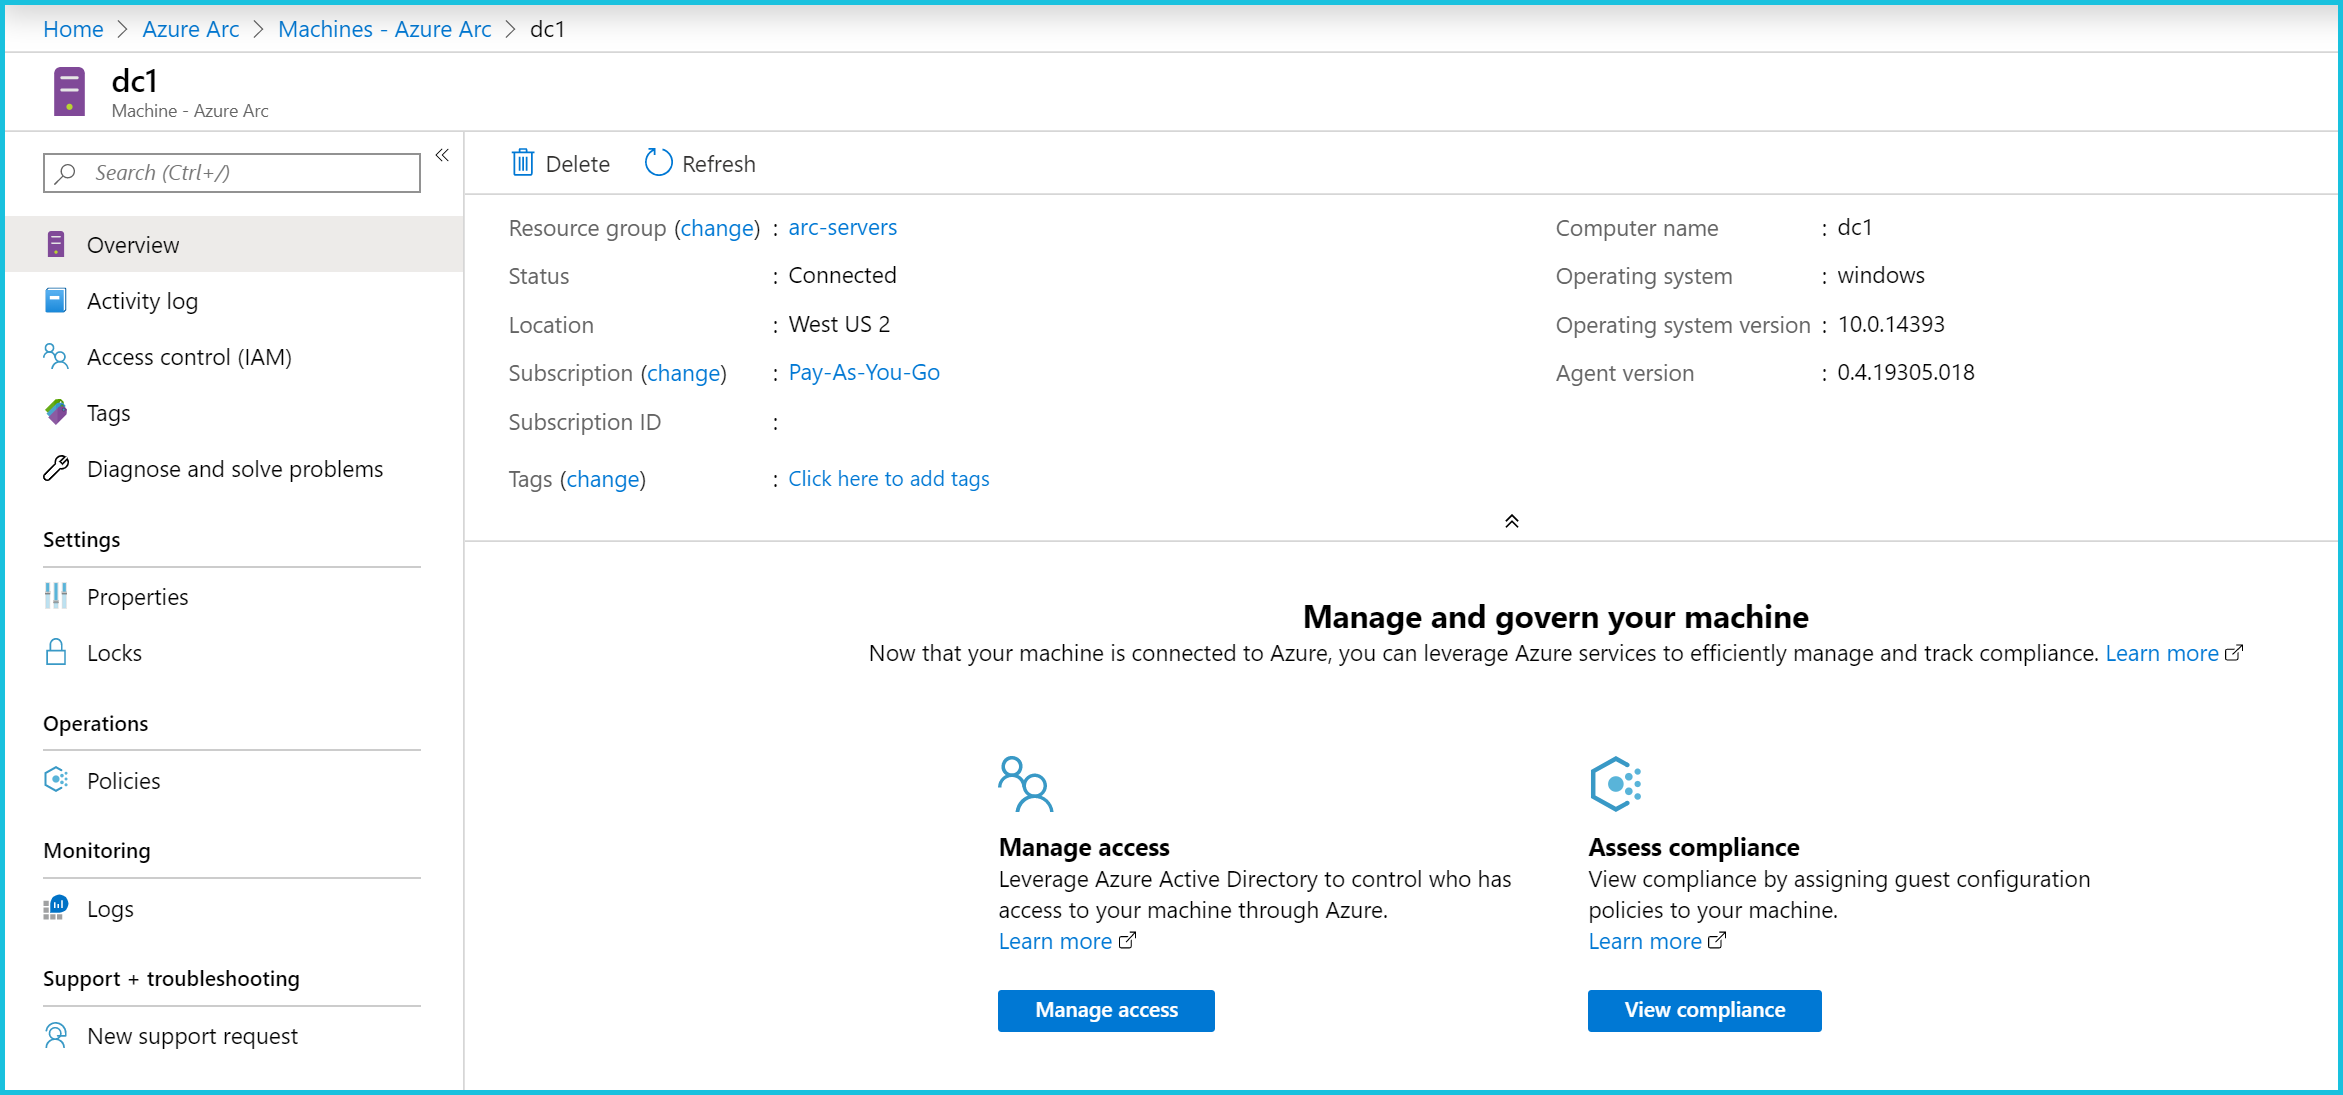
Once the server appears in Azure Arc, you have the ability to assign tags, apply Azure Policy as well as manage access through Role Based Access Control (RBAC) via Azure Active Directory.
Final Thoughts
Azure Arc is in Public Preview. This means we haven’t seen how far they intend on taking this new cross-platfrom hybrid management service. The assurances from the product team lead me to believe we’ll be able to leverage most Azure services we use for our Azure VM’s sooner rather than later. Let’s be honest, the companies that are 100% in the cloud and only one cloud are rare. Managing on-prem, AWS and Azure instances is cumbersome. The idea of having a single platform-agnostic tool to manage them all is really a game changer. Truly, one ring to rule them all. For further information regarding Azure Arc for servers, check out the Microsoft Docs site here.


