How do I enable BitLocker without a TPM chip in Windows 8?
Many consumer notebooks come without Trusted Platform Modules (TPM), which BitLocker uses to store encryption keys so that users can boot into Windows from an encrypted system volume without entering a password or needing to have an additional device, such as USB key, that holds the volume’s encryption key. In this article, I’ll show you how to modify local policy to allow users to encrypt the system volume when there is no TPM.
The Difference Between System Volumes and Data Volumes
If you’ve ever tried to encrypt a data volume in Windows 8 or Windows Server 2012, you’ll know there isn’t any special hardware requirement. You can configure the drive to be unlocked using a password or USB key.
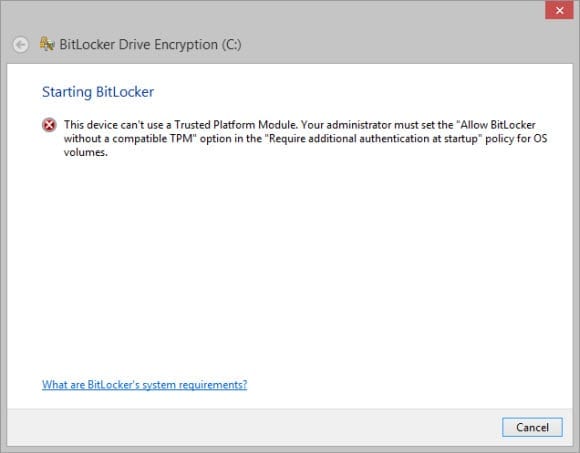
If you decide to encrypt the system volume with no TPM, you’ll receive an error stating that you need to enable the feature in policy. This is to stop users from accidentally locking themselves out of the system completely, and to make sure users understand that without a TPM, BitLocker on the system volume adds some inconvenience to the boot process.
Enabling Additional Authentication at Startup
Before we can encrypt the system volume, we need to enable the additional authentication startup policy in Windows.
- Press the Windows key and type mmc on the Start screen.
- You should see MMC appear (Microsoft Management Console) in the search results to the left. Press CTRL+SHIFT+ENTER together to start MMC with administrator privileges. Enter credentials if prompted.
- In the MMC window, select Add/Remove Snap-In from the File menu.
- In the Add or Remove Snap-ins dialog box, select Group Policy Object Editor from the list under Available snap-ins and click Add.
- In the Select Group Policy Object dialog, the Group Policy Object should already be set to Local Computer. Click Finish.
- Local Computer Policy should now appear on the right under Selected snap-ins. Click OK in the Add or Remove Snap-ins dialog box.
- Under Console Root in the left pane of the MMC window, expand Local Computer Policy > Computer Configuration > Administrative Templates > Windows Components > BitLocker Drive Encryption > Operating System Drives.
- Double-click Require additional authentication at startup in the central pane.
- In the Require additional authentication at startup dialog, check Enabled and click OK.
- Close the MMC window.
Now that we’ve turned on addition authentication at startup, we can enable BitLocker on the system volume.
- Open File Explorer by pressing Windows key + E. Right-click the system volume in File Explorer (usually labelled C) and select Turn on BitLocker from the menu. Enter administrative credentials if prompted.
- Once the requirements have been checked, choose to unlock the drive with a password or USB key. In this example, I’m going to opt for a password.
At this point, if your drive isn’t already prepared for BitLocker, which might be the case if you didn’t do a fresh install of Windows 8, you will be prompted to allow the wizard to make the necessary partition changes to the drive to support BitLocker.
- Enter your password twice and click Next.
- On the next screen, choose how you want to save the recovery key. The recovery key is used in case you lose the USB stick that’s used to unlock the encrypted volume, or forget the password. I’m going to choose to save the recovery key to my Microsoft online account.
- Now, choose Encrypt used disk space only or Encrypt entire drive. Click Next to continue.
- Make sure that Run BitLocker system check is selected on the Are you ready to encrypt this drive screen and click Continue.
- Restart the computer.
When the computer restarts, you’ll be prompted to enter a password or provide the USB stick with the encryption key. Once the OS has booted and verified that the volume can be unlocked without using the recovery key, Windows will start to encrypt the drive.


