How to Copy a Virtual Hard Disk in Microsoft Azure
In today’s Ask the Admin, I will show you how to use the AZCopy tool to copy an Azure virtual machine (VM) to a virtual hard disk (VHD).
Azure VMs are automatically provided with a VHD when you provision them using the Azure management portal. For instance, if you choose to deploy Windows Server 2016 Datacenter, then the attached OS disk will contain the appropriate server image. But sometimes, you might want to use a custom disk image and attach it to a VM.
There are several ways you to get a custom disk image into Azure storage. You can upload an image from your local PC to Azure. You can also copy an existing VHD of a VM that has been generalized from an Azure storage account. That is what I am going to show you how to do in this article.
I will use the AZCopy tool to copy the OS disk of an existing Azure VM to a new container in the same storage account. To follow the instructions below, you will need an Azure subscription and at least one VM already provisioned. If you do not have an Azure subscription, you can get a free 30-day trial here. For more information on provisioning VMs in Azure, see Create a Virtual Machine in the Azure Cloud on the Petri IT Knowledgebase.
Prepare to Copy a VHD
Before copying a VHD in Azure, you will need to download and install the AzCopy tool on your local PC. You can download the tool for free here.
- Log in to the Azure management portal. Make sure that the VHD you want to copy is attached to a VM. The VM should be in the Stopped (deallocated) state. To see a list of VMs, click Virtual machine in the options on the left.
- If you want to copy a VM VHD, click the VM in the list and in the Virtual machine panel. Then, click Disks under SETTINGS.
- On the left, you will see a list of disks attached to the VM. Click the disk that you want to copy.
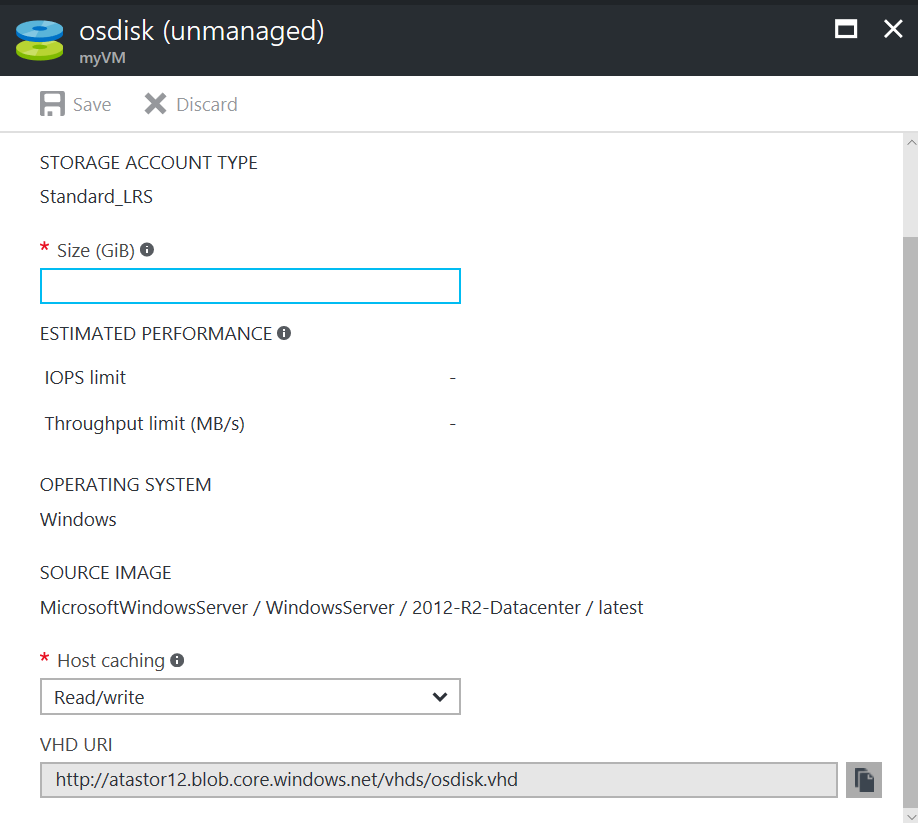
- At the bottom of the disk panel, the first part of the VHD URI shows the name of the storage account where the VHD is stored. In this example, the storage account is called atastor12. The name of the container is vhds.
- Make a note of the disk file name. You will need it later.

Get the Storage Account Access Key and Container URL
The AzCopy tool requires the storage account access key and container URL, which you can find in the Azure management portal.
- Expand the list of options on the far left of the Azure management portal by clicking the hamburger icon in the top left corner.
- Click More services at the bottom of the list and type storage in the search field.
- Click Storage accounts in the list of results.
- On the Storage accounts panel, click the storage account where the VHD you want to copy is located. In this case, atastor12.
- On the Storage accounts pane, click Access keys under SETTINGS.
- Copy the first access key by clicking the COPY icon on the left of the key. Store the key temporarily in Notepad.
- Now click Containers under BLOB SERVICE.
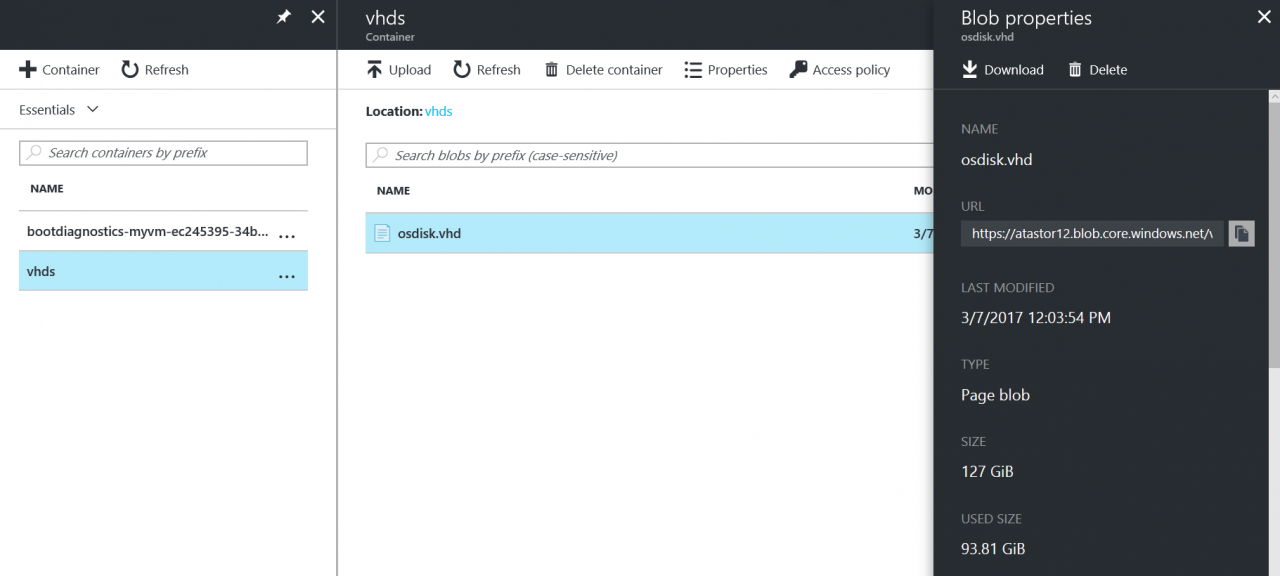
- On the right, click the container where the VHD you are going to copy is stored. In this example, vhds.
- In the Container panel, click Properties.
- In the Container properties panel, click the COPY icon to the right of the URL field. Paste the URL in Notepad. You will need it later. You will also need the storage account access key.

Run AzCopy
Open a command prompt on your local PC in the C:\Program Files (x86)\Microsoft SDKs\Azure\AzCopy directory. The easiest way to do this is to locate the AzCopy directory in File Explorer. You will need to right click the directory, while holding SHIFT, and click Open command window here in the context menu.
In the command prompt window, run the AzCopy command as shown below. Replace <container URL> with the URL you pasted in Notepad, <dest container URL> with the URL for the destination container, <storage account key> with the storage key you pasted to Notepad from the Azure management portal, and <disk name> with the name of the VHD you want to copy from the source URL.
You must copy the VHD to a different container or a different storage account. To make things easy, I am copying to a different container in the same storage account. The storage account key is the same in /SourceKey and /DestKey.
AzCopy /Source:<source container URL> /Dest:<dest container URL> /SourceKey:<storage account key> /DestKey:<storage account key> /Pattern:<disk name>
In my example, the destination container does not exist in the storage account but AzCopy will create it. I just made up a name: vhdscloned. My command line looks something like this:
AzCopy /Source:https://atastor12.blob.core.windows.net/vhds/ /Dest:https://atastor12.blob.core.windows.net/vhdscloned/ /SourceKey:QbU90fErU9cCJ7xchQ== /DestKey:QbU90fErU9cCJ7xchQ== /Pattern:osdisk.vhd

When the copy operation has completed, click Refresh above the list of containers on the Storage account panel in the Azure management portal. The new destination container will appear in the list. Click the new container. You will see a copy of the VHD from the source container.
In this article, I showed you how to copy a VHD in Azure to a new storage account container.


