VMware Site Recovery Manager: VRM Server Configuration and Testing
Welcome back to our VMware Site Recovery Manager (VRM) database configuration discussion. We’ve broken this article into two parts: Part one covered preparing the VRM database, while part two will go over testing the VRM database and configuring the VRM Server.
How to Test the VRM Database
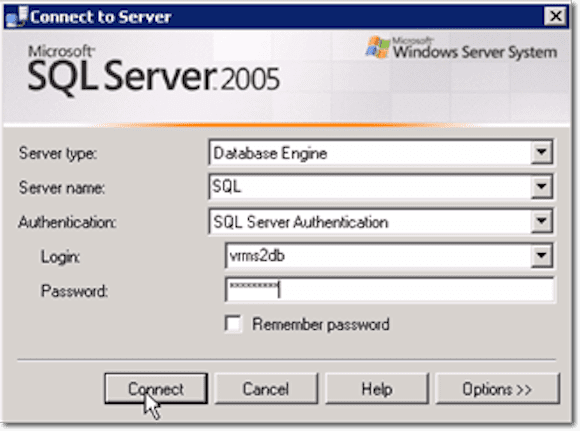
To test that everything’s okay, close that session of SQL Server Management Studio and log in via SQL Server Authentication using the login account you just created.
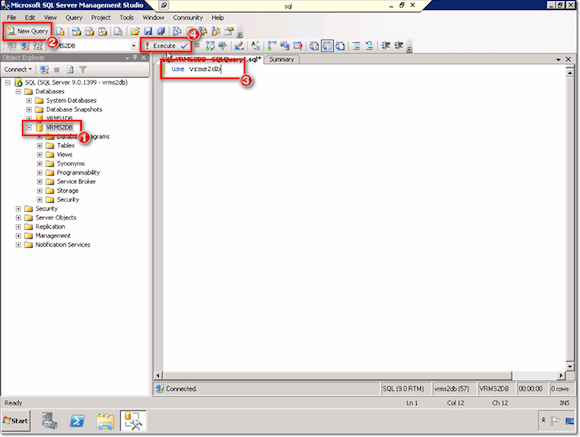
Once inside, select the database you created, click New Query, type in use <the name of your newly created database> in the large text box, and click Execute.
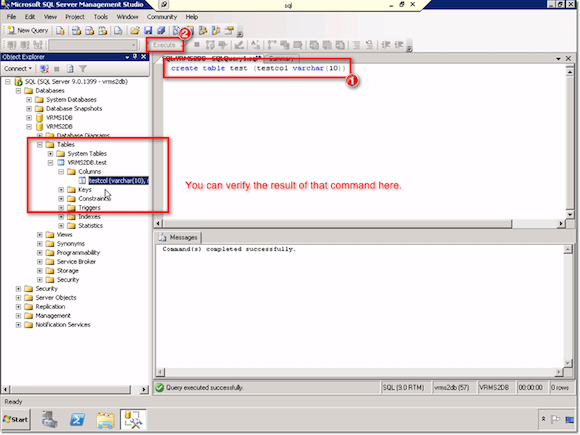
That action would select the database in question and put you in the context of that database for the very next command you’re about to run. Next, type in the command: create table test (testcol varchar(10)), then click Execute.
That will create a table named “test” with a column named “testcol” having type “varchar.”
If you were able to do that, that means the user account you’re currently using has permissions with the ability to create tables and possibly put data to it. That also means, you should be good to go when you start connecting from the actual VRM server itself.
Don’t forget to delete that test table before you go. Just right-click on it and select Delete.
At this point, you’re now ready to move on to the next step, which is to configure your VRM Server.
How to Configure the VRM Server
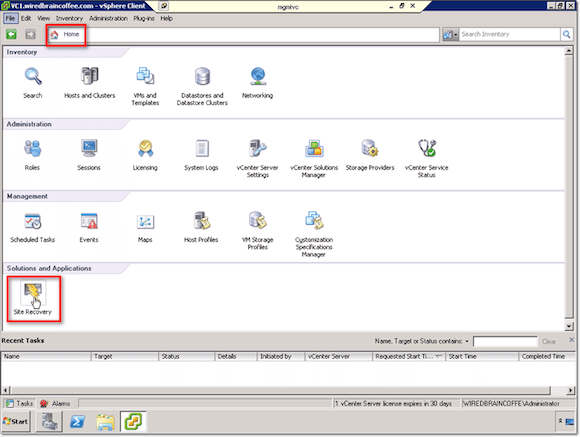
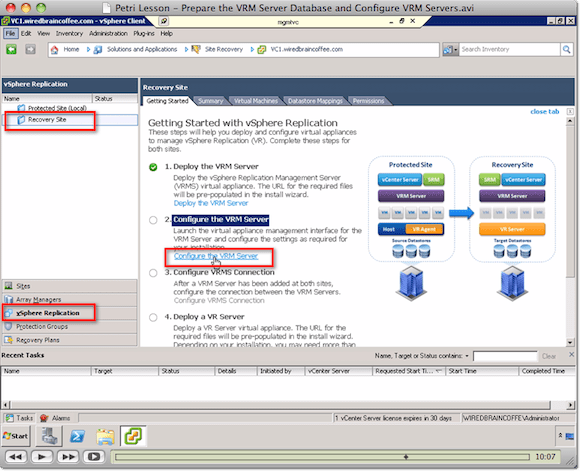
Launch your vSphere Client, login to the Home screen, and navigate to the Site Recovery plugin.
Navigate to the vSphere Replication section for the Recovery Site and click Configure the VRM Server.
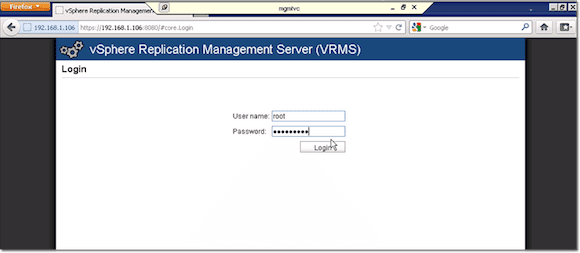
That should bring up a browser. Login using your root account.
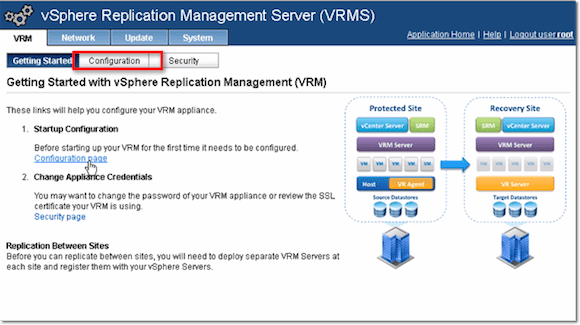
Before you start things up, you need to carry out some configurations. Click on the tab that says Configuration.
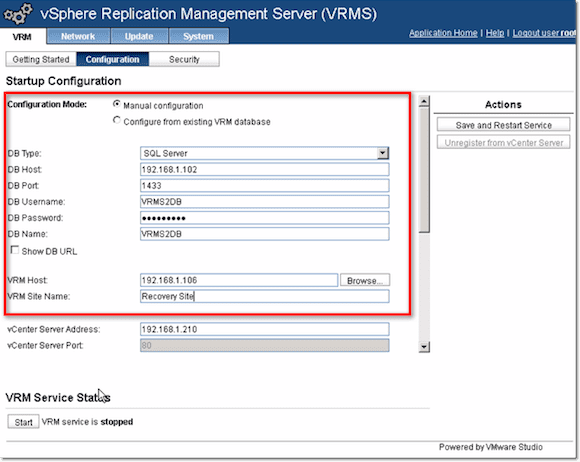
Select the Manual configuration option. Next, select a database type from the DB Type drop-down list box. In our case, that would be SQL Server.
Enter the IP number and port number of your database server into the DB Host and DB Port fields respectively. The standard DB port is 1433.
Also enter a username and a password as well as the DB Name (the name of your database) into their respective fields. Enter the IP address of your VRM Host and the name of your VRM Site (into the VRM Site Name).
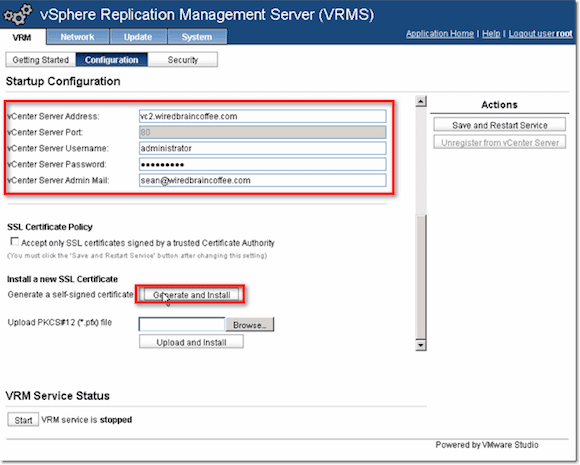
Enter your vCenter Server Address, username, password, and admin mail (e-mail address). To generate and install a self-signed SSL certificate, click Generate and Install.
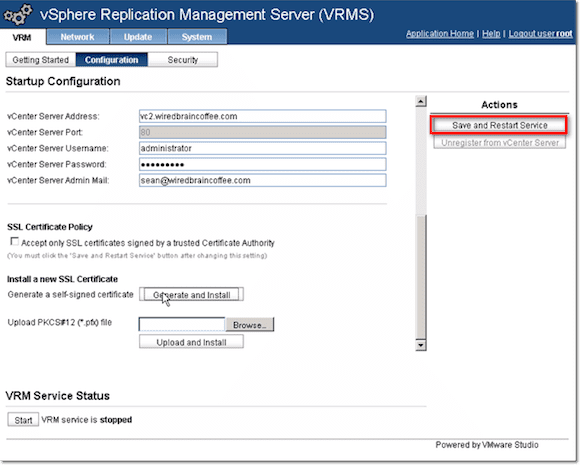
Once you’re done, select Save and Restart Service.
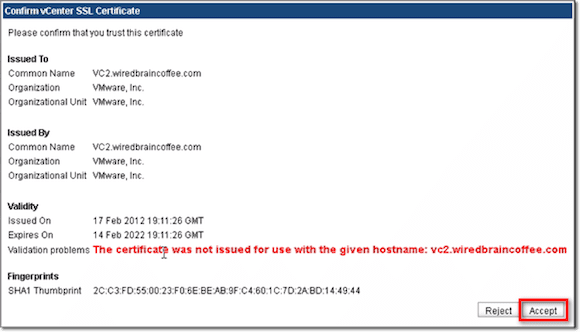
If all goes well, all you’ll get would be a little notification about the certificate. That’s if you only used a self-signed cert. Make sure everything’s fine, then click Accept.
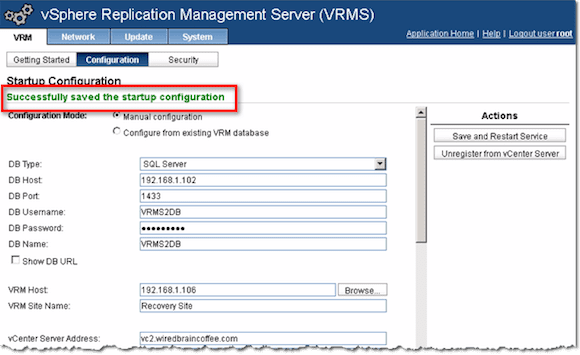
Barring any hiccups, you should see a green “Successfully saved the startup configuration” message at the top of your screen.
That’s it! You now know how to prepare your VRM Server Database and configure your VRM Servers. Enjoy!


