Overview
The purpose of a share, which is also called a shared folder, is to expose a portion of a server’s file system to network users. The idea is to just keep portions of that file system available to users while allowing other portions of the server’s file system to remain private and unseen by network users.
Windows Explorer is where you’ll often administer shares, so let me show you how it’s done there.
Administrating Shares with Windows Explorer
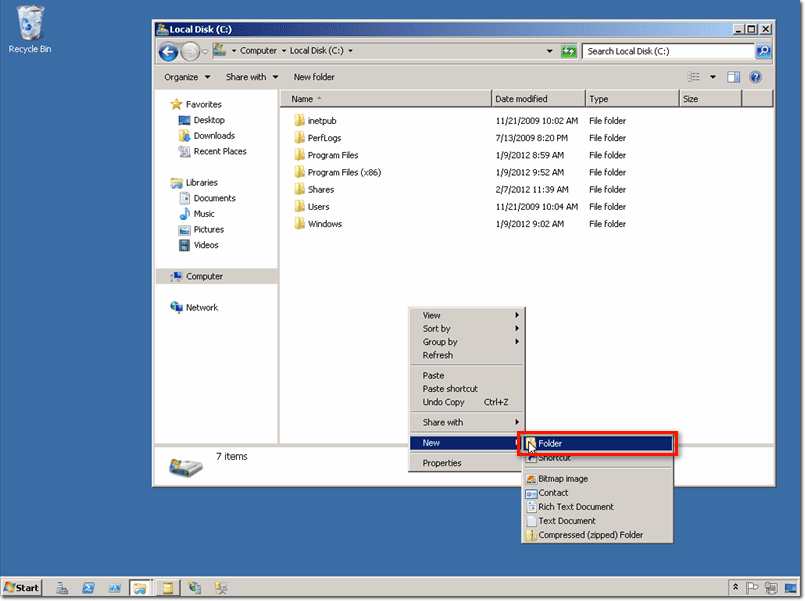
Launch Windows Explorer and create a new folder. Just right-click on an empty space and select New > Folder.
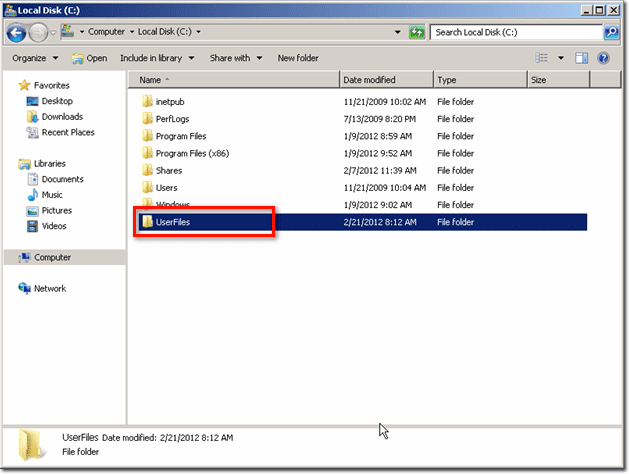
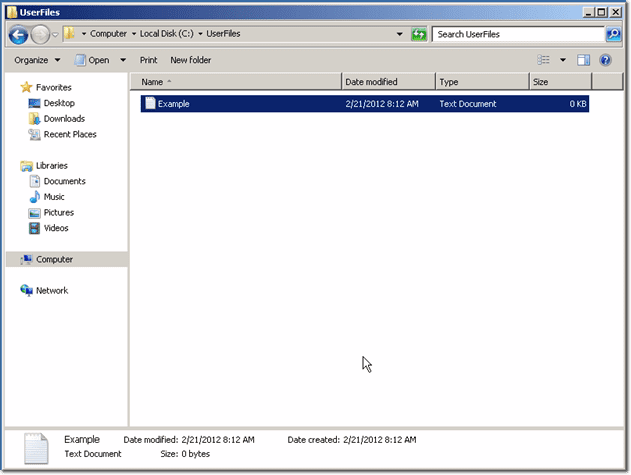
Give the folder a name, e.g. “UserFiles.”
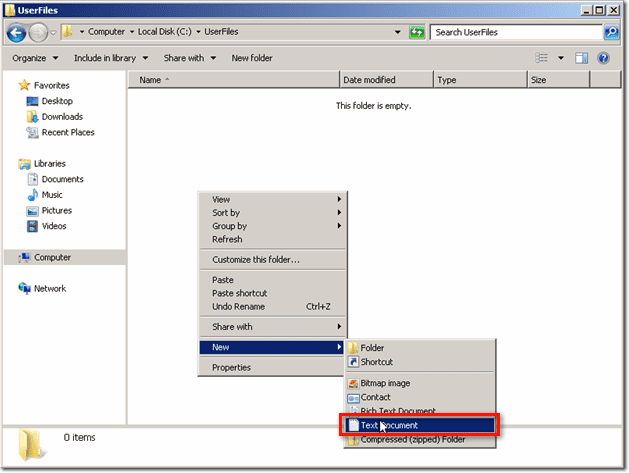
The intent here is that the contents of this folder will be the things we want our users to have access to from the network. For the purpose of an example, I’d like you to create a text document and give it a name, e.g. “Example.”
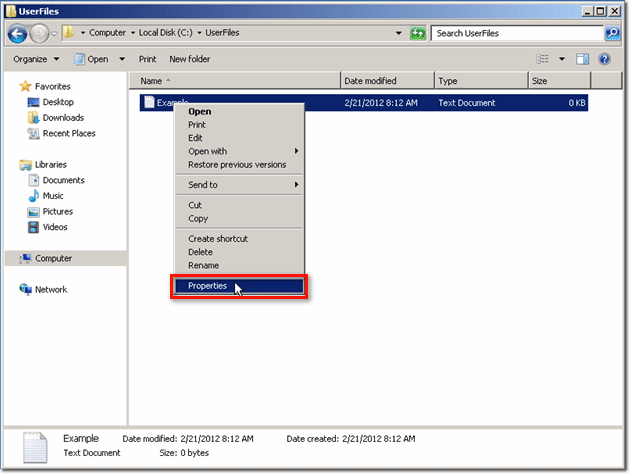
Next, let’s assign permissions to that file. Right-click on it and then select Properties from the context menu.
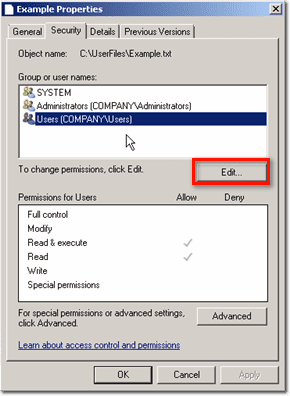
Once you’re in the Properties window, navigate to the Security tab. By default, the file is inheriting the permissions of the folder which, in turn, is inheriting the permissions from the drive itself. If you click on each group or user name, you’ll see their respective permissions in the lower panel.
To proceed with our example, let’s add a new user to this list. To do that, just click the Edit button.
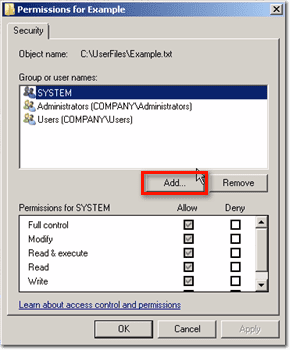
And then in the next window, click Add.
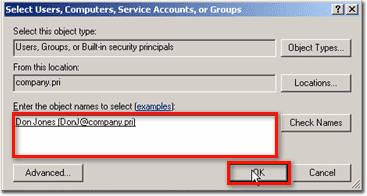
Add an existing user into the text field labeled, “Enter the object names to select” and then click OK.
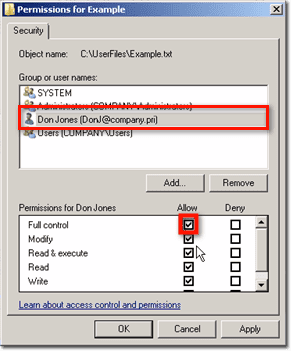
Give that person full control over the contents of the file by clicking the Allow check box for the item: Full control.
Click all OK buttons until you’re back at the folder you created earlier.
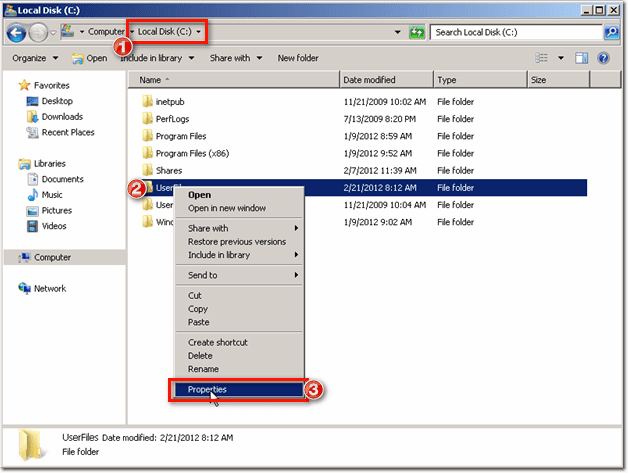
Next, go back up a level, right-click the folder you created, and select Properties.
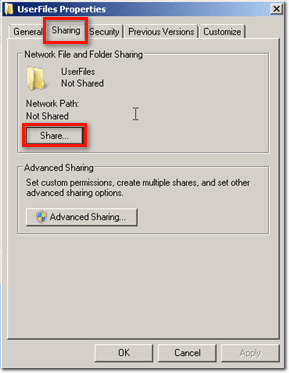
In the Properties window, navigate to the Sharing tab and then click the Share button.
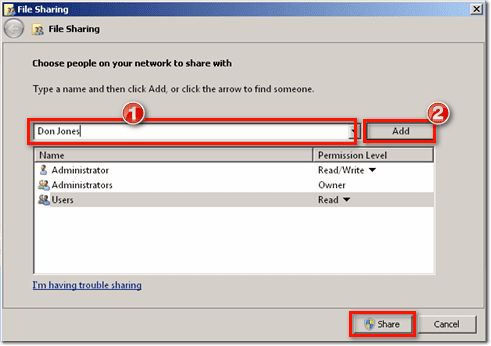
Now you should decide who among your users will be allowed to access files through this share. From the screenshot below, you see that the Administrators group is already in there. In addition to it, you can add whatever groups you like.
Just type in the name of the group (e.g. Users) or the name of an individual into the text box and then click Add. Once you’re done adding, click the Share button.
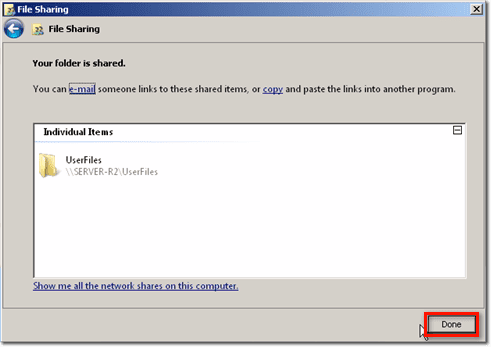
Then click Done.
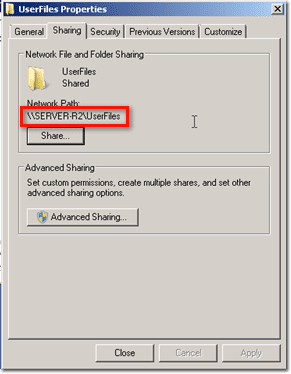
You should then see the network path already filled in.
Users can use that path to access the contents of that folder.
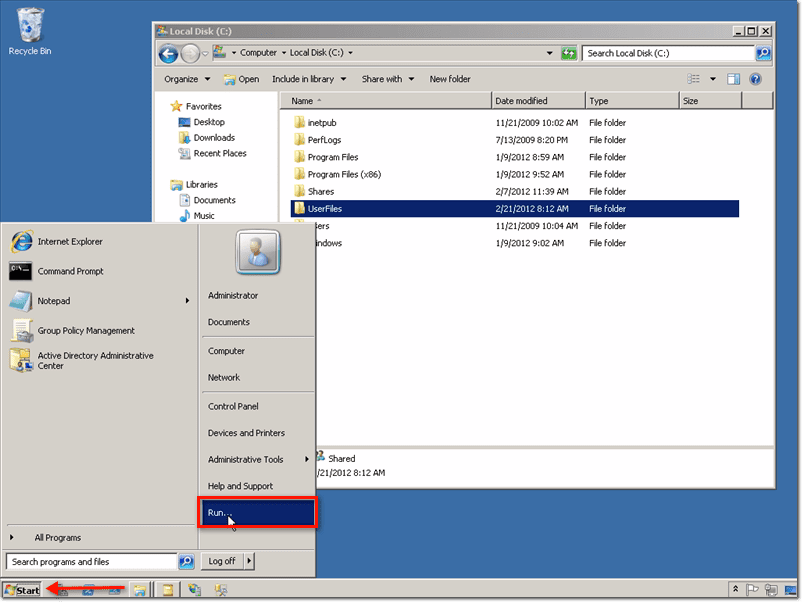
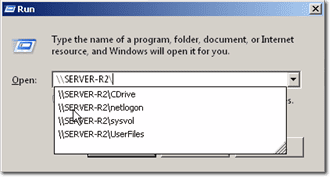
If you want to give it a test run, go to the Start menu and click Run.
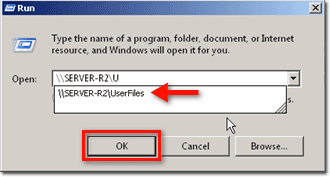
Enter the path. This share is advertised, so if you do that on a local machine, you won’t have to enter the entire path because Windows will automatically populate the rest of the path’s name for you and then suggest that as a choice. Select it and then click OK.
Windows will then open that shared folder in a new window. When users access something through a share, the share will look like the top-level item to them. In other words, they won’t be able to go further up into the filesystem hierarchy.
That is, they won’t be able to reach the Windows folder or anything else contained in the server because the share represents their entry point into the server.
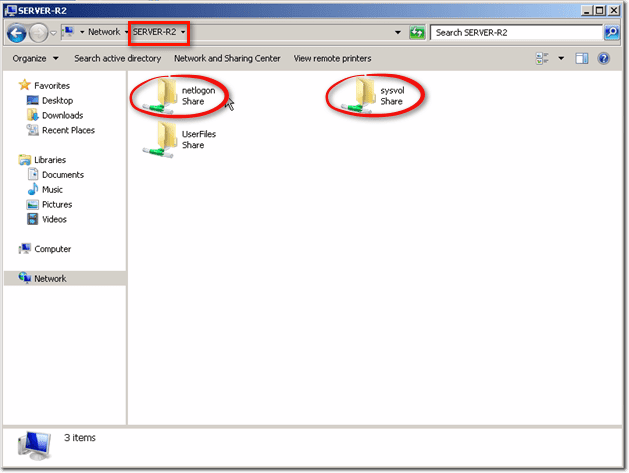
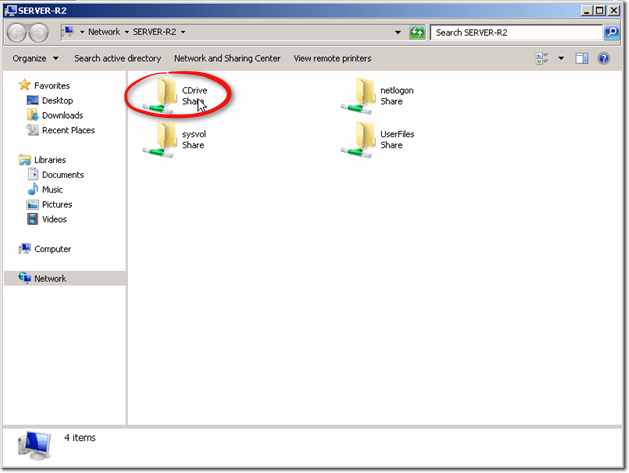
Up in Explorer’s title bar, you can click on the server, and you will then be able to see all the other shares in that computer. Some of those you may or may not have access to. Some of them, like the netlogon and sysvol shares, are there for special purposes. Specifically, those two are used by the Windows operating system itself.
That’s how a shared folder looks. Now you can also share a drive. For example, you can share your C: drive.
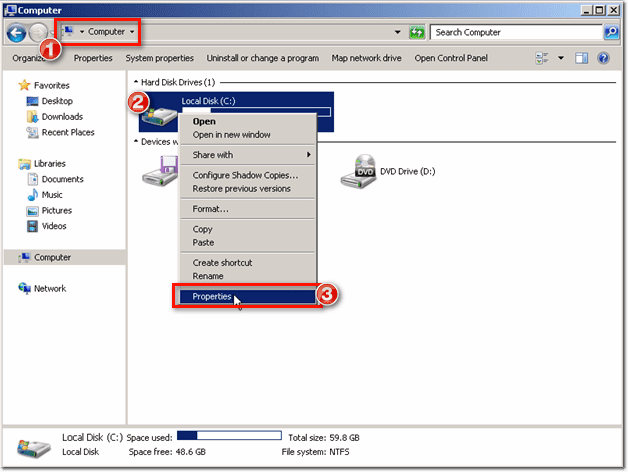
To do that, navigate to MyComputer, right-click your C: drive, and then select Properties.
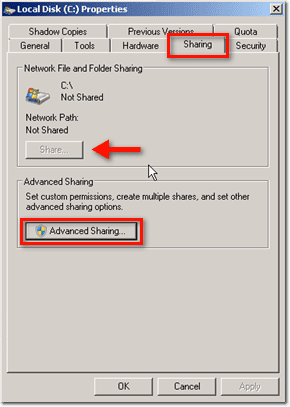
Next, go to the Sharing tab. Depending on the particular drive you’re working with, you may or may not be able to share it by clicking the visible Share button. In my case, my C: drive is my system drive, so I am not allowed to just click the Share button, which is why it’s grayed out.
One way to go around this is to click the Advanced Sharing button.
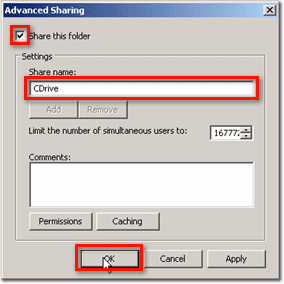
When the Advanced Sharing window appears, click the Share this folder check box. Give the share a name (e.g. CDrive) and then click OK.
If you go back to the root folder of your server,
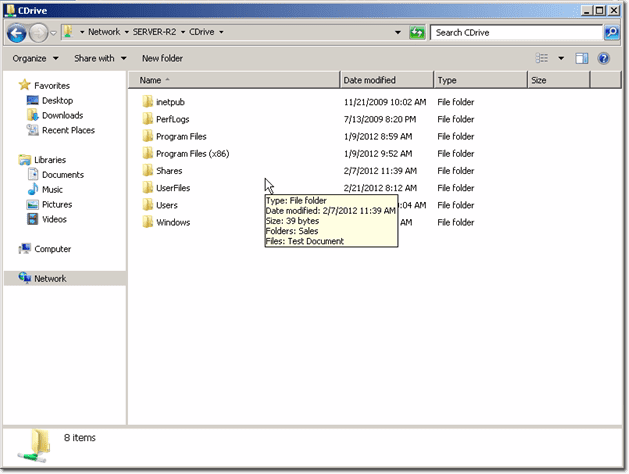
you’ll notice that the shared drive already appears.
Because that share points to the drive itself, it enables you to access all folders on that drive.
Conclusion
This is the broadest form of sharing that Windows offers. If your server has multiple drives attached to it, the only way to give someone access to everything is to share each drive individually.


