Service Manager 2012 Beta: Active Directory Connector Configuration
Microsoft’s System Center Service Manager 2012 Beta is now available for download. In this series of articles we’re going through all of the necessary steps to install and configure all of the different components of SCSM so you can start using it right away.
So far we’ve covered:
- Part 1: System Center Service Manager 2012 System Requirements
- Part 2: How to install the Service Management Server
- Part 3: How to Install the Data Warehouse Server
- Part 4: How to Configure the System Center Configuration Manager 2007 R3
Today we’ll take a look at configuring the Active Directory Connector. And in the upcoming part 6 in this series we’ll complete our Service Manager setup by installing Self-Service Portal.
How to Configure the Active Directory Connector in SCSM 2012
In Part 4 of this series I showed you how to create a System Center Configuration Manager connector, which synchronizes data between Configuration Manager and Service Manager.
Another available connector for SCSM 2012 is Active Directory Connector, which will synchronize data from Active Directory. Let’s take a look at how to configure the AD connector.
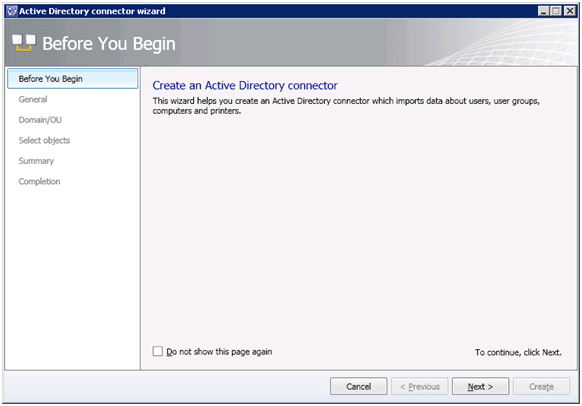
Step 1: Open the Active Directory Connector Wizard from the Service Manager console and click Next to begin the process.
Figure 1: Active Direcotry Connector Wizard
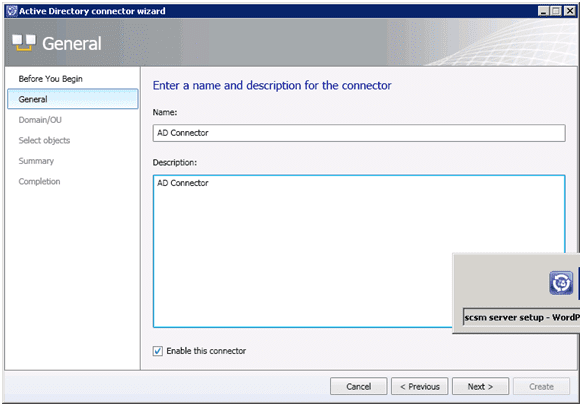
Step 2: Enter the name and description for this connector; in our scenario we kept it simple and enterd AD Connector for both.
Figure 2: Enter a name and description for the connector
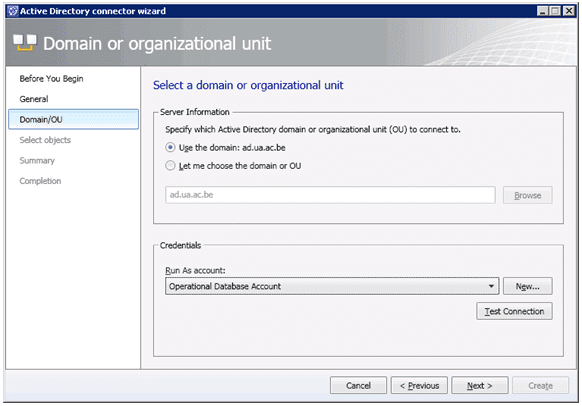
Step 3: Select to synchronize the full domain information or specific organizational unit (OU) information and click Next. For our demonstration I’ll choose the first option, to use the entire doman.
Figure 4: Select a domain or organizational unit
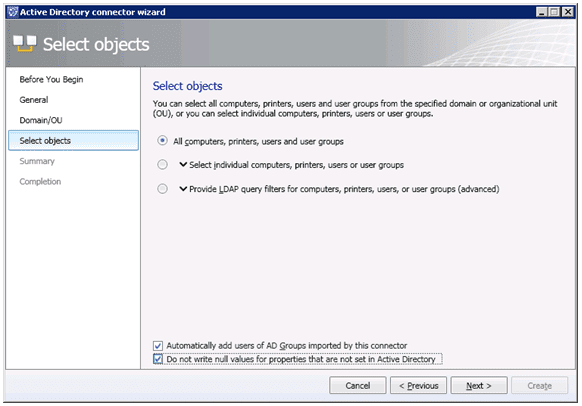
Step 4: Select which objects you want to synchronize; you can choose to do all computers, printers, users and user groups or select individual ones. You can also provide LDAP query filters to specify which objects to synchronize.
Notice you also have two checkboxes at the bottom of the screen that allow you to choose whether to automatically add users of AD Groups imported by this connector and to write null values for properties that are not set in your AD. In our example, we’ll leave both of these checked off.
Once you’re done with all of the options click Next to continue.
Figure 5: Select AD objects to synchronize
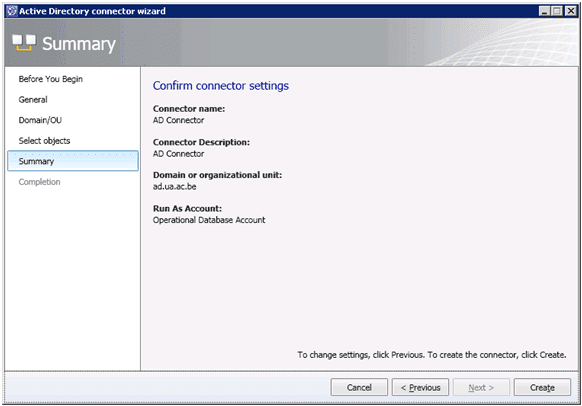
Step 5: Next you’ll get a chance to review and confirm all of your AD connector settings. If everything looks ok, click Create.
Figure 6: Confirm AD Connector Settings
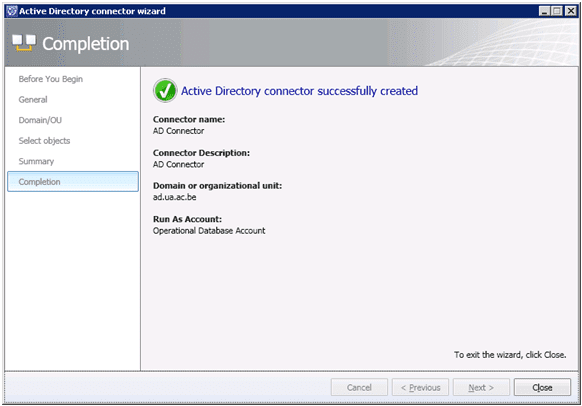
Success! Your Active Directory connector was successfuly configured.
Figure 7: Active Directory connector successfully created
Conclusion
At this stage, the Service Manager 2012 Management Server, the Data Warehouse Server, as well as the Data Warehouse server registration are completed successfully.
For this specific environment, we also configured the Active Directory and System Center Configuration Manager connectors, which allows for synchronizing data between those environments and Service Manager’s CMDB.
In the final article in this series we’ll go over the installation steps of the Self-Service Portal.


