Manage Local Active Directory Groups using Group Policy Preferences
Following the first two entries in my managing Active Directory Local Groups article series, we’re ready for our next installment. In this article, I’ll talk about another feature of Group Policy called “Local Users and Groups” that is part of the relatively new section of GPO called Group Policy Preferences (GPP). Local group GPP settings allows you to centrally create, delete, and rename local Active Directory groups. You can also use these settings items to change local group memberships.
Managing Local Active Directory Groups Article Series
- Part 1: Manage Local Active Directory Groups using Group Policy Restricted Groups
- Part 2: Using “This group is a member of” controls to manage local AD groups
- Part 3: Manage Local Active Directory Groups using Group Policy Preferences
- Part 4: Using Startup Scripts to Manage Local Active Directory Groups
The nice thing about this feature in comparison to the old Restricted Groups feature in GPO is that it lets you add users and groups as members, while ensuring the current group membership is not modified. In turn, this gives you higher flexibility in group membership management.
Although this feature is relatively new, it wasn’t included in the original release of Group Policy as part of Windows Server 2000, but was later added in Windows Vista and was back ported to Windows XP after installing a special client-side add-on (Download Group Policy Preference Client Side Extensions for Windows XP). However, starting from Windows Vista and Windows Server 2008 R2, it just works out of the box.
🎬 Watch This Week in IT.
Using “Local Users and Groups” in Group Policy Preferences
Like in the previous Restricted Groups feature of GPO, you need to create or edit a GPO that’s linked to the OU, which contains the computer objects that you want to be affected by the GPO.
Note: In GPP, you can use item-level targeting to change the scope of preference items, but that’s a topic for a different article.
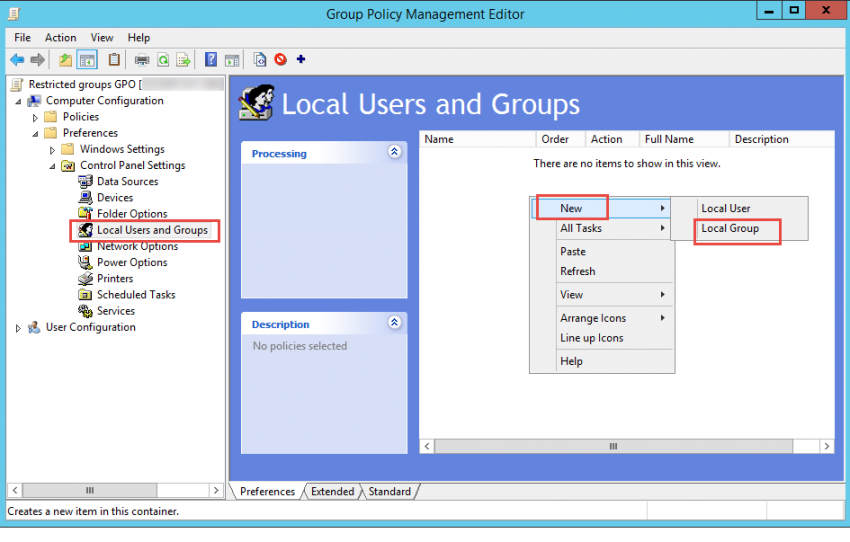
1. In that GPO, browse and expand “Computer Configuration” > “Preferences” > “Control Panel Settings”. Click on “Local Users and Groups”.
2. Right-click on “Local Users and Groups” and select “New Local Group”.
3. In the New Local Group Properties dialog box, select an Action for Group Policy to perform. You can select one of four different options:
- Create: Create a new local group on the local computer. If the local group exists, then do not modify it. It has a green icon associated in the UI.
- Replace: Delete and recreate a local group with the matching name for the local computer. The net result of this action is that it overwrites all existing settings associated with the local group. If the local group does not exist, then this action creates a new local group. The new group will get a new SID. This may prevent groups from having access to resources. It has a red icon associated in the UI.
- Update: The update action Group Policy Preferences lets us rename or modify settings, including group membership, of an existing group. This action differs from the replace option in that it updates the settings defined within the preference item and does not create new groups with a new SID. All other settings remain as they were previously configured. Unlike the delete option, the update action creates a new local group if the local group does not exist. It has a yellow icon associated in the UI.
- Delete: This action lets us remove a local group with the matching name from the local computer. The extension performs no action if the group does not exist. It has a X icon associated in the UI.
It should be noted that these four actions are also known as create, read, update, delete (CRUD) actions using Group Policy Preferences.
4. In this case, we will select “Update”.

5. Enter local group settings for Group Policy to configure. You can either use the built-in groups or enter your own group name.

You can perform various actions on the group, such as renaming it, giving it a description, adding or removing current users to the group, deleting all member users or groups from the group, and so on.
Tip: Press F3, you’ll like it.
In addition, you can perform various actions in the “Common” tab.
In this example, we will use the “Test Local Group” group on a member server.
6. Click on Add to configure specific users or groups. You can choose if you want to add them or delete them, and you can do this for multiple users or groups at the same time.


7. Now, the desired group is in the right pane. Because we chose “Update”, we get a yellow icon.

8. Before the GPO change, our “Test Local Group” only had 1 user, “testuser2”.

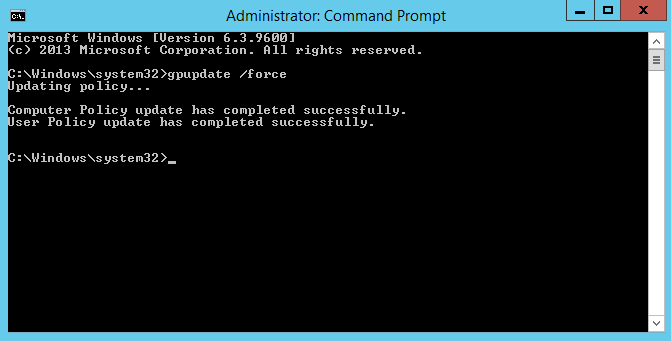
9. After the GPO refresh cycle, you will see that the new member was added to the group, and so was the AD-based group.

Note: Remember that group memberships for the current user take effect during the next user logon using Group Policy Preferences.
FAQs
How do I troubleshoot common errors when using Group Policy Preferences for local group management?
When using Group Policy Preferences, common errors can be resolved by verifying client-side extensions are installed, ensuring proper permissions, checking for WMI connectivity, validating GPO linking, and monitoring event logs for specific error codes.
Can I use Group Policy Preferences to manage local groups across different Windows Server versions simultaneously?
Yes, when using Group Policy Preferences, you can manage local groups across mixed Windows Server environments, but you need to ensure compatibility by installing appropriate client-side extensions on older systems and testing the configuration thoroughly.
What are the backup considerations when using Group Policy Preferences for local group management?
When using Group Policy Preferences, back up GPO settings through GPMC, document all preference configurations, maintain version control, and create recovery points before making significant changes to local group policies.
How do Group Policy Preferences impact performance compared to traditional group policy methods?
Using Group Policy Preferences for local group management typically has minimal performance impact compared to traditional methods, but it’s recommended to implement changes during off-peak hours and monitor client processing time through GP modeling tools.
What security best practices should be followed when using Group Policy Preferences for local group management?
When using Group Policy Preferences, implement least-privilege access, regularly audit group memberships, use item-level targeting judiciously, encrypt sensitive data, and maintain detailed change documentation for security compliance.

Renowned as the creator of the acclaimed Petri IT Knowledgebase back in 1999 Daniel Petri has become a distinguished figure in the IT realm, recognized for delivering reliable, expertise-driven content. This website - www.petri.com - not only embodie...


