Managing Active Directory in PowerShell 3.0 with Out-GridView
How do I manage Active Directory in PowerShell with Out-Gridview?
Previously I looked at how to use PowerShell to export Active Directory user information as a comma-delimited file so that it could be opened in an Excel spreadsheet. This is useful when managers request reports or you just need an easier way to sort or digest information. However, PowerShell has its own GridView application that can be used not only to view information in a more palatable manner, but provide easy data filtering and send to results to another cmdlet.
Export information to GridView
Let’s start with a simple example. Log on to a Windows Server 2012 domain controller (DC) as an administrator and follow the steps below:
- Right-click the blue PowerShell icon on the desktop and select Run as Administrator from the menu.
- In the new PowerShell window type get-aduser –filter * -property * and press Enter. You’ll see all the user information in Active Directory (AD) displayed in the PowerShell window.
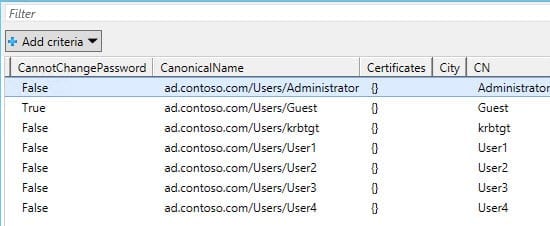
- Now run the same command, but let’s pipe the information to GridView. Type get-aduser –filter * -property * | out-gridview and press Enter. This time the information will displayed in the GridView window.
Much like in an Excel spreadsheet, GridView lets you sort information by clicking on column names, filter information to narrow down your results, and also add search criteria to further hone the data.
Playing with the results
Filtering your results is easy. Just type into the Filter box at the top of GridView what information you want to see. For instance, if I want to see only results that contain the word true, type that into the Filter box. In the results shown in the previous figure, that reduces my results to one user account that has the CannotChangePassword parameter set to true.
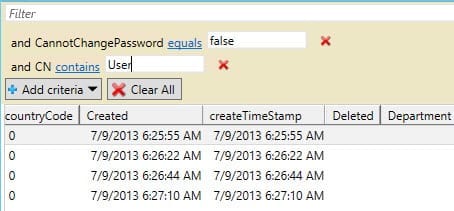
The Add criteria button gives much more granular control over the results. Click the button, then select one or more parameters from the drop-down menu, and then click Add. You’ll see the filter appear at the top of the GridView window. Type a value by which to filter the results in the empty box to the right of the equals operator, and the results in the main window will automatically be changed to reflect your search criteria. You can add more filters by simply clicking the Add criteria button again.
Passthru
GridView allows you to pass the results back to the PowerShell console, which can be useful when you want to filter the results in GridView but then perform additional actions with the returned data.
- Add the –passthru parameter to the cmdlet: get-aduser –filter * -property * | out-gridview –passthru
- In the GridView window, filter the results as desired and then ensure that all the returned records are highlighted. You can do this by pressing CTRL+A in the GridView window.
- Click OK in the bottom right of the GridView window and the results will appear as text in the PowerShell console.
- While an interesting function, the above example isn’t particularly useful. Type the following command and instead of just piping the results back to the PowerShell console as text, you can pipe to another cmdlet: get-aduser –filter * -property * | out-gridview –passthru | group name
The group cmdlet formats and sorts the data as shown in the figure below.


