How to Install And Get Started With the Azure CLI

The Azure Command-Line Interface (CLI) is a cross-platform command line tool allowing IT pros to connect to Azure services and execute administrative commands within the tenant. After installing the Azure CLI locally, you can execute commands using the terminal of your choice. Azure CLI install procedures vary, so let’s explore some options.
In this article, we’re going to detail how to download, install, and get started with the Azure CLI. We’ll explain which Azure services you can manage with the Azure CLI and how you can add extensions to complement native commands for your azure cli install.
Microsoft hosts the Azure CLI as an open-source project, and it’s available on macOS, Linux, and Windows devices. On Windows, the Azure CLI works within the Windows command prompt, Bash, and PowerShell. It’s also available via a browser through the Azure Cloud Shell, and you can also run it inside a Docker container.
How to install the Azure CLI
On a Windows PC, you can get the MSI installer for the Azure CLI from this direct download link. Once you’ve installed it, you can use the Azure CLI via the Windows Command Prompt or PowerShell.
There are different ways to install the Azure CLI on Windows, macOS and Linux. You can also access it from the Azure Cloud Shell or a Docker container. Keep reading for more details on azure CLI install!
What Azure Services can you manage with the Azure CLI?
The Azure CLI can be used to manage most Azure services available across most Azure services. You can check all the supported applications and services on the Microsoft Learn support page. All supported services fit into these groups:
Within the documentation, you’ll see that the Azure CLI supports pretty much available Azure resources including Azure Active Directory, Azure Storage, Azure Virtual Machines, Azure Functions, Azure Stack HCI, and Azure Arc.
Running the Azure CLI on Azure Cloud Shell or a Docker Container
The quickest and easiest option to use the Azure CLI is Azure Cloud Shell, which is part of the Azure Administration portal. Another handy option is to use a Docker container locally.
Using the Azure CLI with Azure Cloud Shell
To access the Azure Cloud Shell, you need an Azure subscription to create the required storage account. Then, you’ll just need to log into your Azure tenant and click on the console icon.
You will then need to select either “Bash” or “PowerShell” and then create a storage account.
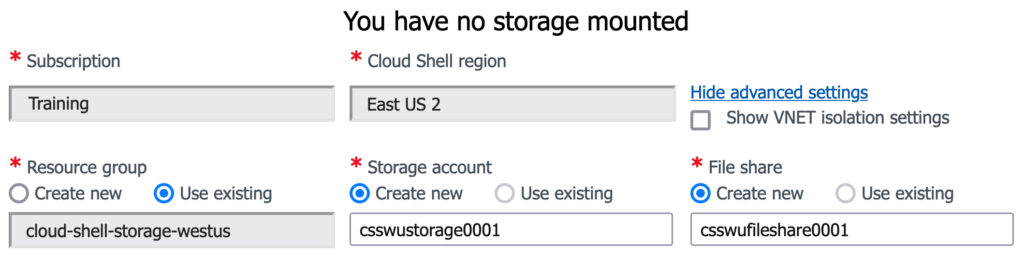
In this example, I opted for PowerShell.

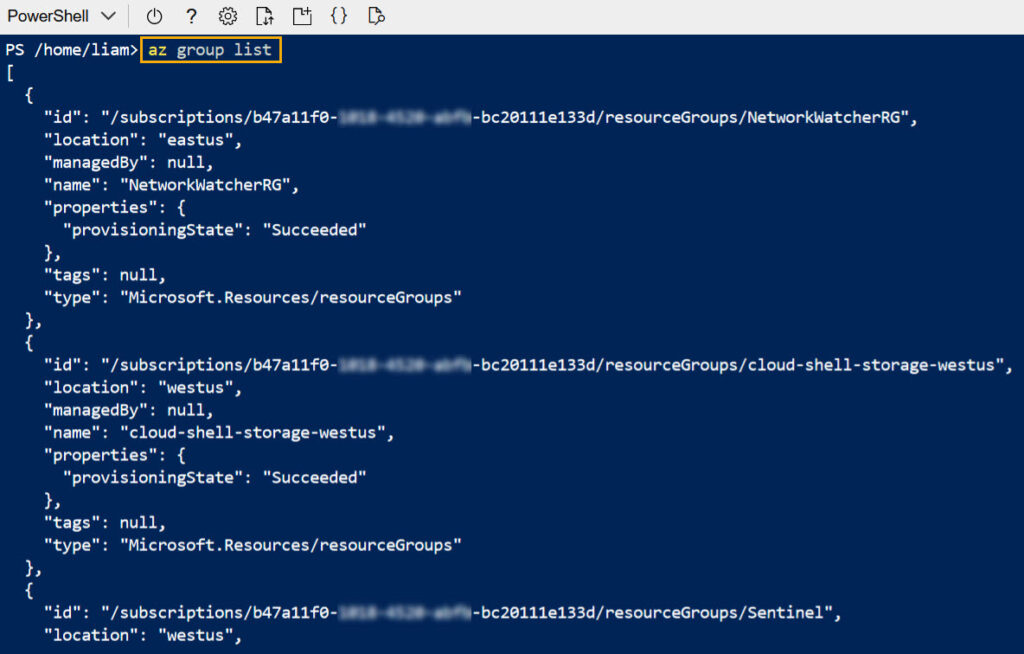
Once you’ve created your storage account, you can start using Azure CLI commands on the web. Let’s start with the az group list command, which is used to list Azure Resource Groups:
az group list
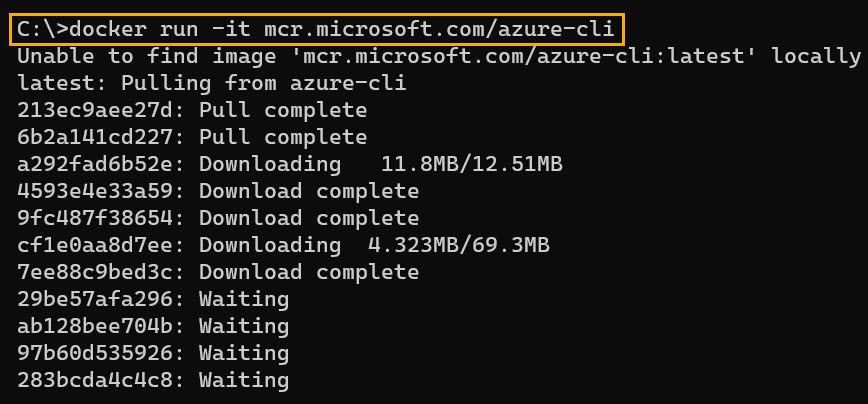
Using the Azure CLI via a Docker container
To use this option, you need to have Docker installed locally on your workstation. You can find more information about how to install the Docker engine on Petri.
Once you have Docker installed and working, you need to execute the following command in a command prompt:
docker run -it mcr.microsoft.com/azure-cli
If you wish to use a specific version of the Azure CLI, you can append the version to the previous command:
docker run -it mcr.microsoft.com/azure-cli:2.36.0
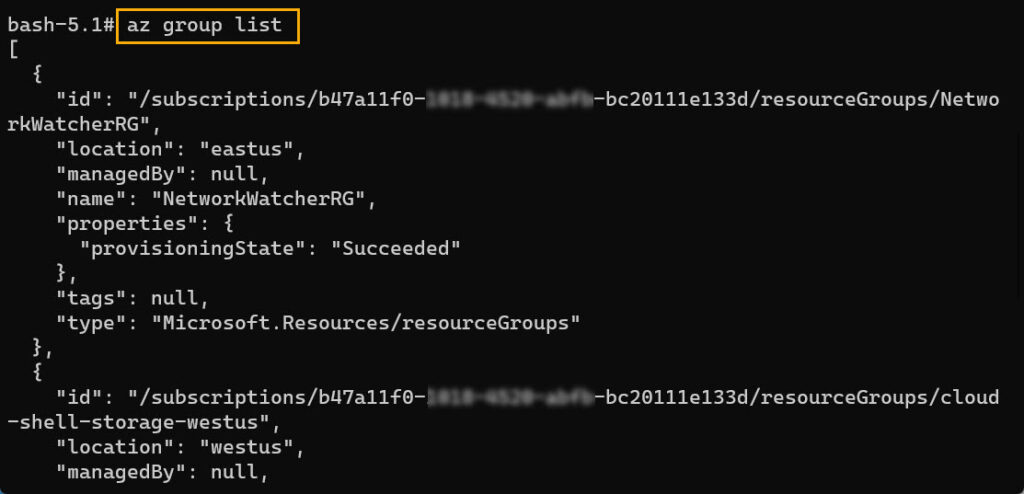
As with all Docker images, you can remove any version from your local Docker container. Once you have the Docker image running, you need to log into your Azure tenant using the az login command.
az login

Once signed in, you can execute all the Azure CLI commands available and interact with the logged-in Azure tenant. For example, executing the same az group list command I used previously with Azure Cloud Shell will display the exact same information:
az group list
Downloading and installing the Azure CLI
If you’re really serious about learning how to use the Azure CLI, you’ll need to install it locally on your Windows, macOS, or Linux machine. You can even install the Azure CLI for the Windows Subsystem for Linux (WSL) if you want to.
Installing the Azure CLI on Windows
On Windows PCs, the MSI file for installing the Azure CLI provides access to the command-line tool via the Windows Command Prompt (CMD) or PowerShell. You can get the MSI installer from this direct download link.
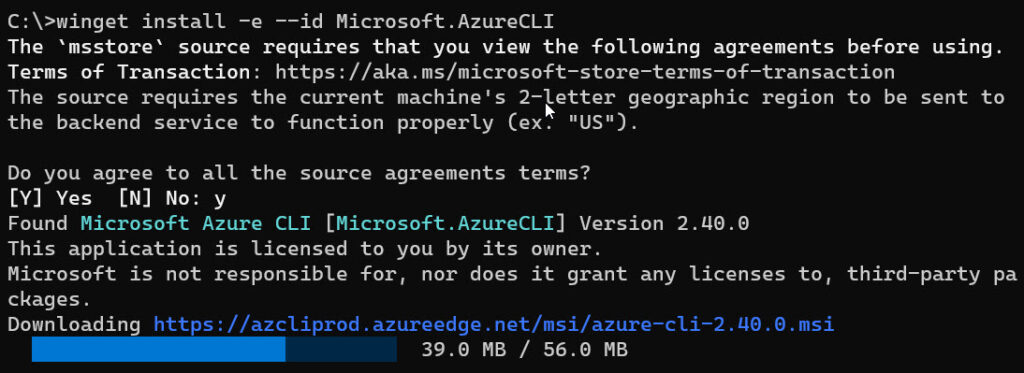
You can also install the Azure CLI with the Windows Package Manager (winget). You’ll need to use the following command:
winget install -e --id Microsoft.AzureCLI
Lastly, you can install the Azure CLI with PowerShell. Here are the commands you need to use:
$progress = 'SilentlyContinue';
Invoke-WebRequest -Uri https://aka.ms/installazurecliwindows -OutFile .\AzureCLI.msi; \
Start-Process msiexec.exe -Wait -ArgumentList '/I AzureCLI.msi /quiet'; rm .\AzureCLI.msi

Installing the Azure CLI on macOS
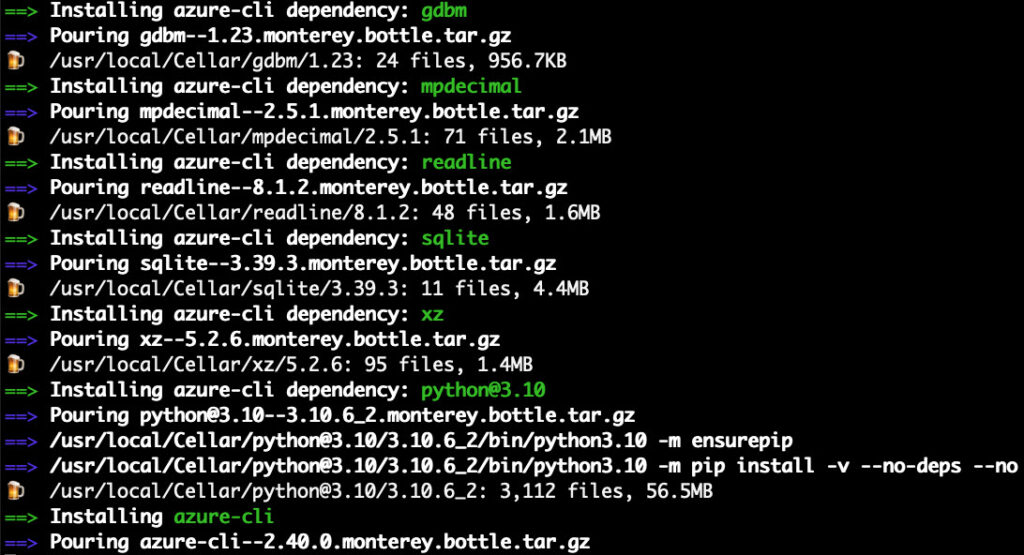
You can install the Azure CLI on macOS with the Homebrew package manager. This article will not cover the installation of homebrew for macOS, but you can get more details on the Homebrew website.
The CLI package supports macOS versions 10.9 and later. Homebrew also makes it easy to keep your installation of the CLI up to date, a key step after your azure CLI install.
Here’s the command you need to use to install the Azure CLI using Homebrew:
brew update && brew install azure-cli
Installing the Azure CLI on Linux
The commands for installing the Azure CLI on Linux are different depending on the distribution you’re using. Some examples are listed below.
- Installation on Ubuntu or Debian:
curl -sL https://aka.ms/InstallAzureCLIDeb | sudo bash
- Installation on CentOS or Fedora:
sudo rpm --import https://packages.microsoft.com/keys/microsoft.asc
sudo dnf install -y https://packages.microsoft.com/config/rhel/9.0/packages-microsoft-prod.rpm
sudo dnf install azure-cli
- Installation on OpenSUSE:
sudo zypper install -y curl
sudo rpm --import https://packages.microsoft.com/keys/microsoft.asc
sudo zypper addrepo --name 'Azure CLI' --check https://packages.microsoft.com/yumrepos/azure-cli azure-cli
sudo zypper install --from azure-cli
- Installation on any version of Linux:
curl -L https://aka.ms/InstallAzureCli | bash
How to check your Azure CLI version
To check which version of the Azure CLI you’re running, you can simply execute the az –version command:
az --version
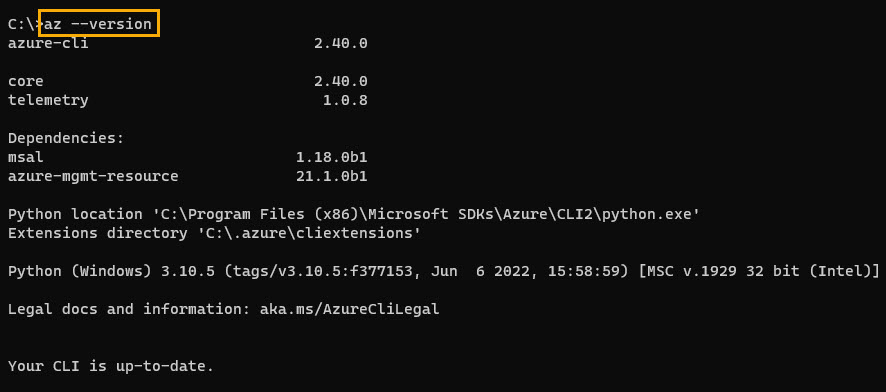
Here, we can see that we’re running version 2.40.0 of the Azure CLI and that it’s up to date.
How to update the Azure CLI
You can use package managers on Windows, macOS, and Linux to keep the Azure CLI up to date. However, there’s also a built-in az upgrade command supported by all operating systems for updating the Azure CLI to the latest version:
az upgrade
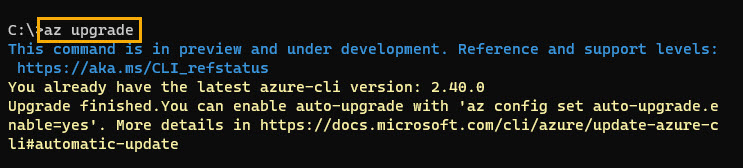
The az upgrade command only supports upgrading to the latest version. The upgrade command is not supported using the Azure Cloud Shell, though. Executing this command also updates any Azure CLI extensions that are currently installed. I’ll share more details about extensions below.
The Azure CLI supports automatic upgrades, but not by default. To enable automatic upgrades, you need to set the configuration to support it. Here’s the command you need to use:
az config set auto-upgrade.enable=yes
By setting the property below, you can also remove the confirmation prompts after enabling automatic upgrades.
az config set auto-upgrade.prompt=no
If you would also like to update all extensions or block extension updates, you can set the “auto-upgrade.all” property to either “no” or “yes,” depending on what you want to do.
Getting started with the Azure CLI
Once you have the Azure CLI installed and working, the next step is to log into your chosen Azure tenant and start using commands. Before executing any commands, though, it is essential to understand the structure and syntax of Azure CLI commands. This is crucial after you perform your azure cli install.
Signing Into the Azure CLI
The Azure CLI supports different types of logins to an Azure tenant. The current sign-in options are:
- Interactive sign-in
- Credential sign-in
- Service principal sign-in
- Managed identity sign-in
Each approach is distinct and requires a different configuration and usage. However, the most seamless sign-in option is to use the following commands:
az login
az login -u username -p password
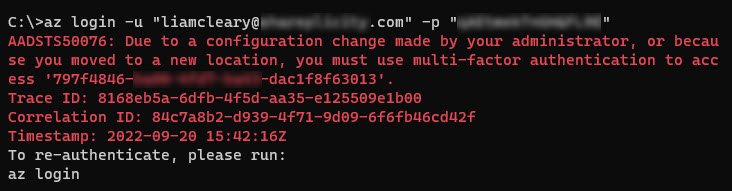
With the az login command, the Azure CLI will try to open a web browser to allow you to enter credentials. If it cannot open a browser, it will return a device login option where you can launch the browser, enter the device code, and sign in.
Both options return an authentication token to the Azure CLI. The downside to this approach is that if you must complete multi-factor authentication, you must use the command and not pass any credentials.
Selecting an Azure tenant and subscription
Once authenticated to an Azure tenant, you may need to view and select the tenant or subscription you want to manage. You’ll first need to check the available accounts you can access, and you can do so with the following commands:
az account tenant list
az account show
When executing the az account tenant list command, you’ll be asked to install an extension. Once the extension is installed, you can run the same command again and it will return all the Azure tenants to which the currently logged-in account has access to.

Setting the tenant to work with can be done either by setting the user and password as part of the command or by using the browser authentication flow. You can also set the tenant to operate with the az login command. To do that, you’ll need to mention the tenant ID that returned after you executed the az account show command earlier:
az login –tenant 7a45bb9c-62f8-434e-b230-3c912fe51e1d
With the tenant set, you can then select the subscription you want to use. You can use query syntax and the core Azure CLI command if you need to access the currently active subscription:
Az account list –query “[?isDefault]”
You can copy the subscription ID and use the az account set command to set the subscription. You can also populate this information into a variable to use it again later.
$id="$(az account list --query "[?isDefault].id" -o tsv)"
az account set --subscription $id
Understanding Azure CLI groups, subgroups, and commands
When executing commands with the Azure CLI, it is crucial to understand the structure of each command. Every command starts with “az” followed by the subgroup and any required parameters.
A command group combines “az” plus a subgroup, such as “group.” The command could be “list,” “show,” or even “add.” Each command may or may not have required optional parameters.
Here are a few examples of the syntax you need to use with Azure CLI commands:
az group list
az group list --help
az group list --g "Resource Group
Each Azure CLI group represents an available Azure service, combined with the commands to operate or modify the service. The subgroups will differ depending on the parent group, the same as any parameters.
If you need to control virtual machines within Azure, then you need to use the group az vm. For Azure Key Vaults, you’ll use az keyvault, and for SQL Databases you can use az sql server.
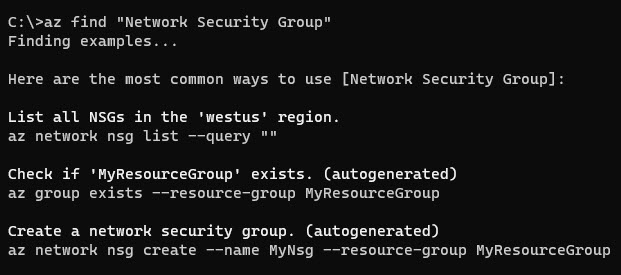
You can use the az find command if you’re unsure of the command to use. For example, if you don’t know the command for controlling “Azure Network Security Groups,” you can type az find “network security group,” which will return common examples.
az find "network security group"
An added benefit to using the Azure CLI is the ability to collect data and then modify the output format as needed. You can always set the output within the core command set by using the “–output” property.
The Azure CLI supports the JSON, JSONCX, YAML, YAMLC, TABLE, TSV, and NONE formats. You can choose any output format depending on the data or values returned.
The following examples produce the list of resource groups in various forms:
az group list --out json
az group list --out jsonc
az group list --out yaml
az group list --out yamlc
az group list --out table
az group list --out tsv
What are Azure CLI extensions?
You can add extensions to the Azure CLI to add functionality over native commands. Extensions are often experimental or pre-release features.
Microsoft also has a full list of available extensions on Microsoft Learn. You can view existing extensions available for the Azure CLI by executing the following command:
az extension list-available --output table
The most common extension used with Azure CLI allows the creation of aliases mapped to other commands. To use this alias extension, you must first add it with the following command:
az extension add --name alias
For example, if we want to use “wa” as an alias for “webapp”, we can create it with the az alias command:
az alias create --name wa --command webapp
You can then call the alias the same way you would use the full group name:
az wa list
To go even further, you can create aliases that perform specific actions, such as making a “Resource Group” within an Azure tenant:
az alias create --name add-rg --command "group create --name 'MyAliasResourceGroup' --location eastus --output table"
az add-rg
You can enhance this further by combining commands into a single alias. For example, you might want to create virtual machines with specific properties without having to manually enter them.
az alias create --name add-vm --command "vm create --resource-group 'MyAliasResourceGroup' --name 'MyAliasVM' --image 'Win2022AzureEditionCore' --public-ip-sku 'Standard' --admin-username 'Trainer' --admin-password 'Pass@word1DEMO' --output table"
az add-vm
For power users, extensions like the alias one can really enhance the capabilities of the Azure CLI. For beginners, though, the interactive mode may be a good way to get familiar with the command-line tool.
What is the Azure CLI interactive mode?
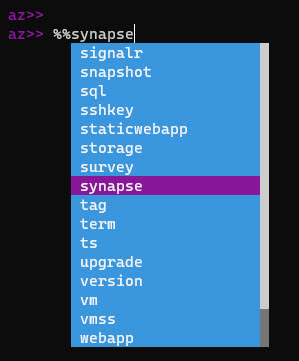
The Azure CLI interactive mode provides an interactive environment for executing Azure CLI commands. Interactive mode displays autocompletion dropdowns, auto cache suggestions, runtime documentation, and examples that can really help to apprehend the Azure CLI.
To access the interactive mode, you need to execute the following command:
az interactive
Once loaded, you can execute commands without needing to prefix them with “az.” You can also see help details at the bottom of the console showing examples of command structure.
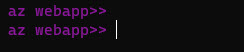
You can scope the available commands to focus on a specific service or group within an Azure tenant. If you want to work with web applications, you can use “%%webapp,” which then changes the “az>>” prompt to “az webapp>>.”
You can also change this to be any of the groups available within the dropdown menu.
If you need to revert this change or go back to the default prompt, you can just execute “%%.” Overall, using interactive mode should help you to learn Azure CLI commands much more easily.
Conclusion
Using the comprehensive Azure portal may present some limitations when you want to automate management tasks within Azure. Using PowerShell to manage tasks can also be complex due to its dependency on modules created for Azure. PowerShell modules may not exist for every service, and that’s why the Azure CLI is better suited for these tasks.
The Azure CLI bridges the gap for administrators who want a simple yet powerful cross-platform scripting approach to management. Azure CLI is a powerful tool that all IT admins should need to learn and practice. We hope that this guide helped you to get started with the LCI, thanks for reading it!
FAQs
How long does it take to azure CLI install on different operating systems?
The azure CLI install process typically takes 2-5 minutes on Windows, 3-7 minutes on macOS, and 5-10 minutes on Linux systems, depending on your internet connection speed and system performance.
Can I perform azure CLI install without an internet connection?
Yes, you can perform an offline azure CLI install by downloading the installation package beforehand. For Windows, download the MSI file; for Linux, download the RPM or DEB package; and for macOS, download the PKG file.
What are the minimum system requirements for azure CLI install?
For azure CLI install, you need at least 1GB RAM, 500MB free disk space, a 64-bit processor, and an operating system that’s still supported by the manufacturer (Windows 8 or later, macOS 10.9+, or modern Linux distributions).
Will azure CLI install affect my existing Azure PowerShell installations?
No, the azure CLI install process is completely independent of Azure PowerShell installations. You can have both tools installed and running simultaneously without any conflicts.
Does azure CLI install require administrator privileges?
Yes, administrator or sudo privileges are required for the azure CLI install process as it needs to modify system directories and registry entries. However, once installed, regular user privileges are sufficient for running CLI commands.

Liam started his career as a Trainer but realized that Programming and Hacking were more fun. After spending time in infrastructure and security services, he moved to consult for SharePoint where he became a Microsoft MVP. He is also a Microsoft Cert...
