Managing Azure Resources with Cloud Shell
Get stuff done from almost anywhere with Azure Cloud Shell. In this Ask the Admin, I’ll look at the different ways Azure can be managed from the command line, including Cloud Shell, which is currently in preview.
If you have read some of my previous posts on managing Azure, you will know that I am a big fan of automation using PowerShell and Azure Resource Manager (ARM) JSON templates. It is rare that I need to do something only once, so it makes sense most of the time to learn how to configure or deploy a resource using one of the above methods. For more information on using PowerShell and ARM to manage Azure, see Deploy VMs Using Azure Resource Manager and PowerShell and Provision a Domain Using a Microsoft Azure Resource Manager Template on Petri.
There are five main ways in which you can deploy and configure Azure resources:
- Azure management portal
- Microsoft Azure PowerShell
- Azure Command Line Interface (CLI)
- Azure Resource Management templates
- REST API
The Azure management portal is good for making one-off configuration changes and quickly deploying ARM templates from the QuickStart gallery. You can also use it to generate ARM templates from applications that you have deployed manually. The portal is usually the best solution if you need a visual overview of what is going on in your Azure environment. The RESTful APIs are largely intended for developers so that they can configure Azure using web services.
Azure PowerShell Versus CLI
For system administrators, that leaves Microsoft Azure PowerShell and the Command Line Interface. If you are from a Windows background, then PowerShell is likely your tool of choice. It offers the most comprehensive command-based management tool for Azure and can natively pass objects around. The Azure CLI was created for developers that use Linux and Macs and who are familiar with Bash or other Linux shells. The syntax of the recently released version 2.0 looks a bit like PowerShell. Azure CLI enables developers to get started quickly with Azure management without having to learn PowerShell or use a Windows device to automate the deployment of apps in Azure.
Azure Cloud Shell
Cloud Shell is a browser-based shell that enables developers and system administrators to configure Azure without having to set up a connection manually from their workstation. Azure Cloud provides secure terminal access to a virtual machine from anywhere, including the Azure management portal and the new Azure mobile app. It allows users to authenticate securely and have their files persist across sessions. Azure Cloud Shell requires an Azure file share to persist files in a directory ($Home), which automatically gets reattached for each new session. An Azure storage account is needed for the file share, in turn incurring a small monthly fee.
Microsoft promises to update Cloud Shell regularly but from the get-go, it already supports a set of common tools and languages, including Bash and sh, Azure CLI, AzCopy, git, Docker CLI, and MySQL client. For more detailed information about the tools and languages Cloud Shell supports, see Microsoft’s website.
What About PowerShell Support?
There is no official support for PowerShell at this time but you can apply to get early access.
Start a Cloud Shell Session
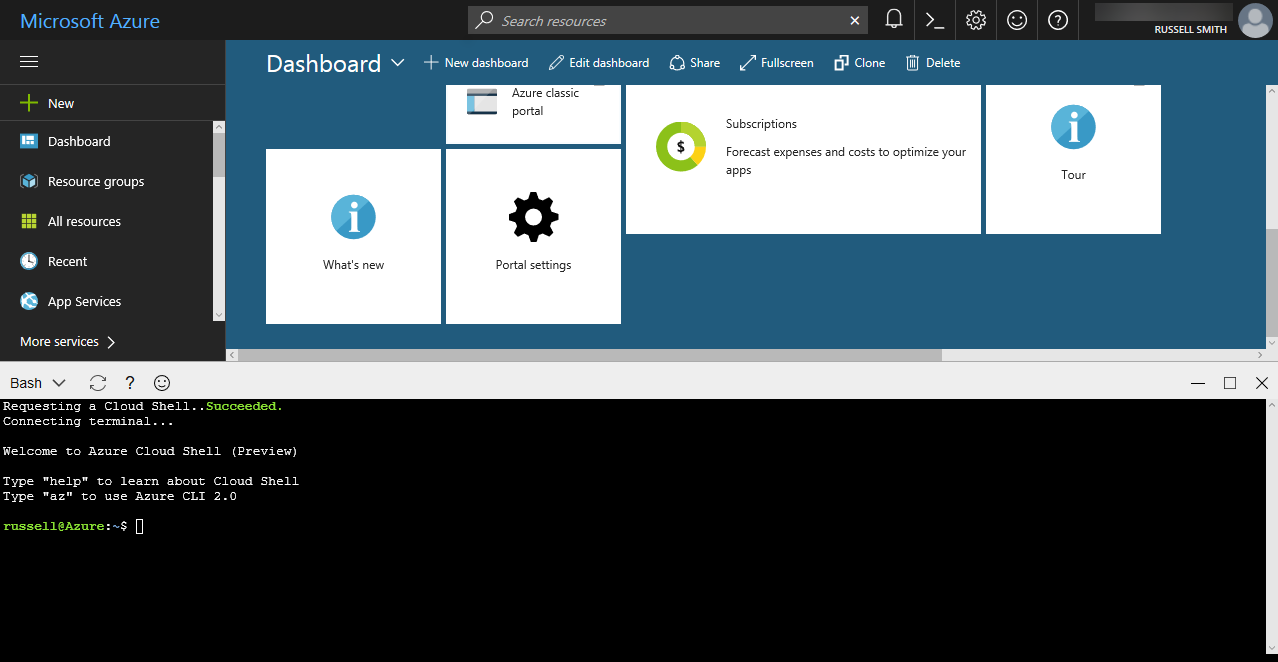
Log into the Azure management portal. Click the Azure Cloud Shell icon, which is located between the notifications and settings icon in the top right-hand corner. A new Cloud Shell session will open at the bottom of the browser window.

Does Cloud Shell Work?
Sometimes. In my short experience with it, connecting to a terminal session can take a while and frequently times out. It is likely that during the preview phase there is more demand than Microsoft has the capacity to handle. I am looking forward to the final release, especially when PowerShell support is added. It should be easier for quick operations compared to signing in directly from a workstation and no set up is required.
In this article, I looked at the different ways of managing Azure from the command line.
Related Article:


