Initialize and Format a Disk in Windows Using Disk Management
In today’s Ask the Admin, I’ll show you how to initialize and format a disk using Disk Management.
When attaching disks to a server or workstation running Windows, they don’t automatically appear in Windows Explorer. You need to bring disks online, initialize, and format them before they can be used. Disk Management is a tool in all versions of Windows that allows you to manage disks attached to the device.
In this article, I’m going to use Hyper-V to run Windows Server 2012 R2 in a virtual machine (VM). I’ve already installed the operating system, and as part of the process, a system disk is added by default. But I want to add an additional disk, so I used Hyper-V manager to add an additional disk to the VM. For more information on working with disks in Hyper-V, see Hyper-V Virtual Machine Storage Controllers Explained on the Petri IT Knowledgebase.
Once the disk is attached to the server or VM, you need to log in to Windows and open Disk Management. The instructions that follow also apply to Windows 10, and most other supported versions of Windows:
- Log in to the device as a local administrator.
- Right-click the Start button on the taskbar, and select Disk Management from the menu.

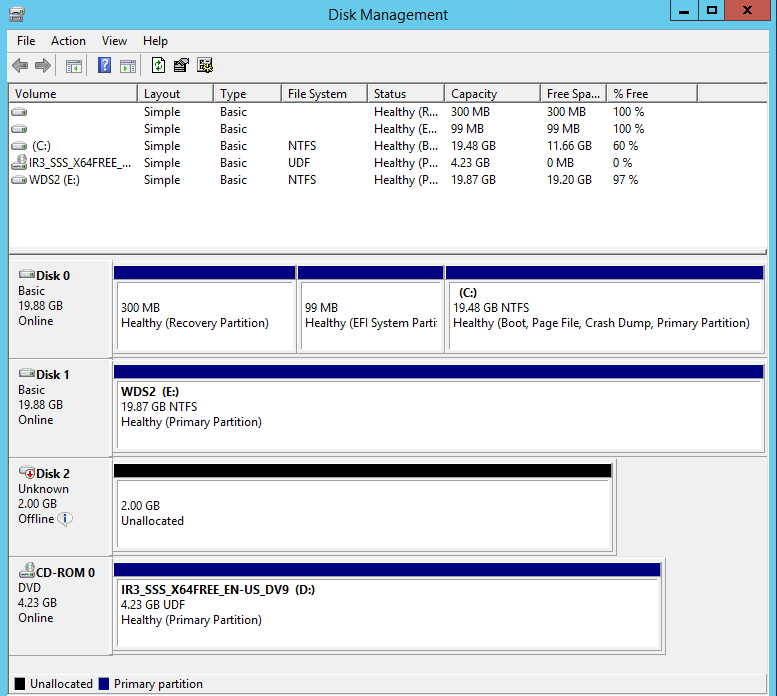
In the lower half of the Disk Management console, you will see a graphical representation of the disks attached to the system. You should see one disk that is labeled Offline.
- Right-click in the gray square in which Offline is written for the disk, and select Online from the menu. The Offline status should now change to Not initialized.
- Right-click again in the same place and select Initialize Disk from the menu.
- In the Initialize Disk dialog box, select the kind of partition you want to create, either MBR or GPT, and then click OK. The disk’s status should now change to Online.
For more information about MBR and GPT, see Windows GPT Disks – Is Bigger Really Better? on Petri IT Knowledgebase.
- Right-click the disk where Unallocated is written, and select New Simple Volume… from the menu.
- Click Next on the welcome screen of the New Simple Volume Wizard.
- On the Specify Volume Size screen, click Next to accept the defaults to create a new volume that uses the entire space available on the disk.
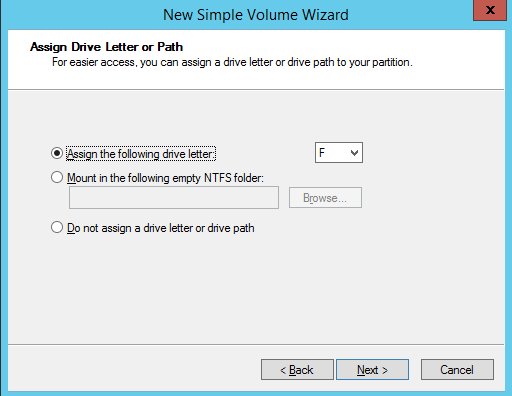
- On the Assign Drive Letter or Path screen, check Assign the following drive letter, select an available letter from the drop-down menu, and click Next.

- On the Format Partition screen, check Format this volume with the following settings, and change the File system, Allocation unit size and Volume label if required, and then click Next.
- Click Finish on the Completing the New Simple Volume Wizard screen.
The partition will be formatted and the status should change to Healthy. Close Disk Management and open Windows Explorer (WIN+E) and you will see your new disk in the list of available drives.
In this article, I showed you how to bring a disk online, initialize it, assign a drive letter, and create and format a simple volume using Disk Management.


